

Everything posted by phutumsch
-
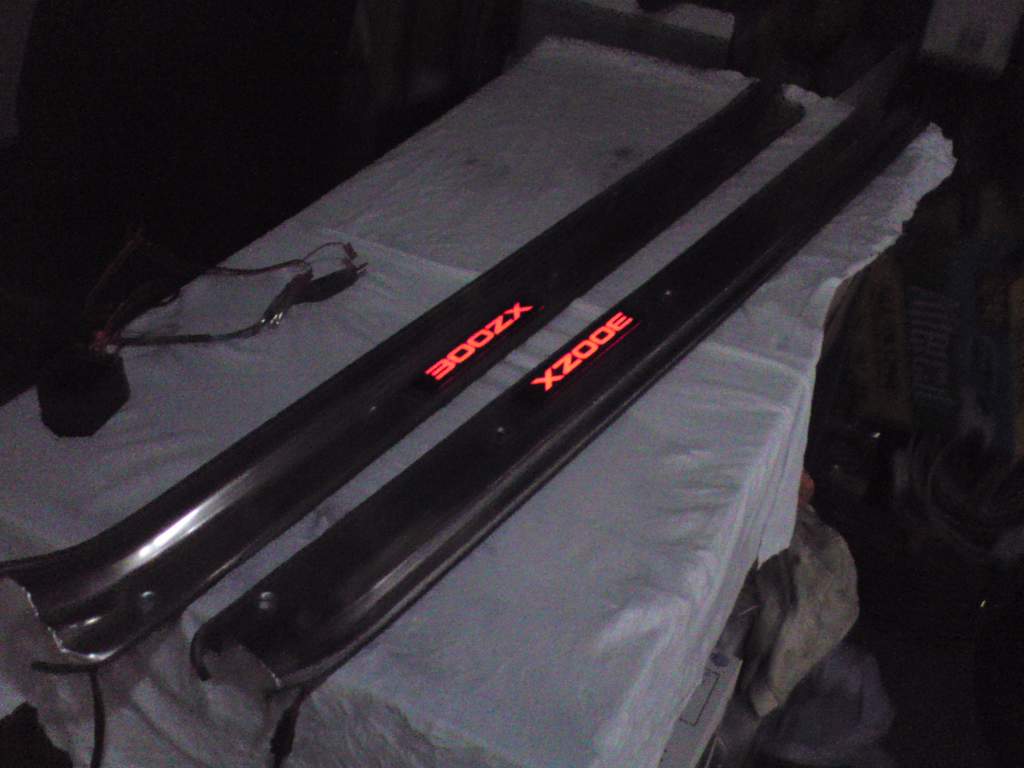
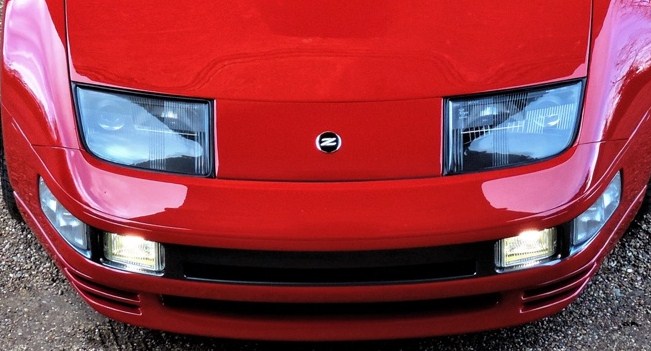
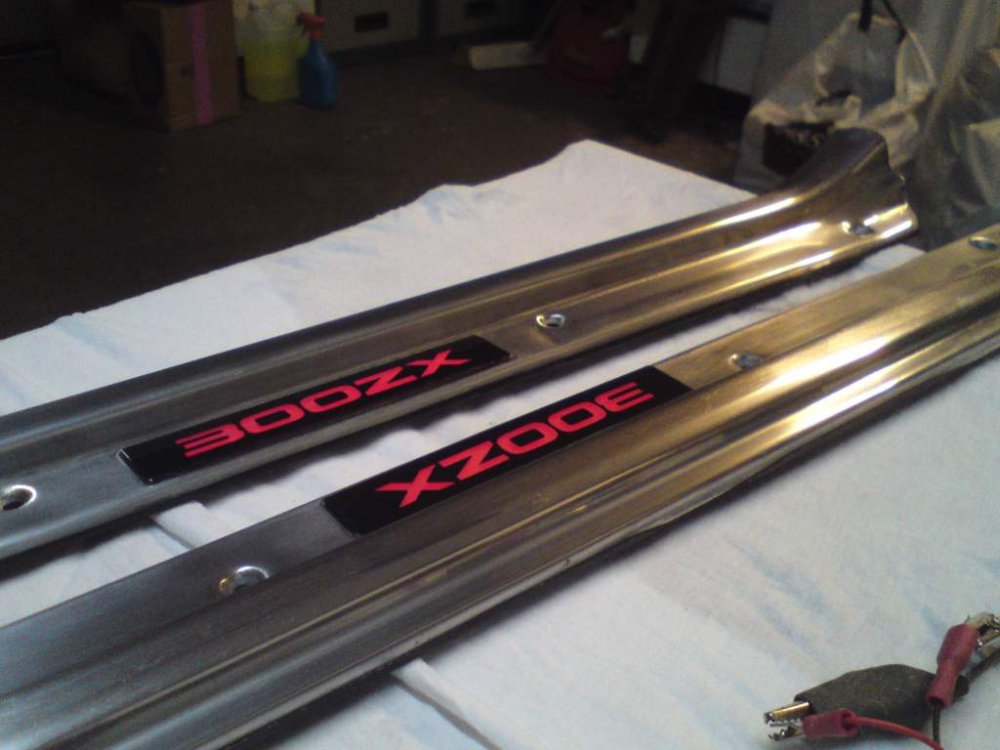
Like the one in the video, I have one prepared that is ready to be affixed to the reverse light panel, with brake so that is bright light up of the 300ZX and with it also the subtle not so bright light up that comes on with the tail lights. Once this has gone i'm not doing another, cost is £85 fitted, this will include the red 300ZX when all lights are off just like 99 panel. 99 genuine panel does not light up fyi, only the Altia panel from an optional extra as ever lit up and that was only in green. To convert the 2 x chambers to fog above the white reverse, again i have one ready but i will probably do some more, cost for this is £55, i do not need your panel just the 2 x chambers sending, the reverse bulbs i will fit are in the stock location and cost me £12 the pair on their own. To just put in a red EL sheet behind the red 300ZX, this will come on with the tail lights and is a subtle illumination, cost for this £55.00, i will spray the inside 4 chamber housings in chrome to mimic the genuine 99 panel also. Think that clears up a few inquiries :biggrin:.
-
Wife told me the in-laws were coming for a family sit down Xmas dinner.......think i've put paid to that, hehe !! Kudos to me i'm sure for using the lounge for what it was intended for :). Oh i'm playing a dangerous game :gun_bandana: Can anyone put me up for a while ?


-
Yes nice one Graham, they sure have a groovy kind of love, now look what you've done !! Congratulations to you both :wink:.
-
I can do them yes, give me 10 day turnaround worst case. If you can get my number from Ian then text me and i'll get back to you with a guide price, i take it there will be no postage involved so that helps :thumbup1:.
-
Happy birthday :cool3:.
-
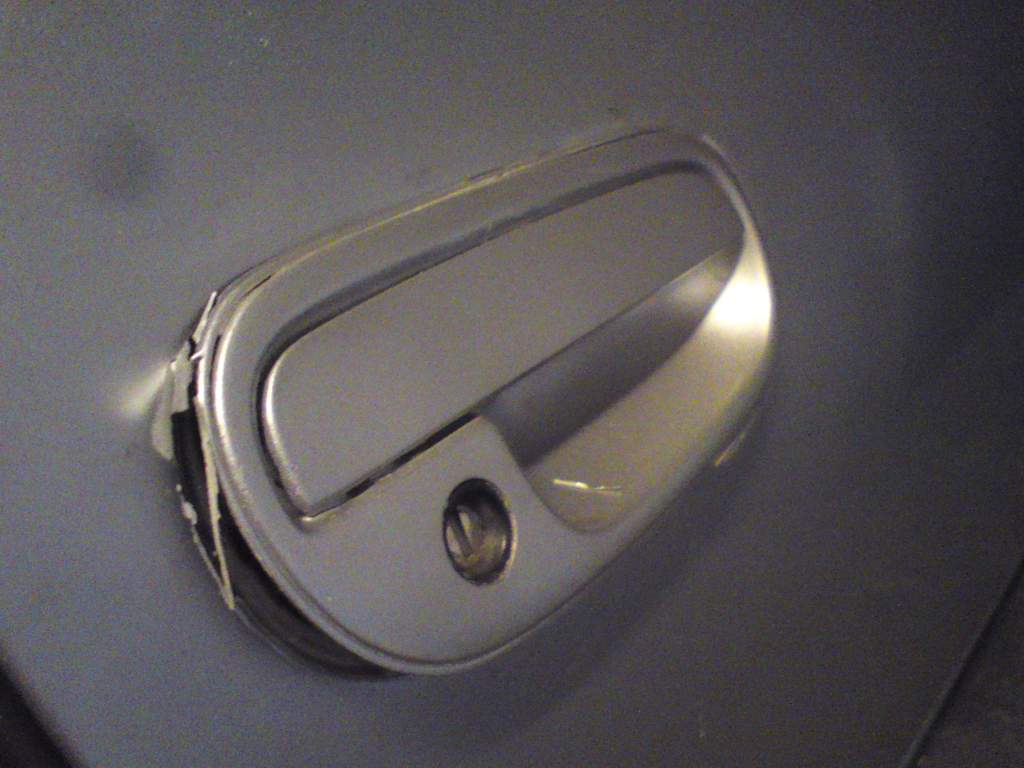
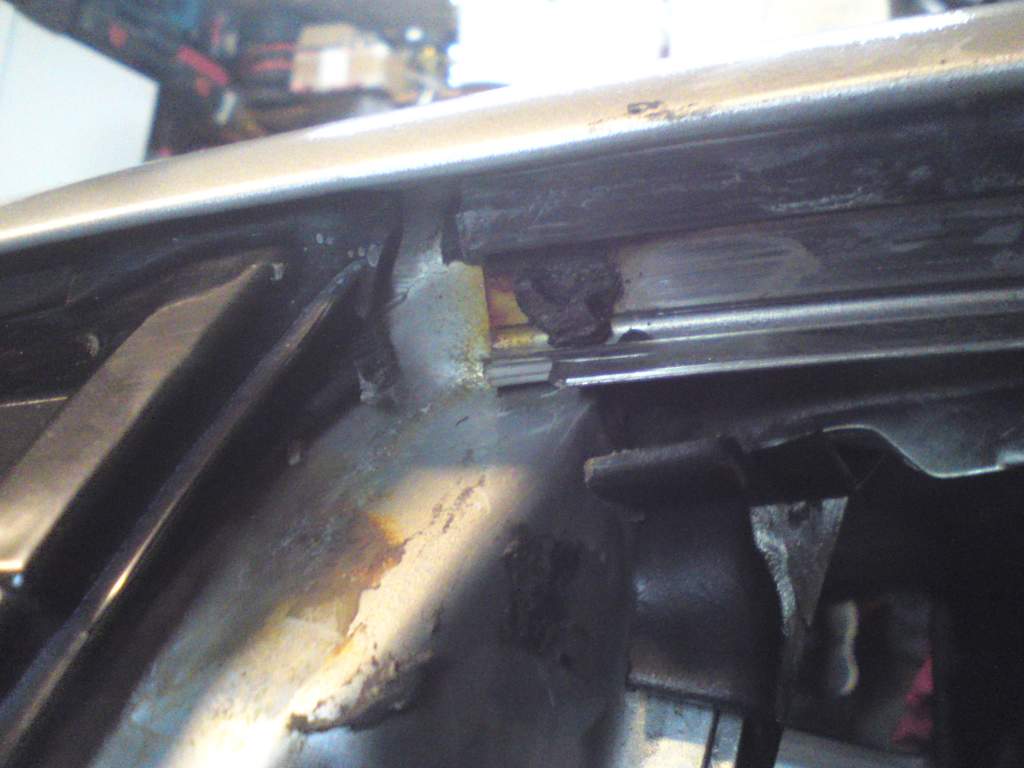
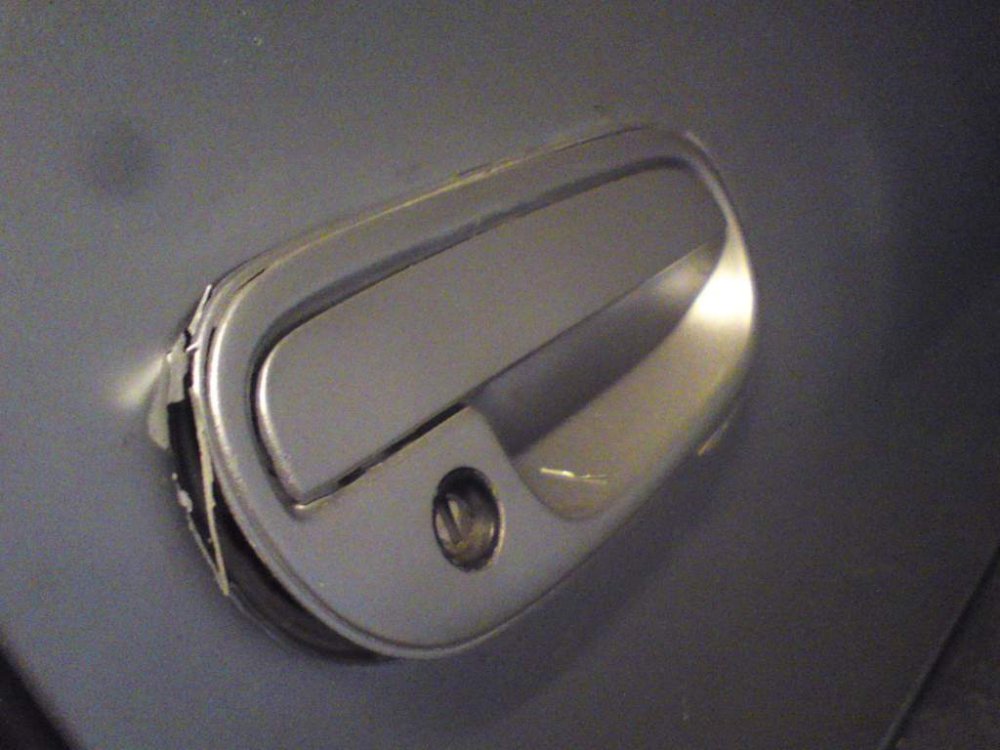
This is what happens when you get someone who doesn't care to spray your car, i'll mention again that when i left the car at the aherm......spray shop (i ran out of time) i told him the door handles were just two nuts (door card was already removed by me the same day), he couldn't be bothered and just sprayed over. The door handle will now be completely stripped down, key barrel out, etc, then handed to my sprayer - a nice clean free from paint gasket will be found for the refit. On taking the door rubber seals off, cos i'm doing this properly now, i found some rust, haha....it's coming from a weeping screw head...officially now a breaking thread !!

-
Relax :rolleyes:.
-
Wow a series 8 Z32...........such a shame it didn't feature more :biggrin:.
-
Some episodes coming up with great interest for me, Astra GTE and MX5 :cool3:. Hope it's mk2 and mk1 respectively.
-
Lets not dwell on the numbering, my source was the channel 4 website itself and it says it's episode 2 !!!
-
I don't think it is, more like someone else has labelled it up wrong and put it out there. E03 is a 1964 Volvo P1800 and the 4th episode in Series 4 is a 1934 Singer Le Mans :biggrin:
-
It really is - when one of the culprits playing along has odd headlights, so so wish i had a picture :thumbdown:.
-
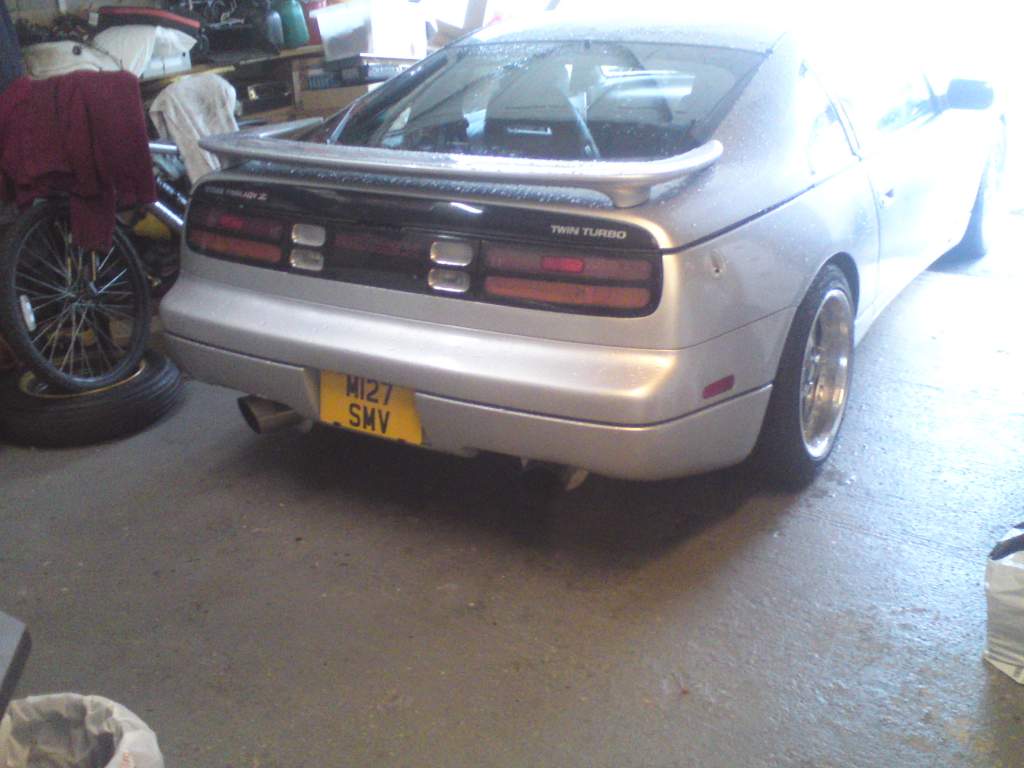
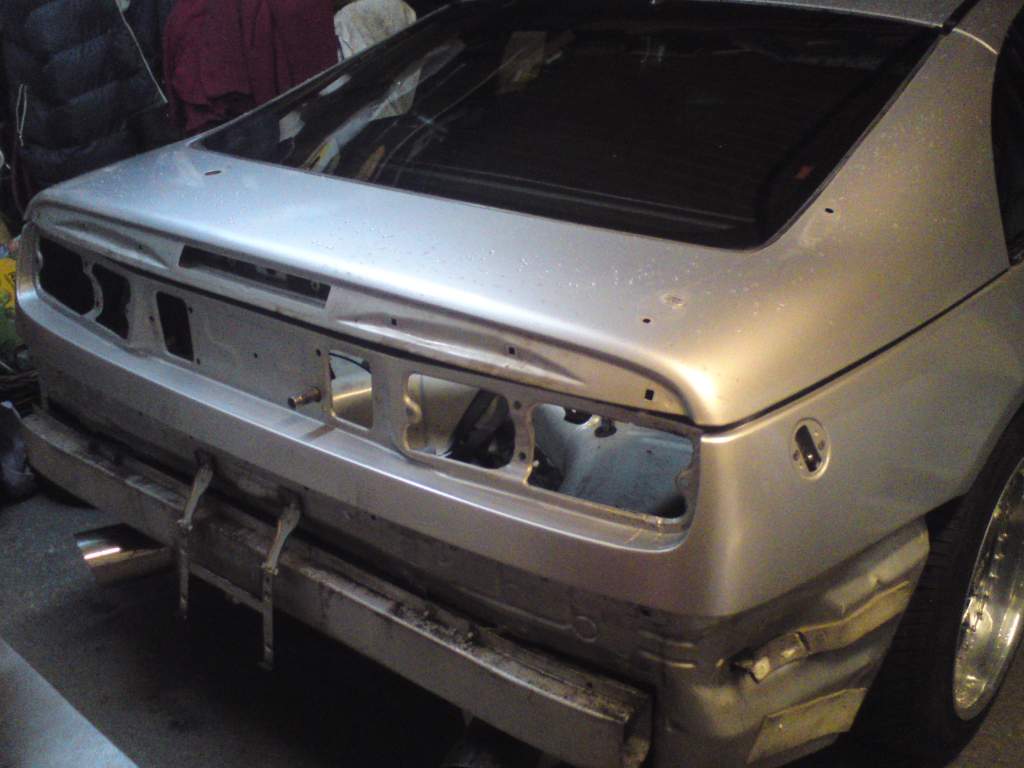
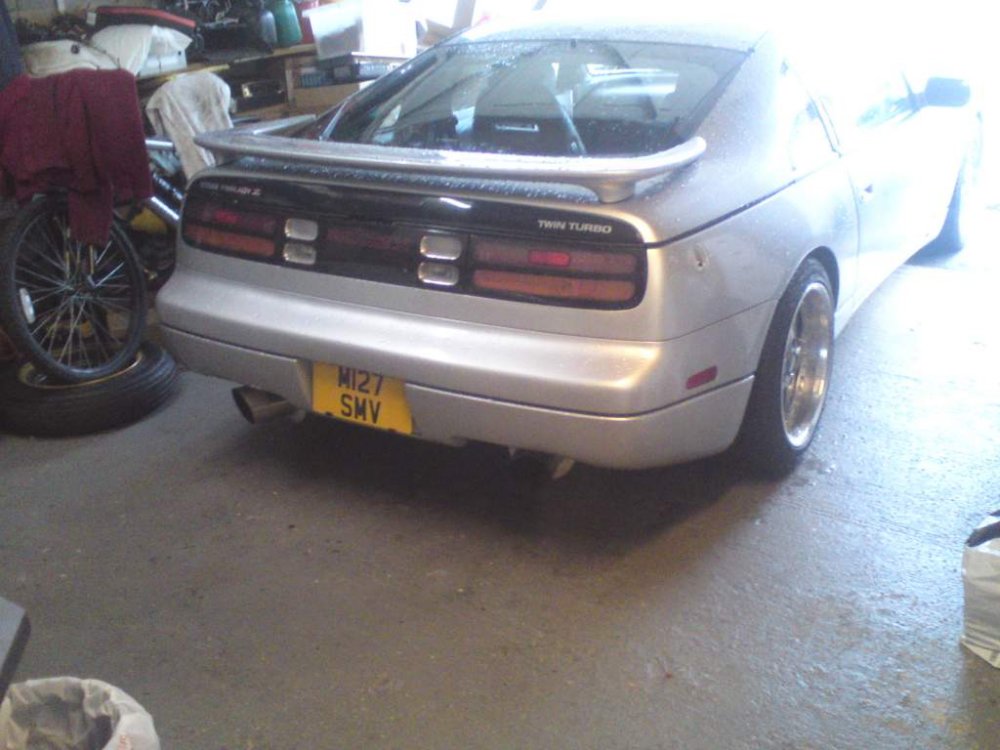
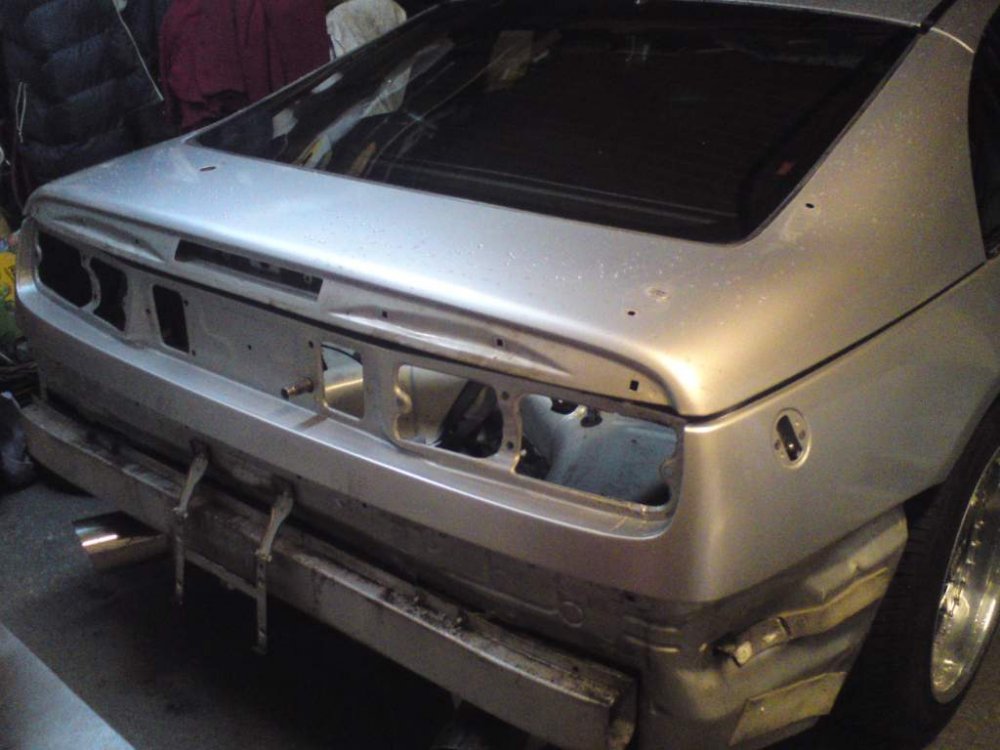
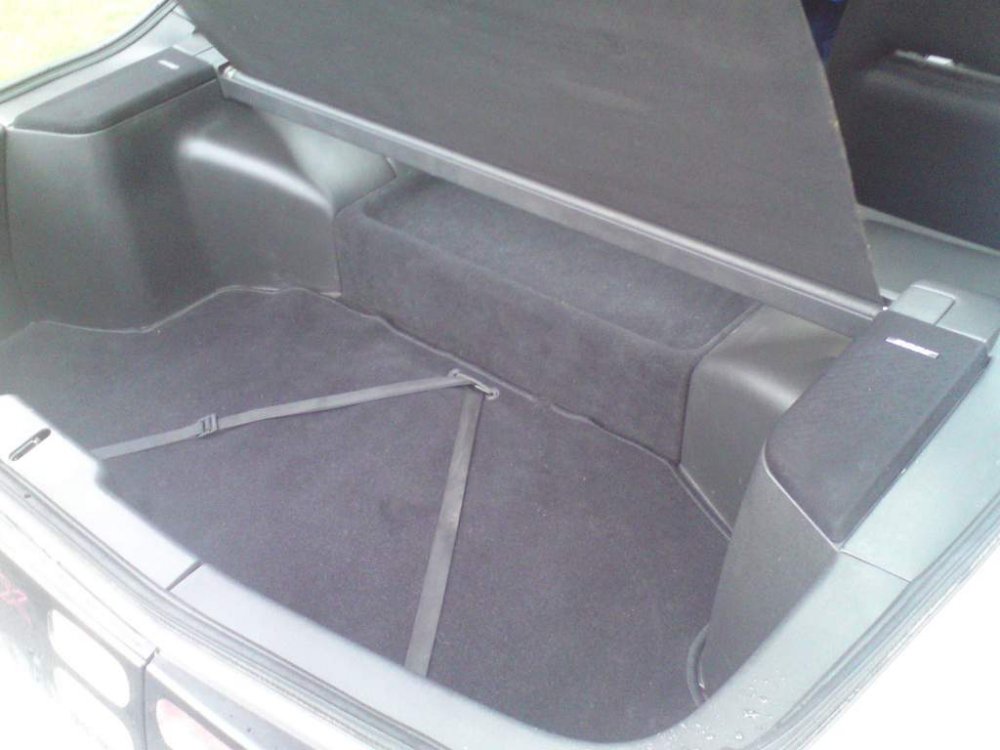
The time has come to start preparing myself for a respray, this time properly and in the comfort of my own garage with time on my side :crying:. You may notice the 89 lights, these were just temporary as i wanted to sort a few very minor issues out with my genuine 99's :wink:. Things removed this time that wasn't before.....i know....i know it's a given !! Delicate strip above the lights, rear wiper motor, the tailgate 4 trims and the aerial cover which is one nut......doh !!! I then cleaned with wire wool and petrol with a paint brush all the old black butyl sealant, can't have my new 99's fitted on all that old muck :thumbup1:.
-
Title says it all.....................enjoy :yes:. Tim and Fuzz are in West Sussex to rescue an iconic 1970s motor, a mighty Datsun 240z, which has been languishing in the garage of a retired GP for years while he put his work in the community first.
-
The wiper blade is fouling on the scuttle by about 4.6mm, but that's minor compared to the dirt/dust/fluff that was on his parcel shelf :yes:.
-
Never thought to look at buying fabric, if these don't last or i get a ladder in mine that'll be what i'll be doing. You don't always need lady friends btw, depends which kind of circles you move in i guess honey :winkiss:.
-
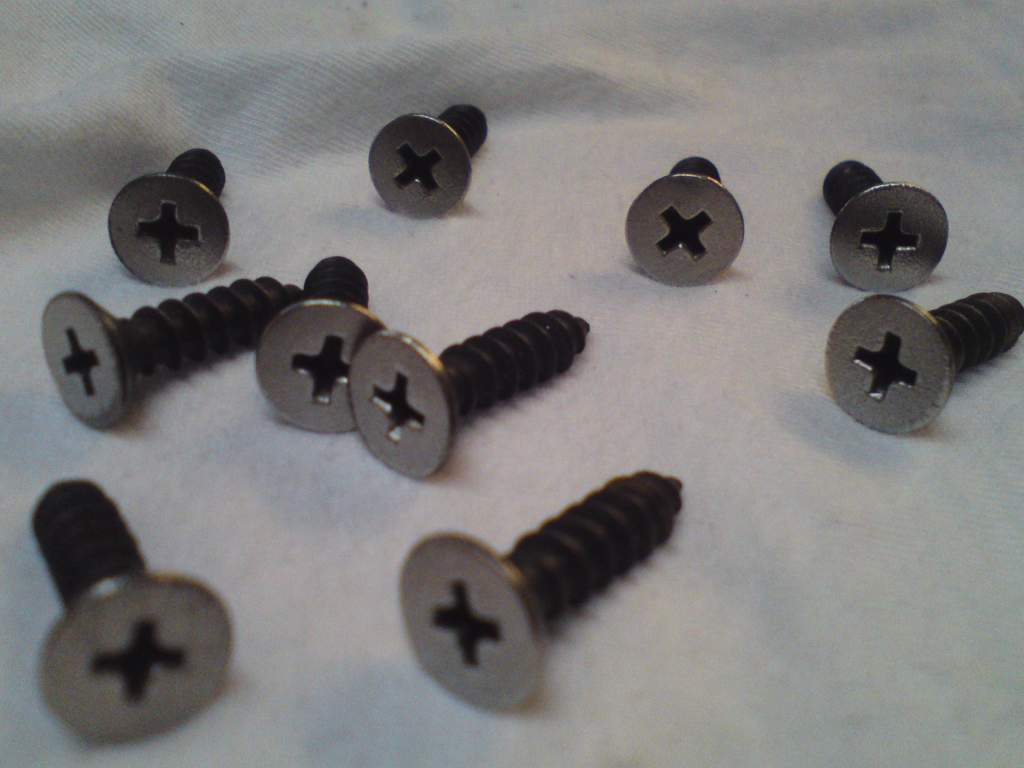
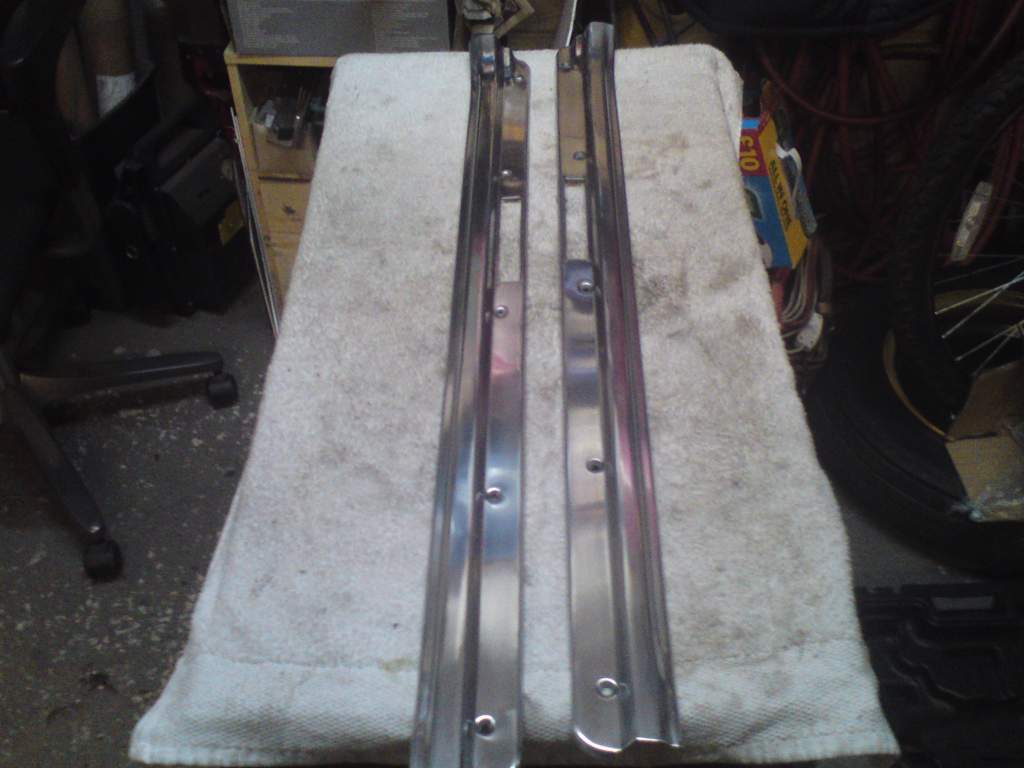
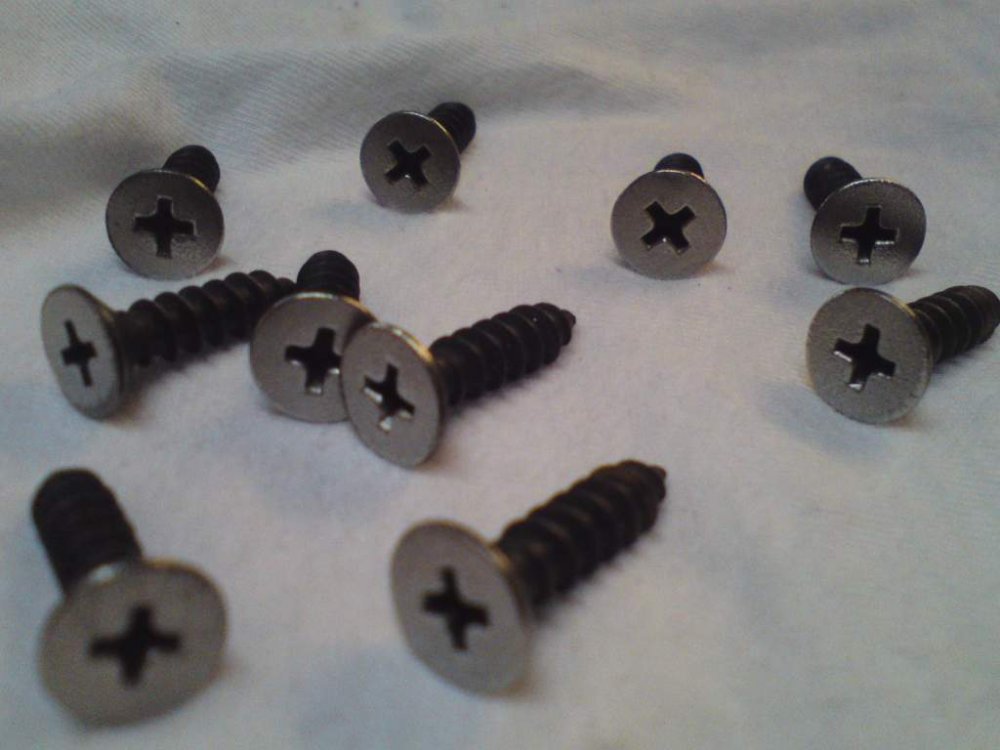
I've done these to go with them, original sill screws but i've scratched off on my wire wheel the tops, should bolt them down a treat. The ones i have fitted must be the original ones that must of come with the Altias, they have more of a convex head whilst these are countersunk flat.
-
In my own little world i am happy, longevity i'm not so sure but i believe i have the correct denier on them.... Final pic in the car, you can see the blackness achieved, contrasting against some of the plastic boot trim pieces......

-
Lets have some finished pics......... Very forgiving on the corners, just naturally clingy :yes: Of course i'm a fan of OEM, hence using black...........there are some perhaps more risky members that may prefer using red stockings to cover theirs :tongue_smilie:.


-
You may well be right Great Mondo but i have lots of lady visitors and they're forever leaving their undergarments about - so it's a waste not to put them to good use :innocent:.
-
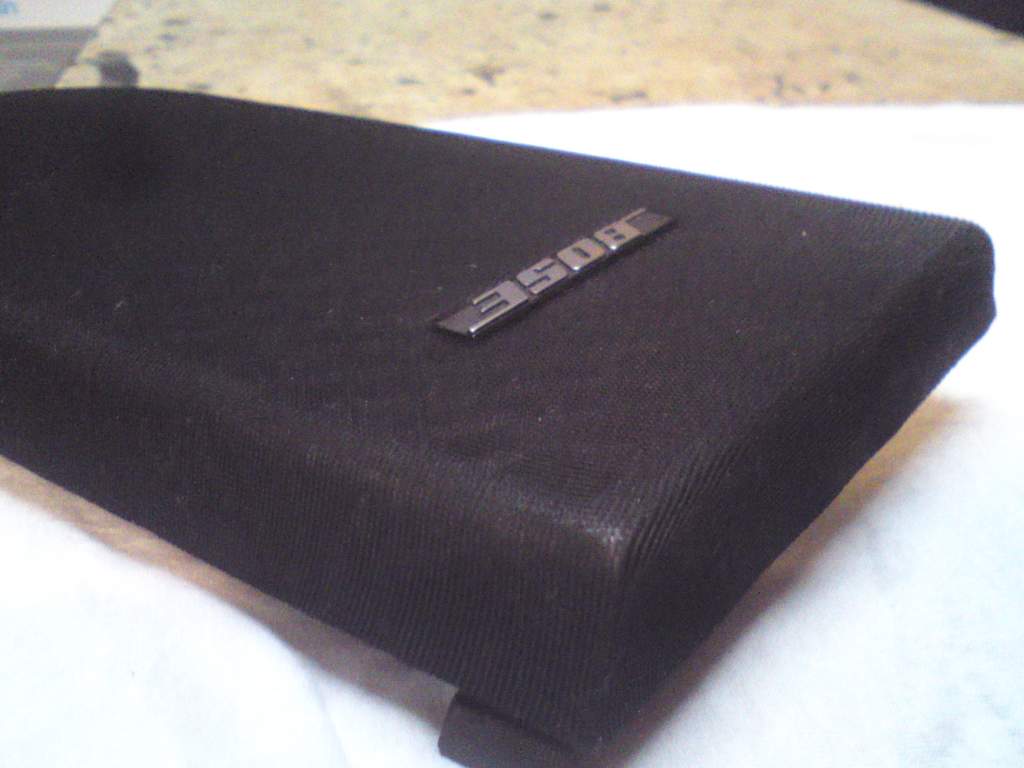
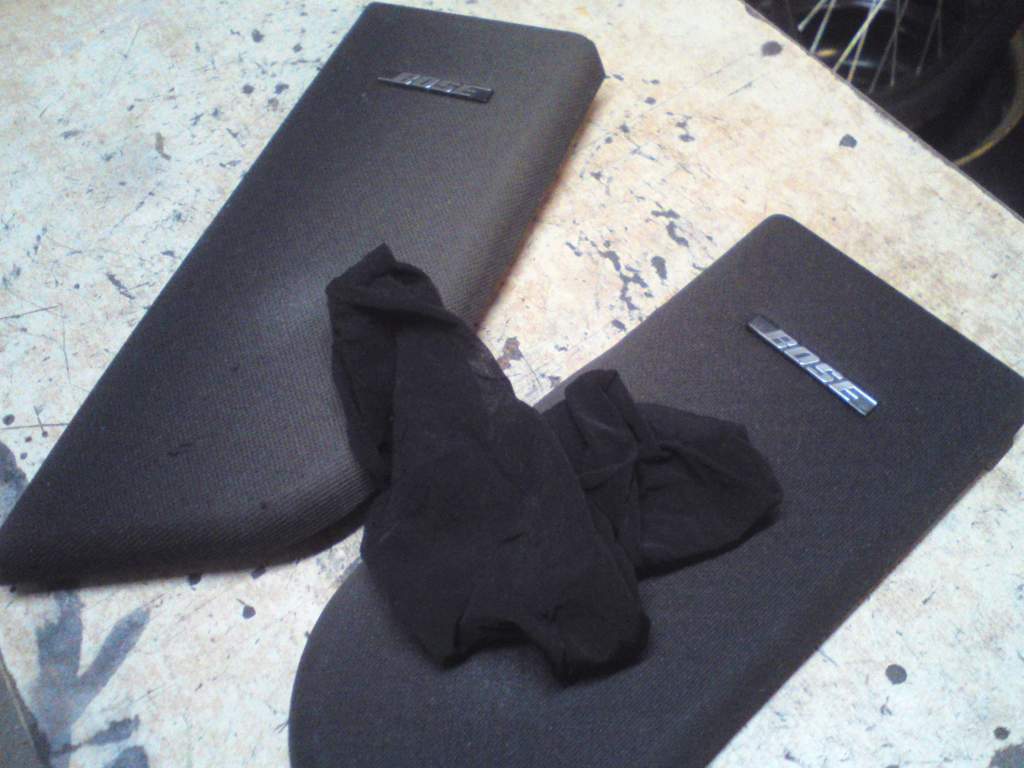
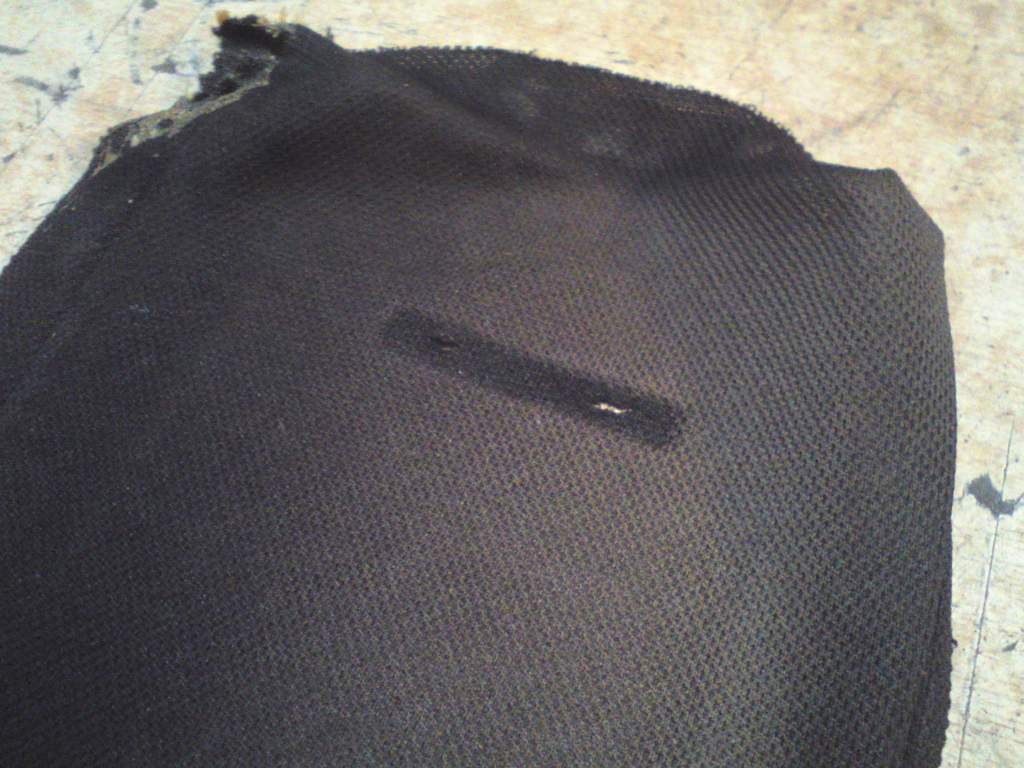
The reason i didn't put this information here in my build thread if you like, it's because you can have your fun because the fabric i am using are my wife's tights :laugh:, yes that's right my wifey's black tights. She tells me they were never worn !! After cutting off the lacy tops :blush:, i slid over and you can see below at the top it's on once and hardly covering the lattice plastic work but the lower part it's doubled up, these may look good stretched and thin on soft shaved long legs but for this job doubling up is a must. Some of you fellas may have your own stash for those special evenings but these really do work well and took me no time at all to cover. There's not a great deal to pin down on the underside because of their naturally clingyness and a drop of hot glue works a treat in the odd place or two. The prongs of the Bose badge are just pushed through and the retainers do there job......
-
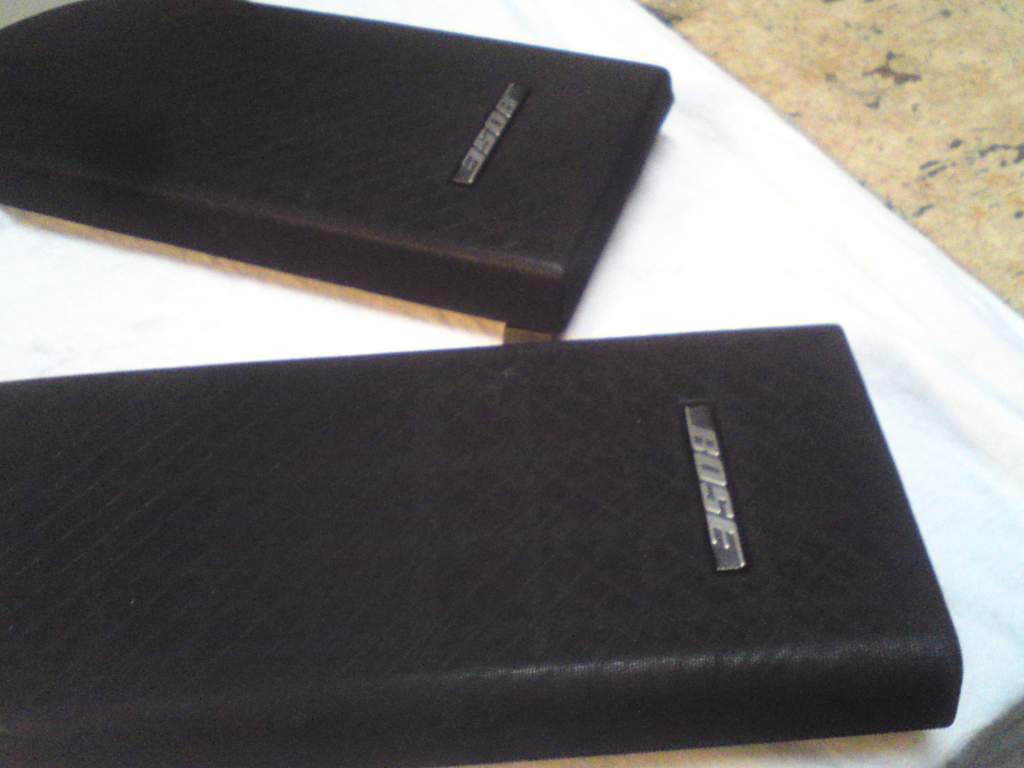
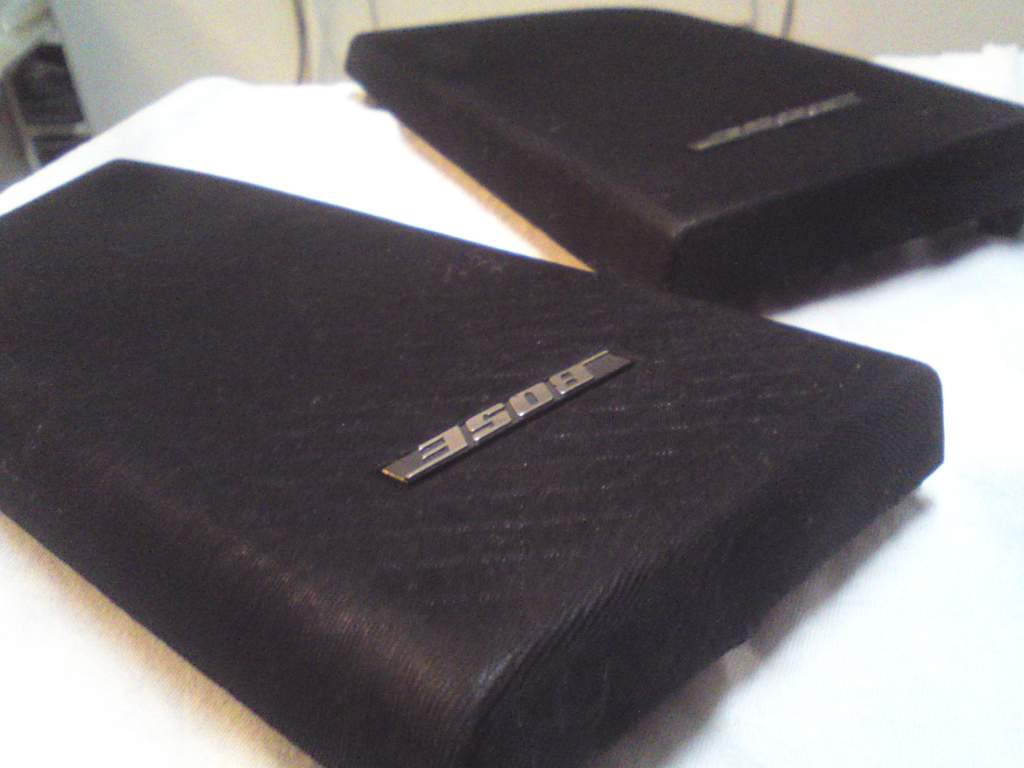
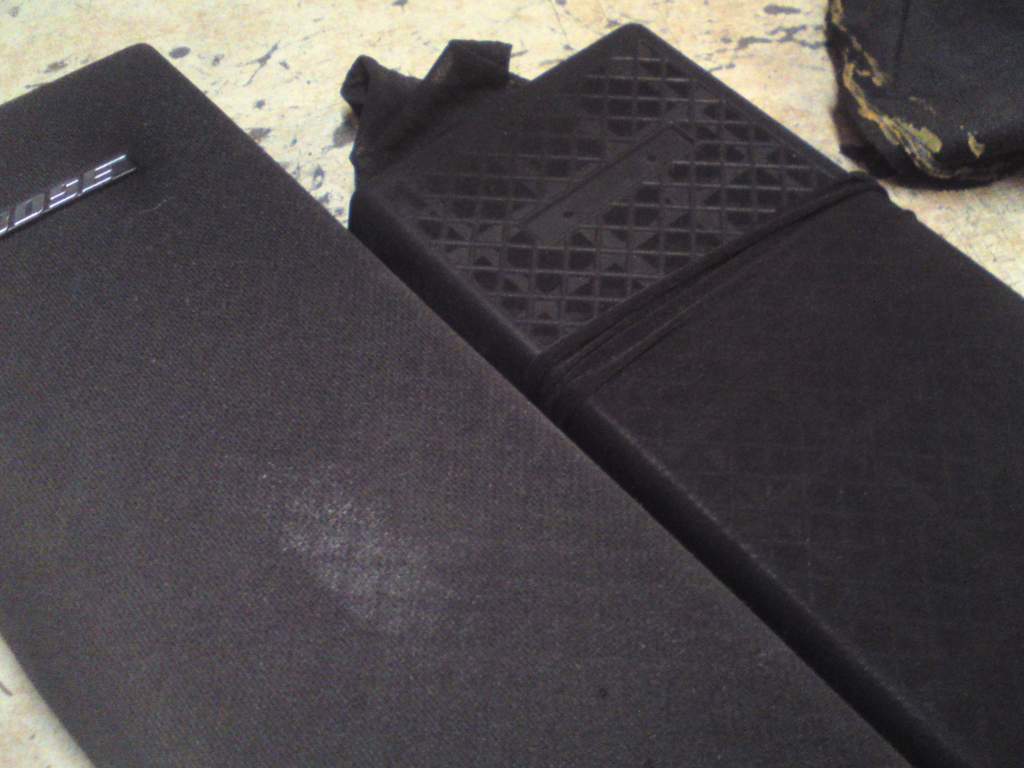
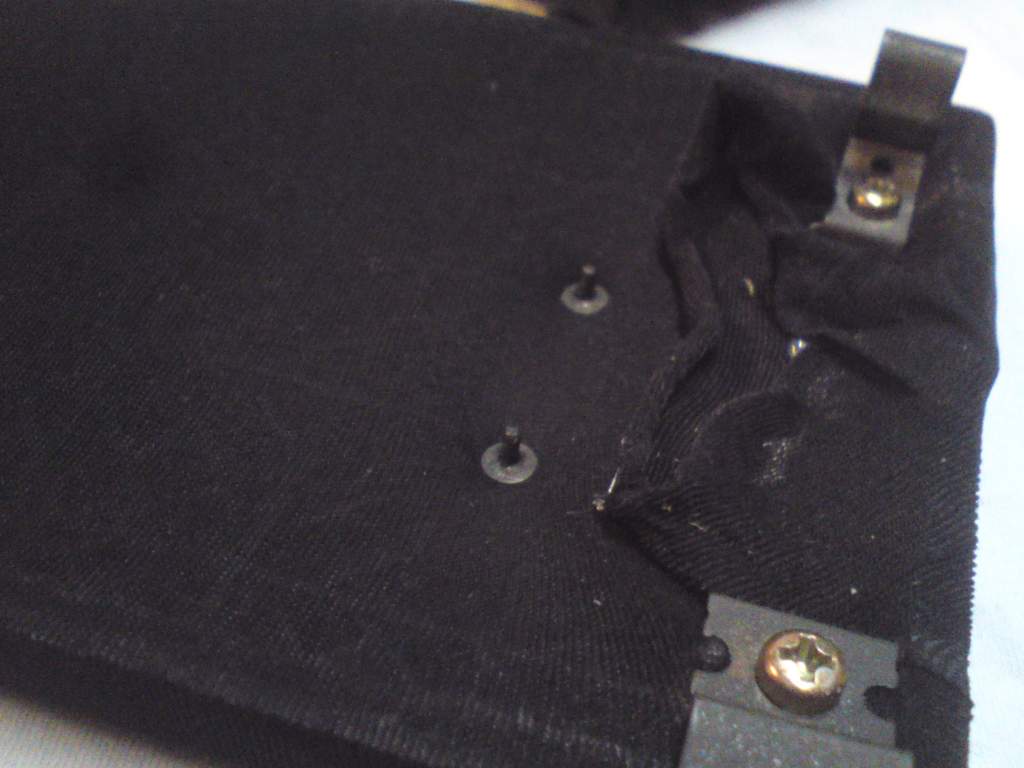
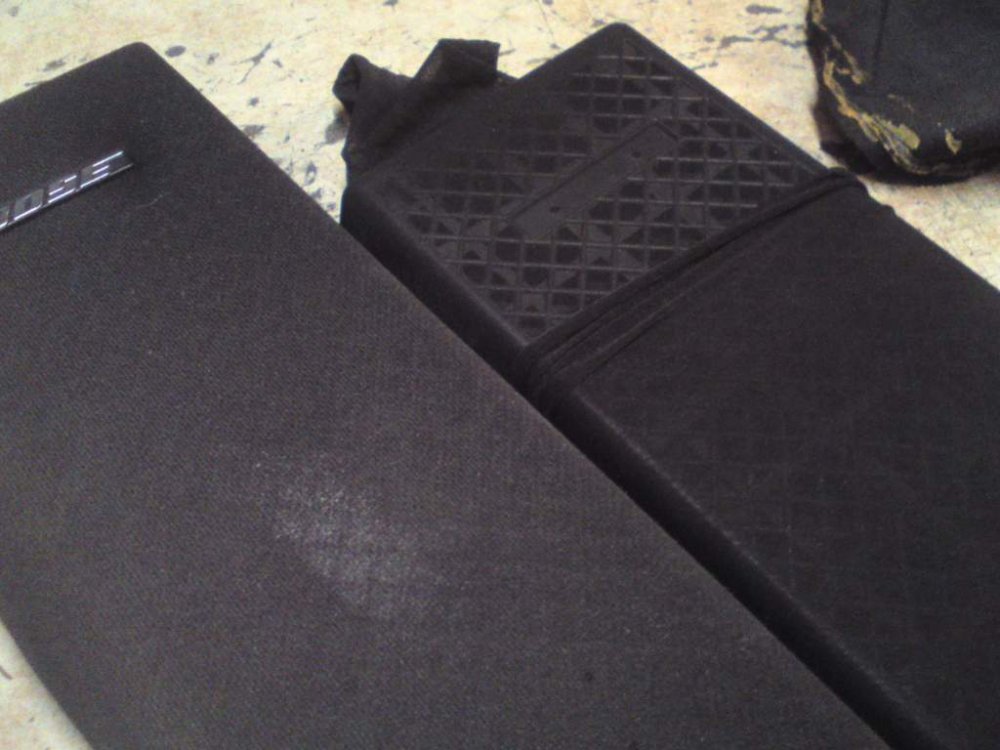
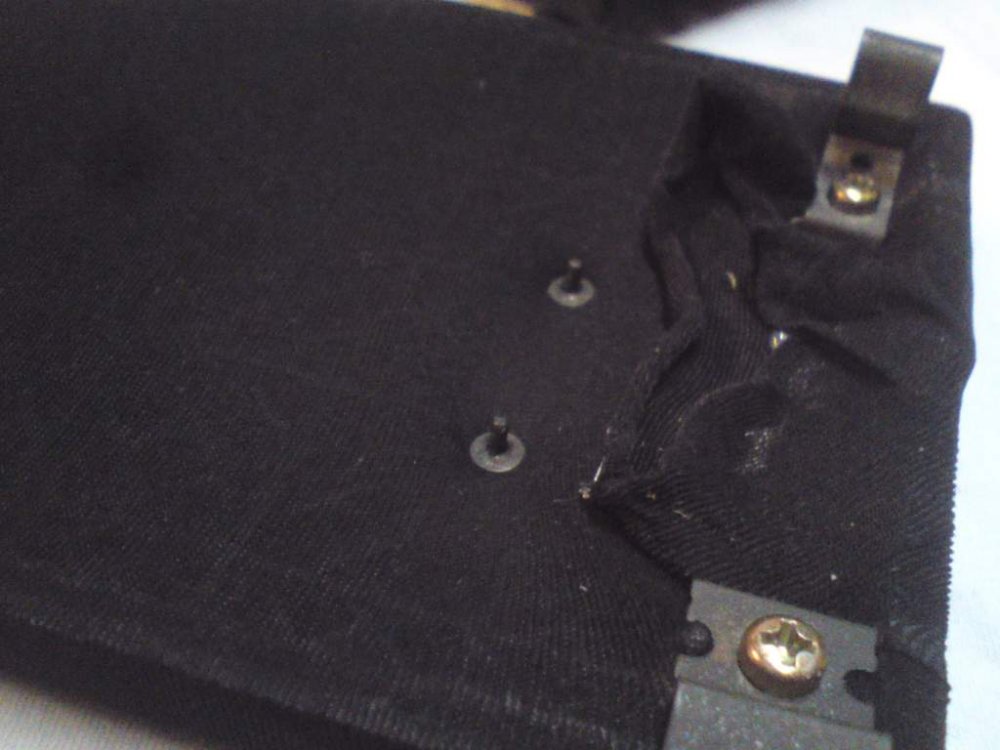
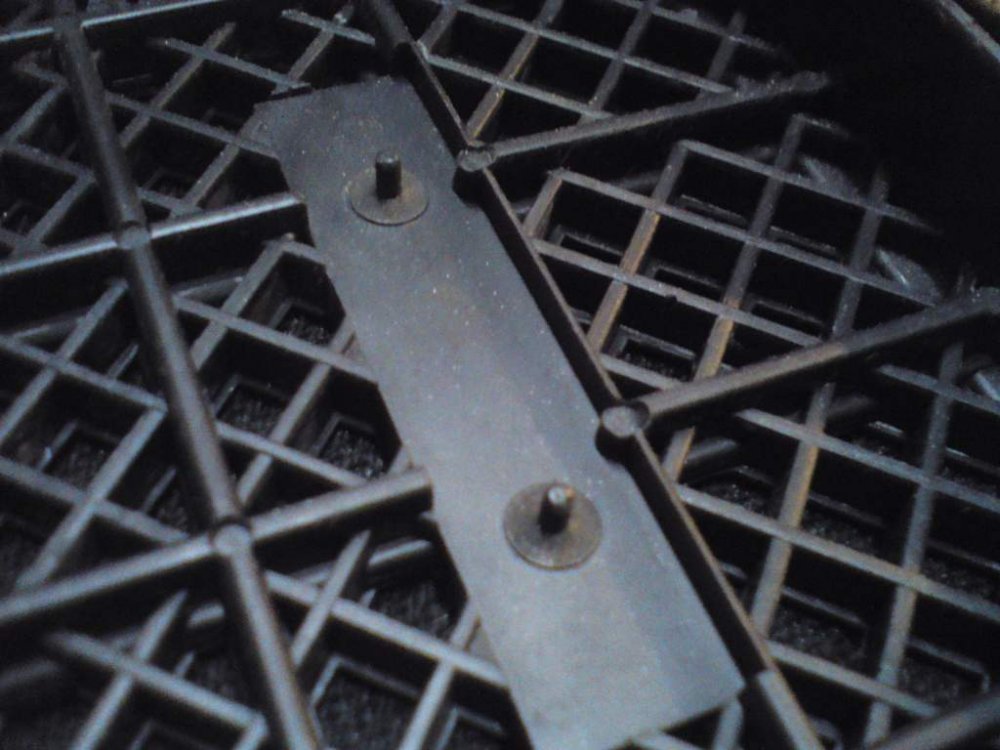
This below is a picture of my Bose rear speaker covers, not sure if it's specific to the Bose ones but the part number is 28190-30P00 and they're discontinued. I have put the new fabric on top to show how faded mine were. Now i'm going to keep the fabric i am using a secret for now but below you can see the darker area that was protected from the elements by the Bose 'badge' on the original 20 odd year old covers. The badge is held on with these, i thought they may be difficult to remove but it was easy, it's a combination of teasing up the retainer ring and pushing down on the proud prong, then put somewhere safe as they're tiny.


-
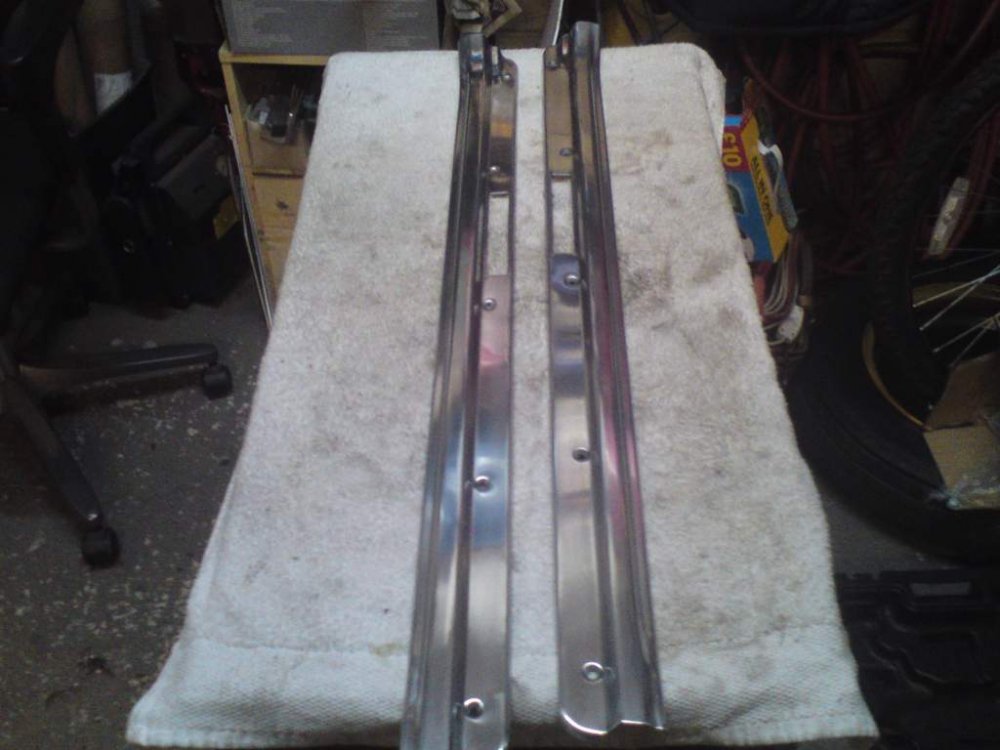
These are now all done, i am going to leave these but with the inevitable fitting finger marks, etc, i will recommend a little peek is applied, they'll come up at treat..... There is a rubber seal that runs their entire length, you can see it on them now.....although there are some missing from the ends, i am sure this can be sorted with some black silicone tubing slit down..... Just darkened my garage a little, when off these are not red fyi, they look kind of mirror like - hope you like ;)........


-
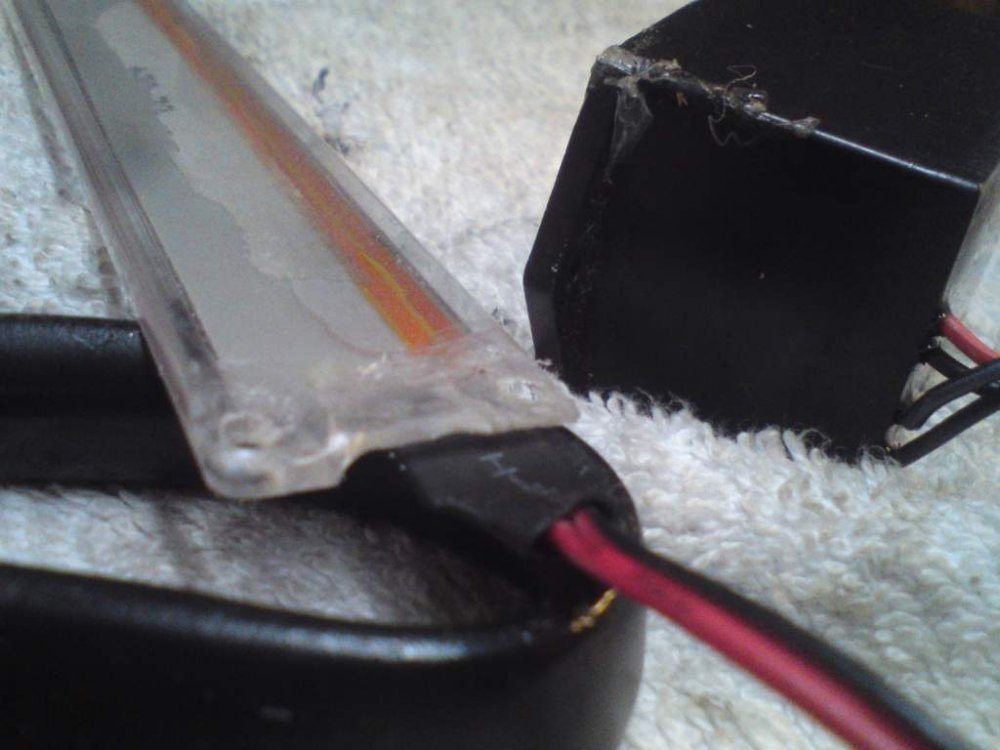
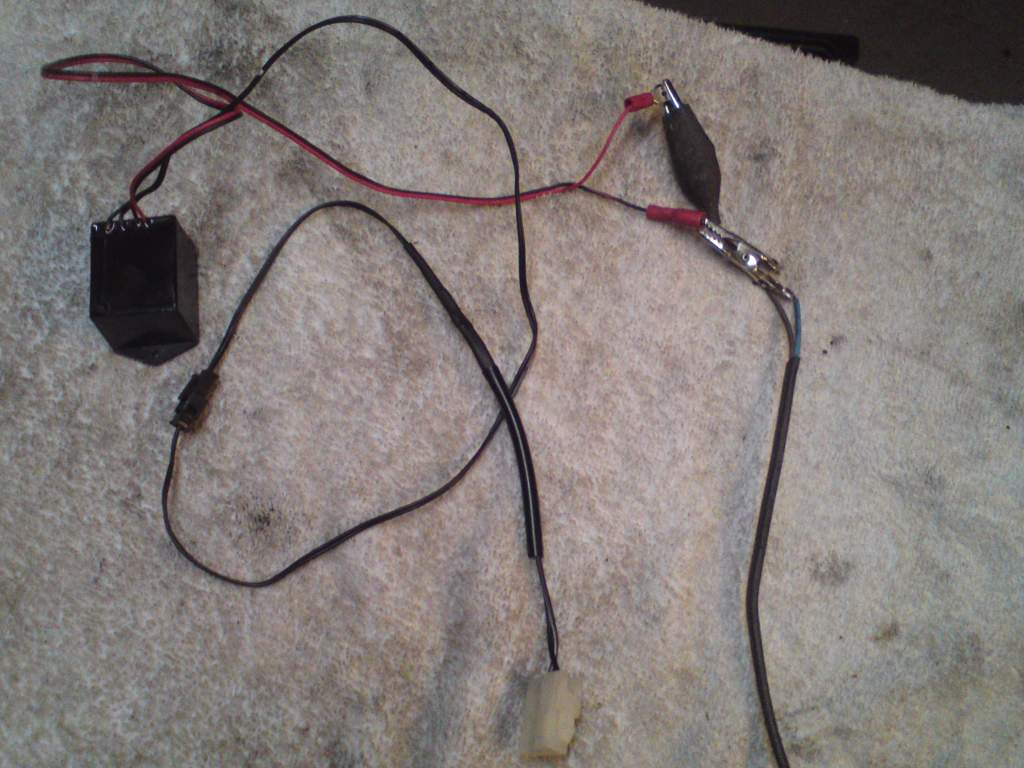
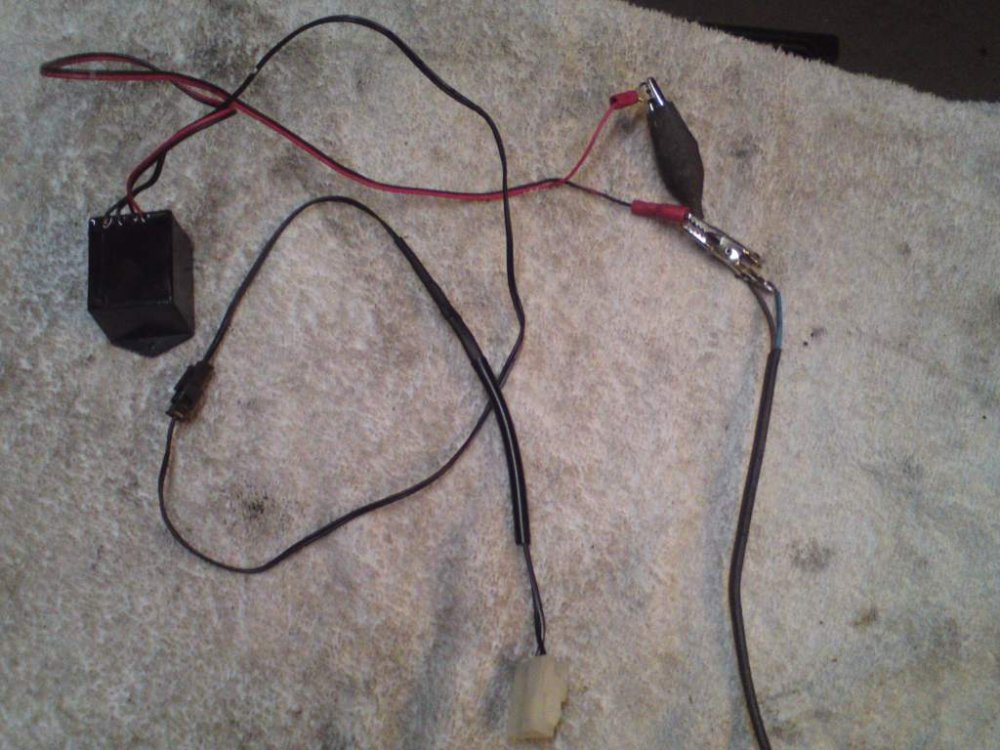
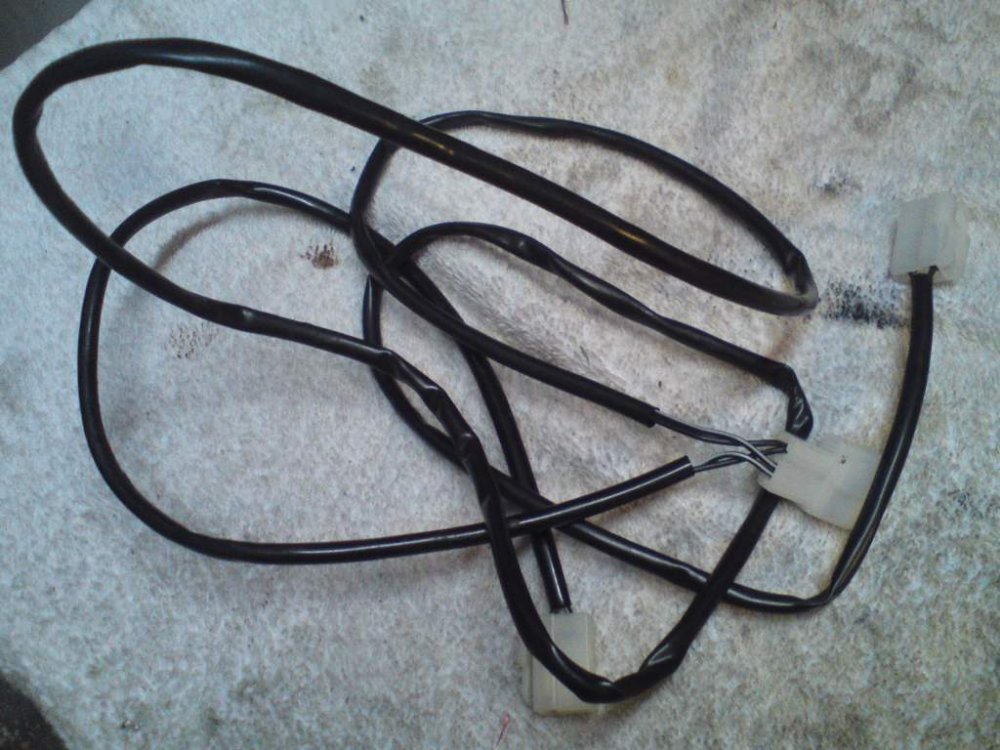
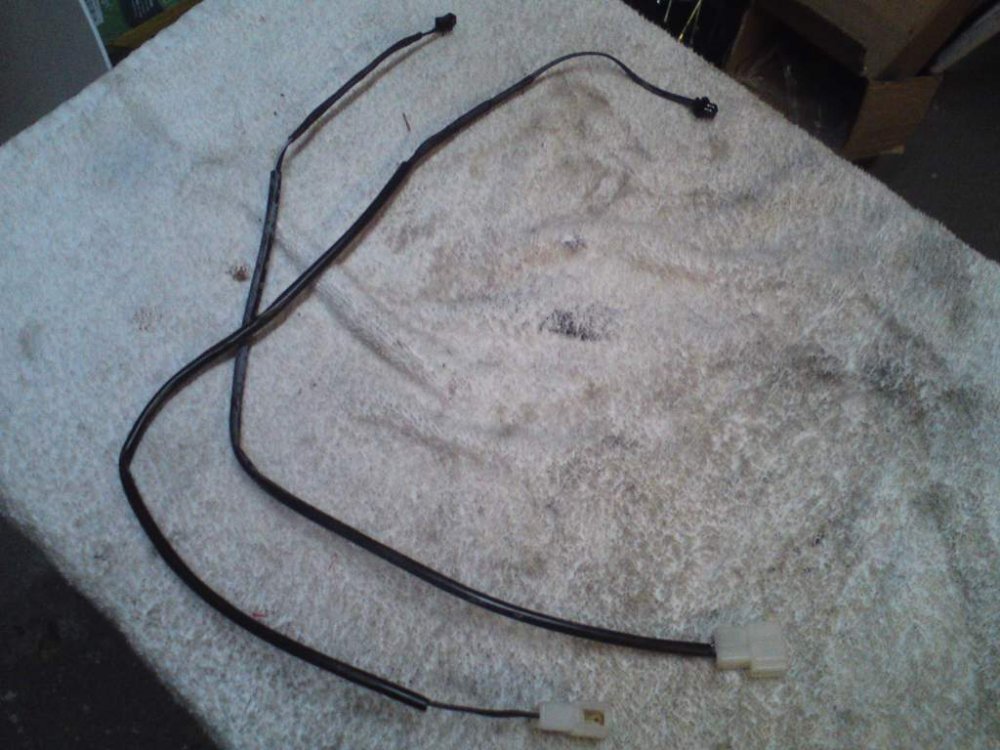
This is the supply wiring, i have attached 12v to the inverter, this will connect at the courtesy light relay which is behind the l/h seat in a shorty, behind the l/h rear seat in a LWB. The cream plug at the bottom is the original, the other end to this i have attached a plug, so should a different invertor be required at some stage it wont be any bother to swap out, most if not all these type of EL products come with these plugs fyi. Next we have something i have done nothing to, 3 plugs, one that comes from the invertor and two out - these two reaching or getting very near to both sills. Bit boring i know but we'll get back to the finished sills very soon, these are the two short looms that will connect at the EL sheet to the larger loom you have just seen above. You may notice i have soldered on black plugs again, making installation/repairs/replacement/cleaning straight forward.
-
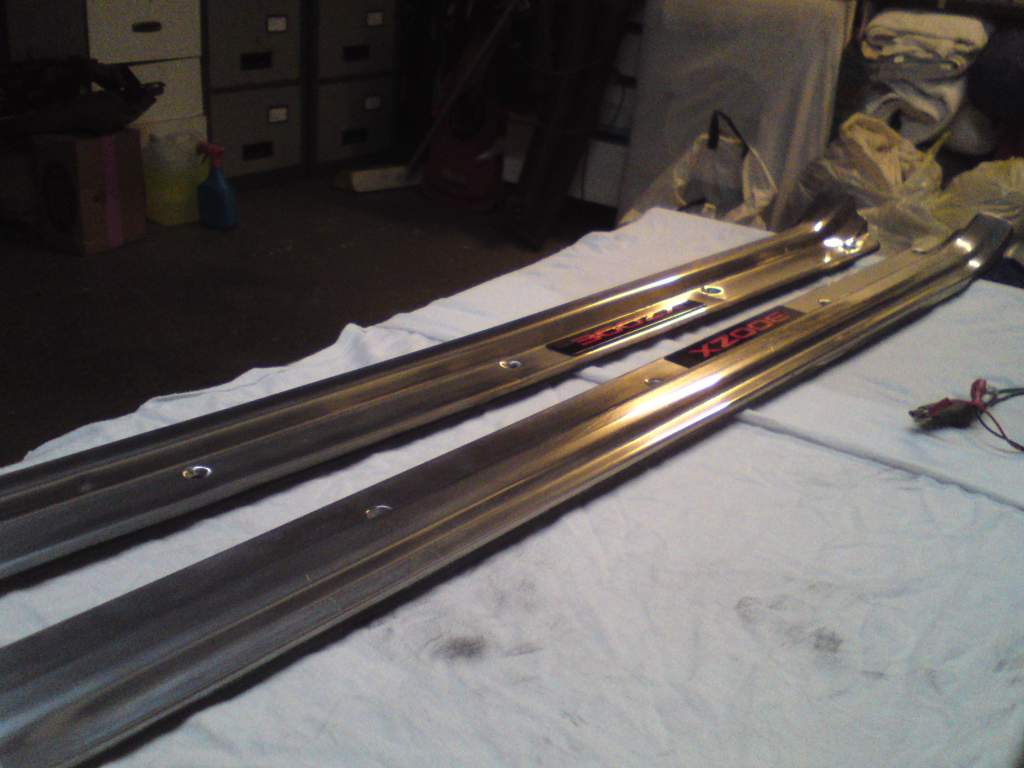
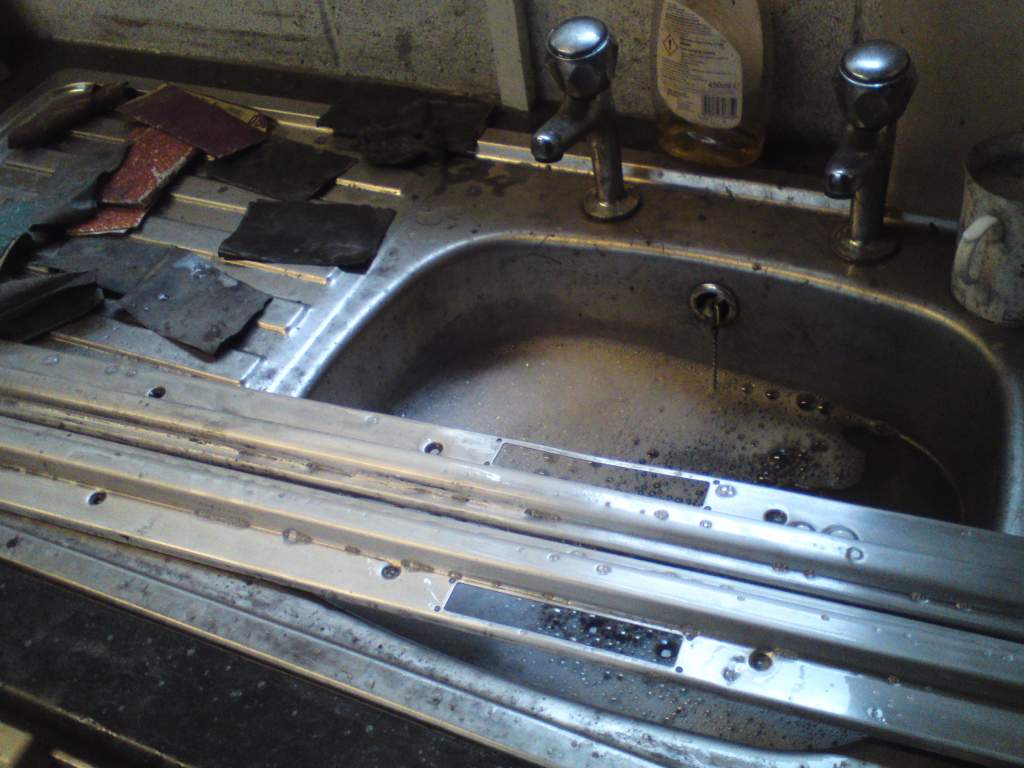
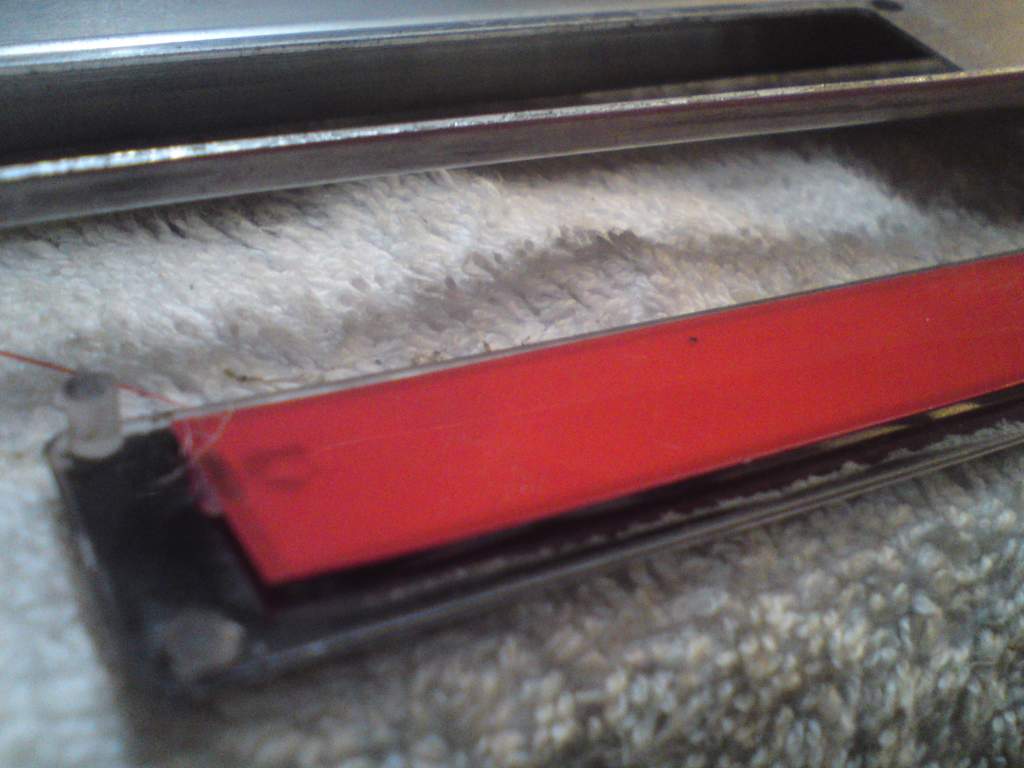
Several hours spent at the sink, already i was at 120 grit, went through the papers 240, 400, 600, 1000, 1500, 2000 and then 2500. The picture below is at 600, it's only when you get to 1000 grit does it start to feel 'glass' like. After drying them off i rubbed them on a denim wheel attached to my bench clamped drill..... Turned out very well, i was going to use some metal polish but i'm going to leave like this.....optional then for the owner. On the back of the 300ZX logo i attached some red acrylic, the type you find in a file. The reason for this the EL sheets can appear a touch pink, this reddens the appearance up very very well, you can see on this pic i have cut down one of the pegs. And the reason for that is the EL sheets contact points are not central like on the original ones used, cutting a bit off here and losing a part of the peg means these will sit nicely without being proud or obstructed.