

Everything posted by phutumsch
-
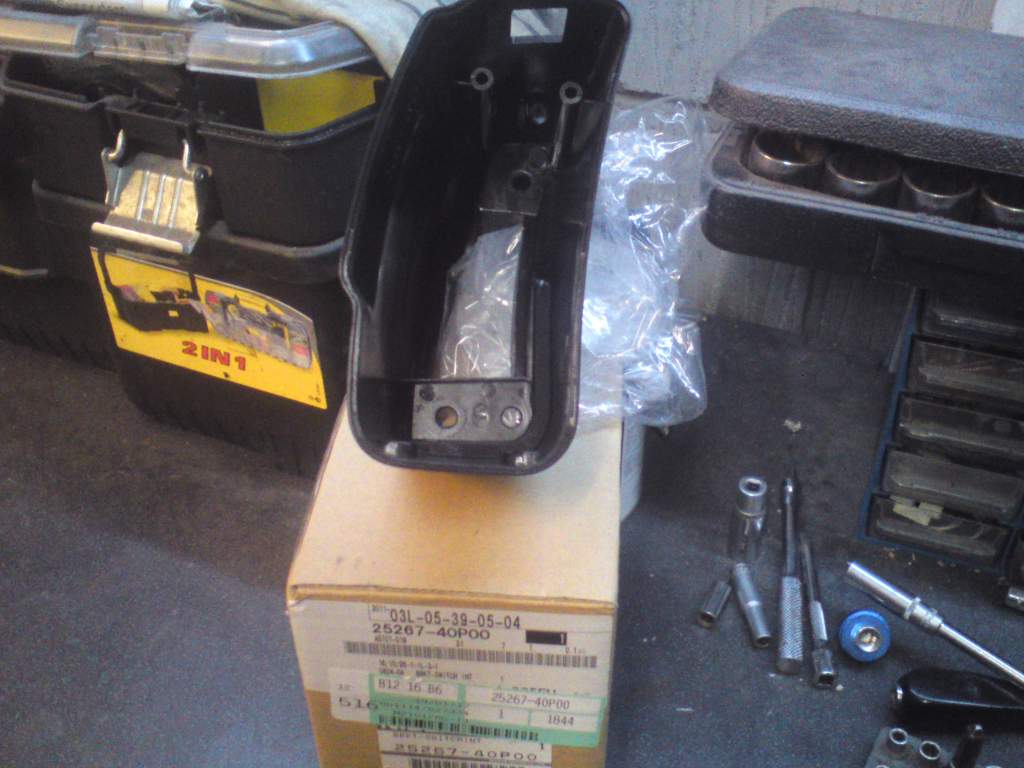
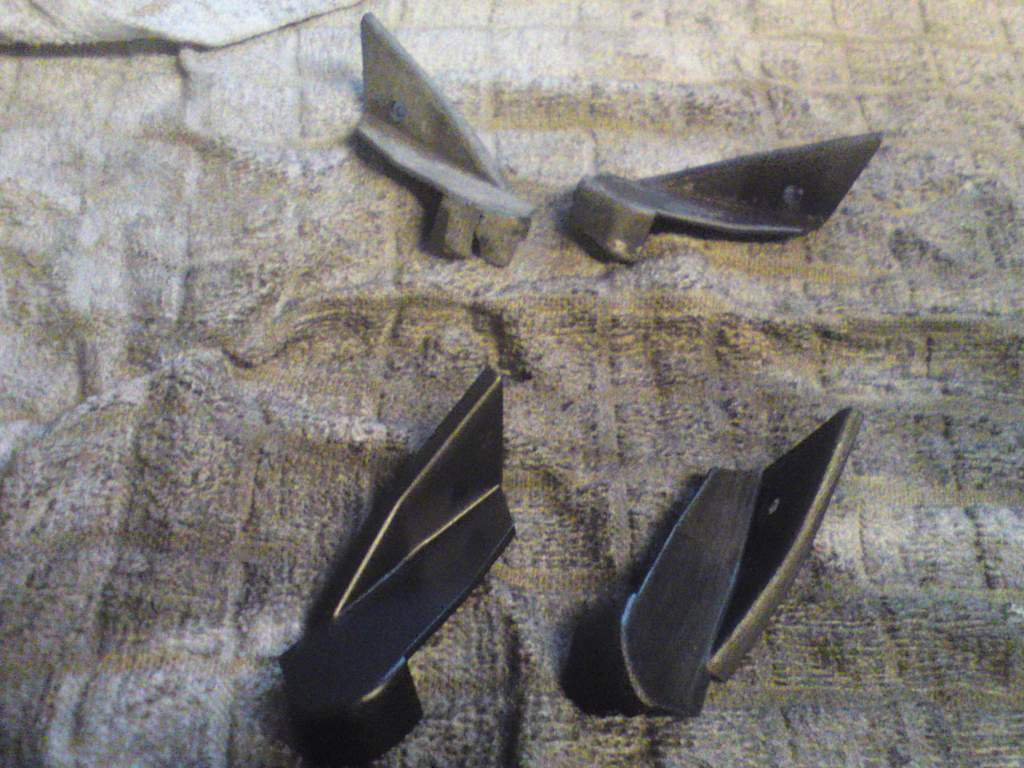
On my current fitted one the screws holes are not too bad for the hazard assy and although cannot be seen, around a screw hole holding it on, it's gone a bit brittle, still 4 more screw holes though that are sound to hold it on with, i thought time for a new one and here it is, complete with part number on the box, just over £30 this was fyi, i wont show it fit because it'll just look like the 'old' one..... And these things, they are the bonnet hinge covers, visible near the scuttle at all times, one of mine was sound but the l/h was not, so bought just the one (£15), quick blow over on both new and old with some satin black, you can see some other broken tatty ones as well in this picture, only fit for the bin these two :yes:.


-
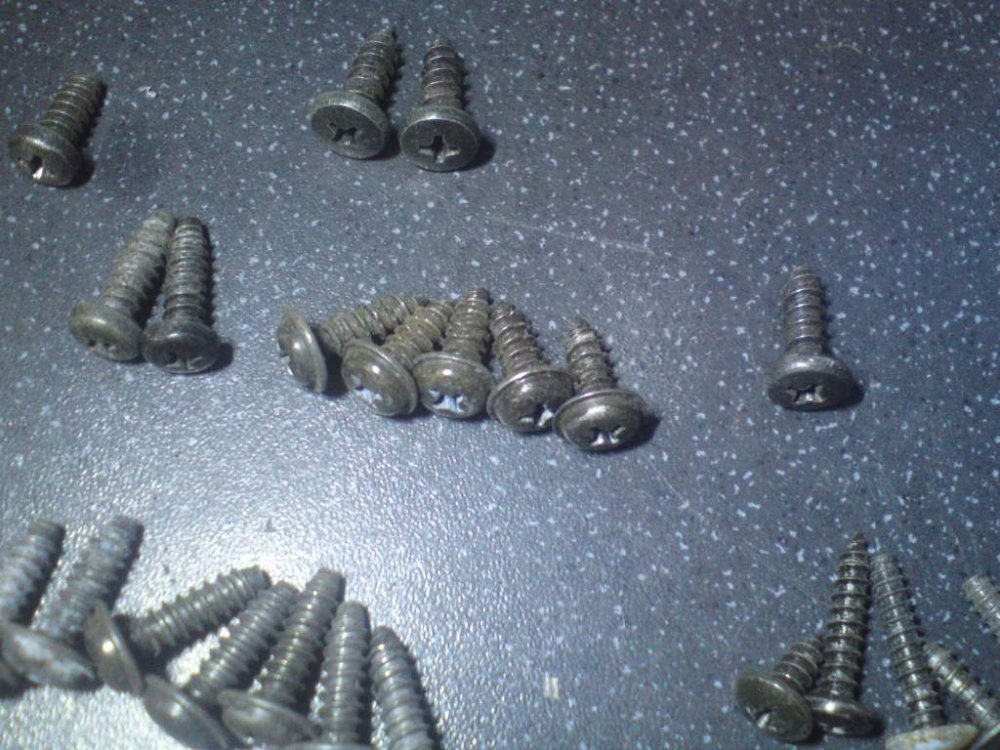
Bit of a thread resurrection going on here........ and having read i'm still unsure, my pod when i bought the car was damaged so long screws were fitted, i then got another which was an improvement but although fine and secure i used the radio console screws but these are 20mm, so is 15mm correct as stated by Keith above ? So i've taken a pic with some options, bottom left we have the radio console screws, bottom right some that are too thin, amongst others you see which are too long imo, the centre of the below pic we have some 15mm in total length flange ones and i think these are correct but there is another with a rounded no flange head and this is 15mm also, so which is it please. No guesses please i need to know 100% as i have virgin holes :innocent:, i have a new pod back and want to use the correct oem screws, thank you.
-
I'm smiling from ear to ear looking at you with your thumb up, you haven't commented what Mrs. Gray as said about this purchase.....sure she thinks you're quite barking and there's no dinner for you this evening !!
-
I don't like taking the later ones apart if i'm honest Joel, they seem to of used a different sealant that takes a higher temperature to yield, once apart though it's straight forward work. Nothing fancy, used my bench wire wheel and for the areas that cannot reach i used my rotary tool with a small grinding bit actually, that scratched away all the loose bits plus a bit more as you'd imagine. Then what you ask.....Holts Rust Terminator, similar treatment is a must and that product i've had a long time in the garage, so long in fact i cannot find it available today, primed over and then satin blacked.
-
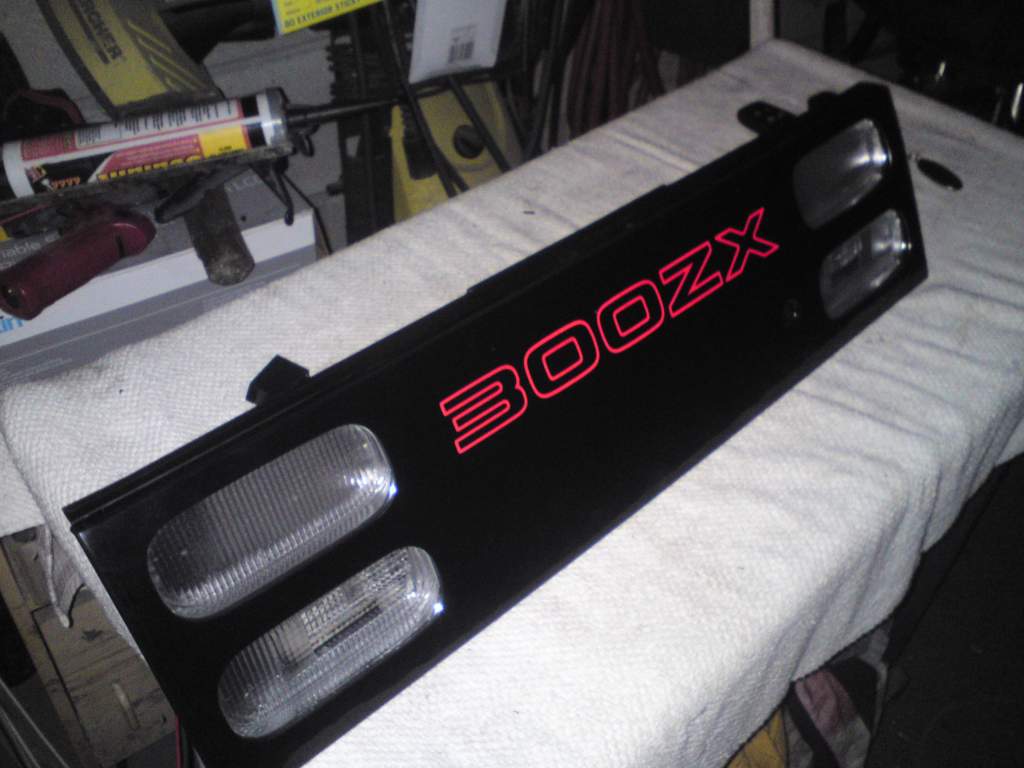
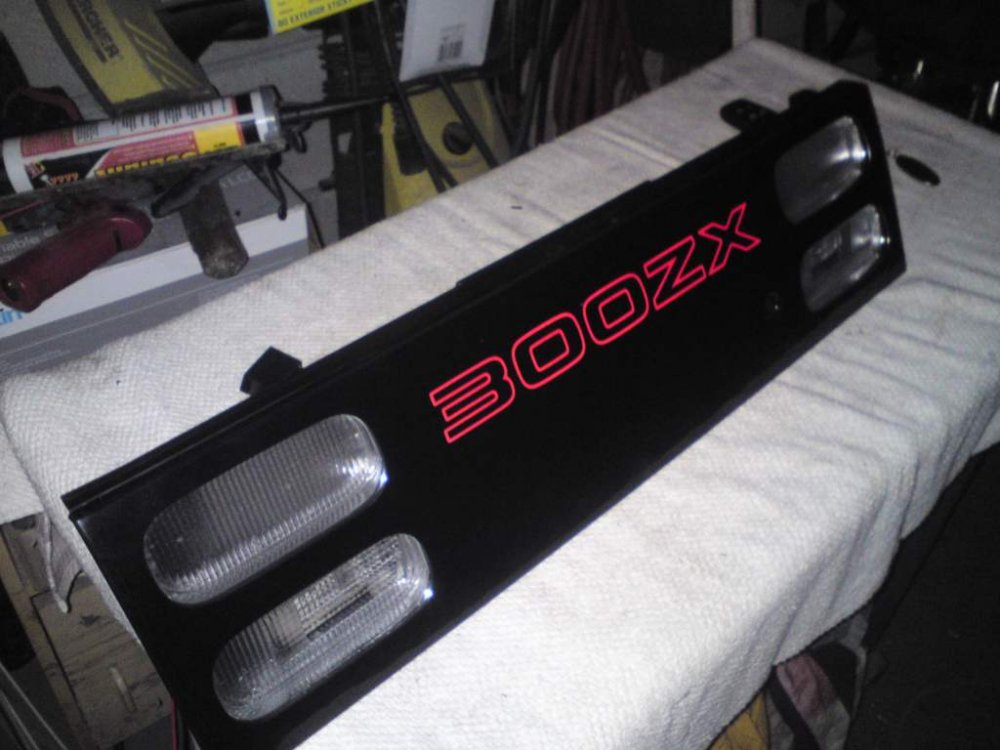
I'm going to have the option of 2 reverse light panels, both are 99 spec and both are lit up red, this one below is brand new with red 'outline' 300ZX illumination, still facelift red when 'off' btw :yes:. Looks a tad pink but i assure you it is not :winkiss:.
-
Is Graham taking it somewhere else then ?
-
Erm that's a given !! Back to thread topic that's twisting my melon :biggrin:.
-
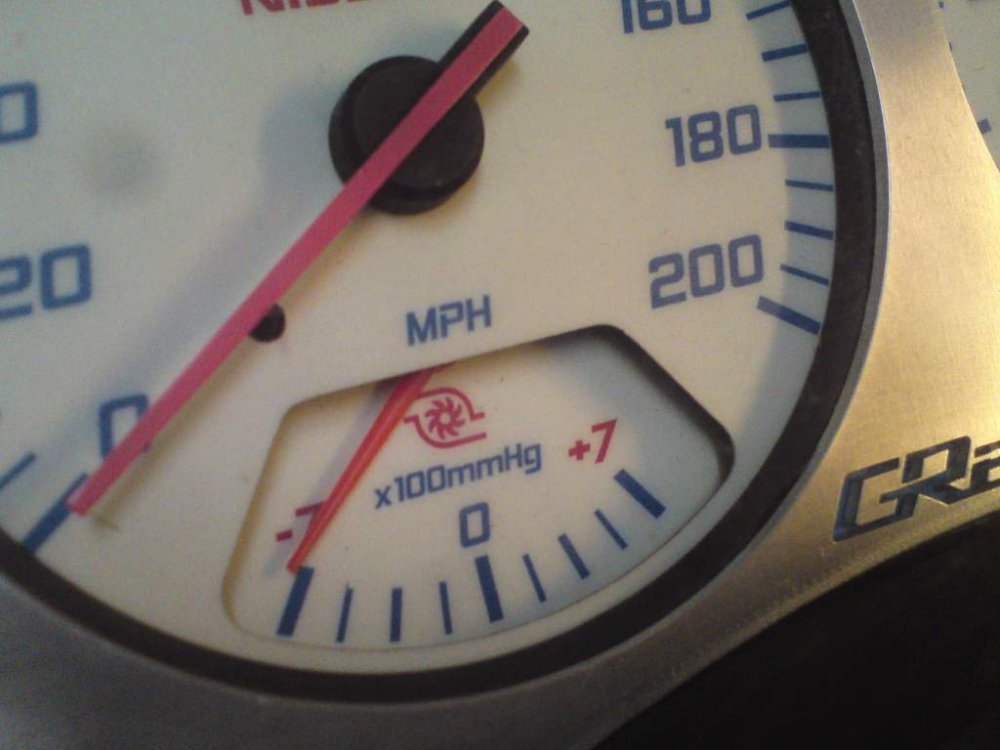
Don't go off the needle position in the pic Ian as the point where the symbol comes on, i have near half a tank of fuel so to make my light come on i was having to lift the assembly out of the fuel and then cup the thermistor chamber in my hand to make the light come on, hence speeding up the simulation process. Needle reaction and low fuel symbol illumination is not immediate or instant. To make the needle drop quicker the electrics were unplugged, done for purposes for pics for this thread. I don't know until i road test but i will want the symbol to come on when it's on or slightly above the last notch, i think you'll run out of gas if no one as ever removed the needle before somewhere a few mm below the last notch or totally clearing it, my pictures needle is in it's unplugged state at the very bottom. I know when i put both float senders to the 'full' position the cluster gauge was bang on the top notch, so i expect i have got the 'empty' area not far off either, it's finding that happy medium, i bet some on here when they fill to the brim the needle is above the full notch and the knock on of this is that they'll run empty above the empty notch, the needle on the spindle is on incorrectly therefore. This however will have no bearing on the low fuel light, it'll still illuminate and therefore cannot lie but what will happen the needle position will appear higher up on the cluster's gauge. Hope i've got that across ok. Is that in laymans terms Andrew, haha, again nice addition.
-
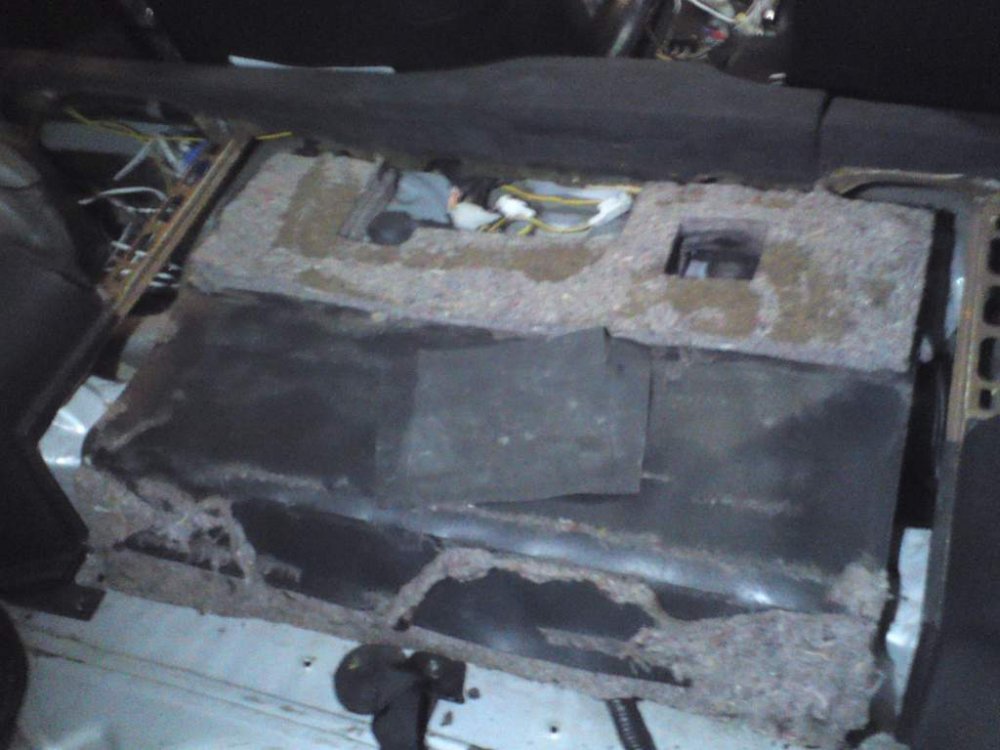
When i am now low on fuel my cluster symbol illuminates and here is the thread on how i did that.... http://www.300zx.co.uk/forums/showthread.php?186675-How-to-fix-low-fuel-light-not-coming-on On putting it all back together i decided to use both or all the insulation pieces i have acquired from various breakers, plus there is some attached to the underside of the shelf, hence the black rubber being visible on the below picture. It just lifts it slightly, gives more support and an all round more snug fitment :yes:. The 't' section trim behind the seats has been perfectly centralized, i offered in all its 5 screws and then when i was happy tightened them all up in turn, all gone together very nicely indeed :thumbup1:.
-
I have read that many low lights do not come on, you do get some forum idiots saying "my light never comes on because i don't let it run that low" !!! Anyway here's the link and what you state Andrew is my take on how it all works as well and a great addition to this thread :yes:. http://www.ebay.co.uk/itm/252492475091?_trksid=p2060353.m2749.l2649&ssPageName=STRK%3AMEBIDX%3AIT That's how i thought it worked when about a year ago i had a look at the assembly, it was only recently did i start to trace back wires did i soon realize what exactly was going on, with me having two identical assemblies at my disposal and trying to work out why one would work and one wouldn't. Spot on Jeff, the same seller does sell a module to allow a led bulb to be run i notice, not specifically for the 300ZX i might add, but what's the point of led in this location. I have fit the oe orange filament bulb and is perfect...... Still visible when i light up my red cluster.....


-
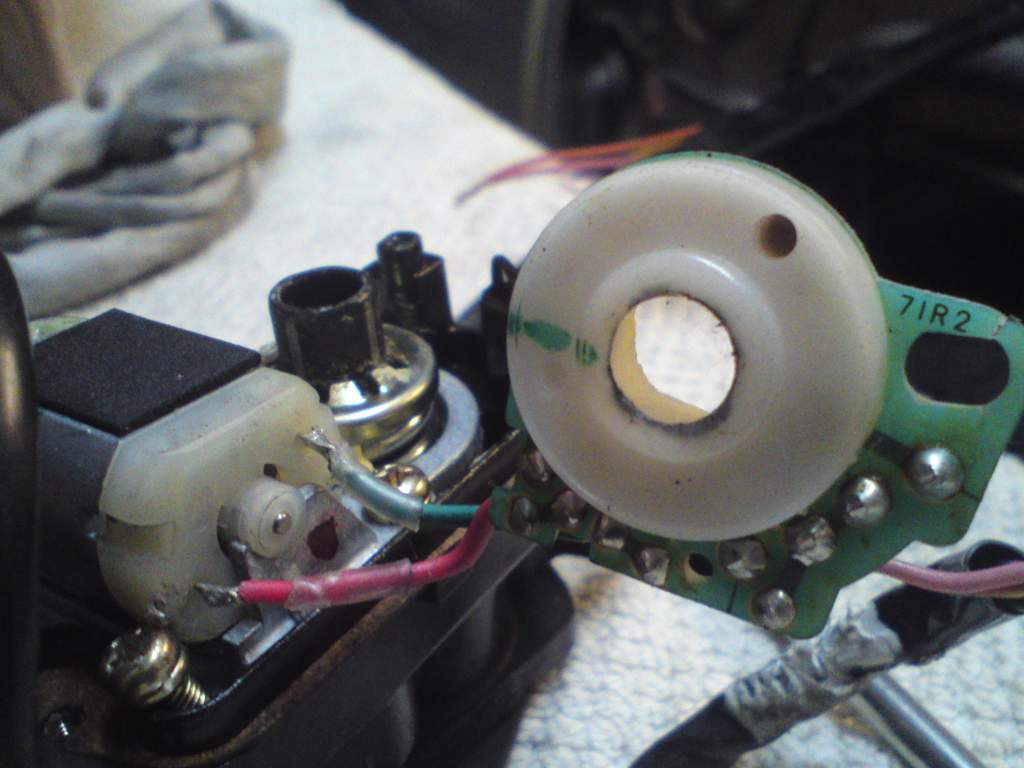
You can buy thermisters and realizing this one on ebay looked identical i bought one, £20 though so not cheap but since i have found tremendous value for money. Below you can see i have popped the thermistor in its cylinder and soldered on the two wires, simples and all secured, this is my broken 94 fuel pump assy being mended btw. Red wire to the top solder point and its black one at the bottom of the pic, original thermistor wires removed of course. I tested/simulated and my 94 assy is working perfectly and with this fuel pump known to be 100% with a new thermistor that is not 20 plus years old, this is what i have re fit, the 89 one breaker acquired will be kept on the shelf.


-
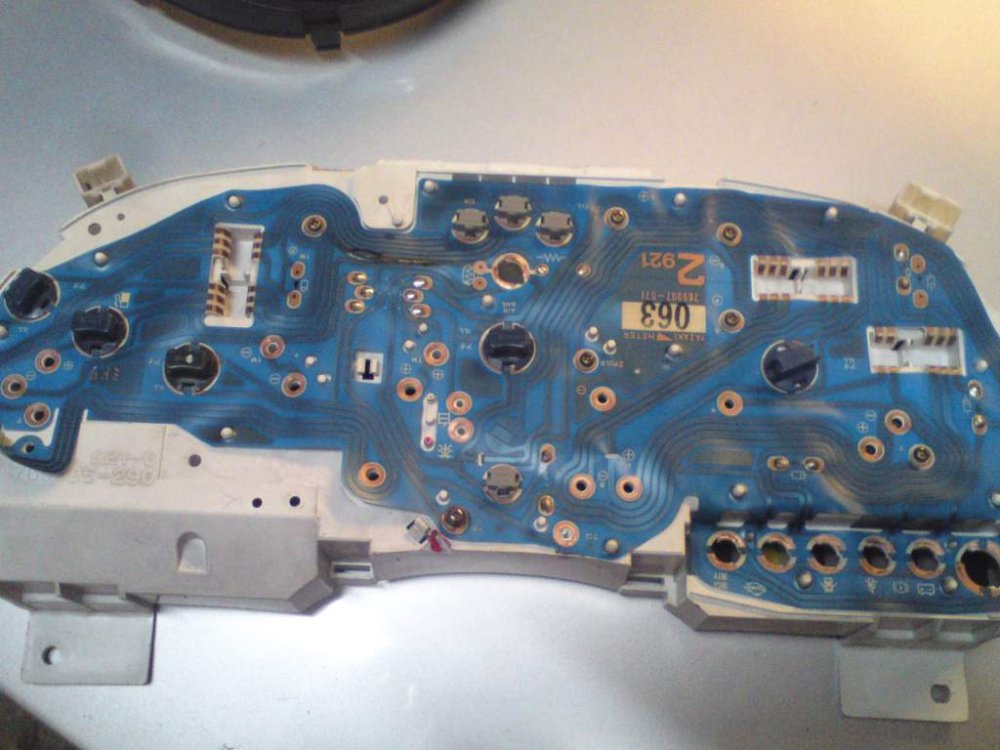
Mine is a SWB but we all have what i am going on to describe, so first of all in a shorty then the fuel pump assy is behind the seats..... I know in a LWB there is just one assembly, which is like the one we SWB owners have in the l/h chamber, strangely though we have another and it's just a gauge read float thing so no pump and no low fuel sender on this r/h one but all this is present on the l/h one........go figure i know. Pic below shows the two SWB assemblies. Clearly you can see there are two of each type because i acquired a 'set' from a Jspec series 1 1989 car and apart from a slight brown colour difference, they are no different to my series 4 car a late 1994. In 7 years of ownership my low fuel light has never worked, i have used at least 3 different instrument clusters in this time and so i assumed the problem was not there. I have also had the fuel pump out before but couldn't just see anything wrong, a broken solder joint for instance and i also know the previous owner has written about his cluster fuel gauge and i could see evidence of 'fiddling' in the fuel pump area, wiring, etc. Having fit the 89 assy and simulated low fuel my cluster gas light for the first time in a long time illuminated, thus telling me the problem was my original 94 fuel pump assembly. Now lets look at the pic below and i'll point your attention to the cylinder chambers that are in the center of this shot, this and only this and what is inside triggers your dash low gas light. Inside this chamber is this thing - a thermister and i've read up and it's a type of resistor, what happens is when it's immersed in fuel it's at a certain temperature, kept cool if you like and it's when it is NOT immersed its resistance changes and it then sends a signal to the bulb in the cluster to illuminate.


-
I am not a trader anymore. I will take it these are zedwizz's led conversions, if you want to save his boards then i wouldn't use - so unplug. I can take a look, an external crack would cause water to get in and as would internal condensation build up from a wet unused car perhaps but if it's only the one side then this is doubtful. When the lights do go back together, they do seal again very well with what's already there, without the use for more of the sealant but as i say i need to see.
-
I think it'll move at the stock speed, once there's no load on it yes it'll spin like crazy but you marry up those cogs and the torque comes into play. Amazing what you can buy for the money, longevity must be a consideration, personally the original motors have been fine for me with only one iffy one, and no doubt they have been tested thoroughly way back in the late 80's, keep us posted.
-
You need to check to see if some other items are working - post 19 i will guide you to http://www.300zx.co.uk/forums/showthread.php?162672-Electrical-issue&p=1915538&highlight=acc+relay#post1915538
-
I refer the right honorable gentleman to the answer i gave in post 8 :yes:.
-
Hahahahahahahahahahahahahahahahahahahahahahahahahaha....................yeah right !!!!!!!!!!!!!
-
Have a good day Dave :yes:.
-
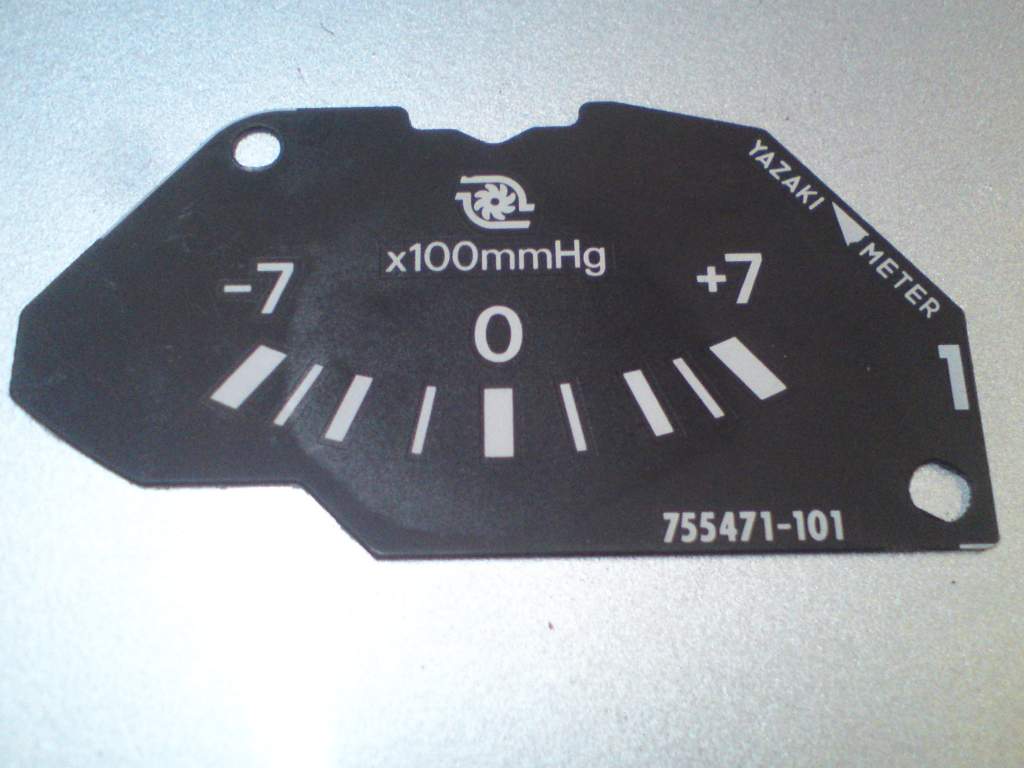
All my carcasses are the same, the tell tale for me with later clocks are the square tabs at the bottom, whether you want to say some of these are from a S3 car, then i just don't know. Series 3 to me has always been a mix up of parts of series 2 and 4, what car from the factory have i got my clocks from ? They are scarce i'll grant you but i have acquired 2 over the years. Having a boost gauge was it an optional extra in the later years ? I know you could of got the digital climate control for extra - the standard fit was the manual pod. Here are the said tabs and the rear on one of my spare clusters, all my plastic pcb's are like this... This picture shows the gauge in my perfectly working spare clocks with the MOMAN el faces, these were not a straight fit because they knew nothing about the later clocks.... This below is the shape of face for the S4 clocks, these are completely different to the earlier series clocks, this sits in a blue tray when fitted.... These are the four screw holes for the gauge, screwing them in makes the contacts.....

-
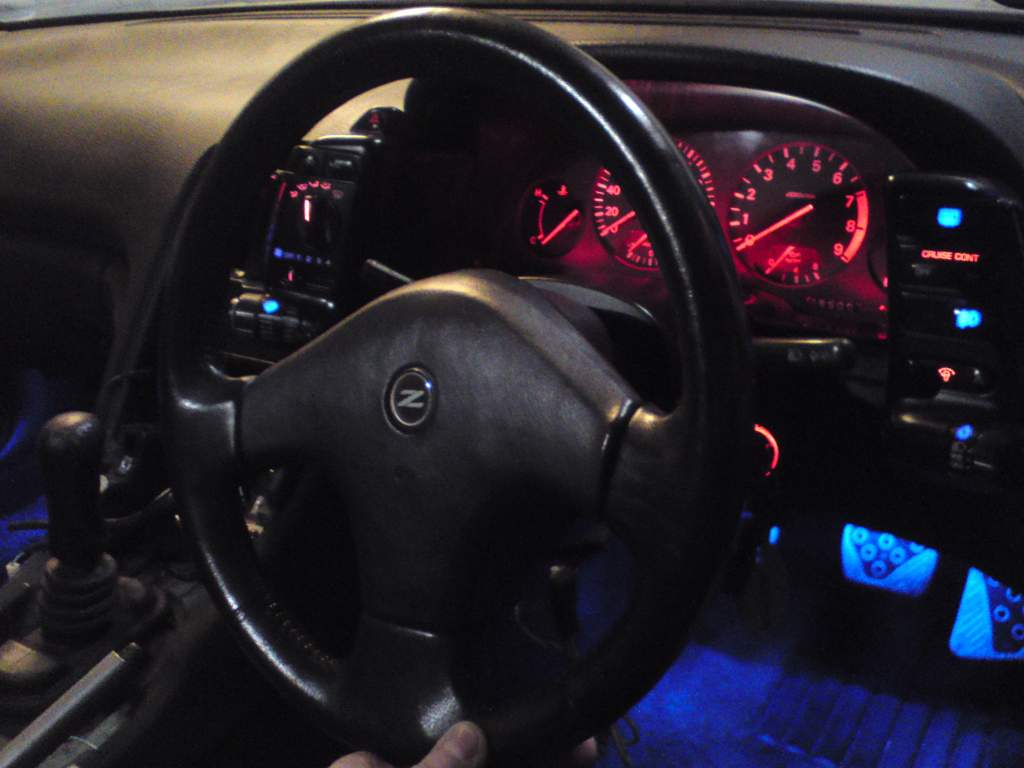
Initially in this thread i had those EL dials and so i migrated in the boost gauge from a set of clocks i did buy, the reason i didn't use the whole unit must of been at the time i was happy with the EL ones. The mph thing could be another set of EL dials from MOMAN i had bespoke made. Up to date though.......i did buy another complete oe cluster and that is the one i'm currently using. http://www.300zx.co.uk/forums/showthread.php?167737-VFM-Ebay-Indiglo-Dial-Faces http://www.300zx.co.uk/forums/showthread.php?184096-Finally-Happy-with-my-Instrument-Cluster
-
I have looked into this today, i have four spare mirrors and under bench testing all worked, most are the non heated type expect for one, this one would not always close when fitted to the car but under my 12v worked 100% of the time today, so with a slight fault this is the reason it's on the shelf at mine. All you state is correct but if you have applied 12v and the ground to the motor direct then there is no hope for you or them, on doing this without the white disc you can apply power until it clicks because the motor will not know from the pcb what position it is in. I've seen you've removed the shaft so 12v should make it spin and spin.

-
Now i see, that's what those circular holes with cavity are for, they just have a round sticky black band aid over them on mine.
-
With my SRS steering wheel being away getting retrimmed, so if my respray guy does get in touch in the meantime i'm a bit stuck....cannot move it you see. So i took a chance on this wheel off a breaker just in case, it was covered in fungi but underneath all its grime i thought it would be ok and sure enough it's fantastic with hardly a mark on it :yes:. No good to me after - so it'll be up for sale at some point in early 2017, here it is aherm fitted/held on by me for now !!

-
I'm keeping, not much weight about them and in any case i recently in my wisdom put back the l/h side one because it was missing, actually only these remain, everything else has been removed by the airbox remover, not me btw.
-
It's supposed to be booked in but i'm not pressing at this time of year, happy to have it sorned and in my garage. It has given me time to attend to a lot of jobs, part of which you see on these pages Dan, however though, once i get back some parts from The Great Mondo and get them fit i will be 100% ready.