
Everything posted by Yowser
-
Thanks, yeah all custom.
-
Space constraints - Im clashing on the bellmouth if I taper or go larger on the Belllmouth diameter itself. It is just a draft at this stage though, I cant move to manufacturing till I take some final measurements, and I cant do that as the heads are off the Block currently.
-
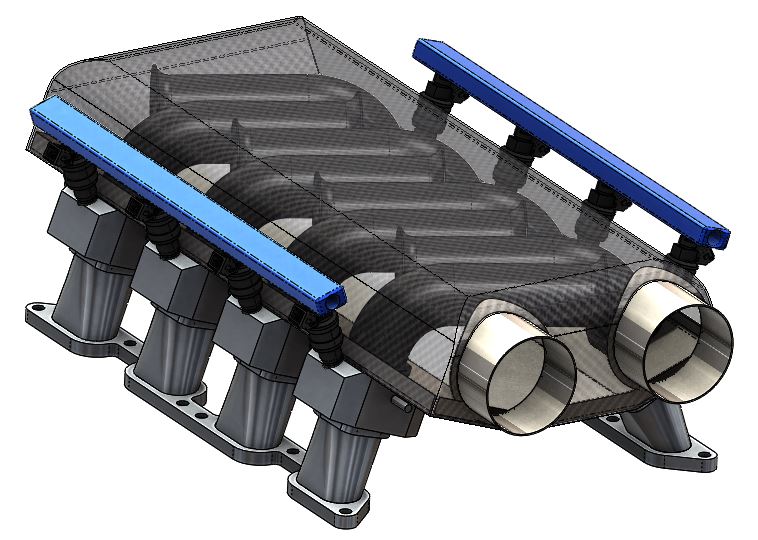
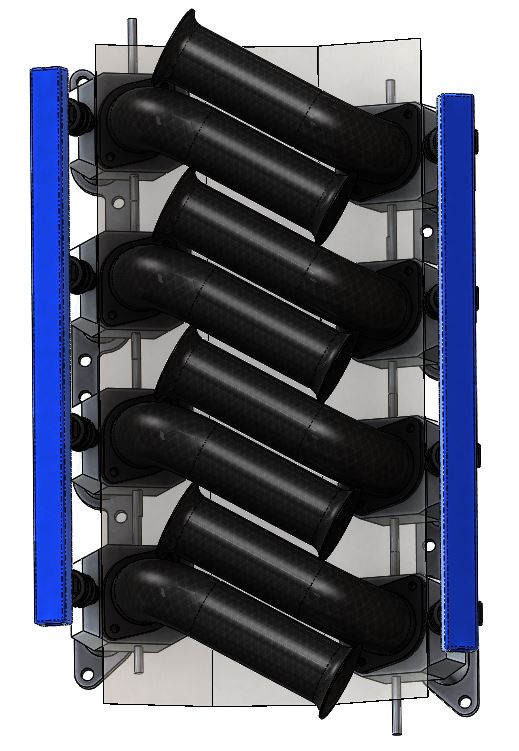
Thats right, the main one being the entire intake runner length from the Intake valve (in the head) to the Velocity stack opening. Its to do with the pressure waves (Helmholtz resonance) from the opening and closing of the Intake valve, and taking advantage of the pressure change and the subsequent pressure wave to improve Volumetric efficiency. I am aiming for the most gains between 6000-9000rpm, without comprising low-end characteristics too much. You are essentially setting the length for the optimum rev range you are aiming to make the most power for. Longer=lower rpm, Shorter=higher rpm. Most aftermarket ITB setups are a comprimise between the space available and the ideal runner length. You will often see setups with far too short runner lengths for the engine characteristics. You can also alter the ratio between Throttle valve and intake valve length, versus throttle valve to Bellmouth length - compromising between optimum fuel mixture and throttle response. There are minor characteristic changes like tapering of the bore and the profile of the bellmouth which all aid in improving the velocity of the flow, and everything needs to be matched in diameter as a ratio of the mating system. You essentially have to take into account the cross section area throughout the system - Valve head diameter (minus valve stem diameter), Cylinder heat port diameter, runner diameter, throttle body diameter and Velocity stack diameter - Ideally tapering at an optimum ratio at all times with the aim of increasing flow velocity without restricting flow rate.
-
E39 M5 V8. Madness.
-
RPS were always a popular choice, if perhaps pricey. There may be better value options these days, Im a little out of touch with whats in the market these days, but as Alic says, an uprated Full Face organic is ideal for your needs. I would'nt bother with Multi puck clutches, which you are likely to see on eBay.
-
:laugh:

-
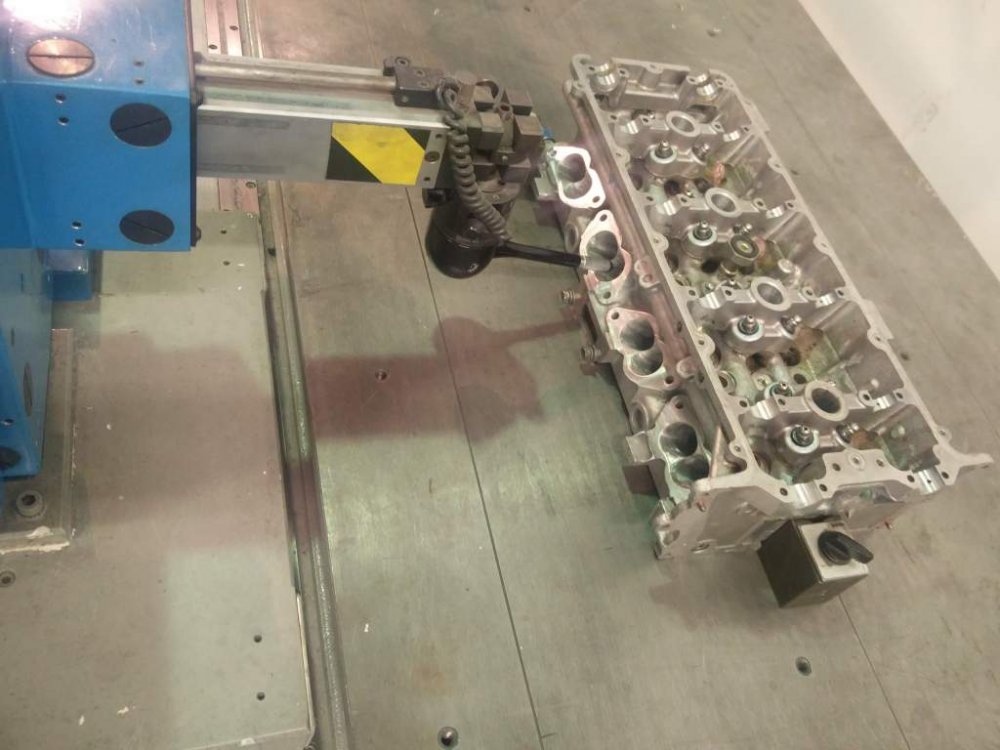
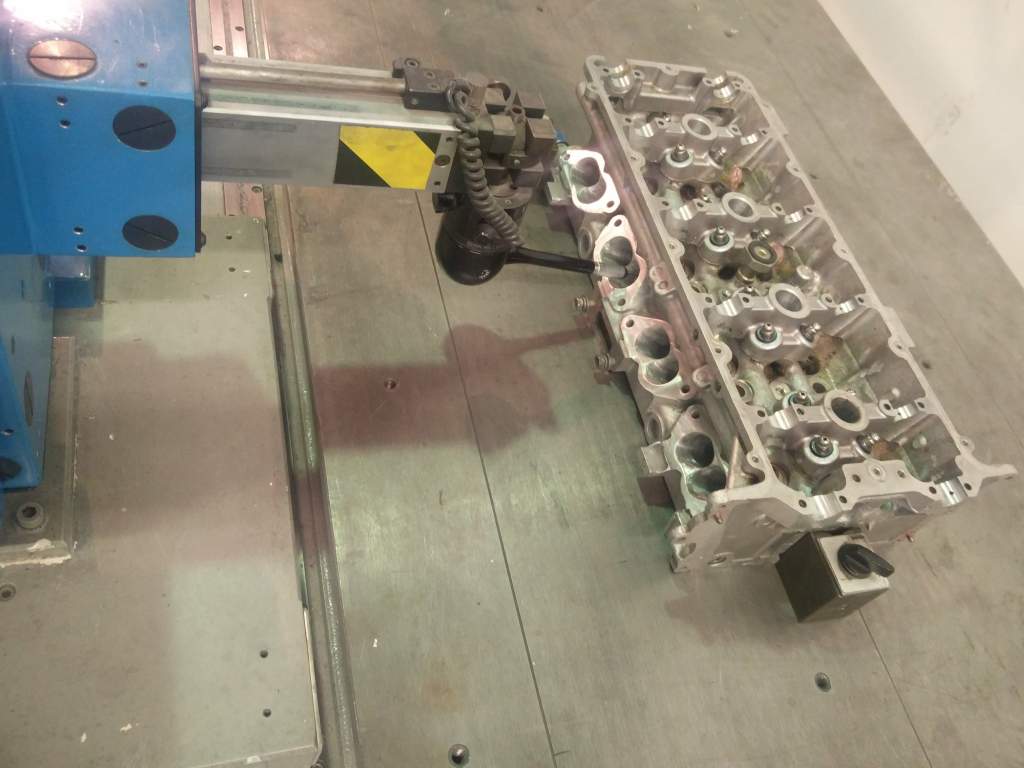
Having the first Head CMM Inspected/Measured during Intake porting progress at work : Some Initial ITB/Velocity Stack/Airbox draft designs. Top Mount Fuel Rail setup with Bosch Injectors Working to a ~350mm Valve head to bellmouth opening length. Shorter TB to Valve ratio length with Injector just after the Throttle to take advantage of local turbulance for fuel atomization. ~10litre Airbox Volume, to (hopefully) avoid intefering with ITB Flow. Trying to make the most out of the limited clearances available.


-
There is a 12mm diameter difference between the TT and NA flywheel, so you should use a 6mm spacer. Although as the starter action is spring loaded Im not suprised 3mm is working ok.
-
Look great :thumbup1:
-
Sorry to see. Devastating. :( I was reading your build thread yesterday.
-
1. Coolant Temp ECU Sensor 2. 3. EGR Gasket 4. Manual Shifter Bushes 5. Window Roof trim clip 6. Aircon regas valve? 7. Idle control valve sensor 8. Door locking thing 9. Throttle cable mount? 10. 11. 12. Idle control valve connector 13. Fuses from Small engine fuse box. Fuel pump..etc 14. Crank Pulley Bolt 15. 16. **** knows 17. Plastic bumper clip 18. B-Pillar bolt cover 19. 20. Crank pulley woodruf key 21 22. Window regulator 23.
-
Good point. I just remembered replacing a club members rear window in the past because it suddently shattered one day from the HRW getting stuck on and overheated on a cold day :scared:. I recall the top trim being very fragile though. Window fitters will do a removal and fitting service without having to supply new glass.
-
Im not sure if can buy complete stick-on replacments, but sounds like a possibility. Another option would be a complete tailgate replacement. I know that sounds very drastic, but they often come up 2nd hand on breakers for not a lot and are relatively straight forward to replace if you got one in the same colour as yours. I did it once as a way to change spoilers without having to get painted.
-
never tried it myself, but something like this - http://www.halfords.com/motoring/paints-body-repair/adhesives/granville-rear-heater-repair
-
Aftermarket Water pump (Davies Craig 130 http://daviescraig.com.au/product/ewp130-alloy-kit-12v-part-no-8080) , which bolts directly onto a custom aluminium Radiator mounted at an angle to fit under the Nose of the Z with electric fan setup, rather than in the stock bay location. Also an Aftermarket in-line Thermostat, as the stock Waterpump and Thermostat housing have been removed, blanked off and new inlet/outlets Fabricated to provide additional clearances. Stock Alternator output should be fine but its an old design and quite heavy. There are more modern smaller lightweight aluminium alternators that may end up replacing it. I need to design and fabricate a custom Aluminium bracket for it too.
-
I first saw the failing alternator BS in a Japanese Performance Magazine review of the Z32, where it cited Zedworld as its technical source. I very much doubt Jeff would of said such a thing, so no idea where they get it from.
-
Spotted at lunch today - Grey 2+2 on a G Plate, but with a Series 4 Rear spoiler. Sounded good. Anyone on here ?Both reasons, Freeing up parasitic drag on the engine for additional power and Packaging Limitations. But an Electric Water pump reduces the risk of cavitation at higher rpm than the original was designed for, it can also be setup to reduce heat soak with the engine off, warm the engine up quicker and efficiently manage the Coolant temperature at all rpm's and loads, rather than the stock mechanical setup which is always a compromise. The Electric PAS pump is mainly due to packaging limitations, and the power it can free up when setup correctly. Its essentially an EHPAS setup (electric-hydraulic), so wont have an effect on the way the original Hydraulic PAS works or feels. - - - Updated - - - Purchased from a UK Trader, however Im not sure if they are doing any more.Electric Water pump and Power Steering pump, so the only ancillery runing from the crank is the 3-Stage Dry Sump pump and Alternator. THe VH is chain driven.Work has started on opening up and Siamesing the Inlet ports. The Early VH's use Dual Concentric 26mm Ports, and Im opening them up to 30mm with a taper down to the original 26mm as it hits the Valve guide, while siamesing the Dual setup by machining much of the Split so that it separates further down. It also means I dont need to integrate a separator into the Inlet runners before the ITB's. This should improve Top end flow, while retaining velocity. My simulations suggest a notable benefit above 6000rpm. The stock Valve Springs are to be replaced with uprated versions, potentially dual spring to help reduce the risk of valve float above 8000rpm. Other than this there has been a lot of smaller parts made up - Lasercut, 3D Printed and Machined Blanking plates for Various powertrain systems no longer required - EGR, PCV, Crankcase breathers, Stock waterpump, oilpump, thermostat housings..etc


 Picked up this little number a few weeks back to be fitted when it goes off to the bodyshop.
 The Engine bay has been cleaned up, smoothed and painted in Satin Black for now. Fitted Polyurethane Steering rack bushes and Aluminium Steering Column Spacer. Fuse box and loom relocated into N/S Inner Arch. Custom Aluminium Dry Sump Pan with 2 Scavenge ports. As the Main Body currently stands :
.thumb.jpg.a3f68840334a9b9f87a4bc67f9ae97dc.jpg)

 Progress is on-going although much of it is not photographed. The Heads have been removed. Cams removed. Valve springs, Retainers and Valves removed. Here you can see the Rocker Arm cam setup.
 :lol:
:lol:


.jpg.2dd0474e531bf7a39adca9ded0e5b62a.jpg)


