Everything posted by Yowser
-
Sorry to hear. Glad you've decided to keep it and looking to bring it back to her glorious old self.
-
I have to echo the OEM choice too. Aesthetics aside, the weighting of the stock knob makes it feel so much better than any Aftermarket one I've tried. OEM (99spec) - https://www.z1motorsports.com/interior/nissan/nismo-red-stitched-shift-knob-p-702.html
-
Exhaust systems and tubes are always sold by Outer Diameter. - - - Updated - - - Exhaust systems and tubes are always sold by Outer Diameter.
-
I was referring more to the £10k total that didnt include a further £5k for the engine.
-
A £6k mechanical restoration by a Nissan dealer (plus £4k bodywork restoration). Christ, must of been in a right state ! But that didnt include the engine, as that was sourced seperatly for £2.5, then Nissan charged him another £2.5 to fit it ! Im lost for words.
-
Not usually a fan of the light conversion, but I think it suits the Strosek kit and your car in particular quite well and is better than every other aftermarket light suggestion in this thread.
-
You can certainly get White LED bulbs without the blue hue. I went through several (eBay) suppliers before finding some that matched my 4300k HID's and they look a LOT better than the mismatched light from an incandescent bulb.
-
The Z32 WAS chavtastic 10 years go, its definitely becoming less so now. Owners seem more interested in quality Track/performance improvements or OEM+ these days.
-
Weight Distribution. It was relocated to the front in 1995, to match the LWB as past of Nissans cost saving exercises.
-
You could mix and match colours ! Would look awesome :thumbup:
-
in Tan ? :D
-
Correct. A - RED B - BLUE C - TAN G - GRAY/BLACK Z - WHITE/CREAM
-
Im not sure on Value, but personally I would say the rust to be a far bigger deal than the Cat D Status, although I accept that a lot of uninformed buyers will be put off by a Cat D.
-
Thanks guys :thumbup1:
-
The Velour is like a medium pile Blue cloth and came on Series 2/3 that came with cloth seats. The Alcantara is a short pile grey cloth and came on Series 2/3 that came with Leather seats. You could always do the rear seat belt conversion and fit some subtle tweeters back in to cover the odl tweeter holes ?
-
I would get the MOT centre to adjust it for you - They've always done it for free for me in the past. However, bear in mind the adjusters are plastic. Do often sieze, and can break.
-
They just bolt up to the Manifolds. Japspeed do sell a TT set that bolt up to their own Divorced Wastegate Turbo Downpipes,and wouldn't fit the NA manifolds.
-
8 Week Lead time sucks, but considering their rarity and that they are made to order , £185 Fitted is a bargain !
-
An improvement over most OEM Cast log manifolds but the manufacturing process is still relatively simple and cheap. Its using Cast flanges that are post-op machined, Pressed Collector. Individual pipe bends, tig welded together. The Bends are a mix of set-bends (Several mandrel bends on a single piece) and individual welded bends. Each runner would be Welded individually in their own Jig, and then the final assembly done at the end into the collector together. At the higher Automotive end, and especially in modern Motorsport its more common to utilise DMLS (Metal 3D Sintered/Printed) and a mix of Mandrel bending and Hydroforming (Forming by Water pressure), where the costs increase exponentially and are setup for bespoke low volume runs with much higher precision requirements. Not necessarily. To take full account of the scavenging affects in the peak rpm range, yes, but with unequal length primaries you can spread your power range over a wider rpm range - more suitable for a road car.
-
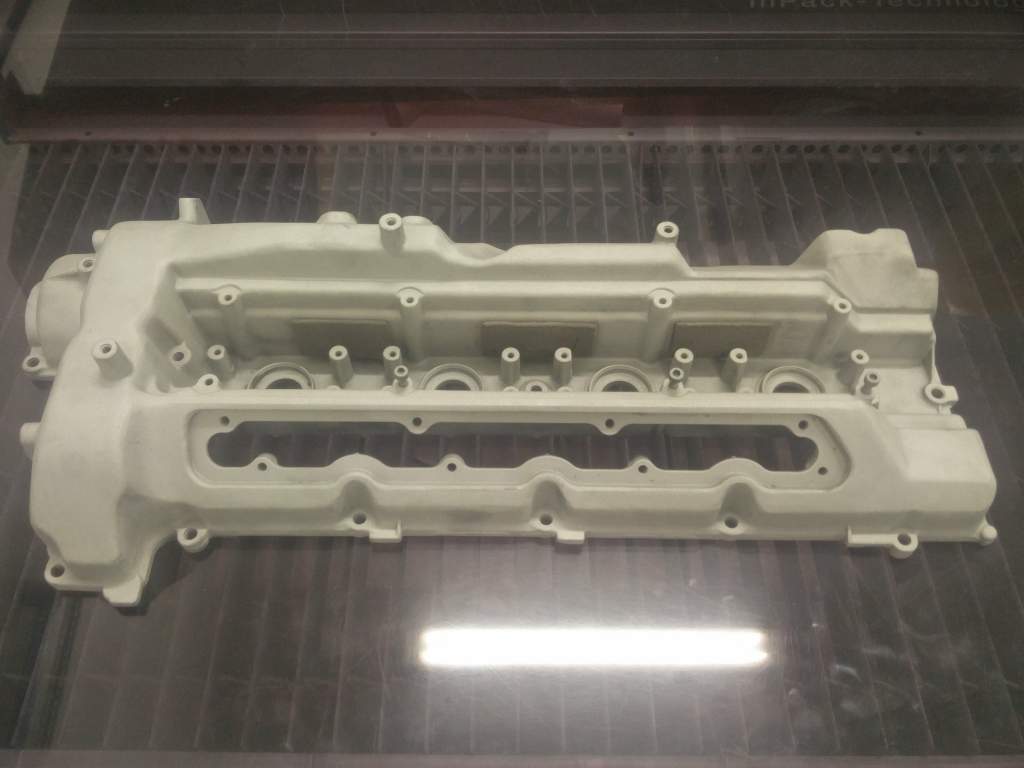
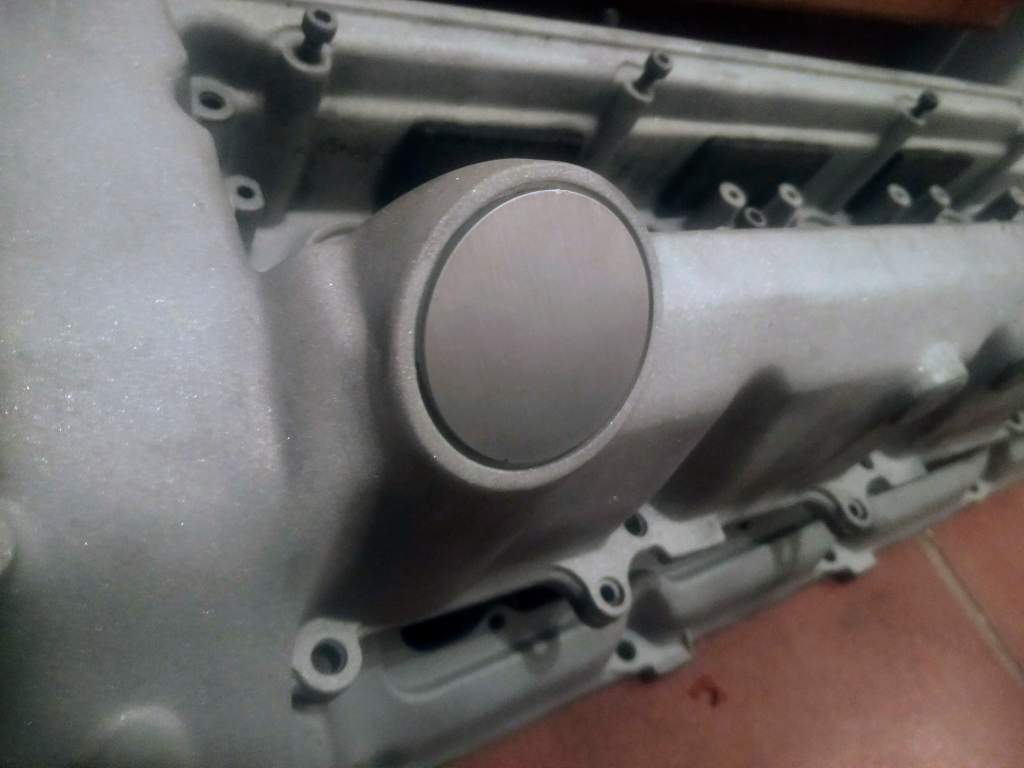
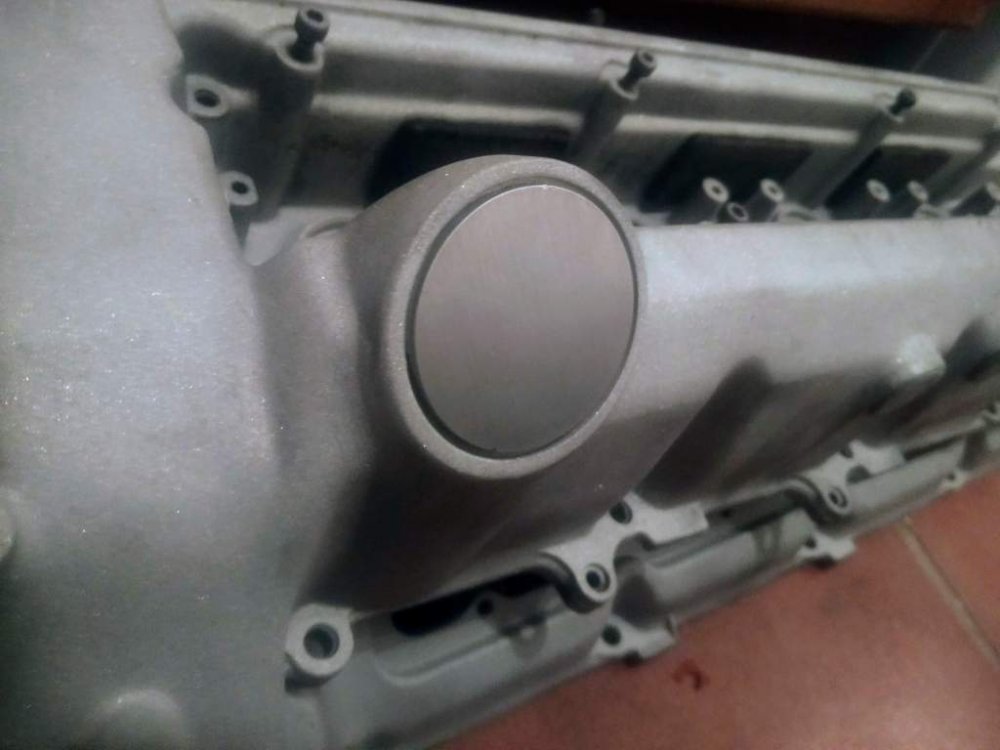
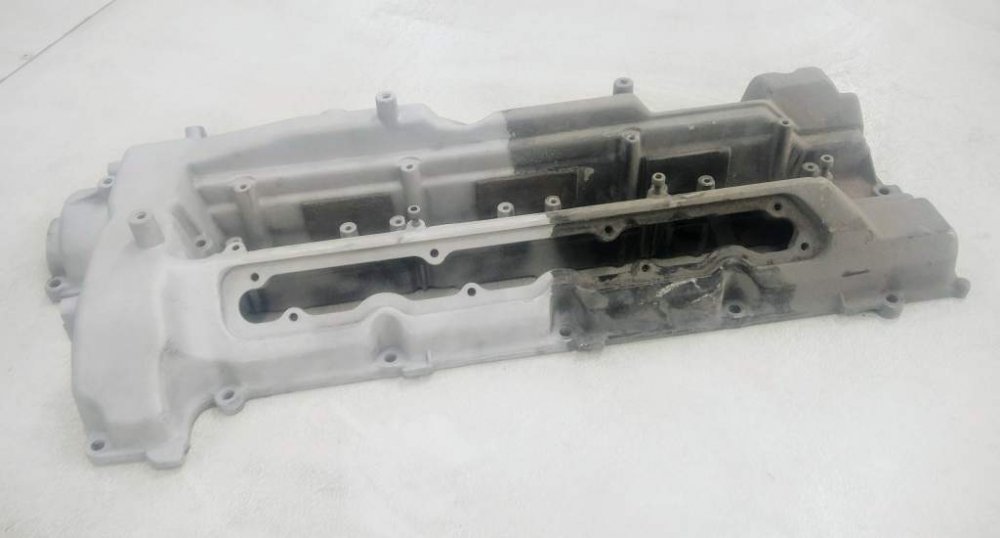
Shotblasted the Cam covers the other week, in preparation for some modifications and then Powder coating. Planning on a Wrinkle Blank Finish.

-
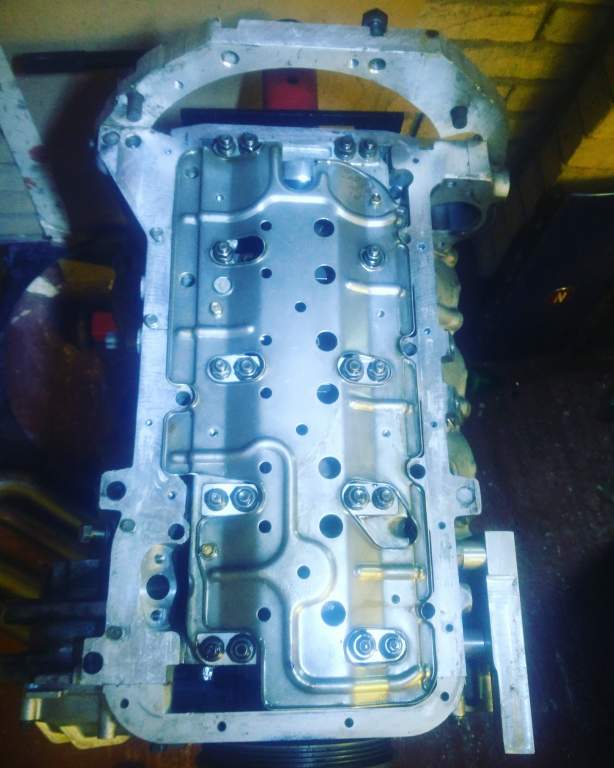
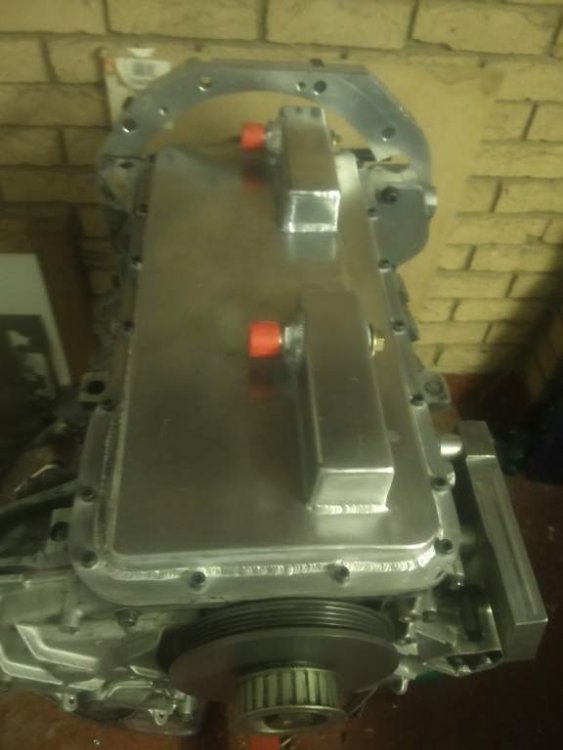
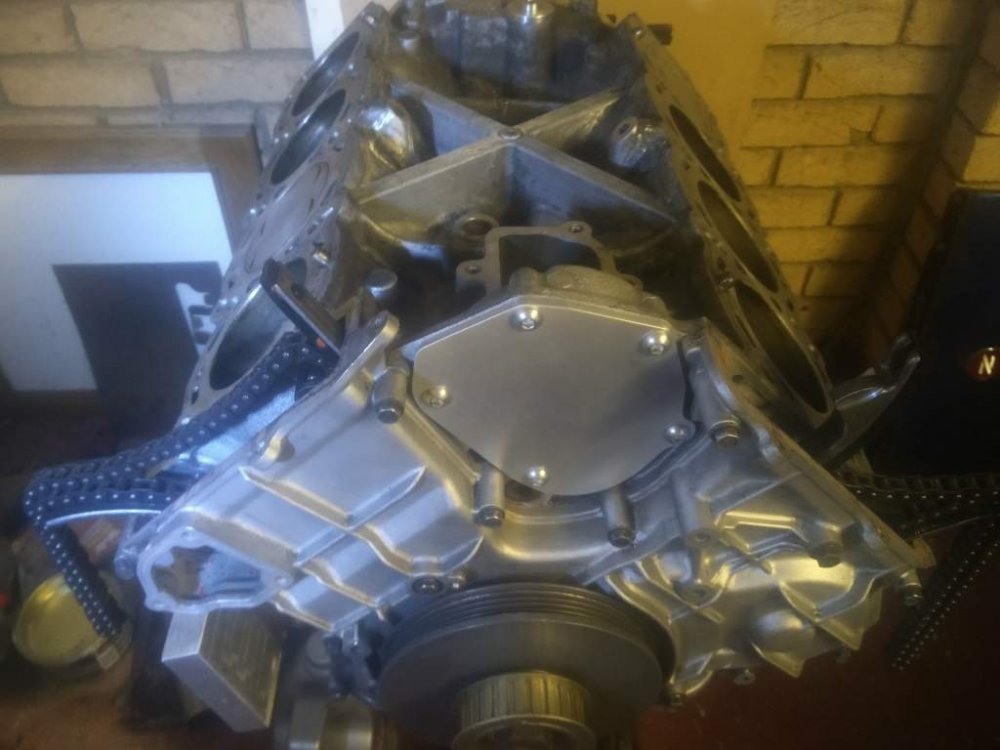
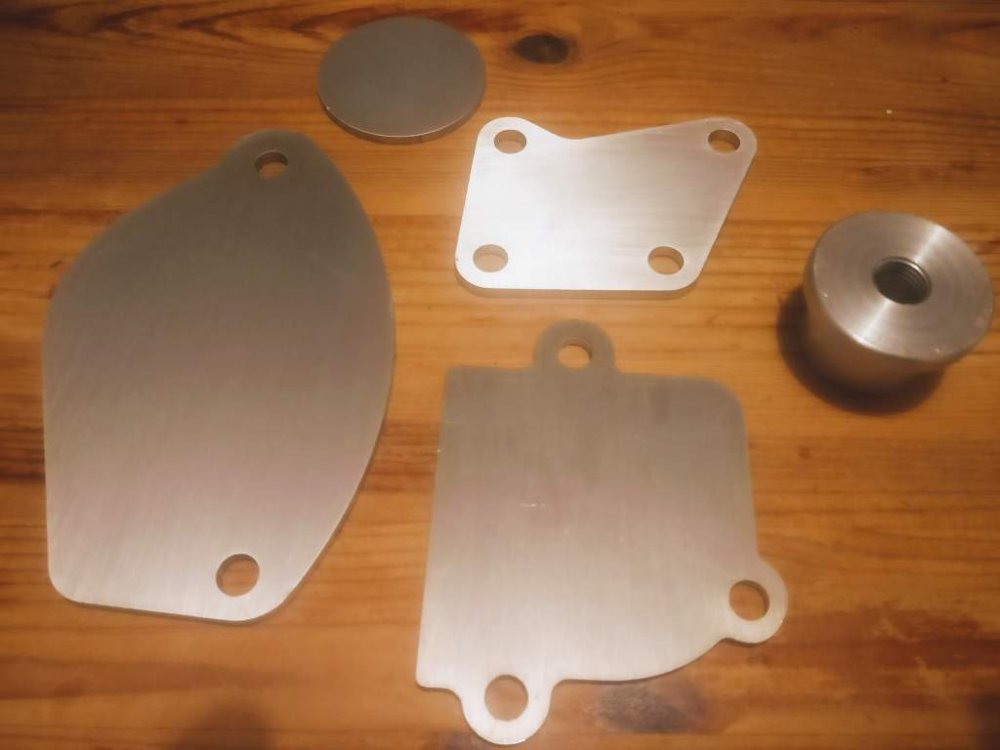
Winter for me has mainly consisted of working obscene hours for the build up of the F1 Season, but now that the Pre-season testing is out of the way Im finding myself with some spare time for the V8 Z. :clap: Finished the Head Intake porting, and will be sent off to have the gasket surfaces skimmed, so I can start the assembly with the New Uprated Valve Springs (Thanks to VHPerformance). Finished the Lower Intake design and is with my Machine shop for CNC Machining, to be done in-between paid jobs. Various Lasercut Blanks, bungs, brackets have been produced and test fitted to engine. Aluminium Dry sump pan fitted to engine I've started work on the Custom fuel setup, using Dual Aluminium extrusions and machined for 14mm Bosch top feed injectors, in a parallel configuration, Adjustable FPR with Black AN8 Fittings and Black Braided lines.


-
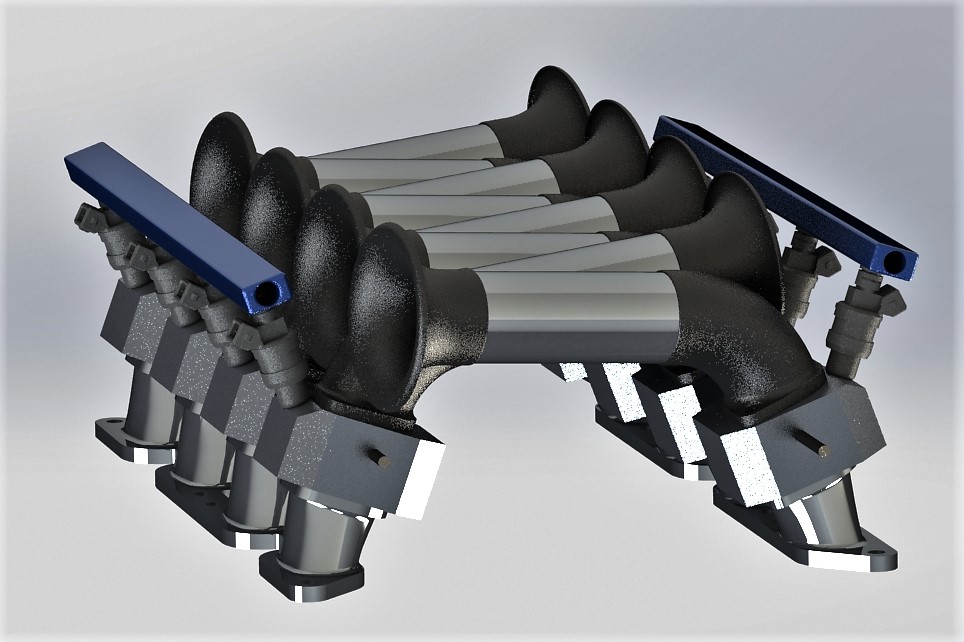
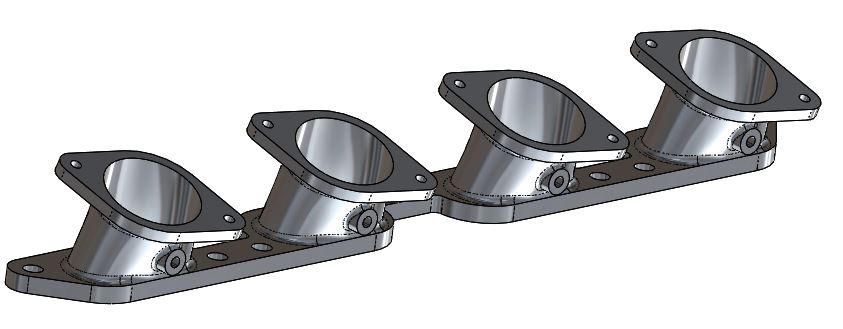
Interesting build, I'll have a proper look after work tonight. Here is a quick render of my full intake setup, minus the airbox and filtered cold feeds.
-
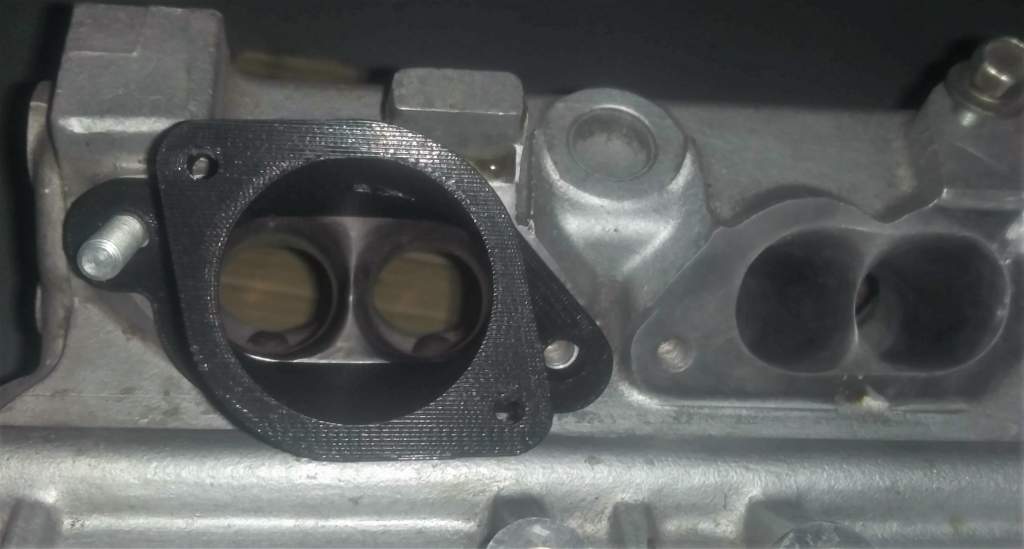
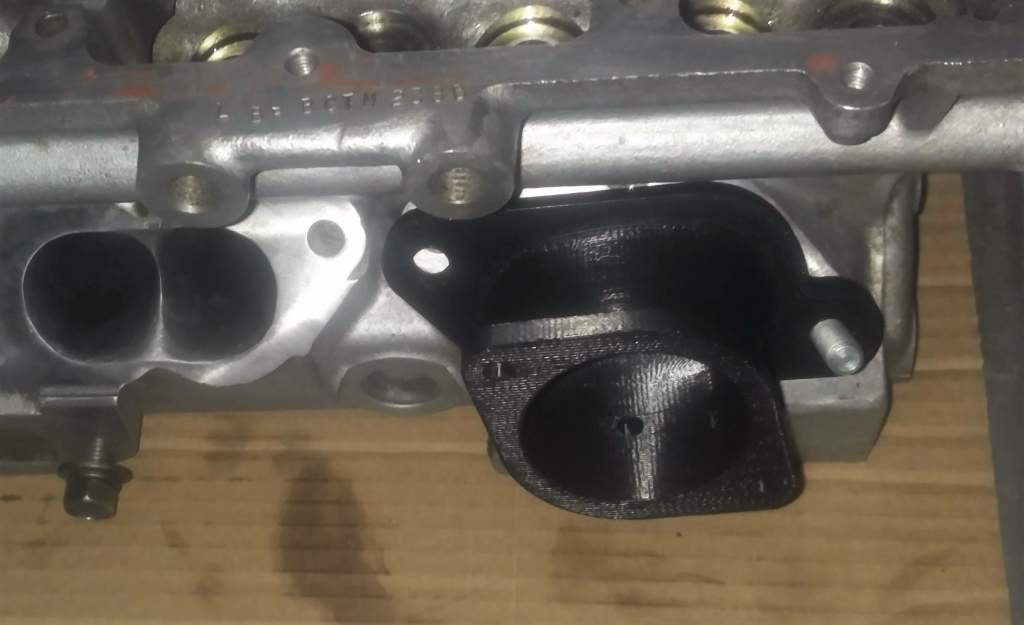
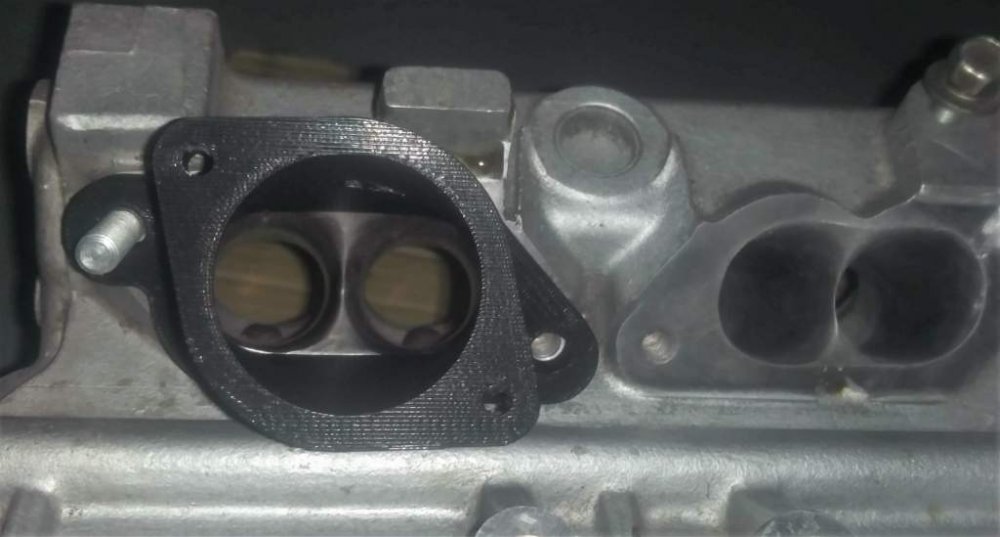
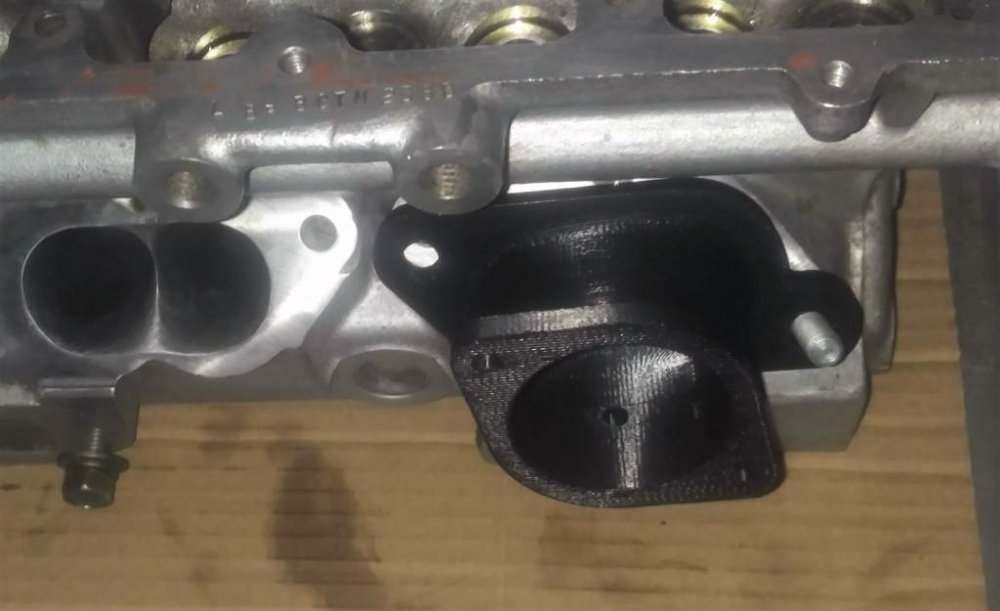
Hi Matt, Im building a ITB setup for my VH45 build also. Are you taking into account the 20degree inlet valve angle from the horizontal face ? Apologies for the crap picture quality, but these shows a 3D printed prototype for a single piece of my custom lower intake manifold. Its a 45mm to Oval Transition, to which I have modified the inlet ports to enlarged taper and reduced the separating bridge to siamese the ports. Entry is at 20degrees for a direct path to the Inlet Valve. For Hood clearance Im introducing a bend pre-Throttle, and the part is completely straight Post-throttle. (The ports are for Vacuum feeds) Mine are being CNC Machined, but If you are considering 3D Printed parts you will need to take into account the inherit porosity of these parts. There are various ways to seal them as a post operation. Using the 3D printed parts for lost plastic cast may be a better method. I have a 8500-9000rpm Peak RPM target, and will be running with a ~350mm inlet length (Valve to Bellmouth opening).
-
Could be R32 GTR owners, same fitment.
-
The brake booster is at the Rear O/S of the engine bay - Large, round, black, fixed to firewall - with the Brake master cylinder bolted to the front of it. There will be a hose from the Intake manifold to the Brake booster. If its an original MT car, them there will be a hose from it going off behind the Front wing to some plastic air tanks, any of the hoses to and from it, or the tanks themselves could be split. They can be accessed by removing the Inner arch liners, or removing the Front wing/arch itself. - Check for splits in all the hoses and tanks. - Check its not been fitted the wrong way round - There is a one way valve inside. - See if you it will pull/hold vacuum by sucking on the main hose to the Booster. You can unbolt the brake booster with 4x nuts from the drivers footwell.