


Everything posted by phutumsch
-
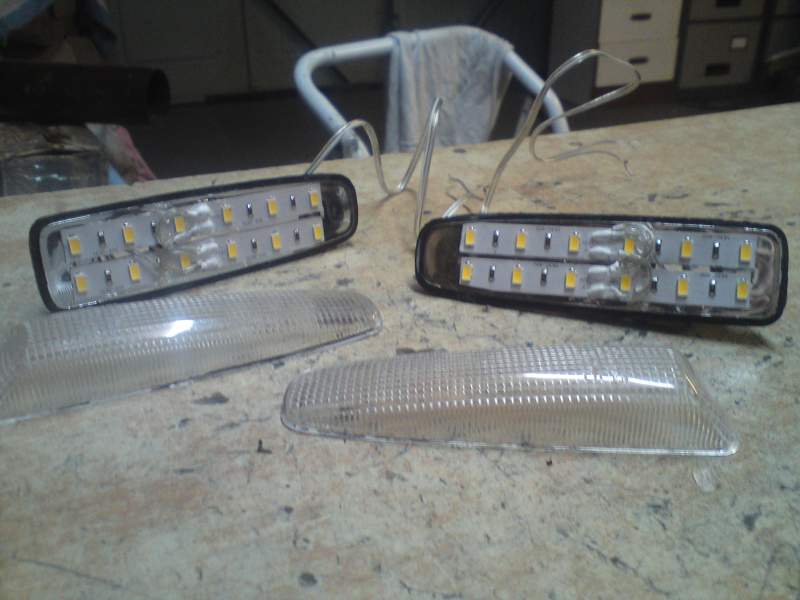
I had some spare clear side indicators and i thought i'd see if they opened up which they did and as you can see i have put a couple of smd strips in. I used some 'clear' wire for the obvious reason and this cannot be seen when the lens is back on. Very bright, very yellow, very happy :clap:.

-
Welcome Derek :thumbup1:.
-
The top rad hose is a touch on the pinky side of red i'll admit - it's difficult you know getting all the right shades of red when you buy from different sources/brands, the same would apply with someone else with a blue theme no doubt :detective:. EDIT UPDATE : Just purchased some new RED radiator hoses !! AND : The gunmetal colour code for the plenum is by Akzo Nobel and is ref FW655F, lacquer was then applied.
-
Having liaised it was decided upon to leave the top chamber red but the lower one to be smoked/tinted, this is the first time i have converted some tango lights this way and i must say they look really well. A very time consuming job as i was also asked to make them fully led which i have executed in a different way to when i have done it before, mainly the stock bulb holders can if need be still be used in an emergency or to compliment, although these are stand alone plug and play led lights. It's the yellow indication that i love, the on/off is so crisp, modern and the chamber is incredibly full. As ever the red, yellow doesn't come over as well but you get the idea in this short video. The second video is showing the reverse light panel in action, although not the exact one as the only difference is the smoked lower lenses but it works exactly the same, please note however these in this vid are genuine 99 lights with standard filament bulbs. Looking forward to seeing all these 3 matching on the car ;). [video=youtube_share;ZPFJN6fn1FE] [video=youtube_share;JpNqE4Js818]
-
80w cree 1156 bulbs and on the bay they're about £7 each from the far east, of course go straight in the stock bulb holders. Don't know what they'd be like if the 2 x chambers were unadulterated though, ie not split between fog/reverse, my guess though no noticeable difference.
-
You did, haha !! Mines a late 94 and mine was omitted. Good look finding a later series boost gauge as you can put one in as all the electrics are there, then you just need the boost solenoid in the engine bay which you can buy for next to nowt :thumbup1:. Richard, welcome.
-
The car might be 1993 but that doesn't mean the engine is !! Check post 30 which is mine and the later series 4 onwards spec, so basically if you DON'T have the two threaded holes on both your plenums either side at the front near the throttle bodies that are for covers for the return springs then both yours are the same and you're good to go. http://www.300zx.co.uk/forums/showthread.php?175200-My-Chrome-Plating-Powder-Coating-and-Polishing-Thread
-
Don't think it's as much the lens Lee as the tails have white housings behind and the reverse chambers are black and set back a little further. Also i think the camera is picking up something that's not as visible in real life but it's certainly something i can look into. Anyway here's a vid in action :thumbup1:. [video=youtube_share;JpNqE4Js818]
-
:dance:.
-
Big clue in this thread somewhere ;). Perhaps that's being too subtle for you :tongue:.
-
Two screws at the top corners hidden by covers so just tease them off with a small screwdriver. Then there are two more screws hidden under that long strip, the strip will just lift up and out. Then get hold at the bottom each side as low down as you can and pull and this'll release two metal poppers - these may be quite well fixed !!!
-
Two screws are under the radio panel so you'll have to remove that or just hover it up a bit. 'no going back' - see what you did there :biggrin:.
-
I was contacted through my youtube channel from a guy in the states and at great expense he sent me his heavy ugly USDM LHD nippled headlights. Although very well packed one broke in transit, the casing and the glass :no: which rendered the matching pair useless, a claim is being made. The only option was for me to carry out a conversion on some Jspec lights hence making them suitable for LHD, these apparently are desirable over the pond :thumbup1:. The buyer wanted halos and a tube switchback light onto a carmad black glossed insert. The idea if you didn't know of a switchback is to light up white so therefore a kind of DRL, under signal the white goes off completely and amber flashes, turn signal off and there is a very slight delay before white returns. My idea is to have the halo lit 100% of the time but the tube can if you wanted just be used as a normal indicator or just a normal DRL without the amber part working at all, all depends where the wires are connected to and is a customer preference so on the video i have tried to show all the possibilities. The individual leds of the halo don't show up so well on film nor does the amber in the tube but in real life both look quite superb :thumbup:. The tube may not be to everyone's taste but i think once fit and therefore set further apart appearance will be improved and these will make a very nice running light as they're quite bright as per modern cars. [video=youtube_share;B9P63sfmCaU]
-
Happy birthday Noel, have a lovely day :thumbup1:.
-
Gladly do you some :thumbup1:. Apart from a damn good wash with hot soapy water and then polished with furniture wax of course inside and out, nothing !! Yeah....nice one Dan !!
-
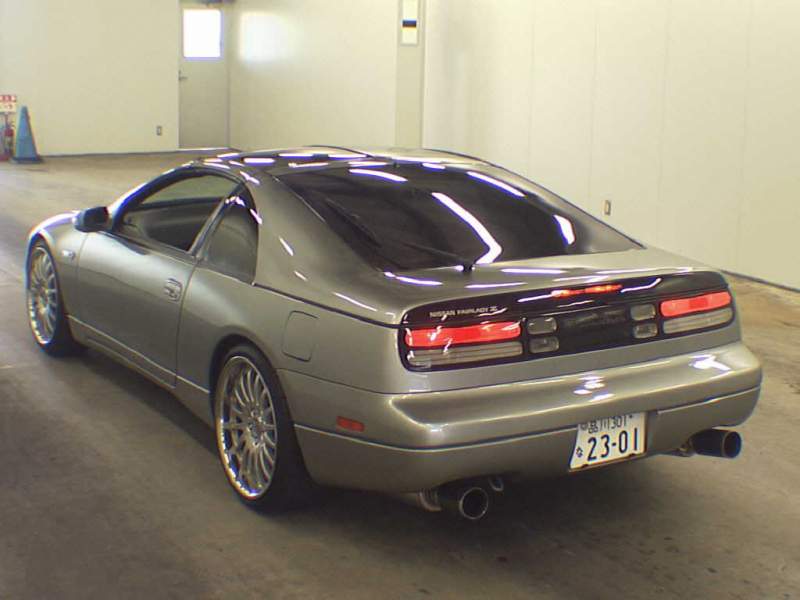
I'm seriously thinking of going to a grey myself and was sent this image to wet my appetite, it's looks a gunmetal to me. Then i found this one myself.
-
Done these for another member and very nice they are too, the 99 carmad insert does lend itself very well to the fitting of an inconspicuous ring light. It's just a shame the crisp sharpness of the individual led's doesn't come across so well on a video, ok close up but a more distance shot the light just merges as one but i can assure you these look great from every angle. First part of the video is with everything off and i'm showing really how the stock look is pretty much maintained if not improved with the halo ring. Then i light it up and the final part is with the dipped HID light powered up and this is 6000K and 55w. Usual work as been carried out also with the fitting of well greased metal adjuster cogs, i was supplied with the already black sprayed inserts and these have been bonded down with flexible, heat resistant black silicone, brackets sprayed up, rubber/glass washed and so on. [video=youtube_share;QYir1OaCTXA]
-
I got the white cree bulbs i had been waiting for in the post today. I must say i am not disappointed with the light they put out, the red top chambers i'm only bothered to satisfy a mot tester but the reverse lights i did want to give off enough to light up the road in the darkest of situations. Should get a video of this panel in action very soon.

-
I don't know what else to say but 100% a H3, 4300 - 6000k and 35w - 55w HID light kit will give off plenty of light for your lows. You certainly should not be even considering nightbreakers - only for the main beam !!
-
The panel in the foreground is the original 99 spec, the other is an 89 copy. I have some matching tail lights to follow for the 89 one - i'll bring your attention to the lower 2 x chambers as these i have tinted. The top two chambers will be for the fogs and here's a pic.


-
I do think in all seriousness mine and yours Lee are the best cars in the 'garage' bar non :clap:.
-
Happy birthday mate, have a good day :thumbup1:.
-
Even me Lee, wouldn't want to get my hands slapped :blush:.
-
The H1 bulbs for the high/main beam have a totally different base to the H3's. H1 bulbs fit into the adapter and then engage in the headlight assy. Holding loose in your hand the base of the H1 bulb acts as ground and the spade at the end is the positive. The adapter plug for this as 3 pins although it's only the outer 2 that are used.
-
Haha, someone made an offer..................they let it expire :headvswal.
