Everything posted by nickz32
-
I’ll more than likely ceramic coat (like my hotside parts) the Plenum in the future. But time is of the essence at the moment and I do t have time to sort that before it goes for mapping on the 30th Sept. As for painting the top of the Plenum black. I’ve pondered it. While black is quickest at loosing heat, it’s also the quickest at absorbing heat. The air charge going through the Plenum is probably doing a more efficient job at removing the heat from the Plenum (to the detriment of the air charge temps) so I think I’m better of focussing in reducing the amount of radiative heat penetrating into the Plenum than increasing its ability to absorb and then radiate that heat. I think in an ideal world, there would be some sort of heat shield underneath the Plenum, but I think that would be really tricky to make so it fit around the cam covers, coil packs etc etc etc
-
No reason why you can’t post here
-
Any pics of the car?
-
So while I’m waiting on the engine, I have again decided to wage war against heat soak. The first battle front is the Plenum. While everyone like a polished Plenum, I’ve decided to take it one step further Yes, that right, I’ve started polishing the underside of the Plenum....... But why I hear you ask? Ok, in the engine bay we have to battle against two types of heat transfer, conductive heat (something hot touching the part) and radiative heat (something hot near the part). When it comes to the Plenum there’s nothing we can do about conductive heat transfer as it has to be bolted to the engine. Radiative heat transfer on the other hand, we can do something about.... Most will know that Gold is the best substance for reflecting radiative heat..... and I shall be using this on my intake pipes on the engine bay. However, wrapping the Plenum would be a serious pain, require a lot of tape and probably look a bit ****. #2 in the substances best at reflecting radiant heat is, as luck would have it, polished aluminium..... which is generally rated at anywhere between 95-98% as effective as gold at reflecting radiant heat transfer. Highly polished aluminium has an emissivity coefficient of 0.035 vs polished gold 0.03 Given that polishing the underside of the Plenum costs me nothing but time and effort, I figured it was worth a crack. I don’t think I’ll reasonably be able to polish the underside entirely (tricky areas around the PCV, water pipes etc) so I’ll focus on the runners and anything else I can get to with a polishing wheel. Can I prove it’s of any benefit..... no.... but there is science behind what I’m trying to do, so it’s worth a punt. Even it reduces intake charge temps by 1c, it’s been worth the effort

-
Have you got the emissions report? What are the numbers?
-
Then I can pretty much guarantee that’s its been tested to the wrong standards, pre Aug 95 Z’s are subject to a Non Standard emissions test (aka non cat test). However, you need to make sure your V5 has the manufacture date as Feb 1995z Search the forum and there should be a post by me about what standard our cars are subject to with supporting documentation from VOSA But by the sound of it you’ve got bigger issues to deal with
-
Cheers guys. Shippings all booked, fingers crossed it’ll be here beginning of next week.... not sure it’ll be fitted quite as quickly as JaiKais was mind
-
I’ll see what I can do
-
Kinda need the engine in the car to get to the NEC :lol: But I know what you mean, would be a cool thing to have on a stand.... I should have had two built
-
Yeah, a quality tyre as well, something like a Wang Li or Triangle :lol:
-
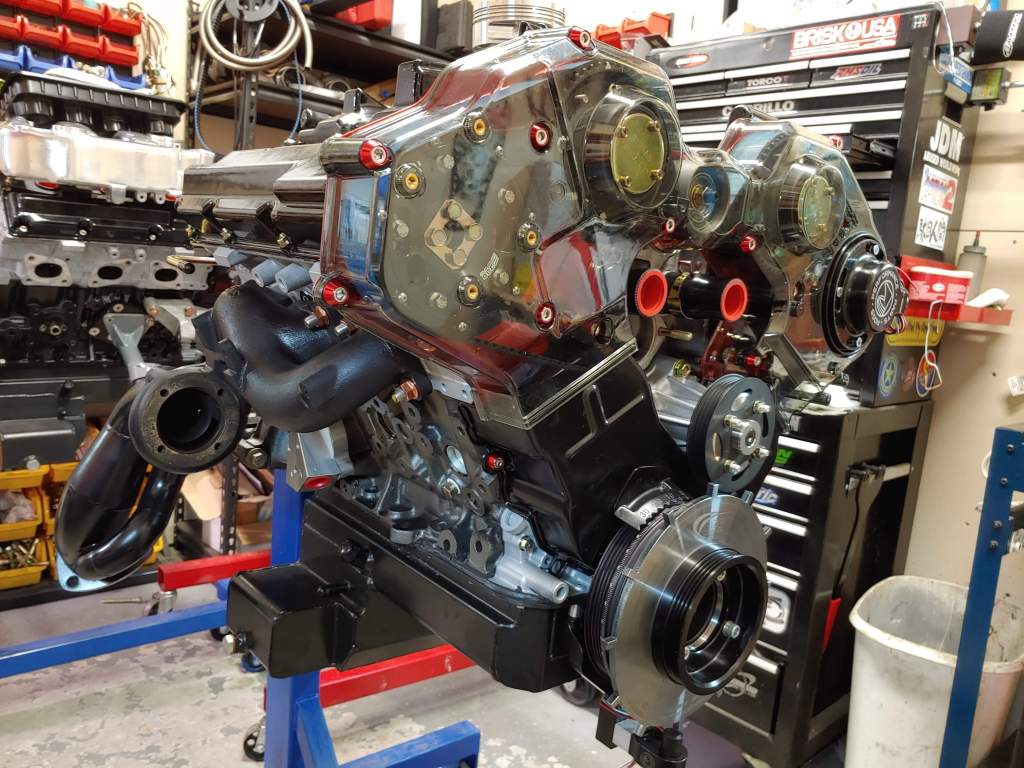
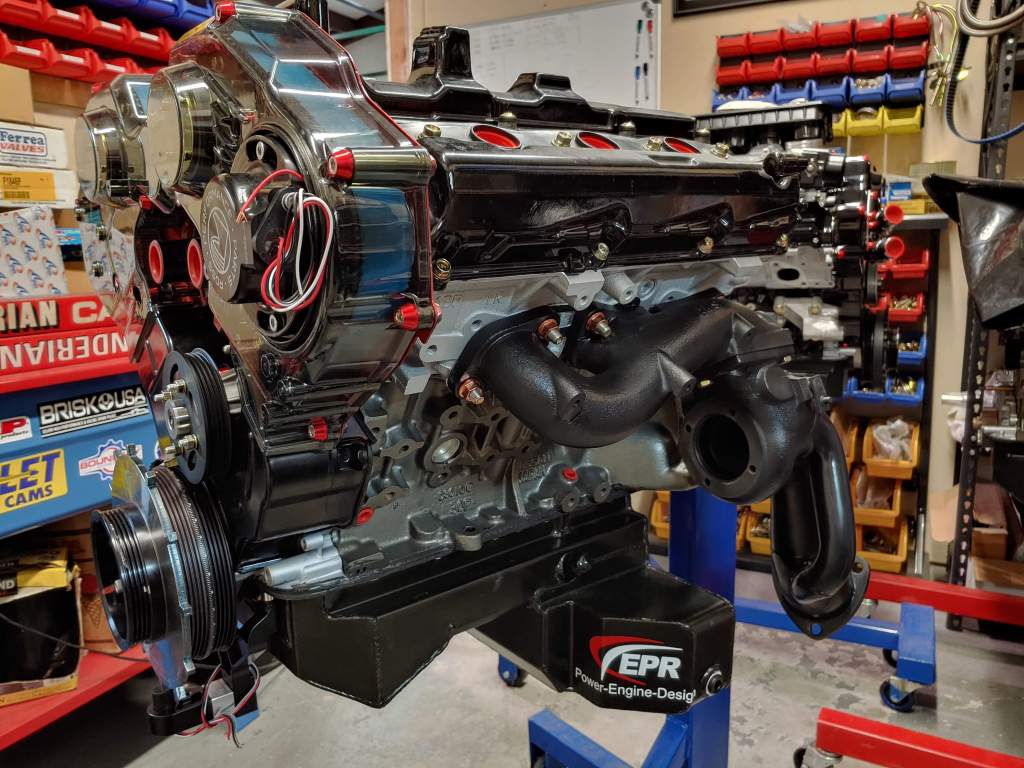
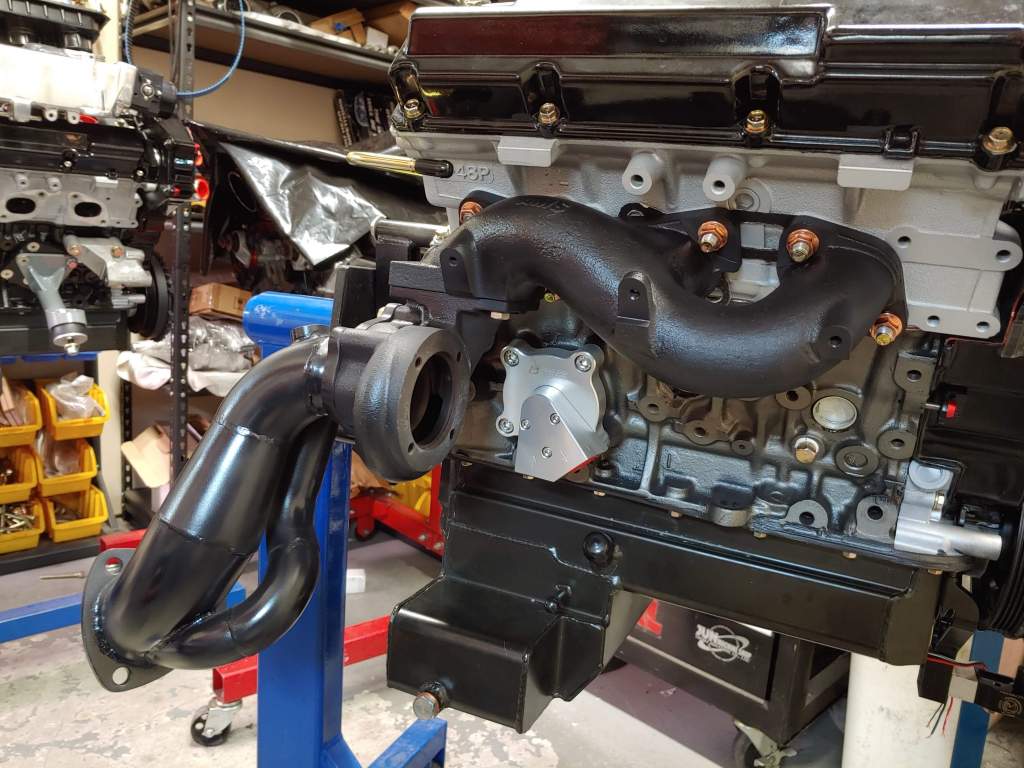
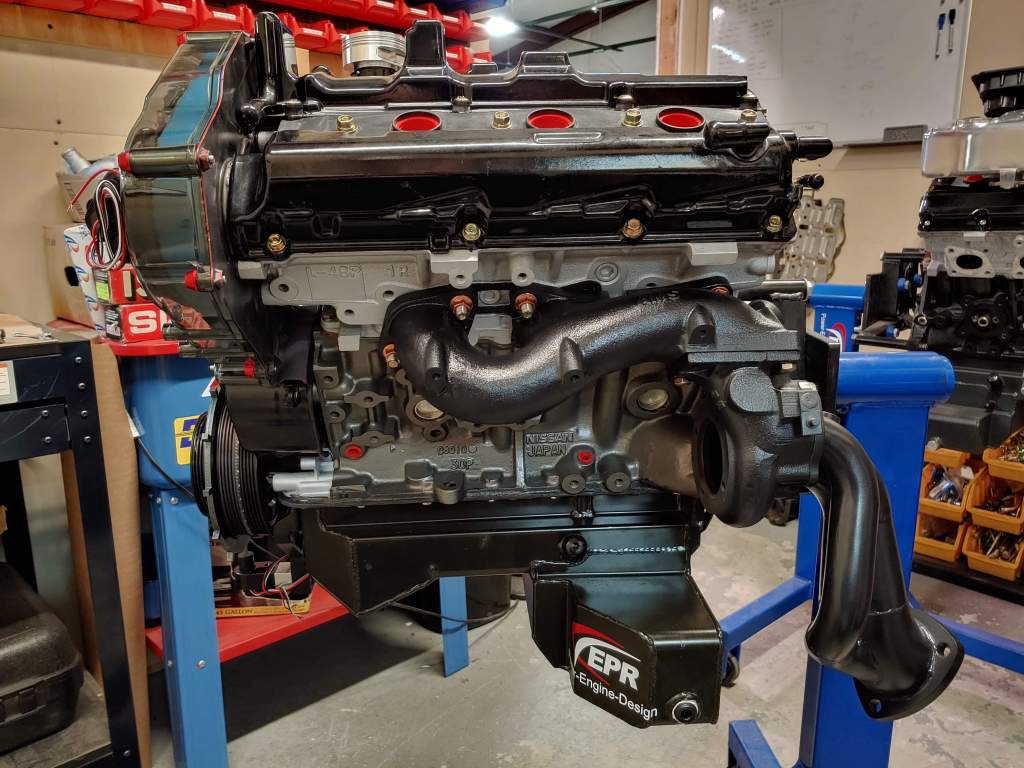
The time has come to ship it home to me! Hotside parts ceramic coated to help fight the war against heat in the engine bay aswell as improve spool in these GT525’s. The exhaust ports and manifold have been gasket matched to optimise flow. FedEx should collect it on Wednesday this week, and 6 days later it will be in my hands


-
Same as the above, chuffed to qualify for this event and looking forward to showing off the years of development that’s gone into my car. Also, great to see so many people voting! See you all in November!
-
Something I only found out yesterday, the vert has its own specific instrument cluster with the roof warning light in the top right hand corner above the fuel gauge.
-
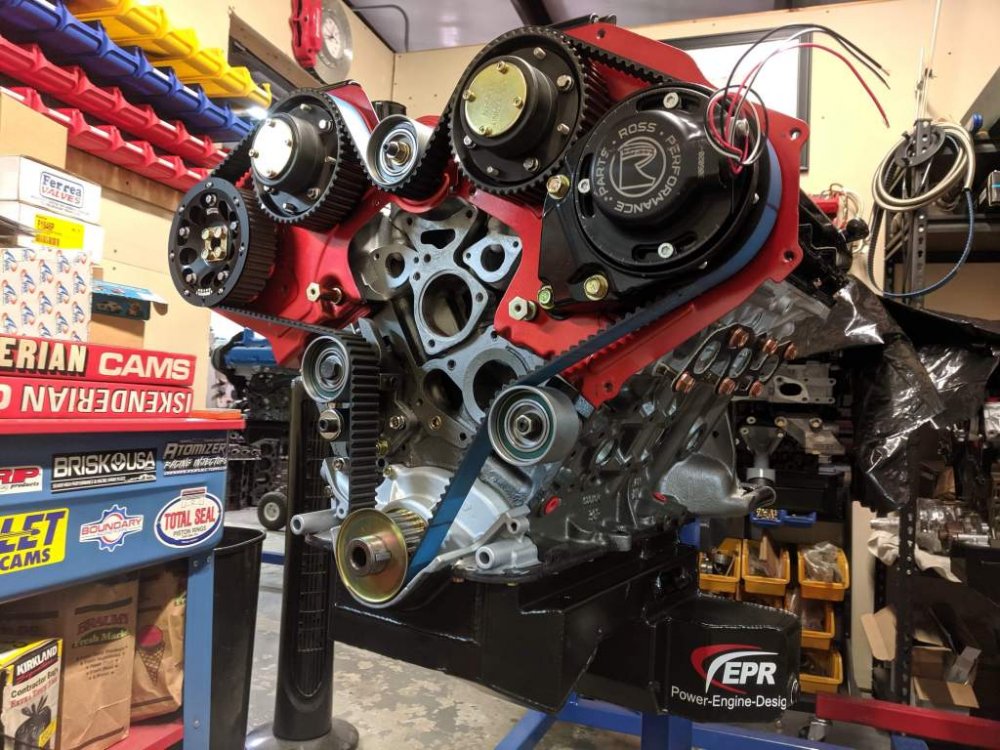
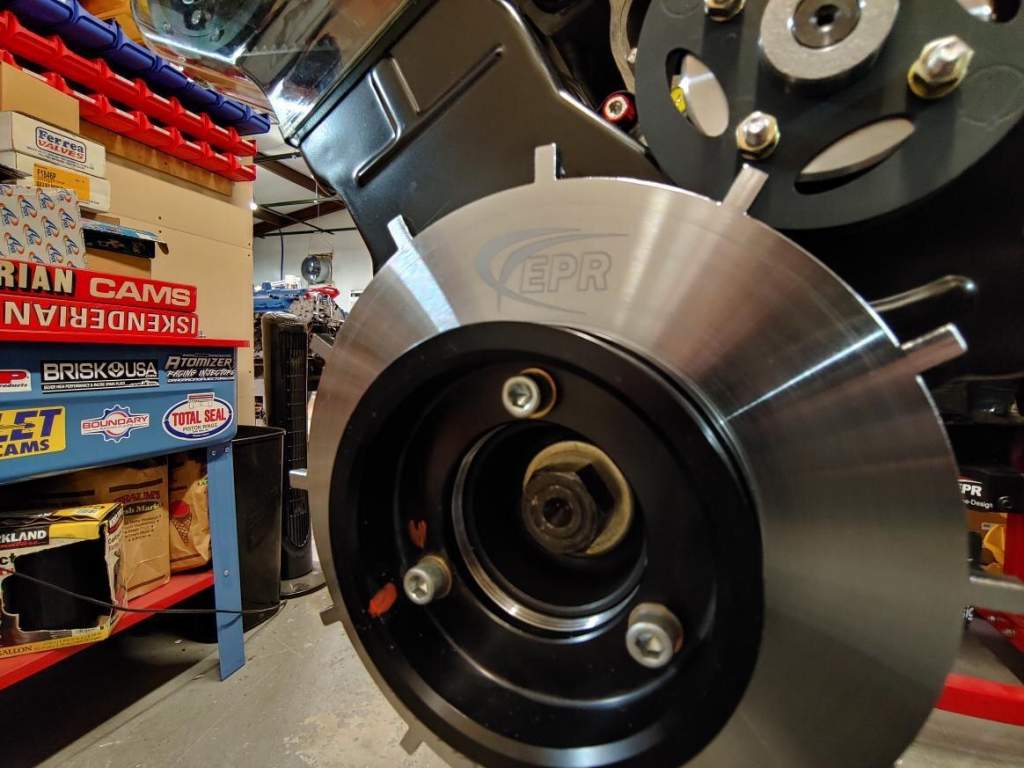
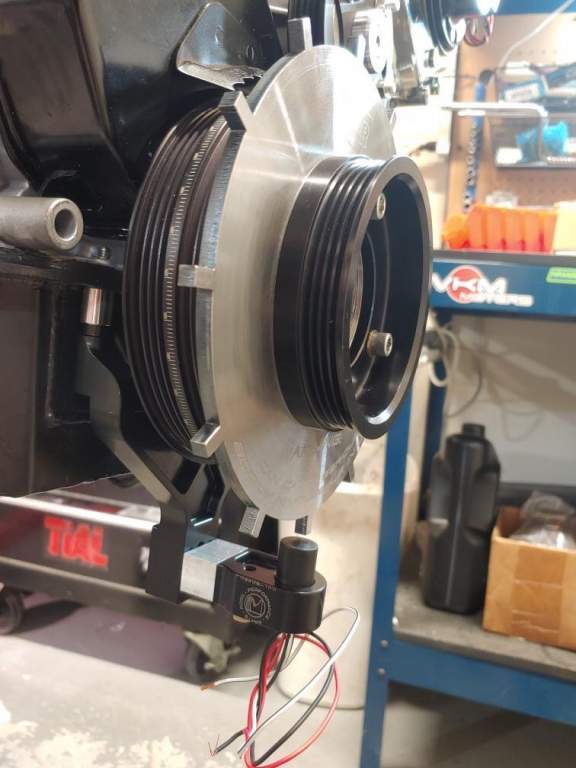
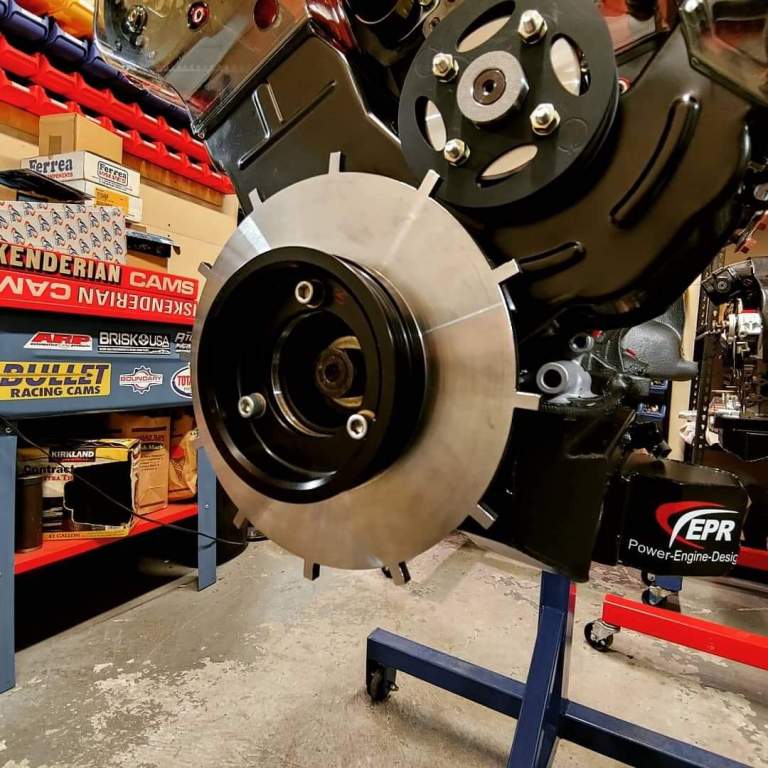
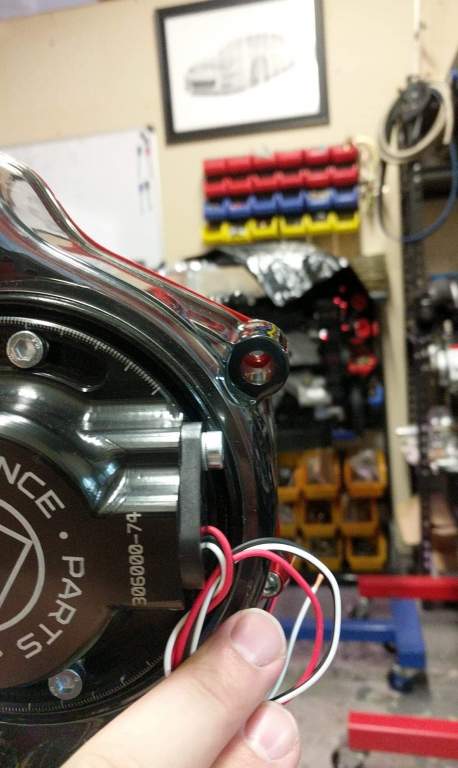
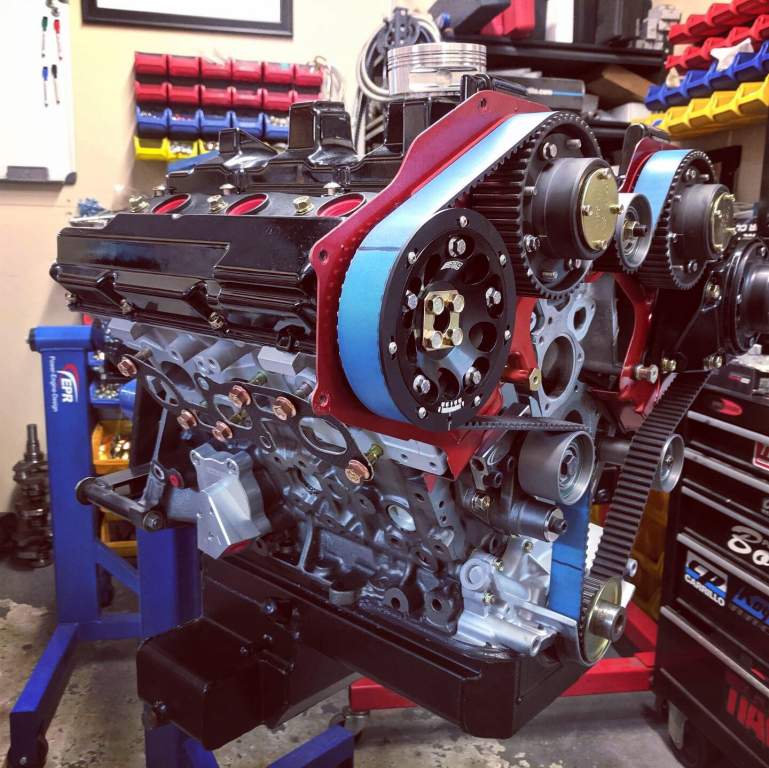
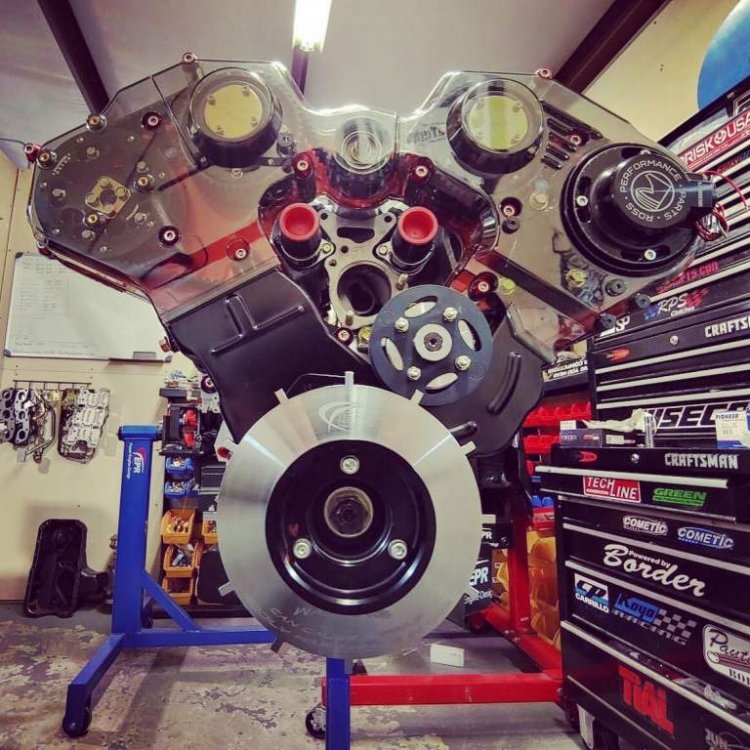
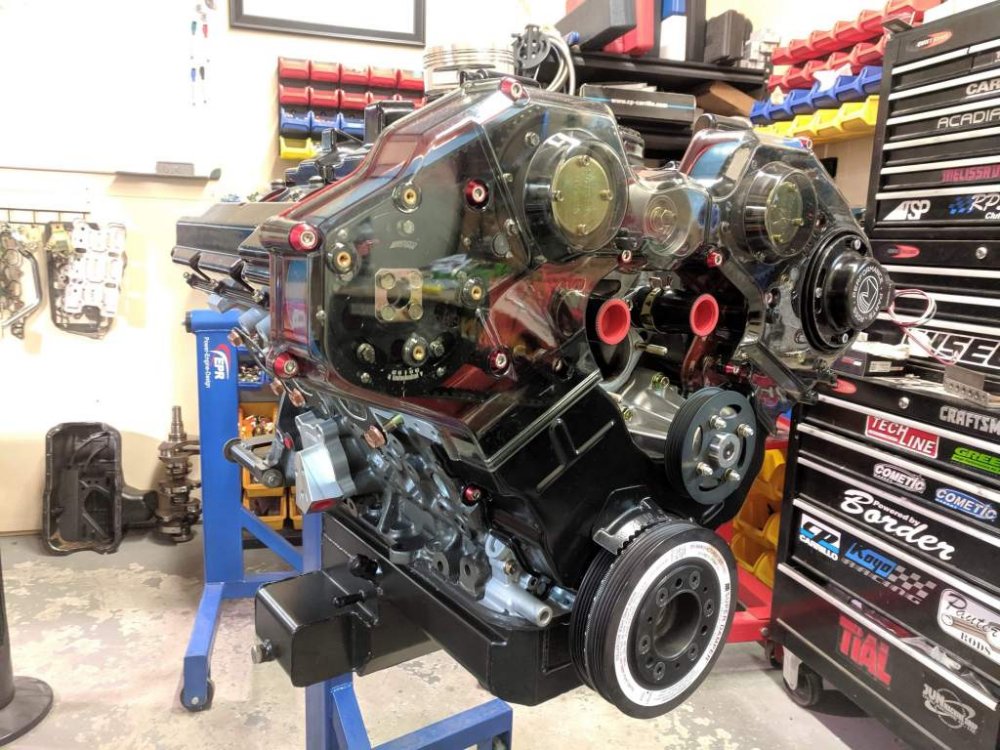
Just to recap why the above came to fruition. I wanted to change to a proper crank and cam trigger setup to replace the OEM CAS setup. Why change? For two reasons, performance and engine safety It’s fairly well documented that there are issues with the OEM setup with regard to its a accuracy. Given the OEM setup is designed to work out the crankshafts position based off the position of the camshaft, both belt tension and harmonics can cause +/- 5 degrees of inaccuracy in the engines position, and therefore ignition timing. As a result this can cause either suboptimal levels of ignition timing for power, or worst case, too much timing leading to det. The only way to solve this is with a proper trigger setup using a sensor on the crankshaft for crank position and a sensor on the camshaft for its “home” position (usually TDC CYL 1). For every 1 rotation of the camshaft, the crank rotated twice a la 4 stroke engine cycle. My initial plan was the Ross Performance Parts harmonic dampener and CAS elimination kit. However RPP only currently offer 2 levels of crank Damper, street and race. The street is rated to 600hp and Race to circa 1000hp. As I am anticipating to be over the 600 mark, I had to go with the Race Damper. However, the Race Damper has no provisions for AC belt due to the extra dampening material. As my car is most definitely a road car, losing AC wasn’t an option I was willing to consider. So, after speaking to Mitch, I changed to an ATi Super Damper, which again is rated to circa 1200hp but had the provision for an AC belt. That lead the to design and implementation of the above trigger wheel and adaptation of the RPP sensor mount. I’m positive this new setup will not only lead to more power, but will ensure my ignition timing is completely optimised to prevent unnecessary det
-
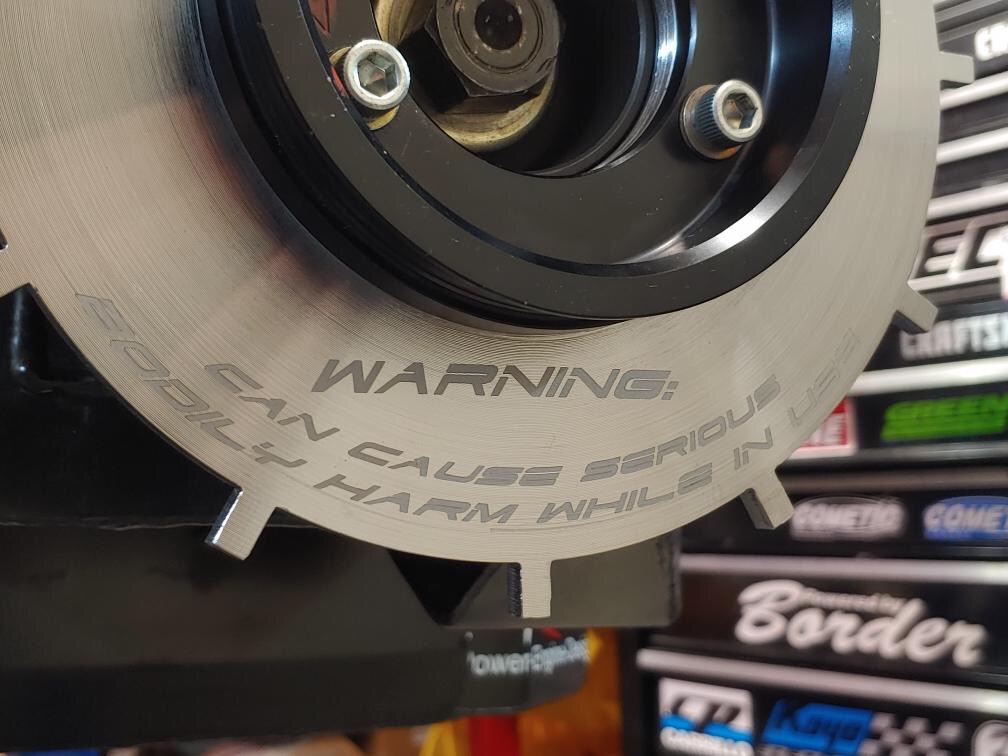
Finishing touches include laser etch EPR logo and warming, as well as it being clear coated to protect it from the elements


-
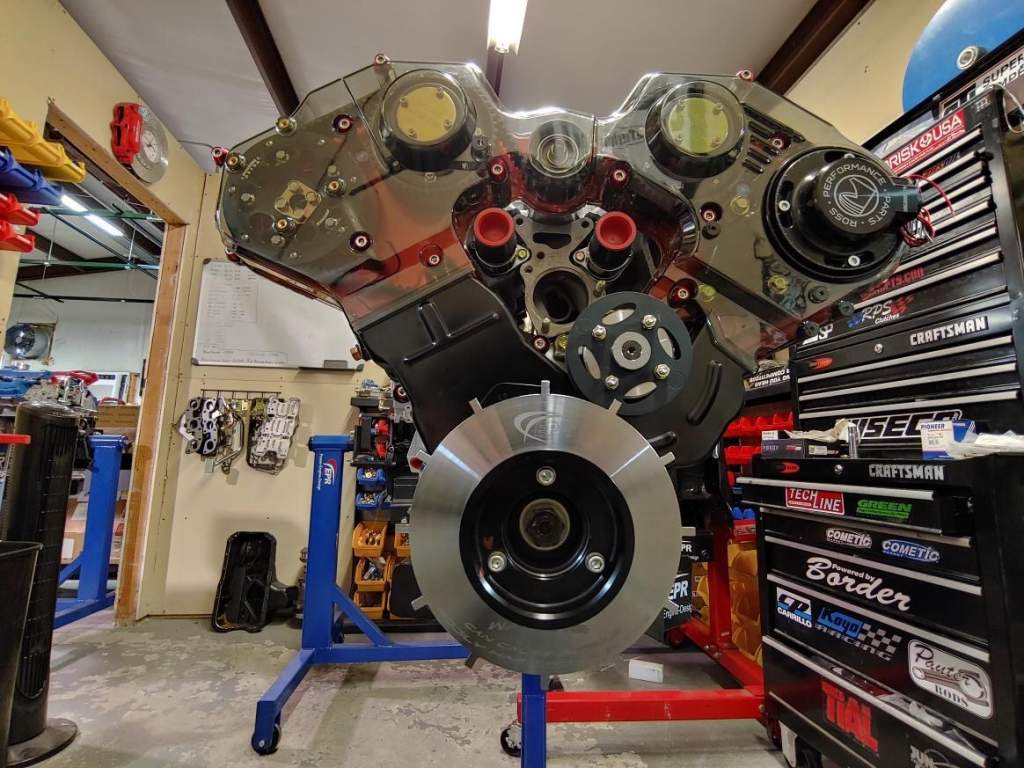
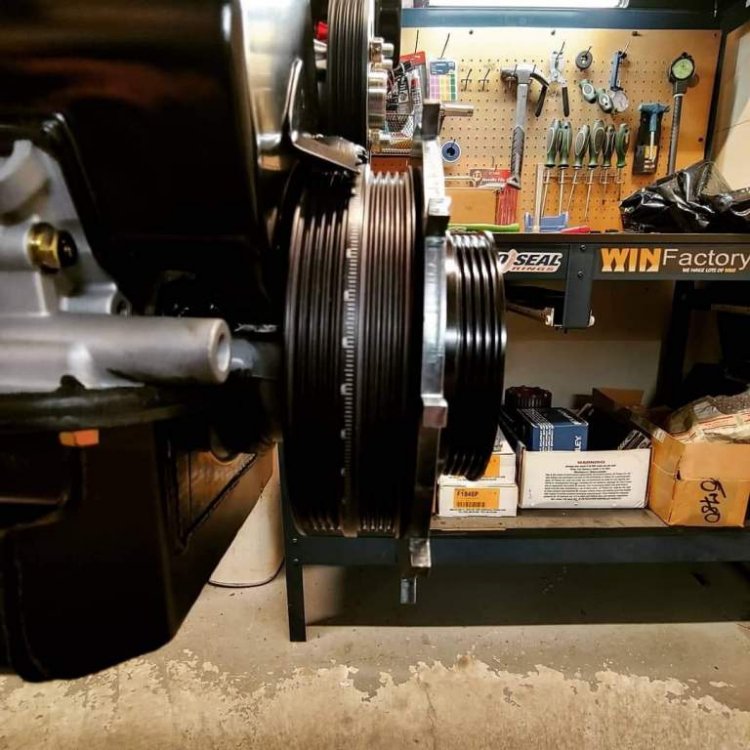
So the fundamentals of the trigger system are there The front pulley has been machined to remove material to ensure belt alignment for the PS pump is maintained. A Billet spacer is being made for the sensor mount to get everything lined up as it should be. All being well, the engine will be shipped at the end of this week!


-
Does it ever pop the dip stick after a spirited drive?
-
Would have loved to have done this, but it’s fairly well documented why I couldn’t Personally, while I accept they were voted for, August Bank Holiday weekend would have more than likely ruled me out due to both work and family stuff. NC500 has been on my list for a while, as has visiting the Normandy Beaches. As long as their is some form of event like this next year, I’ll more than likely be there
-
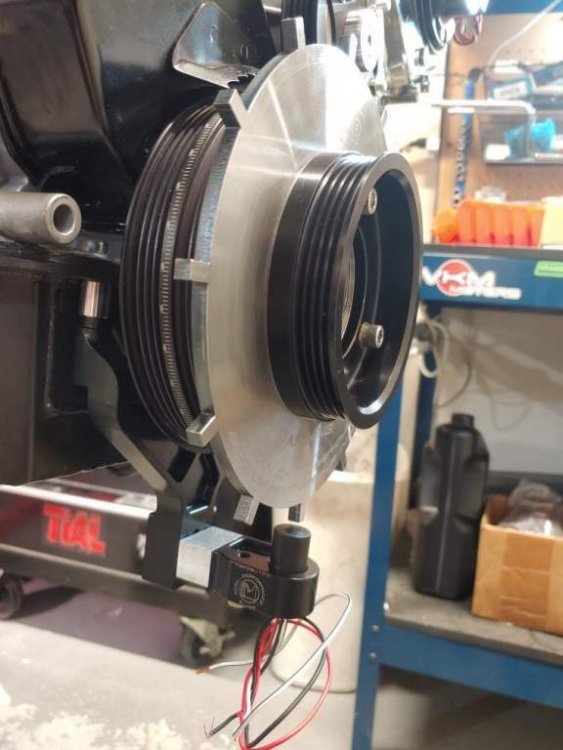
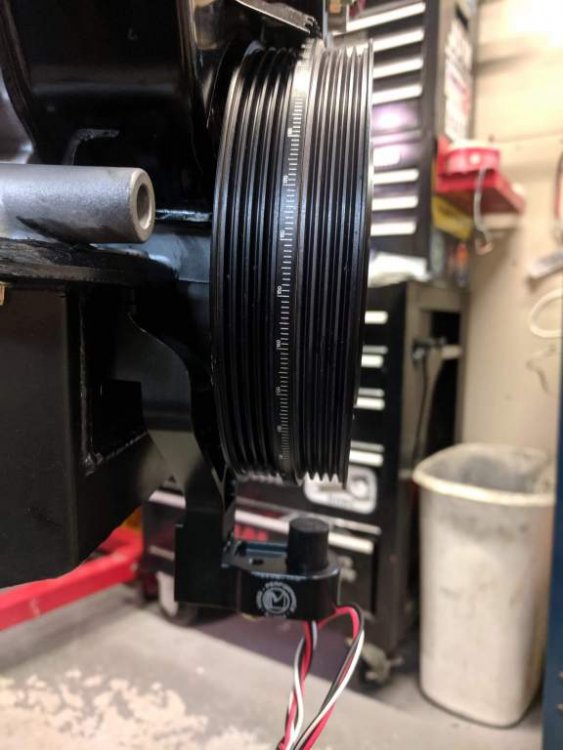
This is the Hall effect sensor and mount that came with the Ross Performance kit. Obviously, it doesn’t have a ring to match up to and it’s in a different position to where the new ring will sit. The plan is for the new ring to sit at the front of the dampener behind the PS pulley and then spaced correctly to suit. The whole crank pulley will then be realigned to correct the offset with the PS pump [ATTACH=CONFIG]118170[/ATTACH]
-
This is the Hall effect sensor and mount that came with the Ross Performance kit. Obviously, it doesn’t have a ring to match up to and it’s in a different position to where the new ring will sit. The plan is for the new ring to sit at the front of the dampener behind the PS pulley and then spaced correctly to suit. The whole crank pulley will then be realigned to correct the offset with the PS pump
-
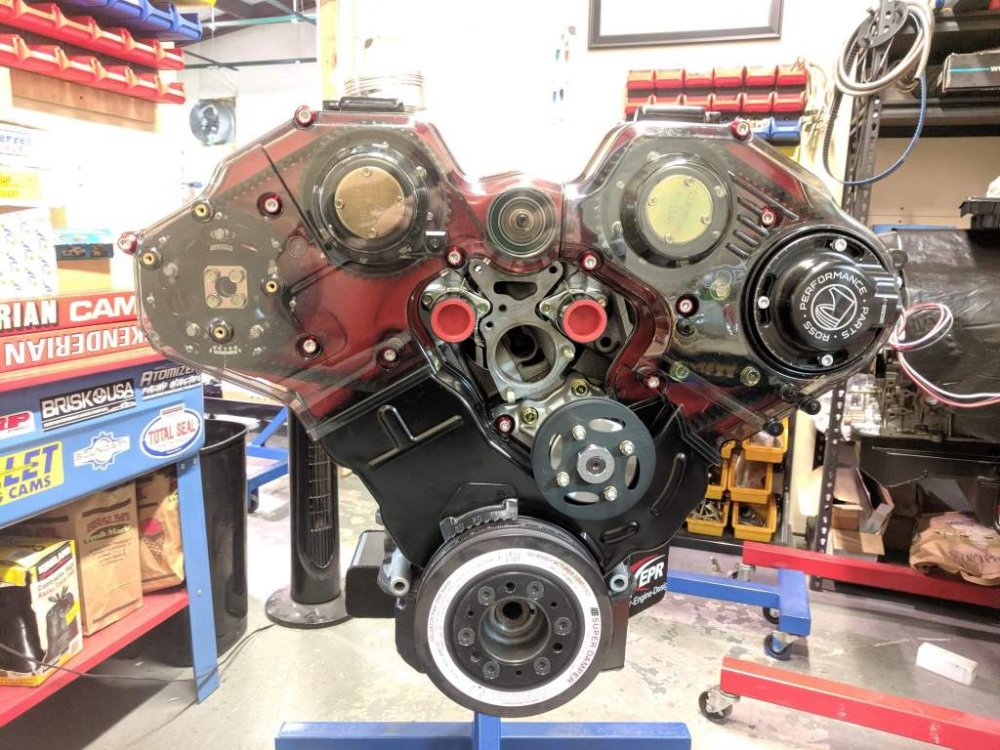
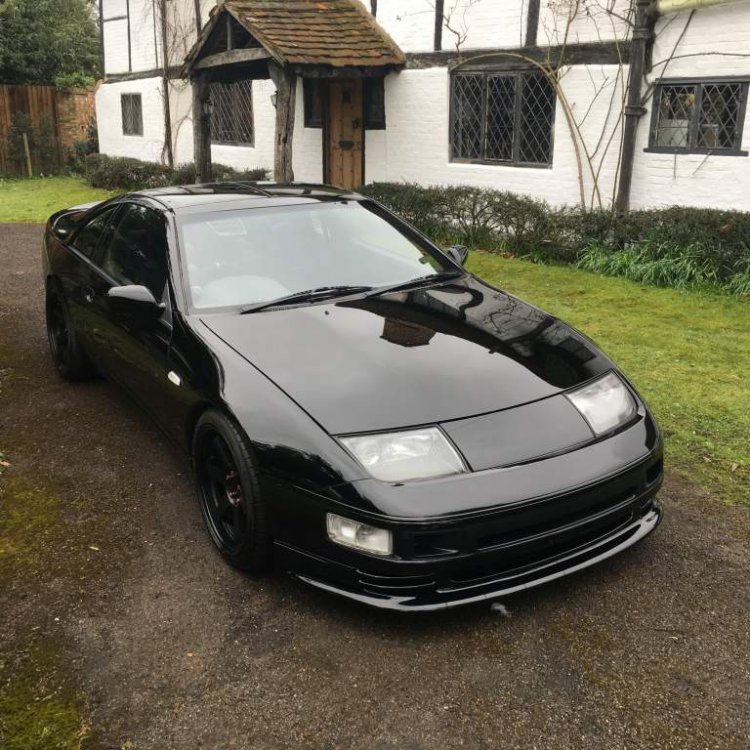
A well timed update to help make sure JaiKai doesn’t completely run away with the NEC voting poll :lol: Ain’t she a beaut! Annoyingly there’s a missing bolt in my Z spec kit! Hopefully Z1 can get one to Mitch sharpish Just waiting on the crank trigger wheel to be fabricated, hall sensor mounting, ceramic coating of hotside parts and I believe she’s done!


-
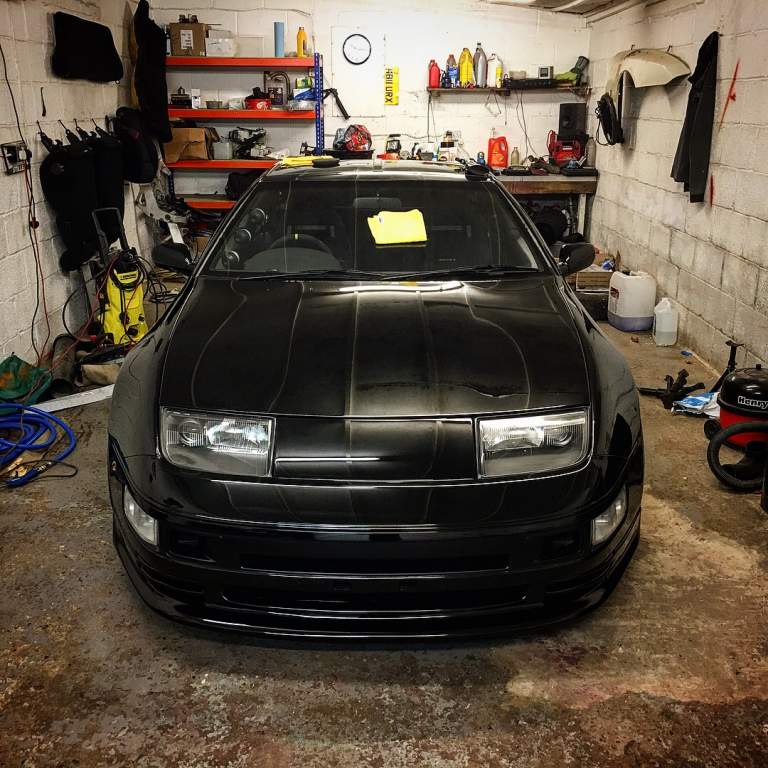
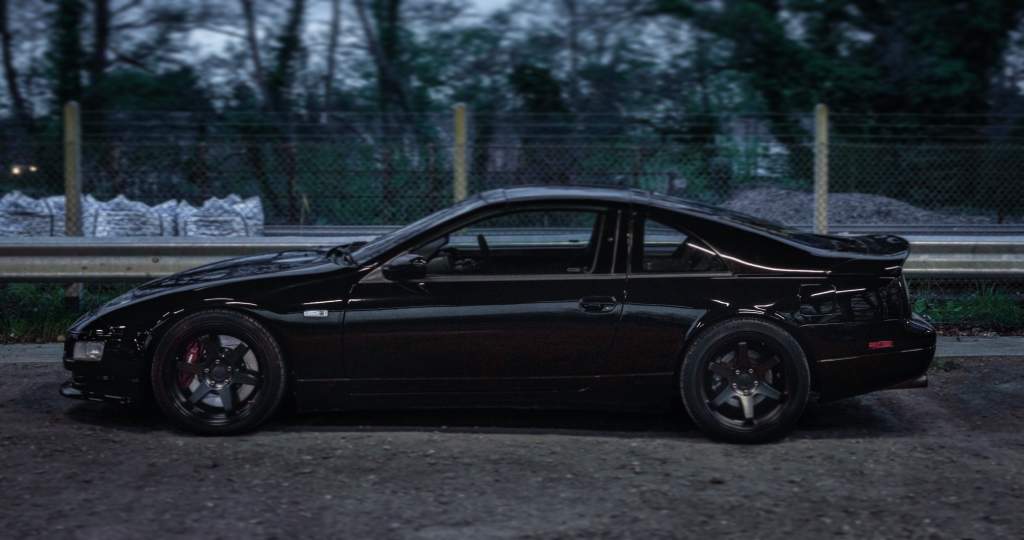
Link to my project build thread: https://www.300zx.co.uk/forums/showthread.php?188495-My-daughter-calls-it-Toothless-the-Dragon-My-%9195-TT-Z Link to the dedicated Instagram account for my car: https://www.instagram.com/nightfury_z32/


-
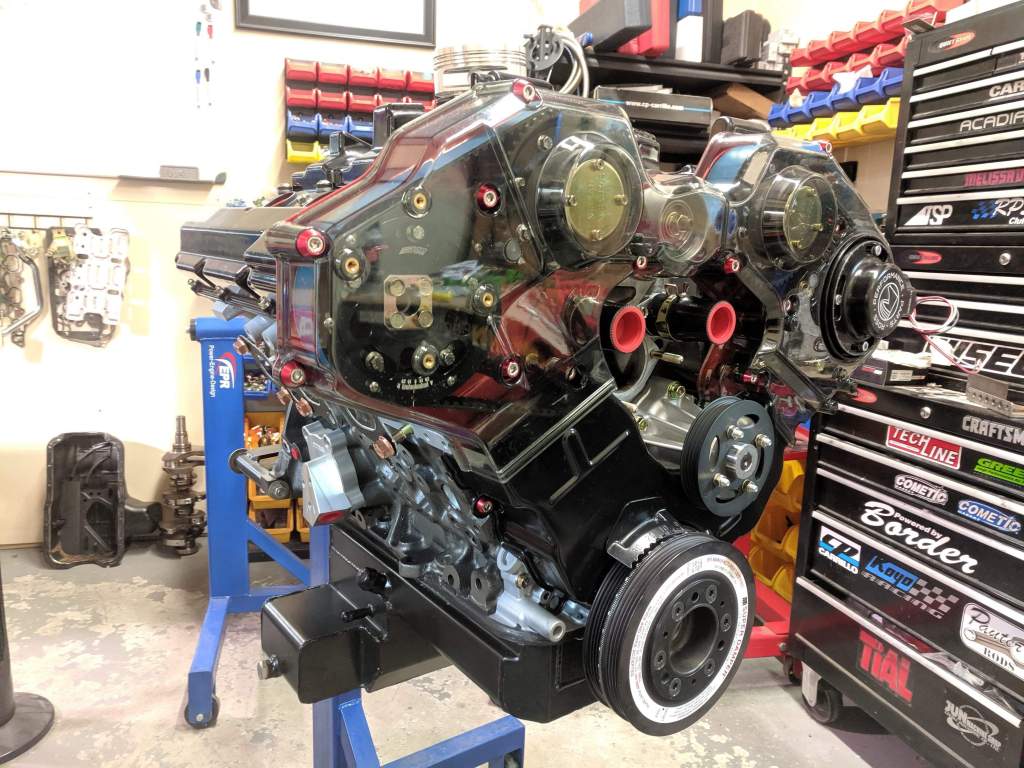
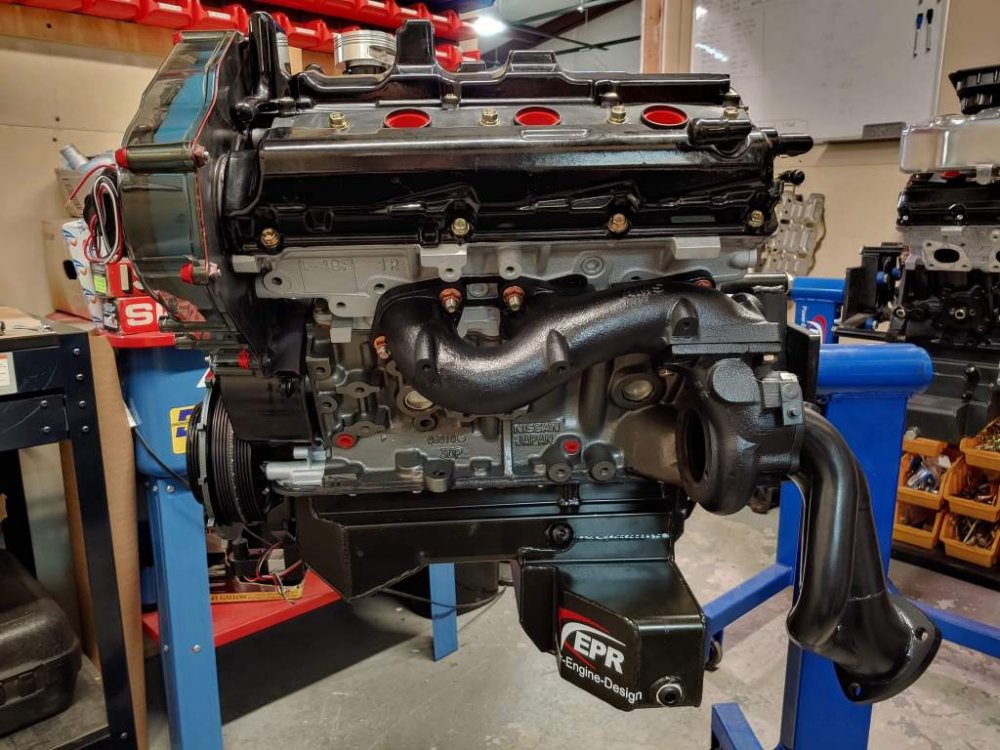
Just waiting on a couple of OEM parts to arrive at EPR (water pump and matrix pipes) so they can be fitted. I think Mitch still has to build the cradle for it to be shipped on. Hopefully it’ll be here in the next 2 weeks
-
Does it only make the noise on Bluetooth connection, or does it do it if you connect via USB aswell?
-
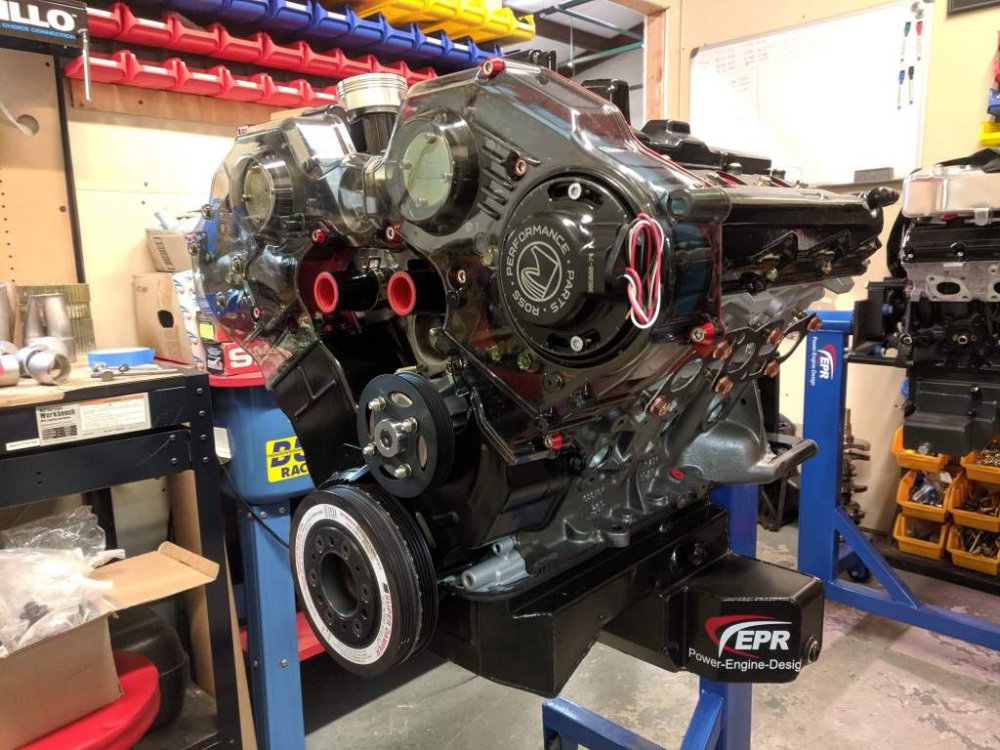
And here she sits, all timed up and ready to rock. Just a few bits to do, like set up the crank trigger bracket and wheel, aswell as the obvious timing covers, water pump etc