Everything posted by veilside01702
-
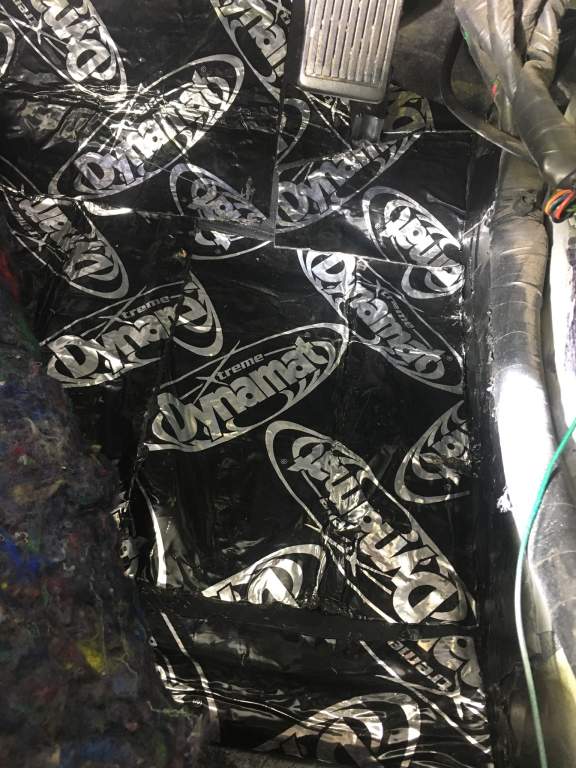
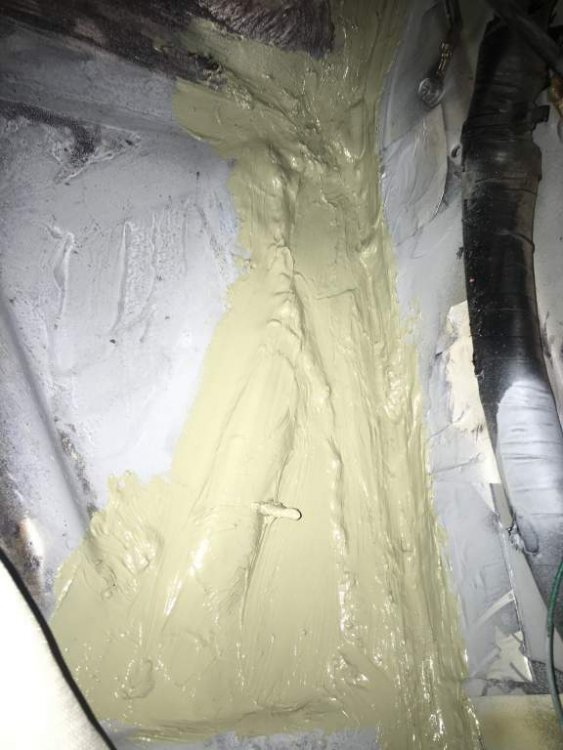
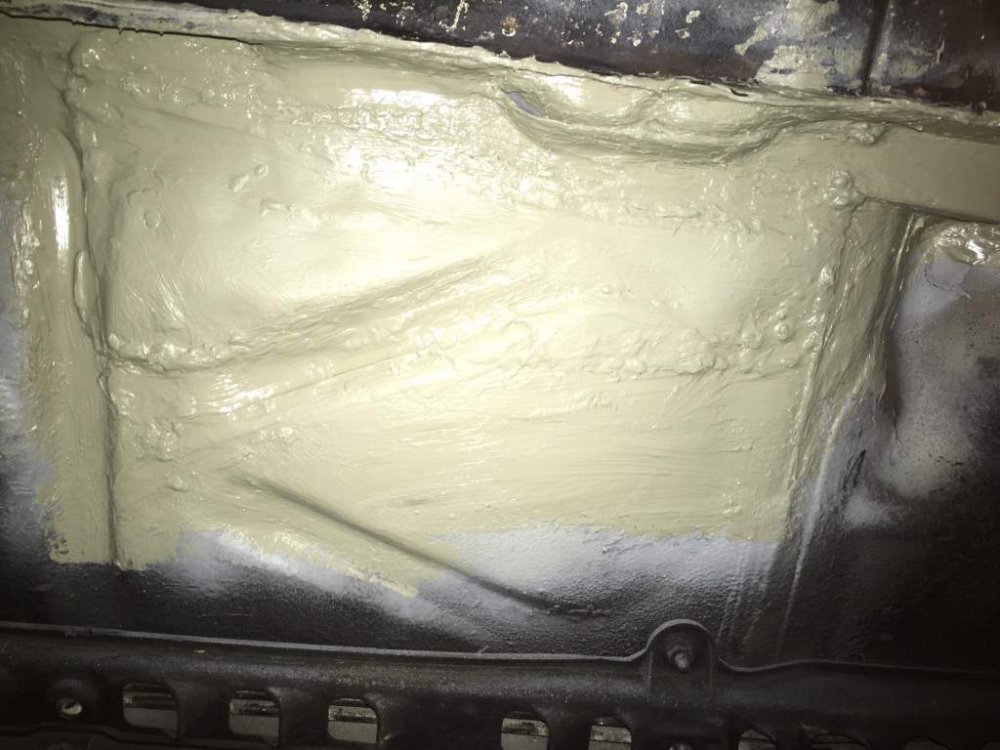
 I wasn’t happy with the seam sealer underneath the car, so I stripped back to metal and reapplied some more. Later today I shall be giving her another coat of paint and Schutz, followed by the Dynax-UC... I finished the inside with some DODO sound stopper LT under the carpet for some added sound deadening where I removed the OE stuff to weld her up. Should be finished in next day or so, if I am happy with the seam sealer when i look later...... if not I will be stripping again.... lol OCD is kicking in I think..... lol
 -
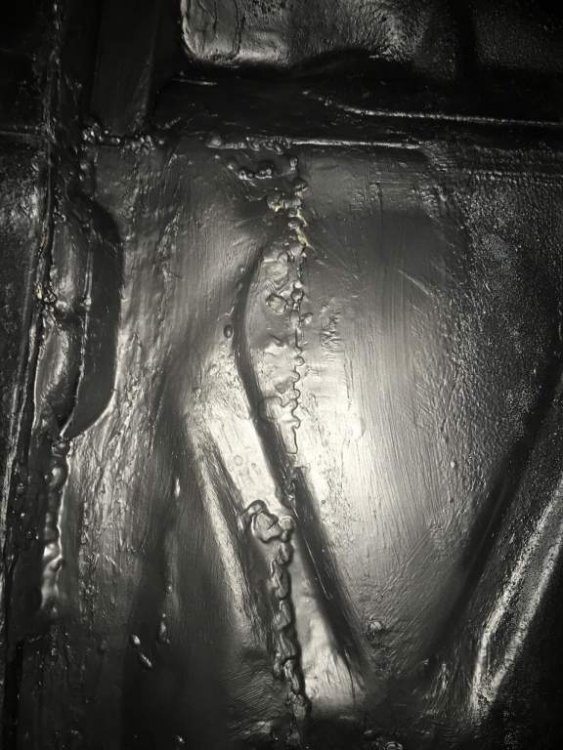
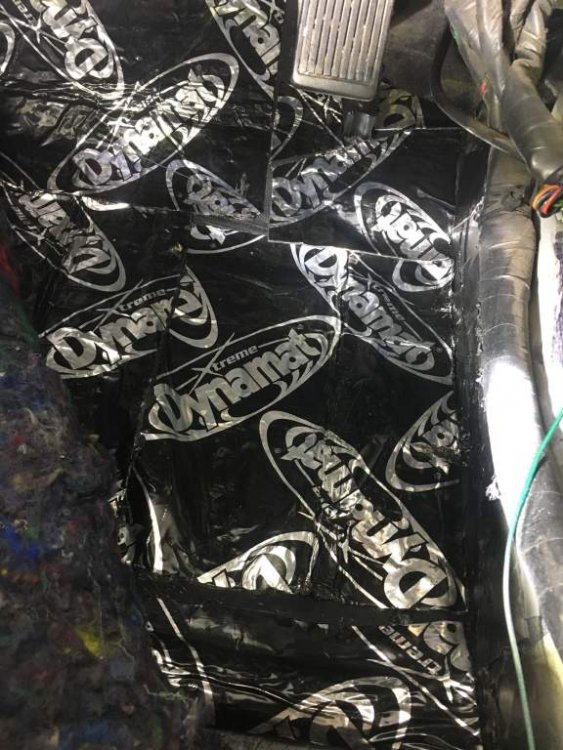
Well it is now seam sealed, painted inside with gloss black paint and underneath with a Matt black. I also rubbed down the entire drivers side floor pan and bottom of sill, rust treated 2 small patches of minor surface rust. Now fully painted floor pan. Next is to use some good quality underbody coating then the Bilthamber Dynax - UC clear underbody wax. While I am at it I shall be giving the sills a new dose of Bilthamber Dynax-S50 cavity treatment.... I also fitted the new dynamatt sound deadening to the floor pan and tomorrow I shall be fitting the Dodo sound stopper LT under the carpet before I fit it back in place....

-
Well time to resurrect this Journal as I am now on a full rebuild mission ready for next years shows and actually getting to drive my baby...... Planned for the next few months :- 1) Full bare metal respray and decide on New Colour and body styling options....:whistling::shifty: 2) Strip and refinish the underneath of the car. 3) Rebuild the suspension again and get everything powder coated. 4) Fit New Tein suspension and Active EDFC system with GPS. 5) Rebuild engine, new gaskets, seals, build new wiring harness and rebuild turbo's 6) Finish building new audio system and fit. 7) Put alloy wheels in for refurbishment.
-
Thanks Ian....
-
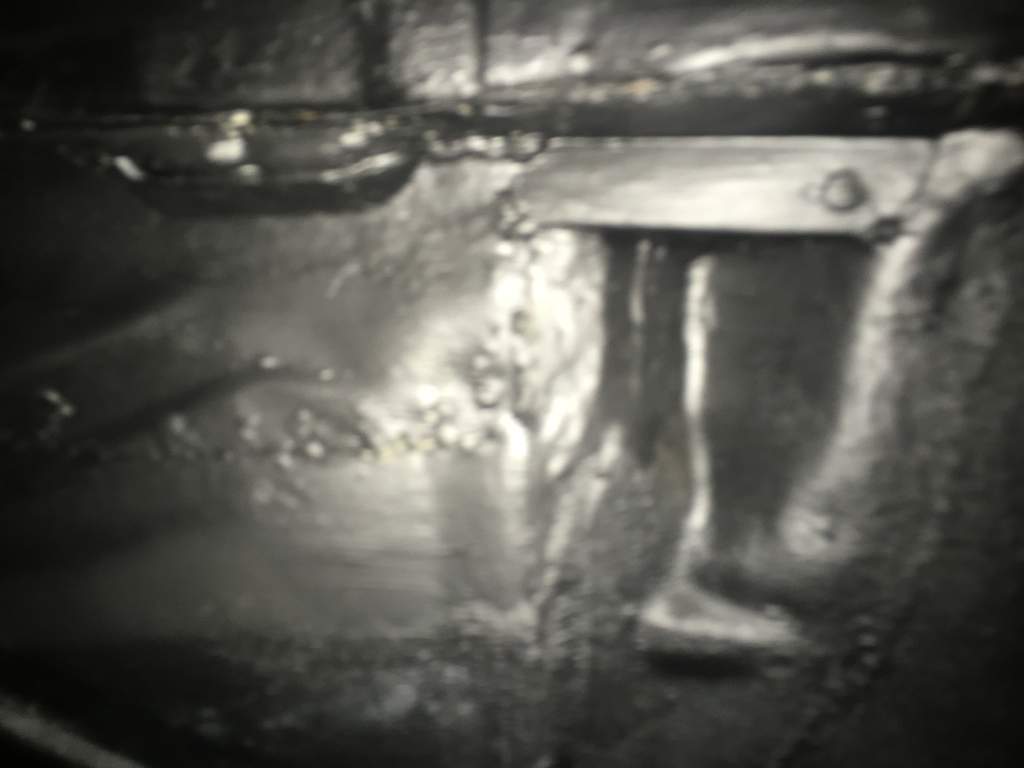
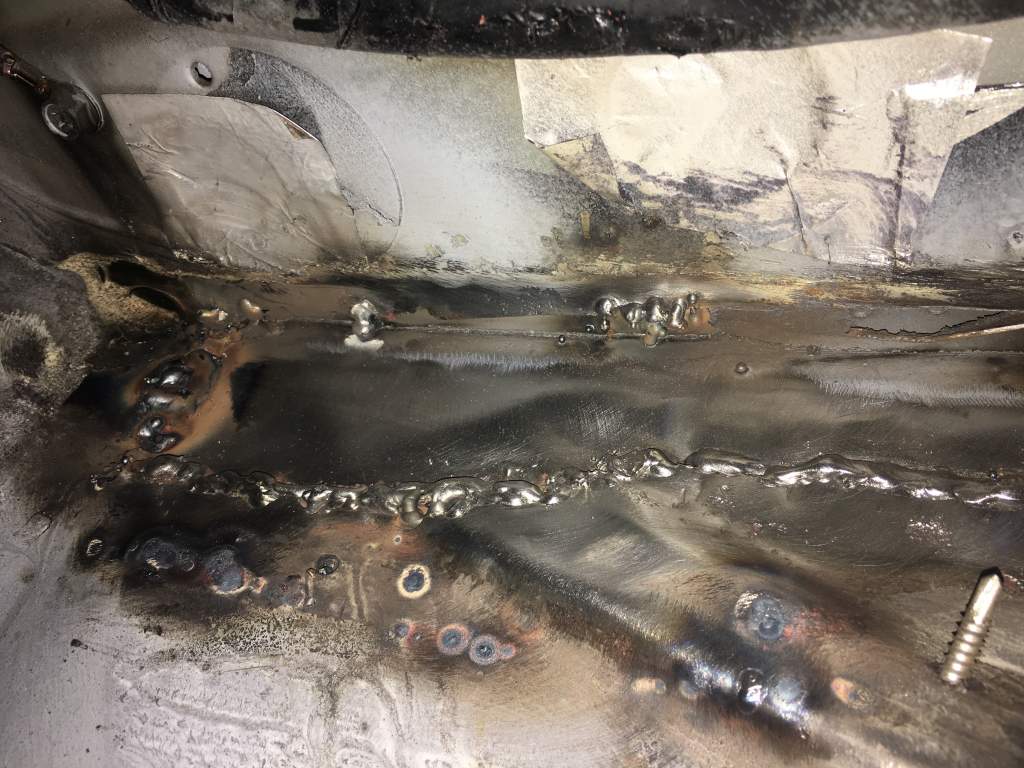
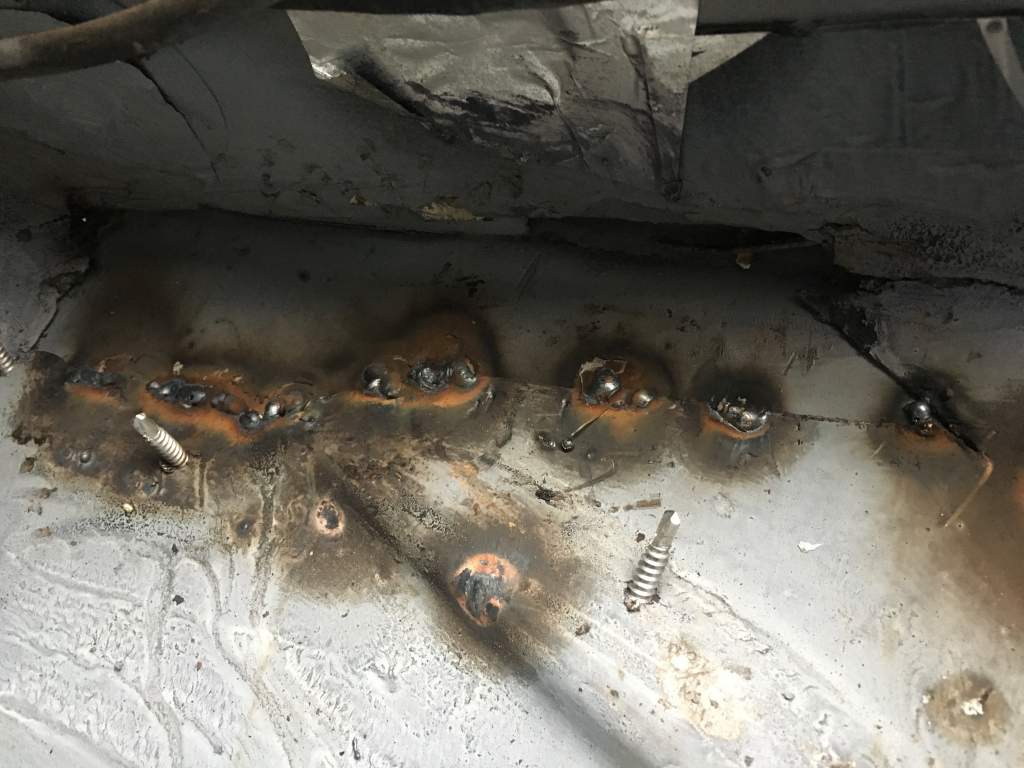
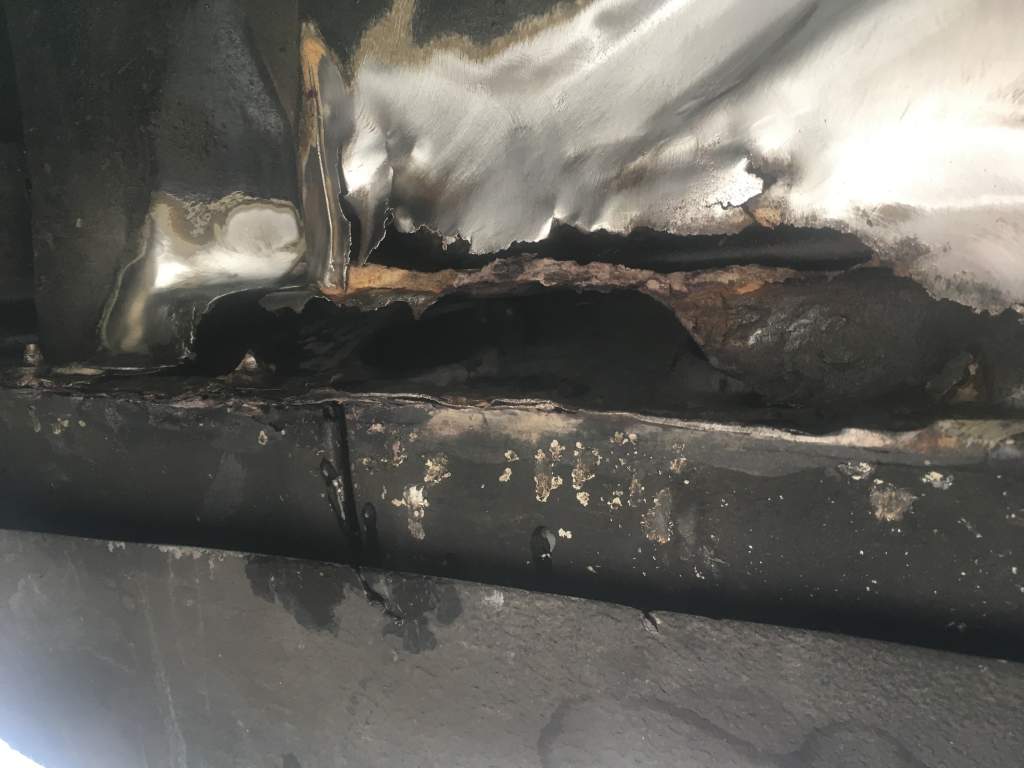
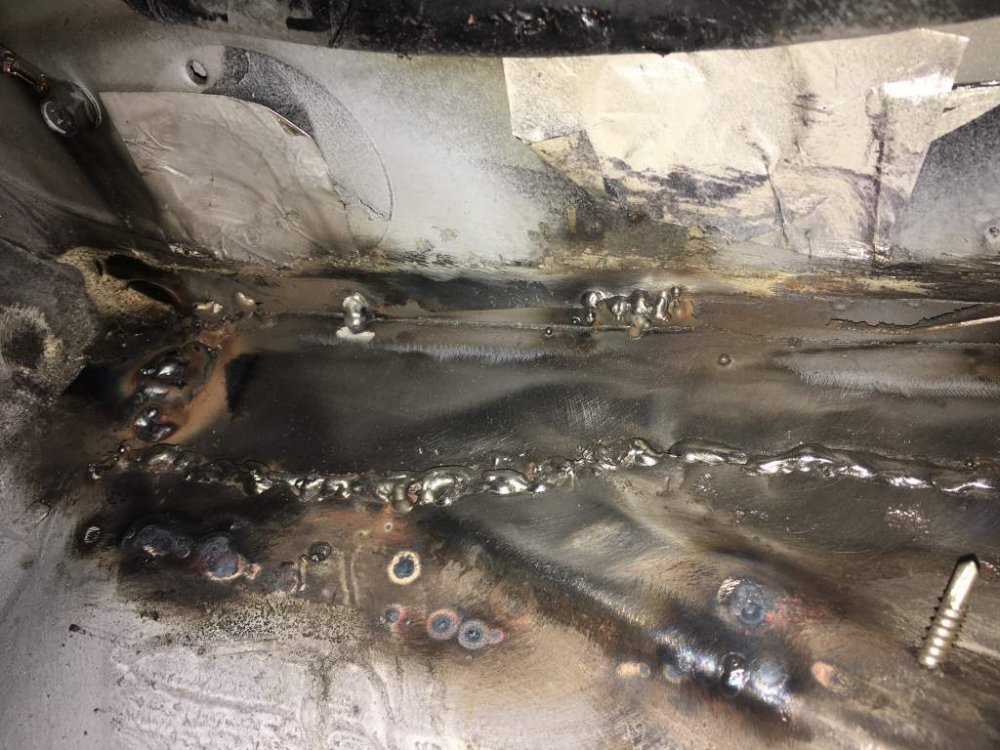
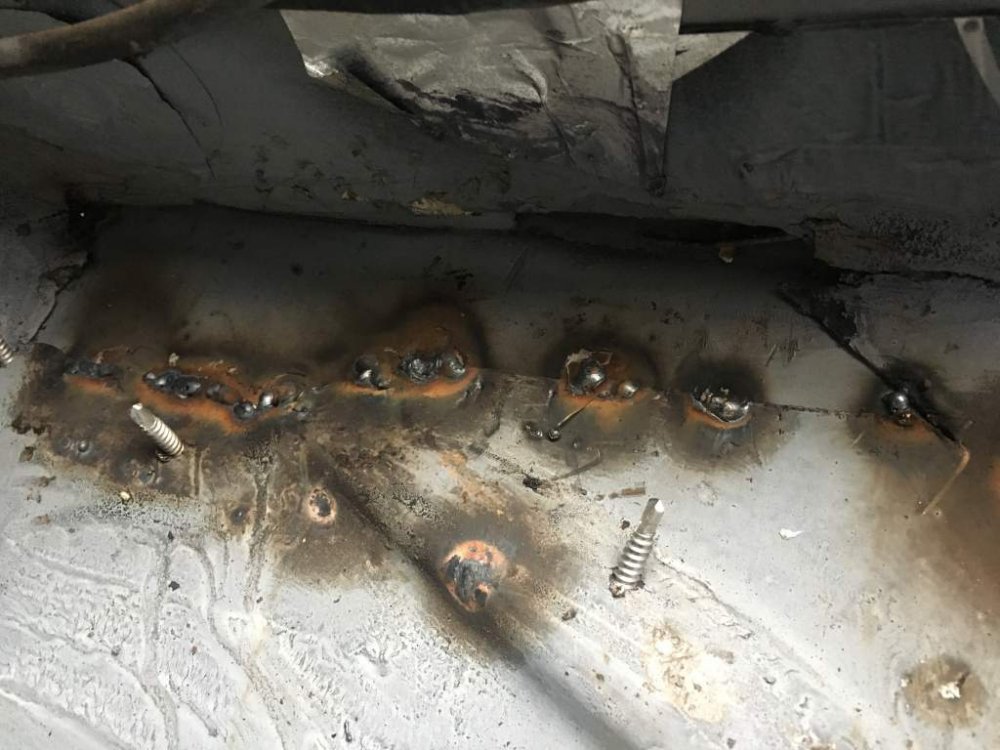
Well she is all welded up and seam sealed..... This was the inside after most of it was welded up on the inside joint.... I also welded the underneath as it was an overlapped joint.... both edges are now sealed and very strong.... This is the inside after cleaning up with wire wheel on the drill... Next is the inside area with a coat of seam sealer applied.... And finally is the underneath with a coat of seam sealer to protect the welds and give it a bit of protection from stone chips while i was there..... Not as pretty as I would have liked...... But I can clean up the welds when the weather gets better next year and i do the entire underside of the car and sills properly...... All i need to do now is cut off the end of one screw, primer and paint it all, sound deaden the inside, spray the inside of the sills again with Bilthamber, and replace the targa drain pipes with silicone ones...... Should be ready for MOT in a few days......... YAY!!!!!
-
Happy Birthday Young Man........ :happybday:(I was taught to respect my elders!)...... lol
-
Happy Birthday Gary.........:happybday::wheelchair:
-
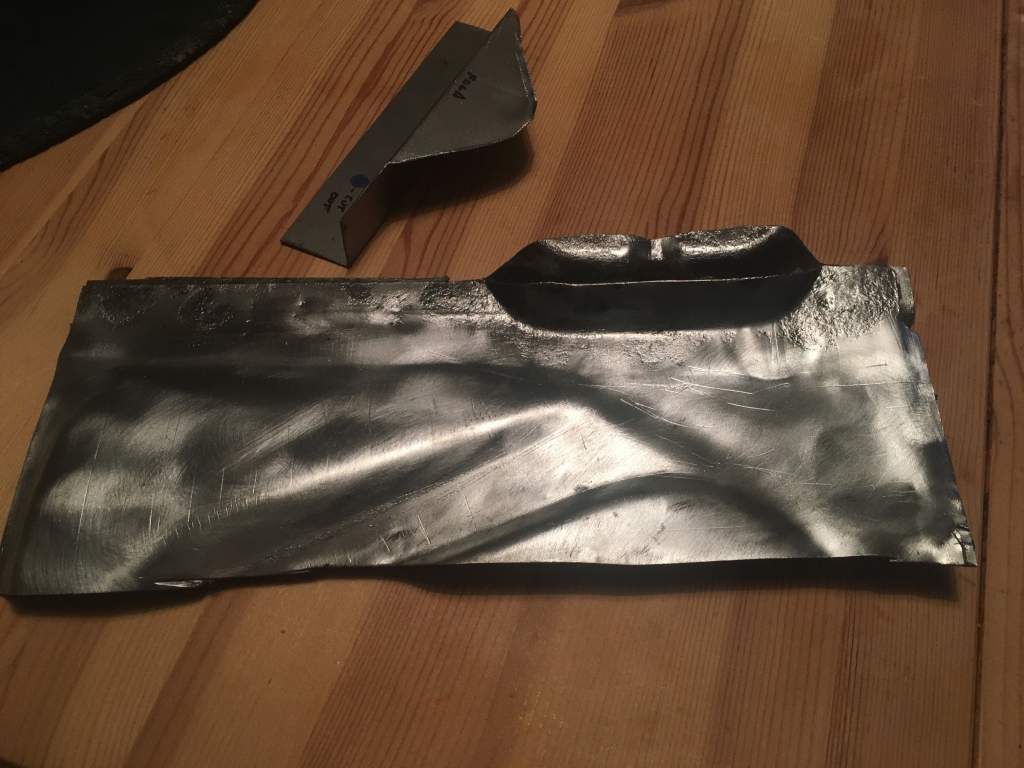
Well after a while making sure the patch section was fitting properly I fixed them in place with self drilling screws and added a few tack welds inside the car. I had to beat the panels together in a few places to make sure there was no gap between them, so the panel hammers and dies came out and I began with a bit of fettling.... I was intending getting some more done, but had to stop due to weather getting a bit damp and running out of shielding gas.... lol Tomorrow is my day to finish this off, grind off the welds, seam sealant and treat it with some rust preventative..... Inside car..... top of patch area....
-
I voted Black...... but have now decided after looking at the photoshop image it isn't right...... As it is Lee's Z...... I think bright pink would suit better for such a big Jessie......:tt2:
-
It's a dead Z .... lol Need to be finishing fabricating and welding drivers floorpan and front sill section...... I have started a thread.... Tomorrow is going to be a Z day hopefully....... if the wife and kids let me.... lol What you been upto?
-
Oh GOD..... They let any riff raff on here now...... lol...... How you doing Geordie?
-
I had exactly the same issue with mine and it drove me nuts...... Till I fitted a new throttle position switch/sensor.... mine had a fault on the switch part inside and not the potentiometer part (comes as one unit)... I had a few near misses when slowing down to stop at lights and nearly rear ending people when the engine cut out and no steering or brakes..... As Tom said....... lol Also, have you had the transmission fluid level checked? This is done with fully warmed up transmission, flat level surface and dip the transmission fluid whilst idling in neutral..... do you have a copy of the workshop manual? Hope this helps....
-
Hi scoobydoo67, I’ve already fabricated one set of rear sill panels and welded it myself..... so hopefully it will go smoothly if I take my time and don’t rush it.... lol I must be bloody bonkers..... lol
-
Well today I got the repair panels cut out and cleaned up ready to soak overnight in the Bilthamber Deox-C corrosion remover to get to any corrosion I didn't manage to strip with the wire wheel... mainly in the jacking point layers.... Tomorrow I am going to round off the corners and then spray them with weld through primer to protect it until i'm ready to get under the car and start welding it in place...

-
Hi Pete, your an absolute star..... The springs are already on the shocks and appear to be factory fitted as I bought the setup from another member brand new. I'm not looking for any lower just a better feel for the road as my OEM are at least 18 years old now, possibly original NA shocks and springs. I have all original setup, so no way to adjust anything at the minute. So standard height for now..... Again, thank you so much for the experienced advice..... Russ
-
Hi Pete, they are listed as Front 8/448 and Rear 6/336 Cheers Russ
-
It’s not luck Richard..... its stupidity..... lol
-
Well now I have them.... any advice on fitting them and setting them up for height and preload? Let alone setting up the EDFC? This could be fun as I have always had OE setup.... and never fitted anything adjustable.... Do I set them up the same length as OE ones? Or do I have to do them individually / front and rear and check ride height? Any advice or experience welcomed.....
-
Well the measuring, template making and cutting out has begun... This morning I have hit the rusty hole area with my trusty wire brush attached to the MAKITA drill.... I finally found some solid metal to fix to and painted everything with some messy Rustins rust converter, including right inside the sill where there was some surface rust hiding inside. Templates cut out ready for transferring to some sheet steel... I shall be fabricating the repair panels later today at my work... I need to use the bench vice and I left my sheet steel and tin snips there... lol I will update the thread when they are cut out and folded properly later or tomorrow!


-
1. Ian Greenfield 2. Craig Stratton 3. AndrewG 4. Chris300 5. JaiKai 6. t.mogsy 7. Gaz 300 8. Richard Smith 9. kgonzokia 10. Funkysi 11. Joelyp 12. Stephen 13. Bigh 14. GSC 15. 182stevecup 16. Rata2ie 17. Johnyboy 18. Art123 19. Devvny 20. Winnoze 21.Mightysi 22. coopd. 23. Slick Pete. 24. Bones28 25. Jonce 26. Nickz32 27. PhilP 28. Veilside01702 I guess I had better get cutting, fabricating and welding then...... lol
-
The drivers side central locking on a Z only works with the door lock. So they fit a solenoid that the alarm system activates to lock the drivers door which in turn locks the passenger door through the OE locking system. This means only one solenoid is needed for the alarm to lock the whole car. If the drivers solenoid is locking the drivers door then you can either just get a solenoid fitted to the passenger side or fault find the factory fitted locking system. Could just be a fuse.... Does the passenger side lock from the drivers door lock with the key? Russ
-
Can I ask for the name "Gertrude" to be added to the poll...... I think that is way more fitting........:lol:
-
Who are you anyway??? :whistling:
-
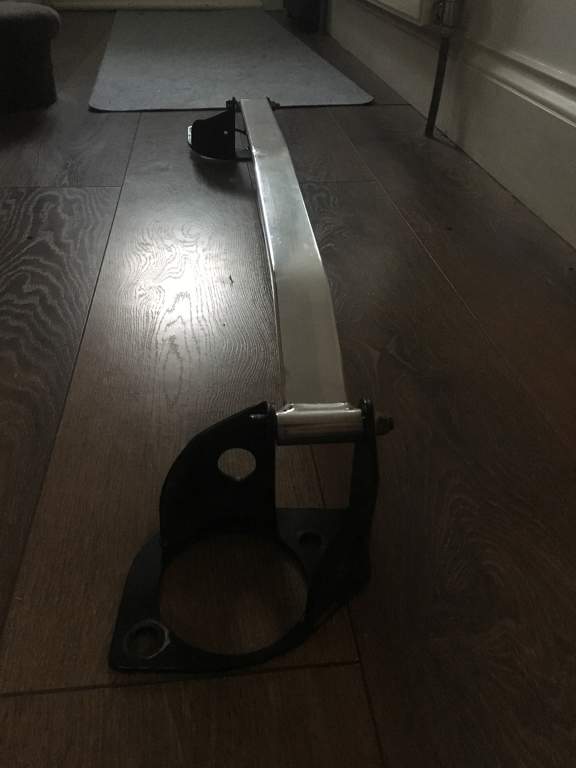
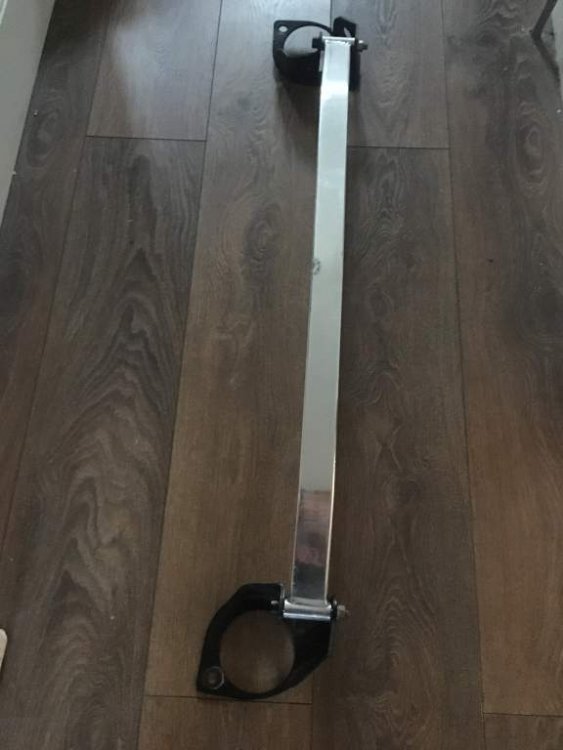
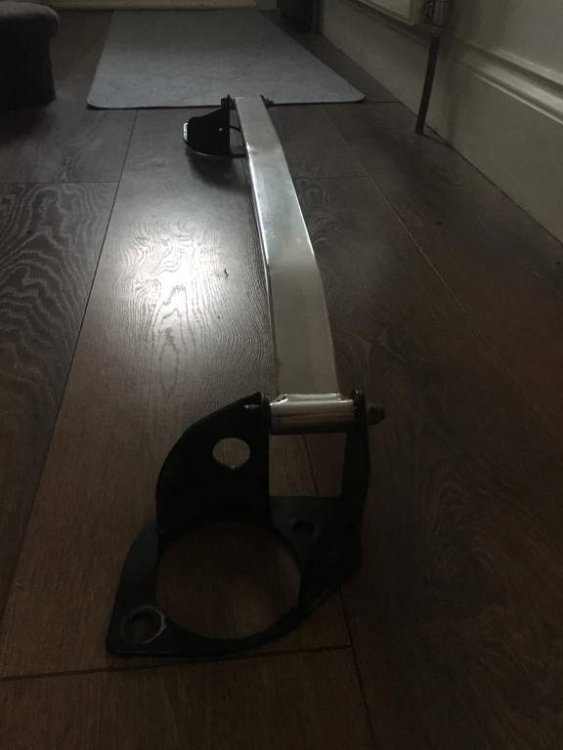
Front strut brace I bought from the US a few years ago......
-
Due to my Z being in need of some welding and off the road for the foreseeable future I am selling the Brand new OEM MAF I bought from Z1. Never used, just sat waiting to be fitted for a couple of months..... Need the funds to get the welding done and MOT'd first......