
Everything posted by redwine300
-
Do not condemn the fan coupling straight away, it is well worth spraying DW40 in the centre so as to lubricate not only the coiled spring but also the small central shaft that operates the internal valve/gate. They have a tendency to become stuck. It may mean you have to take the upper shroud off to access it but well worth the trouble. Mondo, sounds like yours is permanently engaged. Not a bad thing with regards to engine temperature, just may struggle warming up sufficiently. Maybe worth trying some WD40 also. If when you add WD40, you may need to rotate the central shaft slightly just to make sure there is free movement. If so, please be very careful as the vane that controls the flow of viscous fluid is very fragile.
-
In my opinion, it id ok that the fan free spins straight after a drive. The reason being is that the thermal mechanism at the front of the viscous coupling along with the radiator has had ample air flow due to forward movement. It is only when the car is stationary that the fan comes into it's own as the engine temperature will start to rise and activate the coupling. This helps prevent the engine using power to spin the fan when it is not needed, thus not wasting BHP When at idle, (after a few minutes) you should hear a definite roar of air being drawn through the shroud when you raise the RPM (very noticeable) A simple yet somewhat risky way of testing is, from cold at idle with a very heavily gloved hand, you should be able to stop the fan from spinning by adding drag. Once fully warm though, the fan should offer much more resistance. You will be able to hear it though, when mine cuts in after a minute or so at idle, I can hear it from inside the car!
-
Damn! Rumbled.:lol: ---------------------------------------- Finished laying my second attempt of sealant. I have tried to apply what I have learnt from my previous efforts. IE I have build up the corners, etc'
-
Nice one Jeff. Those pictures show great detail, it is easy to forget just how small those individual joints are. Impressive dexterity. I must get me a pair of those specs!
-
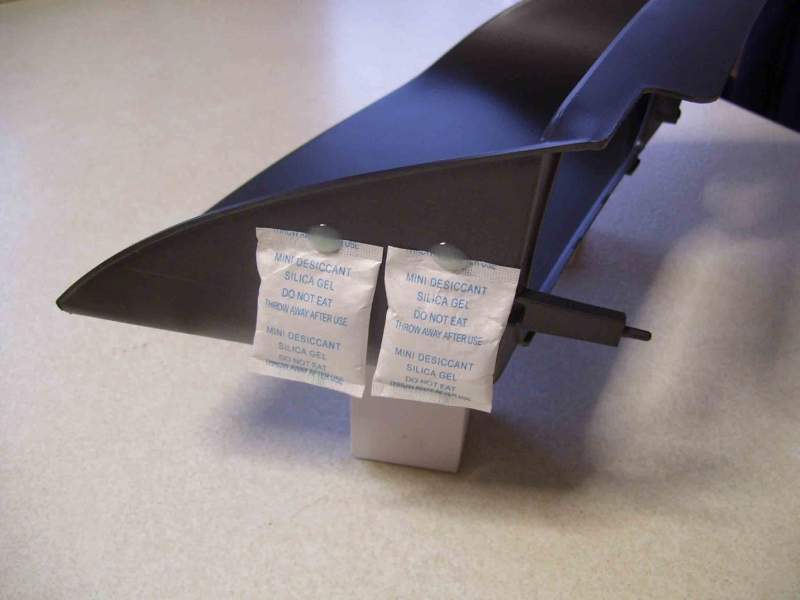
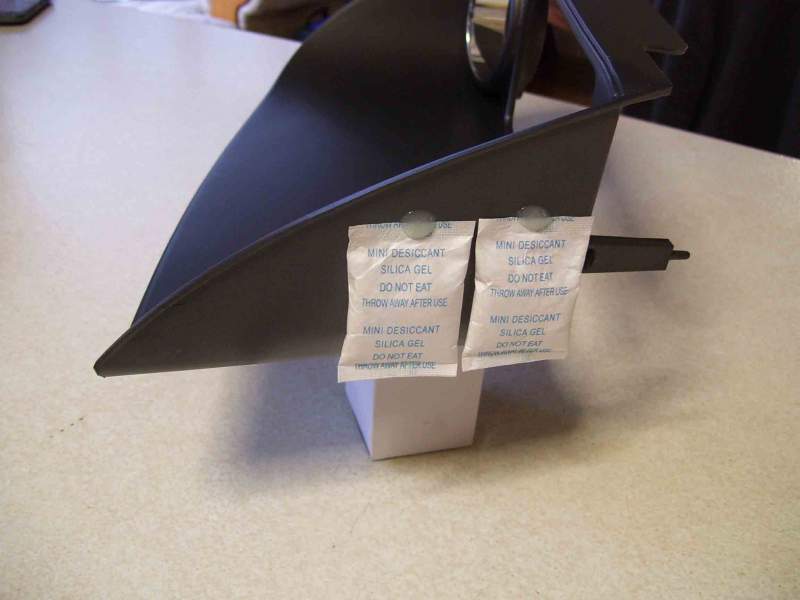
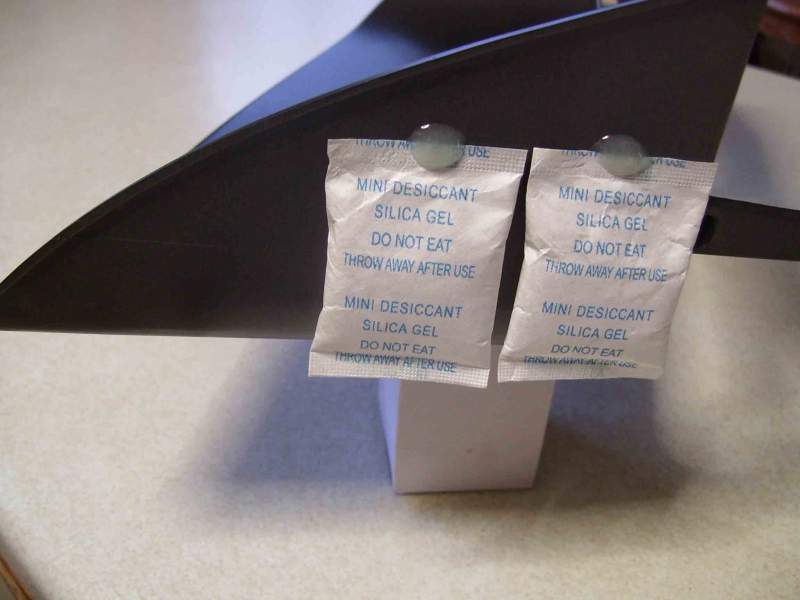
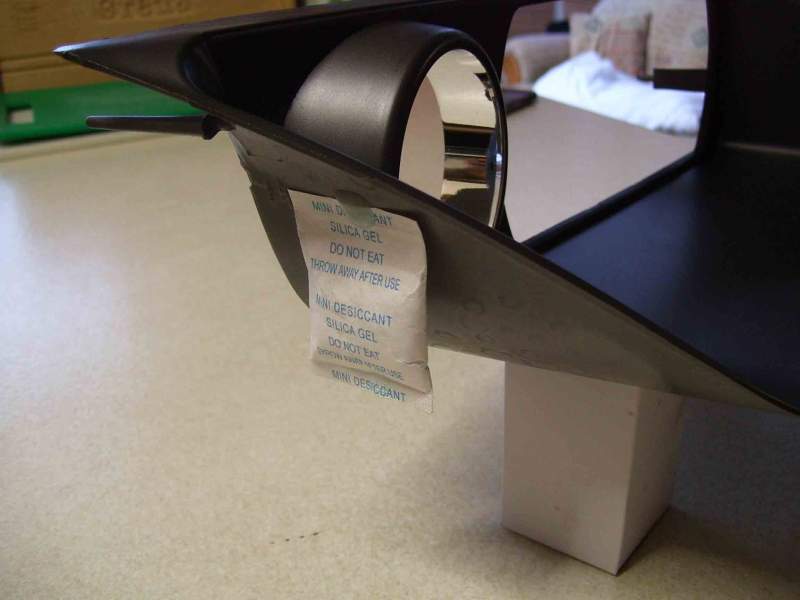
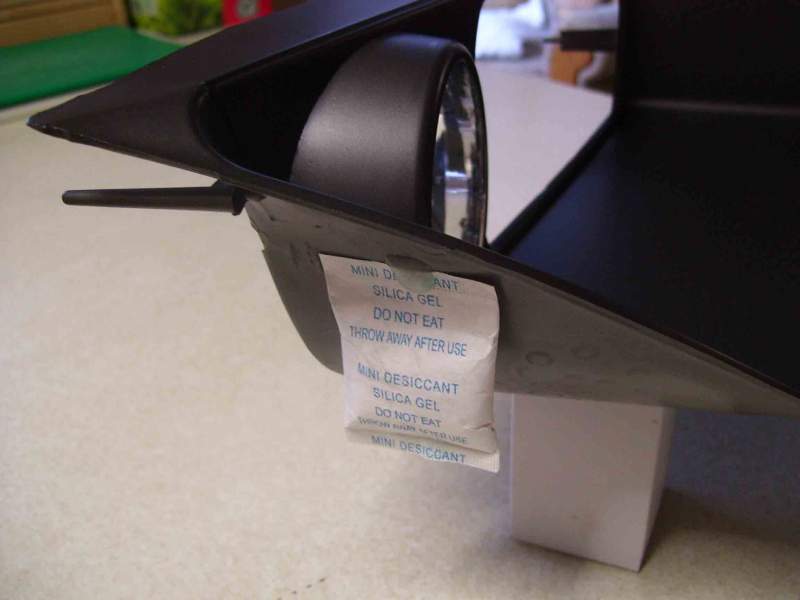
Also, meant to add. I have, on good advice, replaced the original moisture absorbent tablets with some sachets of Silica Gel. Decided on a permanent fixing as opposed to placing them in loose.
-
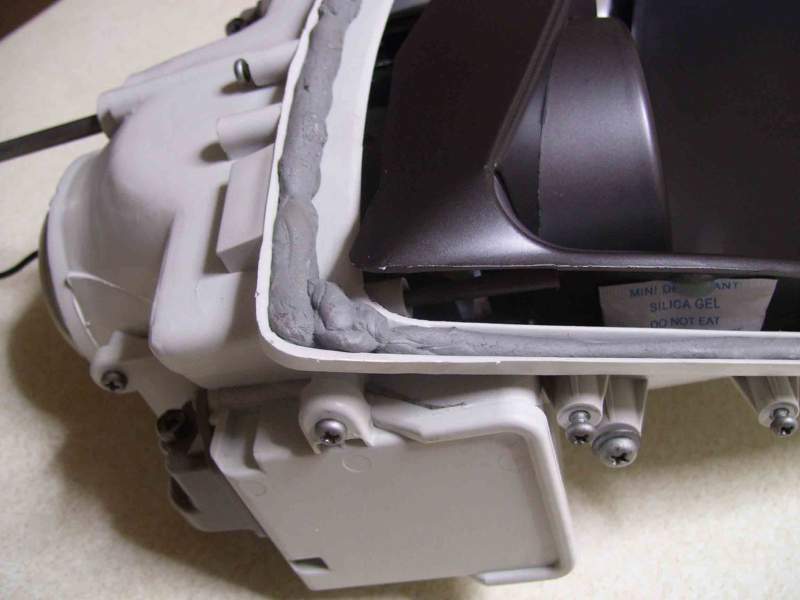
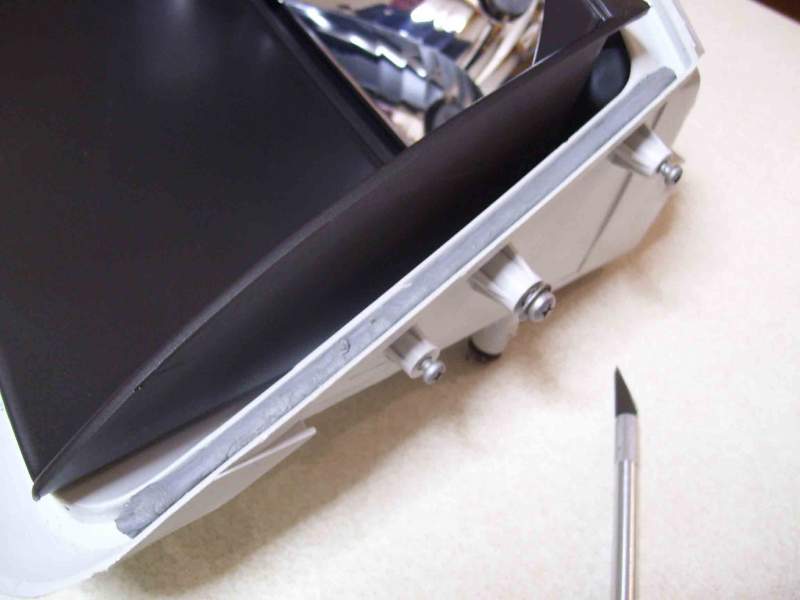
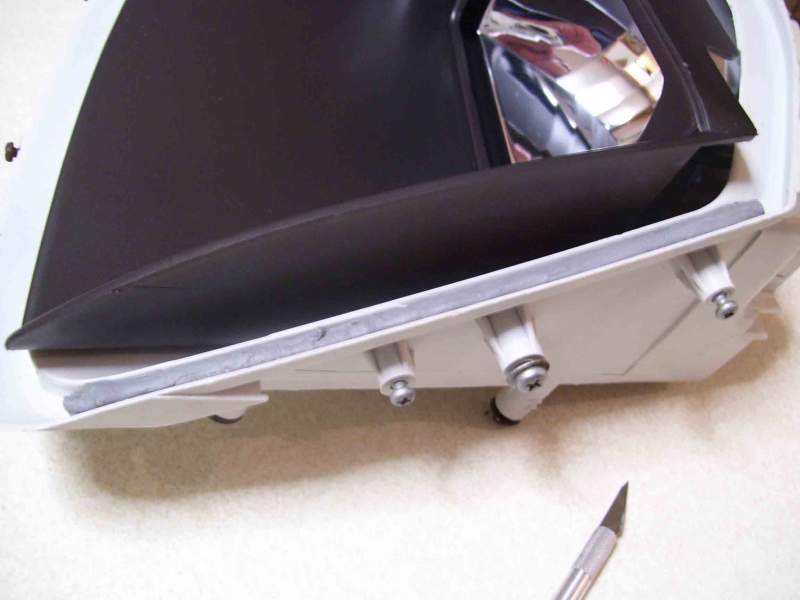
Cheers Russ. Decided to take a bit more of a measured approach on the second headlight based on the results of my first attempt. So I am going to make up individual strips of sealant varying in size depending on the sealed edges. I have seen from my initial attempt that there was to much sealant along the sides (making it difficult to disperse) and not enough sealant in the corners. So far I have laid sealant down the 2 edges just to the top of the channel. As I was re softening the original rubber so as to tease it into shape, I decided to experiment with temperatures so that when it came to re locating the lens for sealing, not only was the rubber at it's softest, but the housing was equally pliable so as to be flexible and not softened or deformed. My plan is to lay the rubber in correct thickness' into the housing and then warm the headlight and the lens at the same time and then bring them together. Hopefully the sides will seal without overflowing and the top, bottom and corners will seal with enough excess rubber to seal and then spread out.

-
Temp sound a little low after 30 minutes running, I would be looking for a shade under half way. Maybe you have a thermostat stuck open? Not a bad thing, easy fix really. Just a thought.
-
Good luck for today. Hope all goes well.
-
Latest news is that the medical team are starting the process of bringing him out of the coma. Apparently he has been responding to simple commands. Fingers crossed.
-
Thanks guys! I have decided to tell myself.. If at first you don't succeed, try try again. After all, if I have to strip and clean the thing again then so be it. Oh well.
-
Well the first thing that springs to mind is a compression test. Good place to start and will tell you a lot.
-
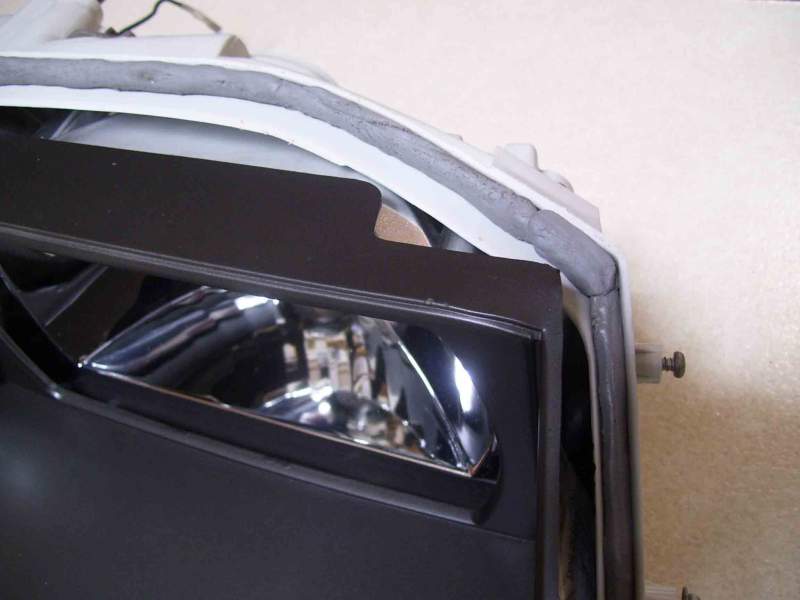
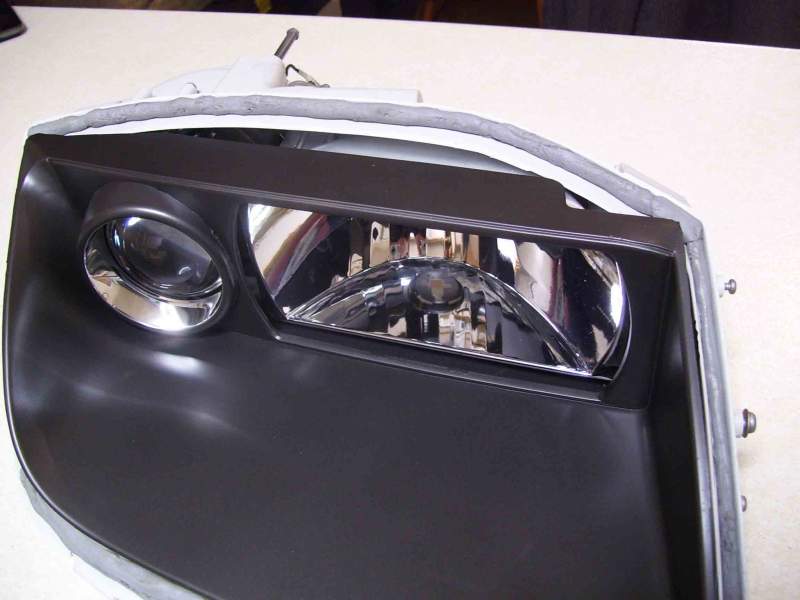
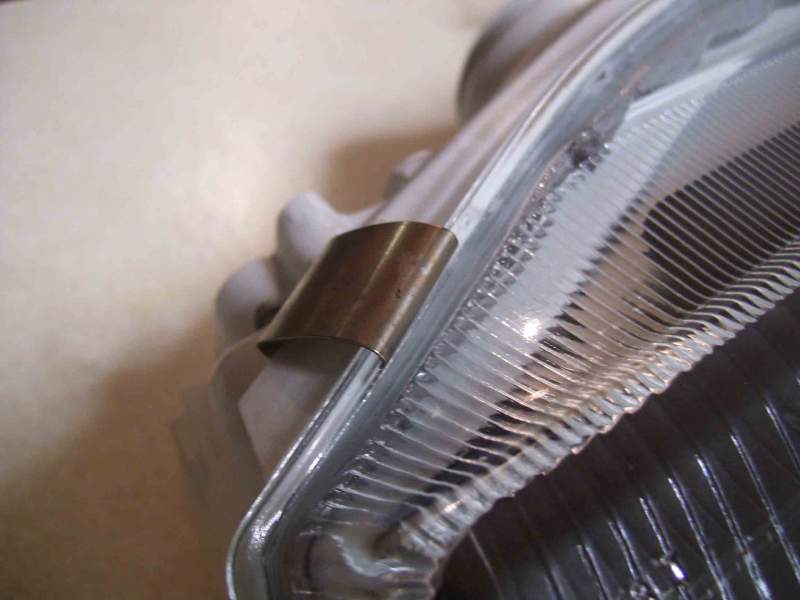
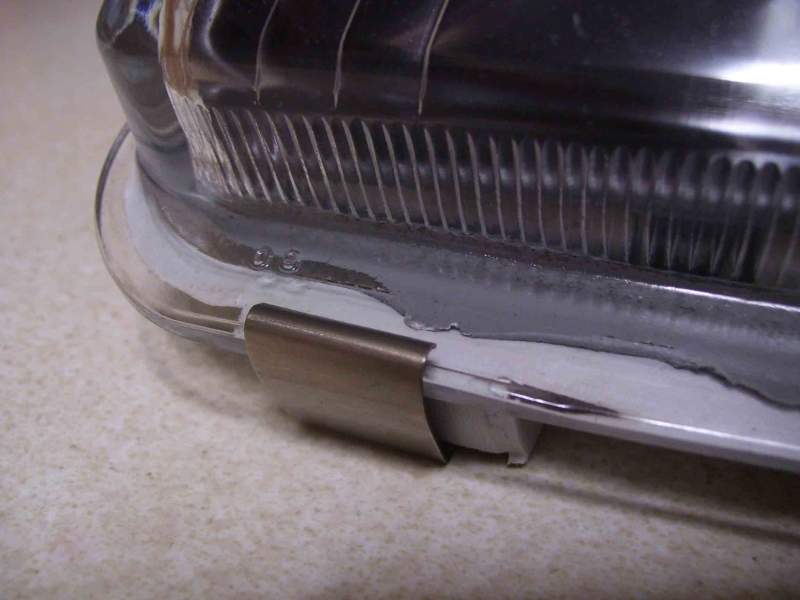
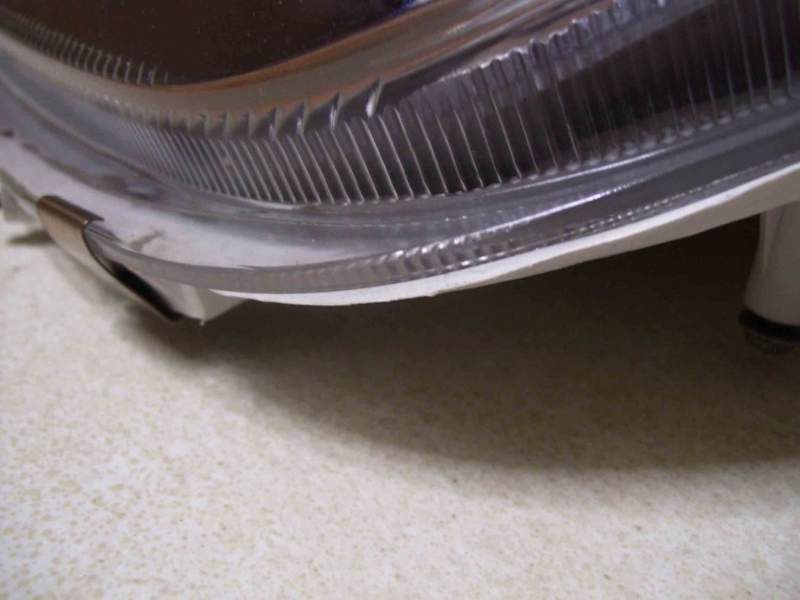
Some additional pictures. I think I will have to seperate the light and have another attempt. I will try another tack on the other headlight first mind.


-
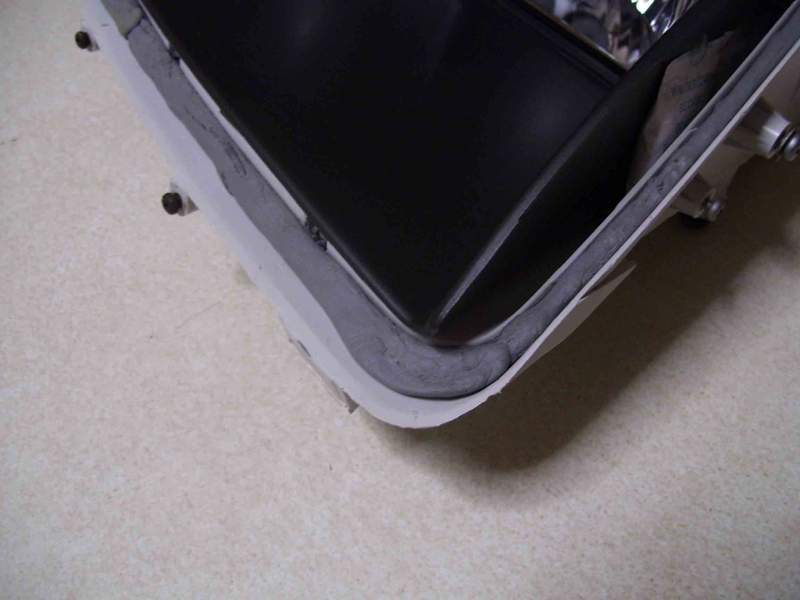
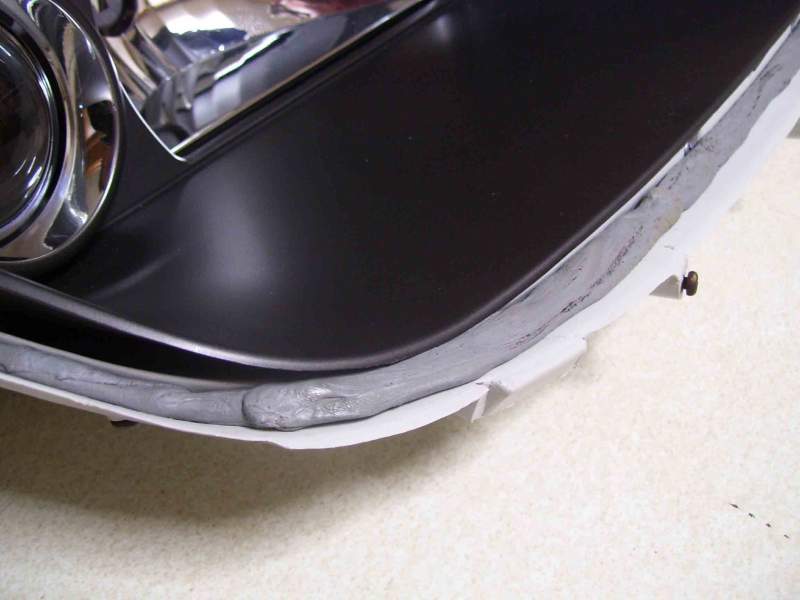
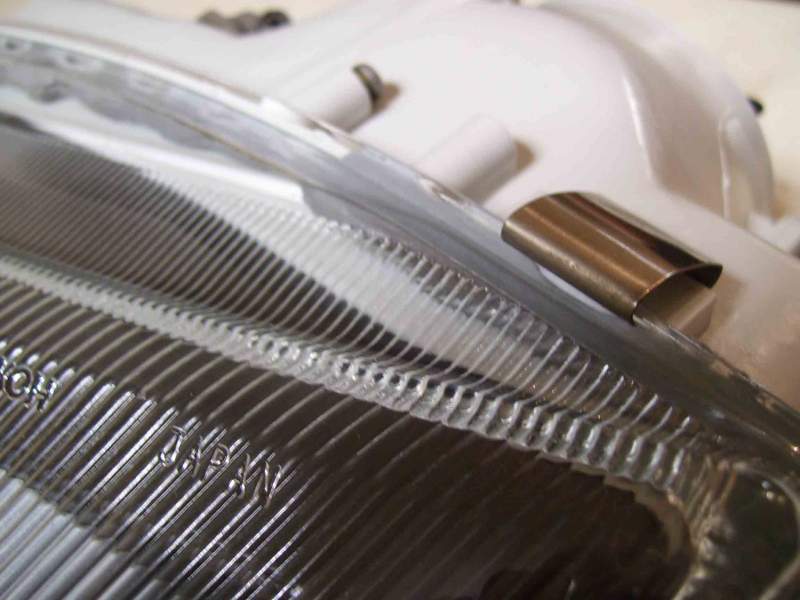
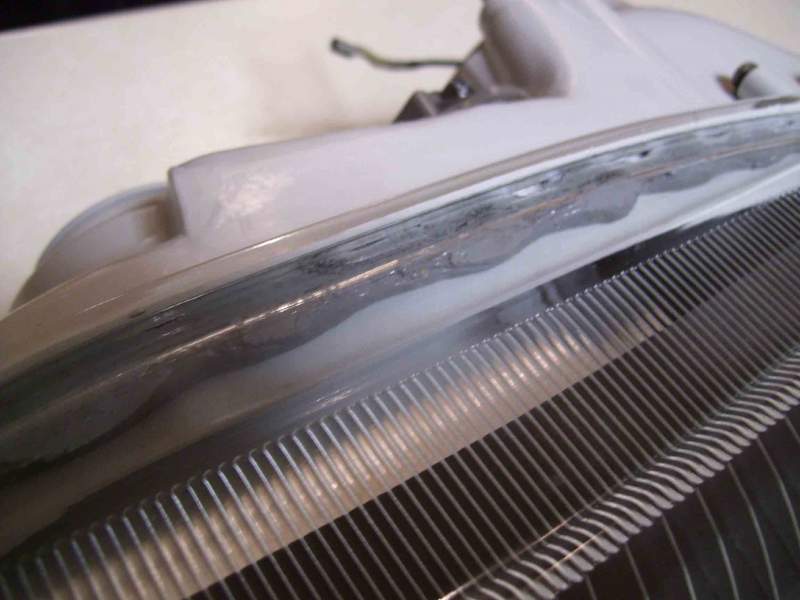
I understand what you are both saying guys, It's just that I am a bit obsessed with originality I guess. I think I see it as a bit of a challenge. Anyway, as luck would have it, (bad luck that is) it seems like my first attempt of re sealing the glass has not ended well. The top 2 corners where the clips are seem to have sealed well, also the 2 sides. But I am a bit concerned about the bit in the middle. It's when I look at the bottom right hand corner that my fears begin. I do not know why, but there appears to be no sealant compressed at that point, and I could not close the gap for love nor money. I am not too sure that there is any seal there at all. I think I will have to vary the amount of rubber I lay down as I think I had too much down the sides to compress, therefore making it difficult settle the lens all around.
-
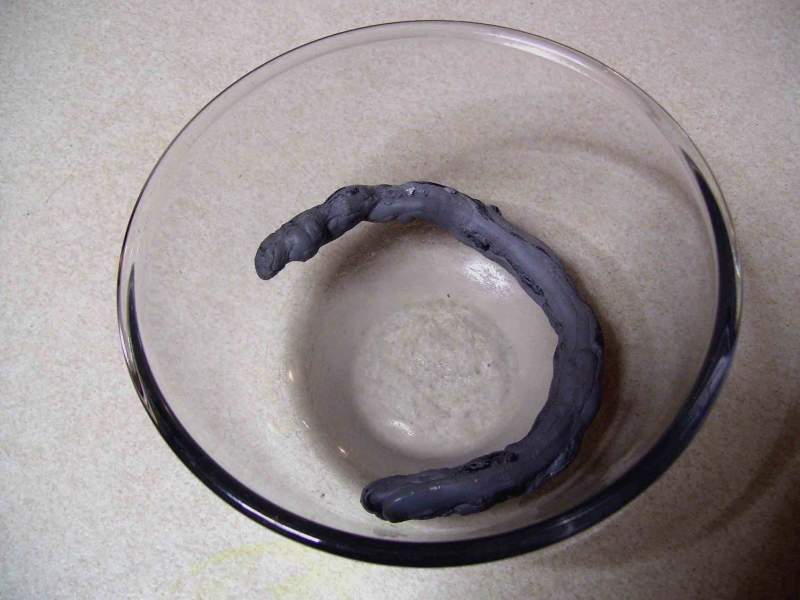
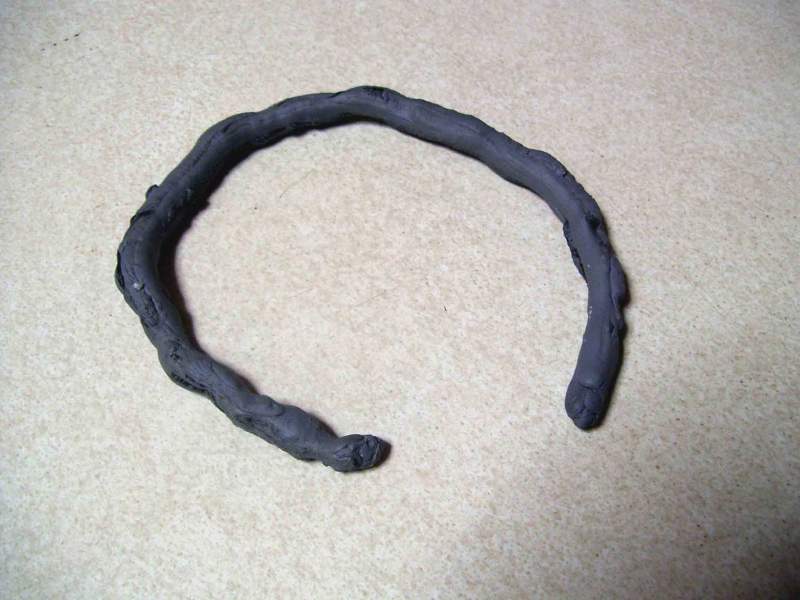
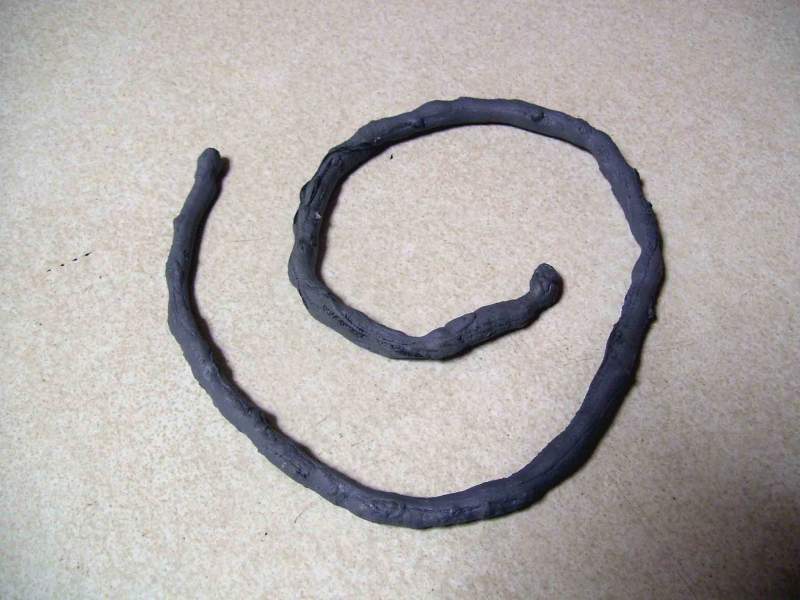
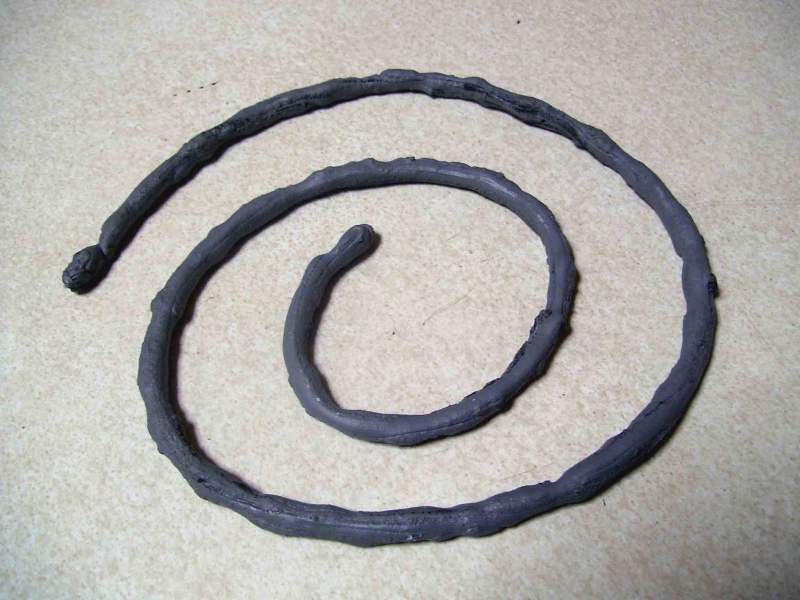
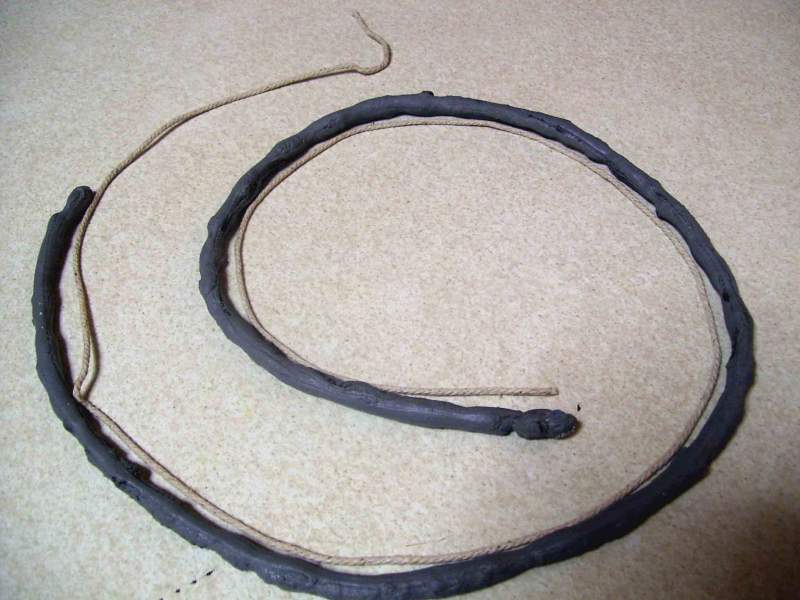
So, with the lights awaiting the re fitting of the glass, I decided to re use the existing grey rubber. First, I warmed all of the pieces collected from the right hand headlight and formed a ball. (well more of a lump really) lol I then in stages warmed and teased the rubber into a long circular strip to match a piece of string as a guide. I still have a little way to go yet, but it did go quite well for a first attempt. With a bit of luck, I may even get to seal the glass in tomorrow night.
-
Thanks Joely P. :thumbup1:
-
Sounds to me that you may have a cold start issue that may of coincidently occurred at the same time. Once warm, maybe it's worth checking your base idle along with your auxiliary air control valve system. Just a thought.
-
I know what you mean mate, MantaV8 suggested it also. I just could not bring myself to move away from the original layout. Mind you, It's still not to late to consider. Mmmmm. decisions, decisions.
-
Cheers. :thumbup1:
-
Try this link, it is an on line manual. http://z32.wikispaces.com/Factory+Service+Manual I think there is a diagnostic section for the climate control that may help.
-
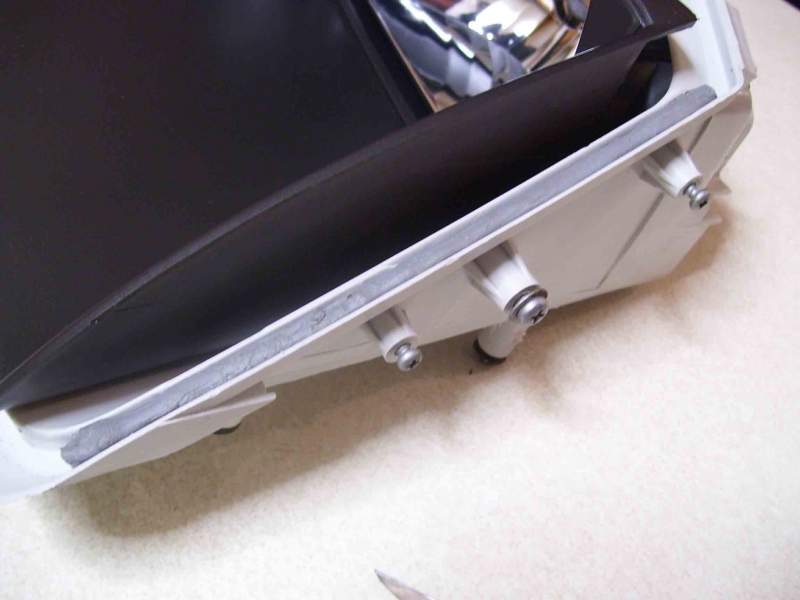
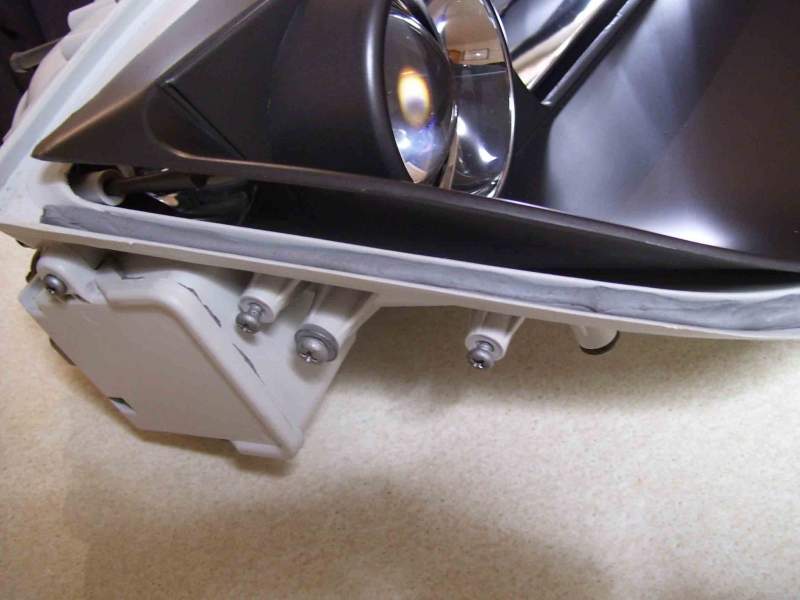
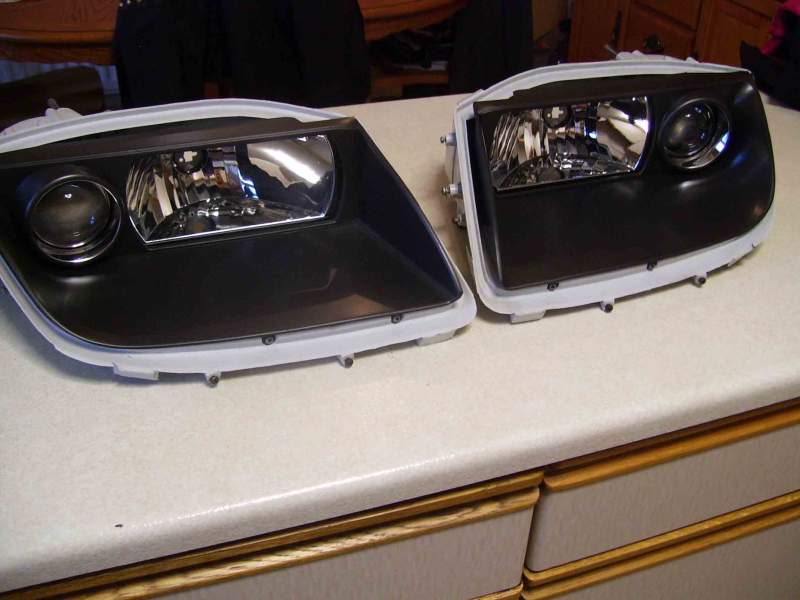
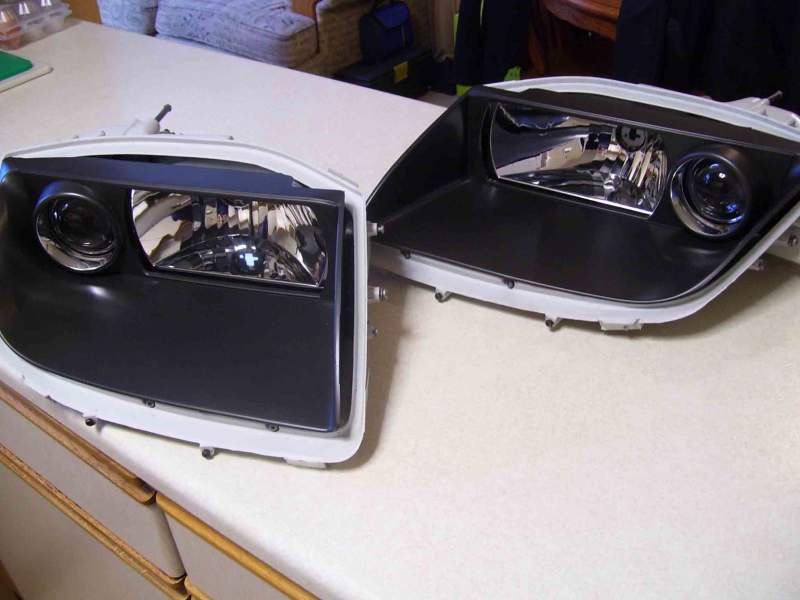
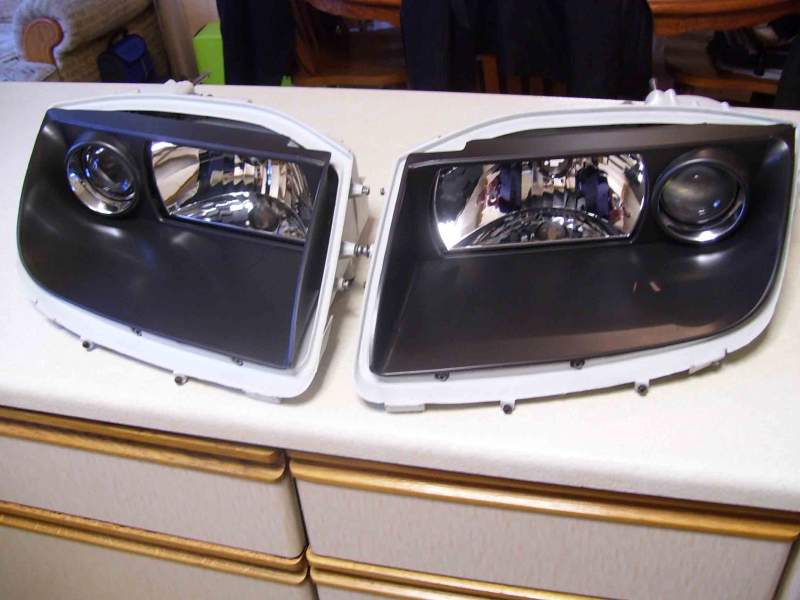
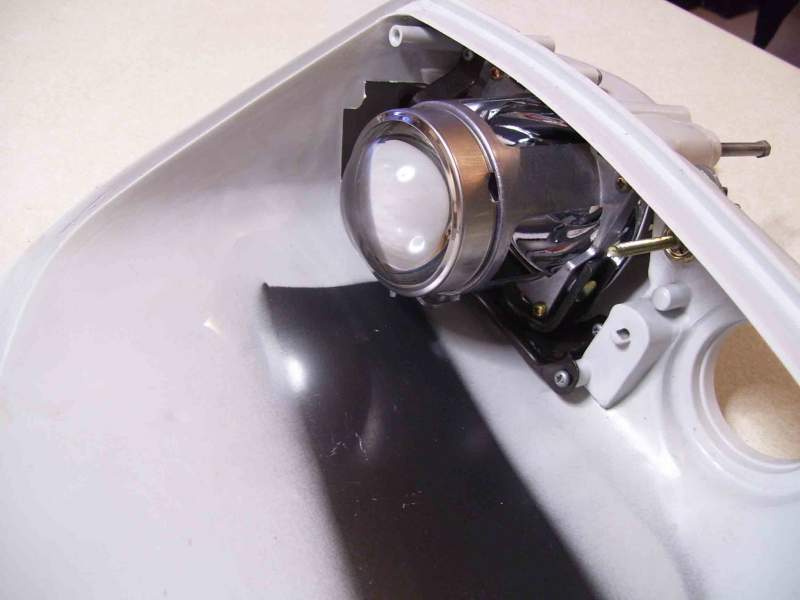
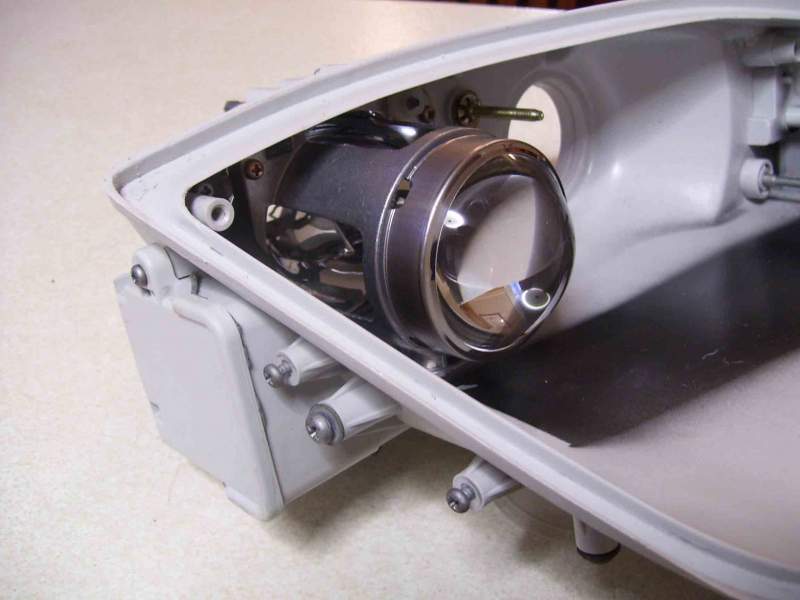
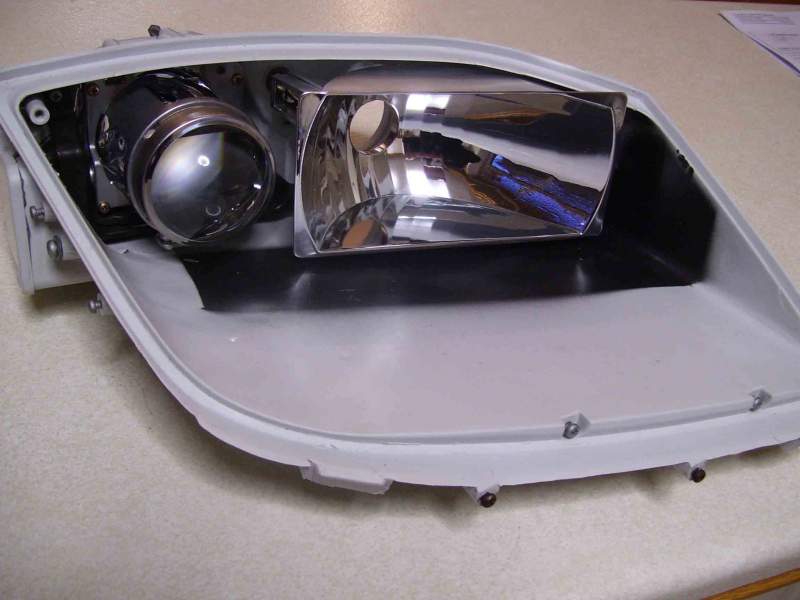
Starting to gather a bit of momentum now. Managed to get both sides up to the same stage. It's amazing how easy it is when you take things apart, but when it comes to putting the things back together it's so fiddly. Don't touch the glass, mind the shiny bits. bl**dy game and a half. Still, getting there. I am dreading putting the glass back on. The last thing I want to do is f**k it up at the last hurdle

-
What are the symptoms exactly?
-
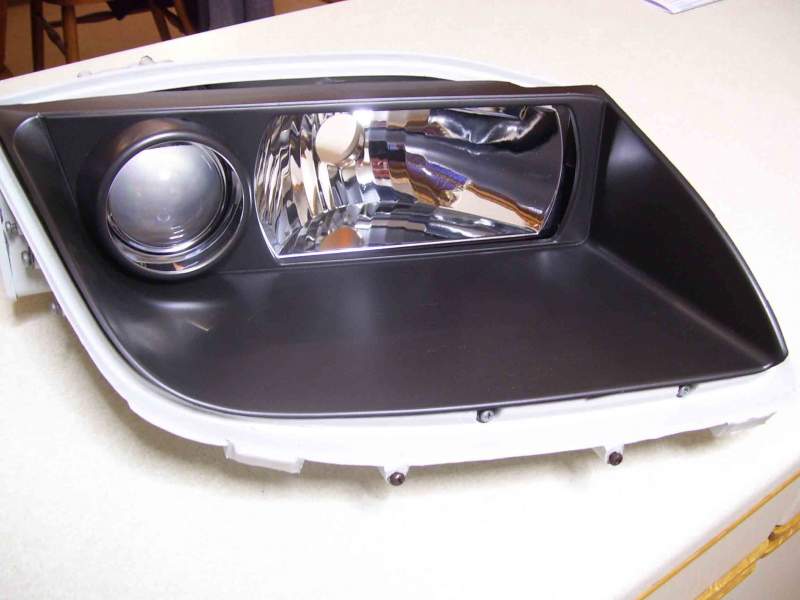
Cheers mate, It's just that there are a couple of imperfections in the finish that do not pick up well in the pictures. Massive improvement though, It's just that I am just a bit of a perfectionist I guess. Started to put things together tonight, just hope I have got everything in the right place. Should be OK as I must have took loads of reference pictures.
-
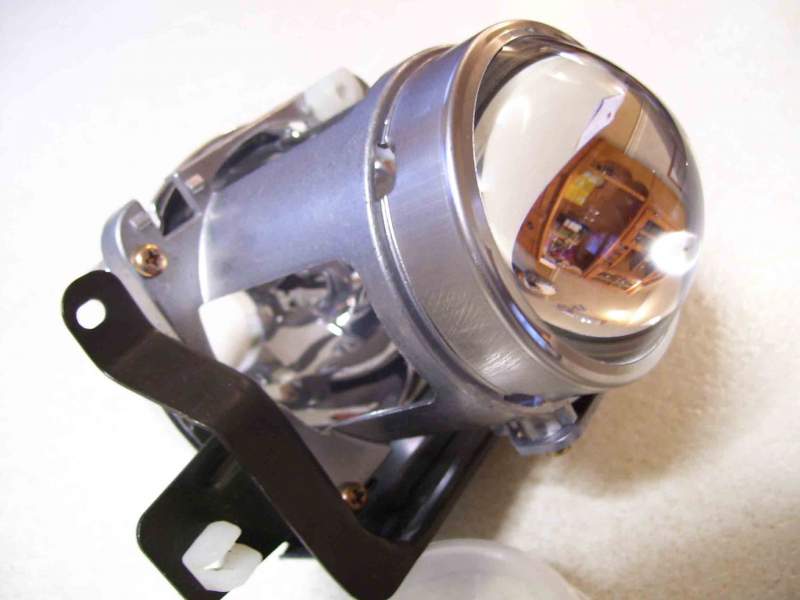
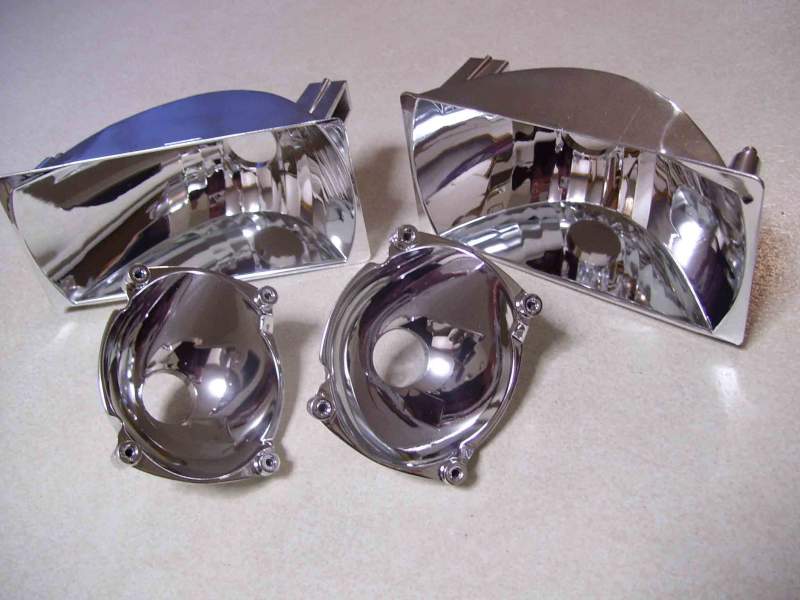
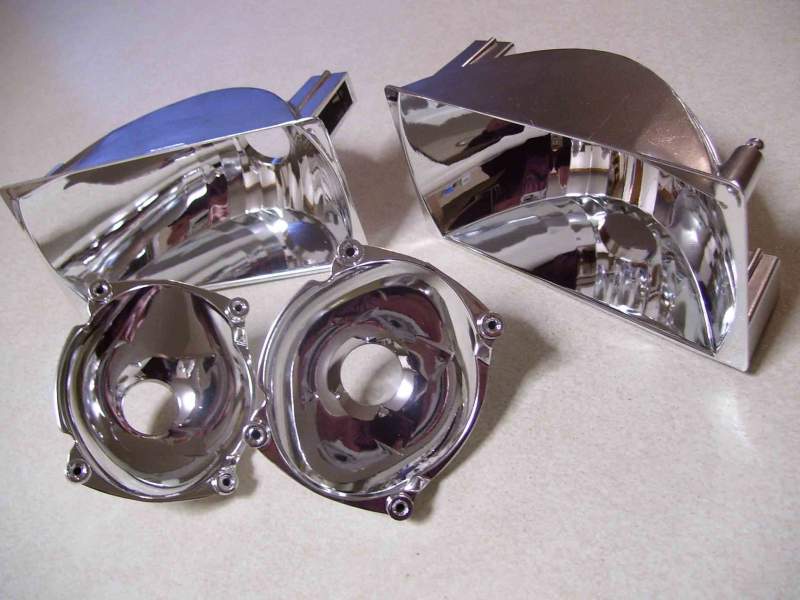
A bit of an update. Here are a couple of pictures of my reflectors after being vacuum metallised. They are not 100% perfect, but far better than before by a mile. Time permitting, I will start the re build over the week end.

-
Cheers for this. I have bought a small roll, but unfortunately it is very soft at room temperature, almost like soft putty. I fear it might be to soft once out in the mid day sun though. I think that the black maybe nearer the mark, will need grey though ideally. I will give them a ring tomorrow. Thanks for the links though mate, appreciate it.
-
Hit a bit of a problem. I was hoping to source new grey sealant for attaching the lens's back on. Can anyone help me get hold of any please? As a backup, I did keep the old rubber just in case. It would be nice if I could use new though. Any help would be much appreciated.

