
Everything posted by redwine300
-
I wish you a speedy recovery.
-
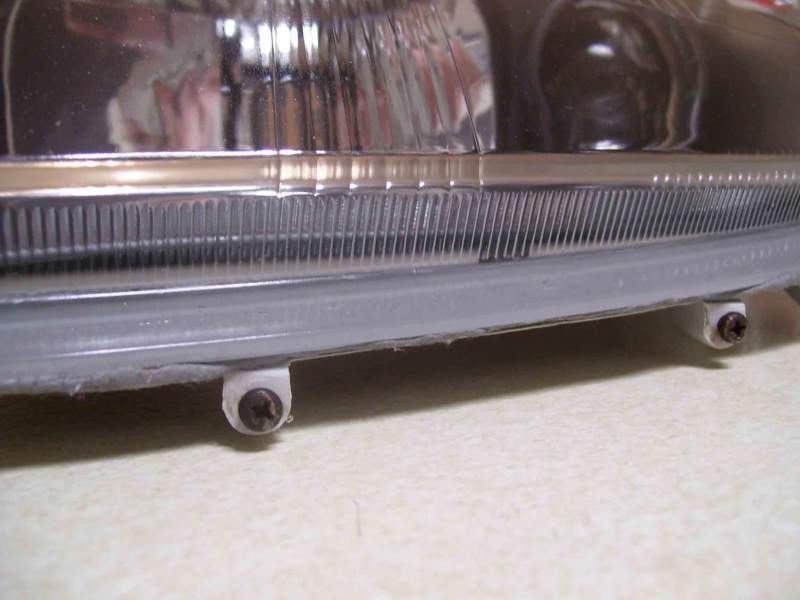
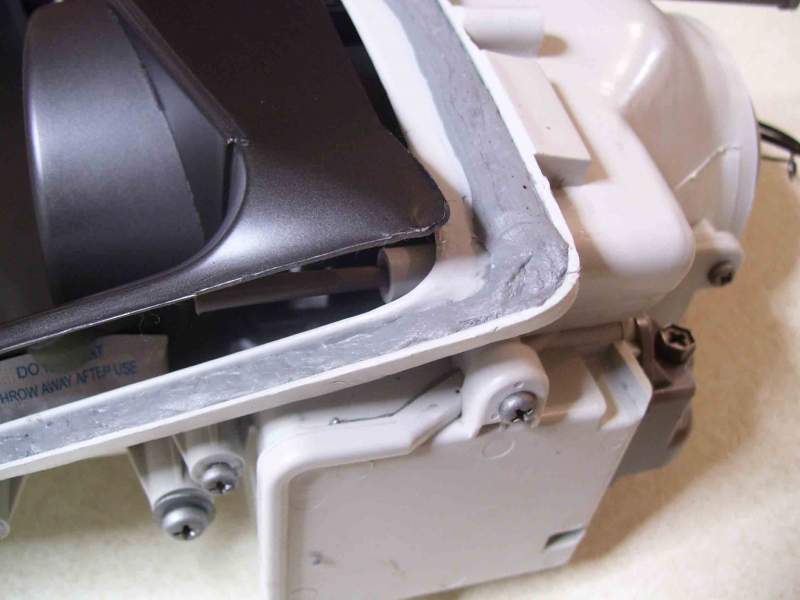
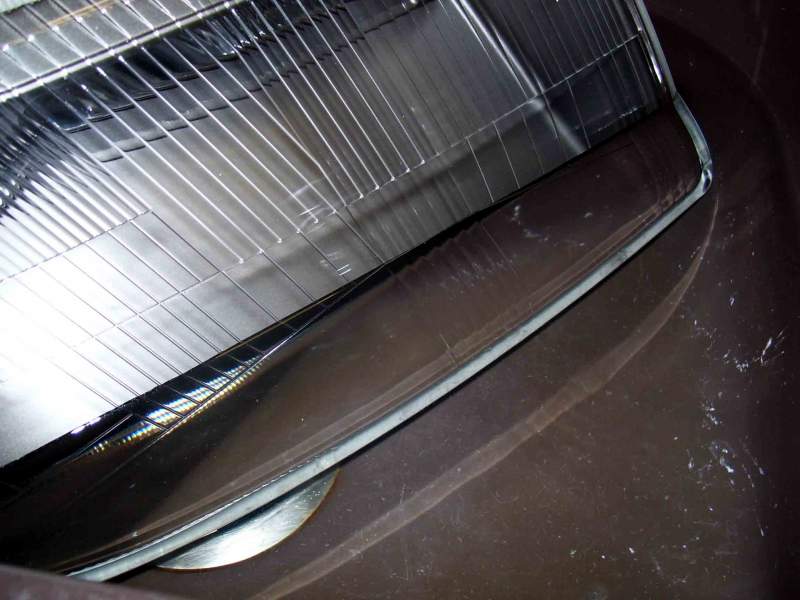
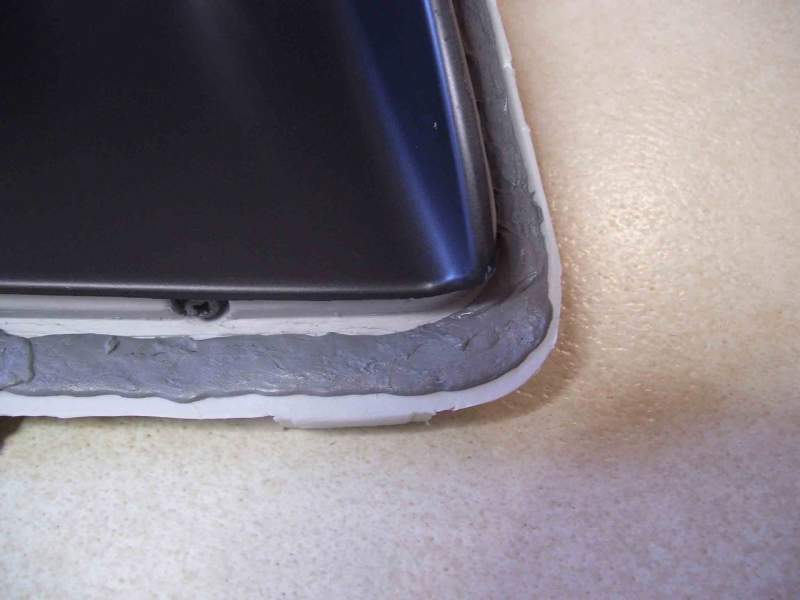
Well, after all my trials and tribulations, this attempt went really well. There was slightly more sealant than needed, which after what seemed like hours wrestling the thing around the kitchen work top, finally settled down enough for me to get the clips on. I am really pleased with the even coverage between the glass and the housing, I feel a lot happier that this will be a good seal. Believe it or not, I am actually contemplating trying to get the first one as good as this one. (Somebody stop me!) lol
-
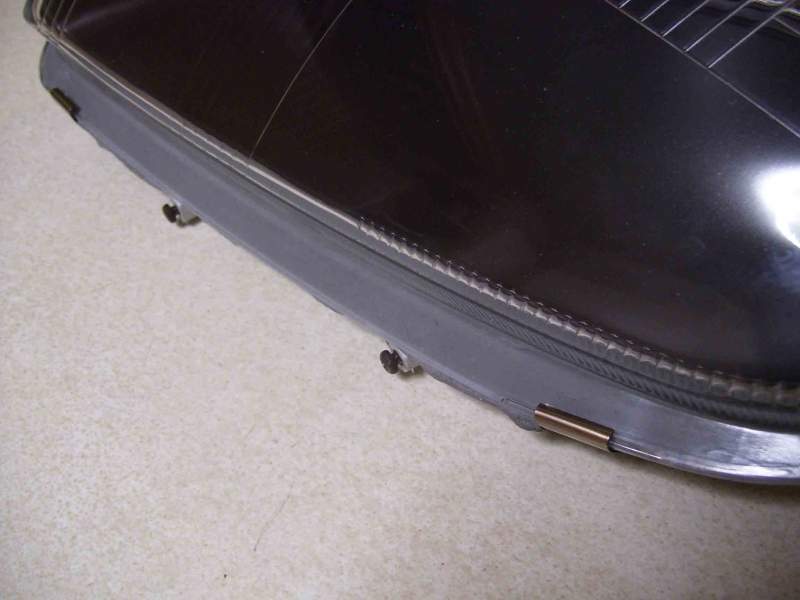
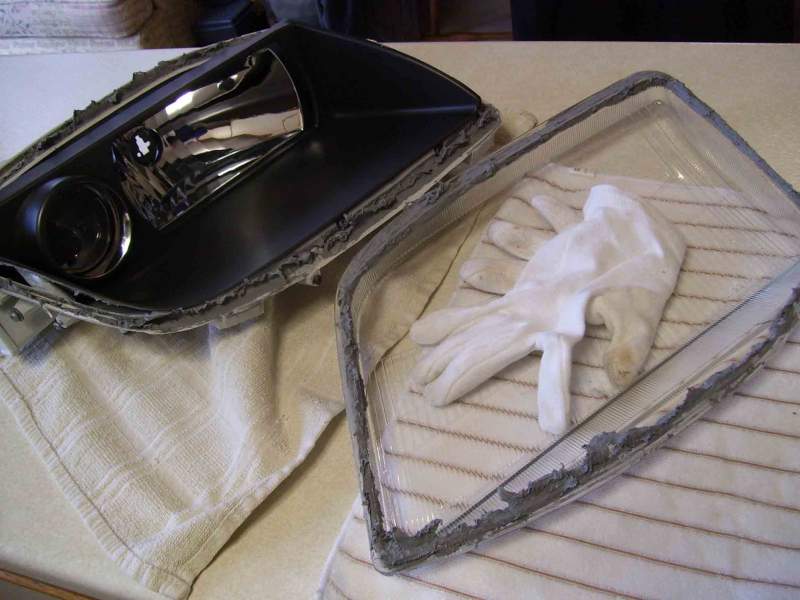
So, with one headlight sealed, (eventually) and put to one side, I have laid the rubber down for the second one. Taking on board my previous attempt, I have applied a greater thickness to both bottom corners and along the front edge. Hopefully not too much. doh. So tomorrow will be when I set the lens, seems like I have been on these for bl==dy ages. Oh yeah, I have. lol
-
Have a look at Janitol plus also. (e bay) I am actually doing the same myself, I think I will need to add sand to the mix so as to help agitate the internal discolouration. I like the vinegar idea, I would like to try this myself. Feedback please.
-
Ditto!!
-
As Si says, I would also recommend fitting new O2 sensors. I have recently changed both of mine and it was a pain. The last thing you would want to do is to go to all that trouble only to find one fail in the near future, at least you would have piece of mind. I went with OEM from Concept Z. http://www.conceptzperformance.com/Cart/items.php?Car_Type=NIS300&car_cat=Exhaust&CA=29&UID=201402230420162.24.156.34
-
I found the same on mine. Instead of removing the link, I adjusted the thing by using long nosed plies and gripped on the splines. Fiddly I know, but saved any dismantling.
-
As you are changing the fan and coupling over, maybe worth running her from cold without mounting them, (only for a few seconds that is) would be interesting to know if the problem still exists.
-
cheers mate.
-
Worth considering checking the condition of the pulley's them selves. Could be that the belt is starting to ride on the base diameter as opposed to contacting only on the angular flanks. Also, I know it is a bit of a pain, but if the flanks are particularly polished due to slippage, it may be worth roughing them up with some course emery cloth. You mentioned that you dash light flickers, this could be the result of belt slip due to poor pulley contact.
-
I would fill it slowly with water and leave to stand, this should in turn drive any remaining fumes out. It will also help remove any remaining detergent.
-
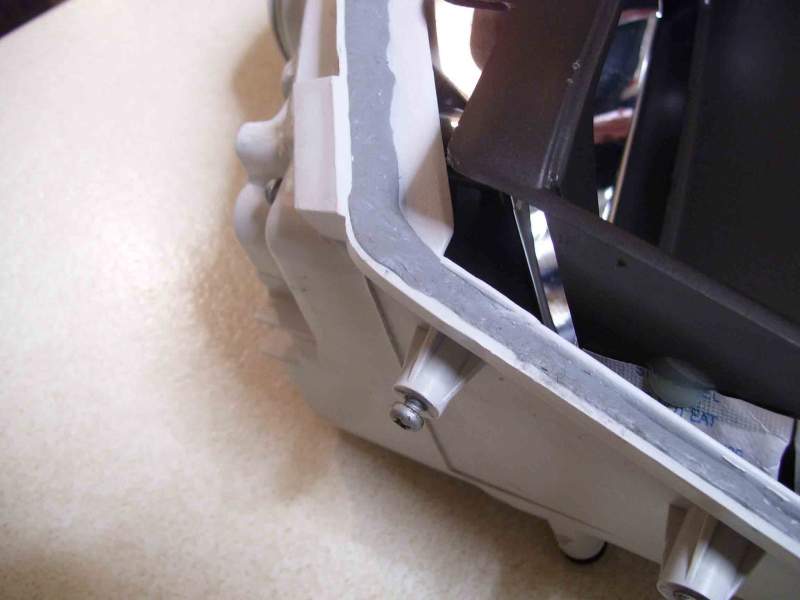
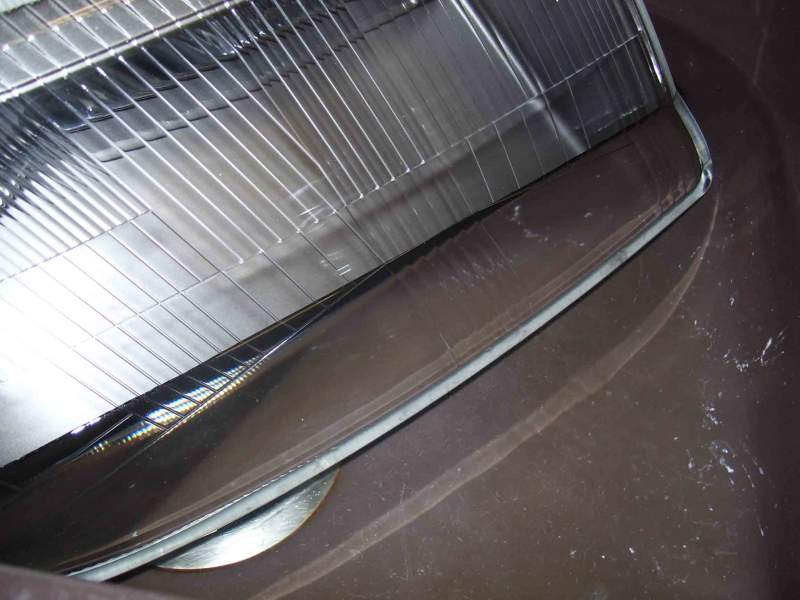
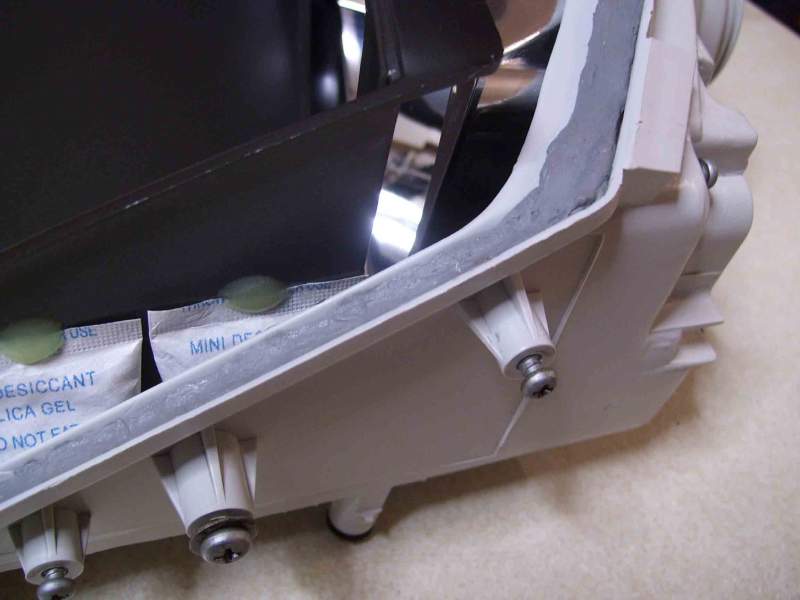
Well, after half an hour or so submerged in warm water there appears to be no ingress of water. Dried everything off and tried to see if there was any sign of a leak but appears not. Looks like this one has passed.
-
Not sure about a resistance check, but there is a voltage check that may help. If you can peel back the outer rubber cover of the connector attached to the MAF itself you can take a voltage reading between the second wire in from the left as you look at it and ground. With the engine up to temp with ignition on but engine not running, you should get 0.8 volts. Engine idling you should be getting between 0.8 and 1.5 volts. Hope that is of help.
-
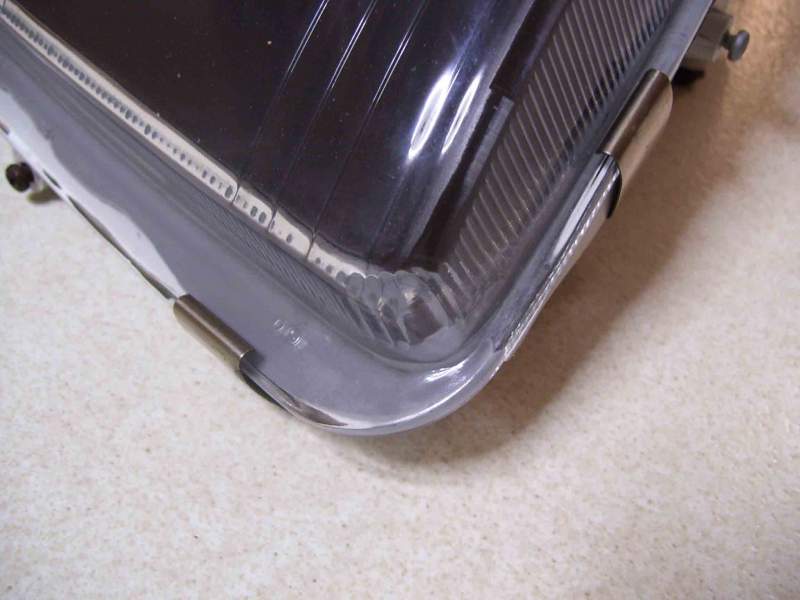
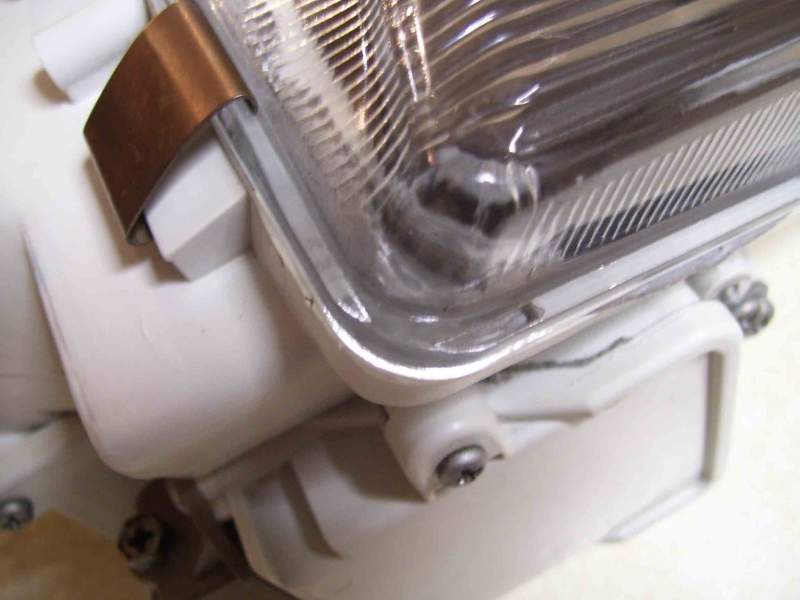
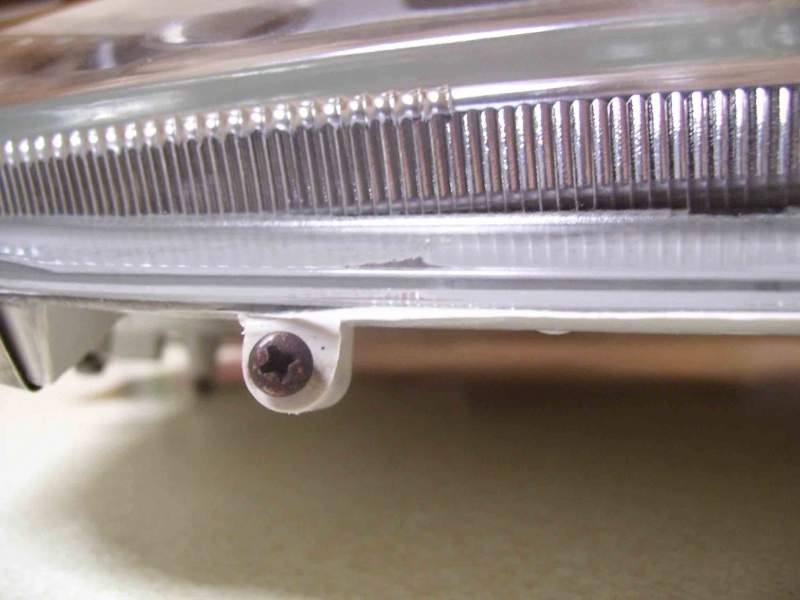
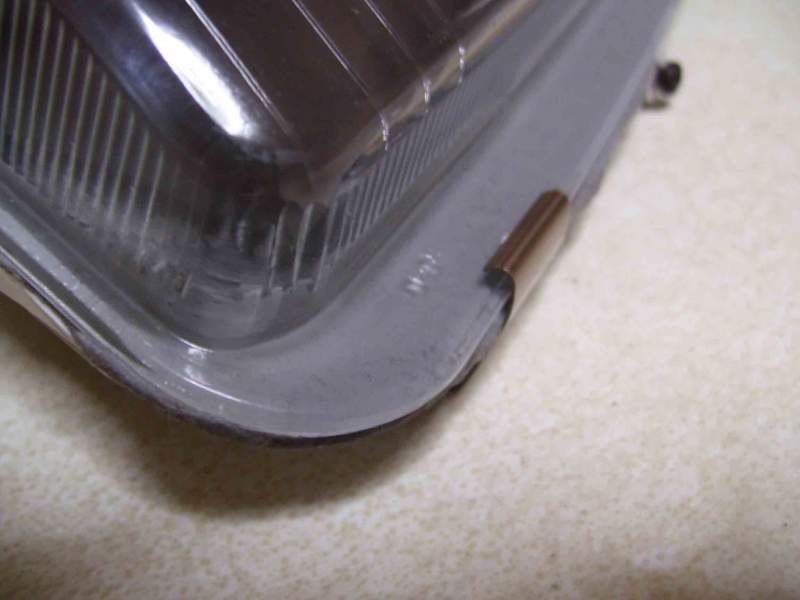
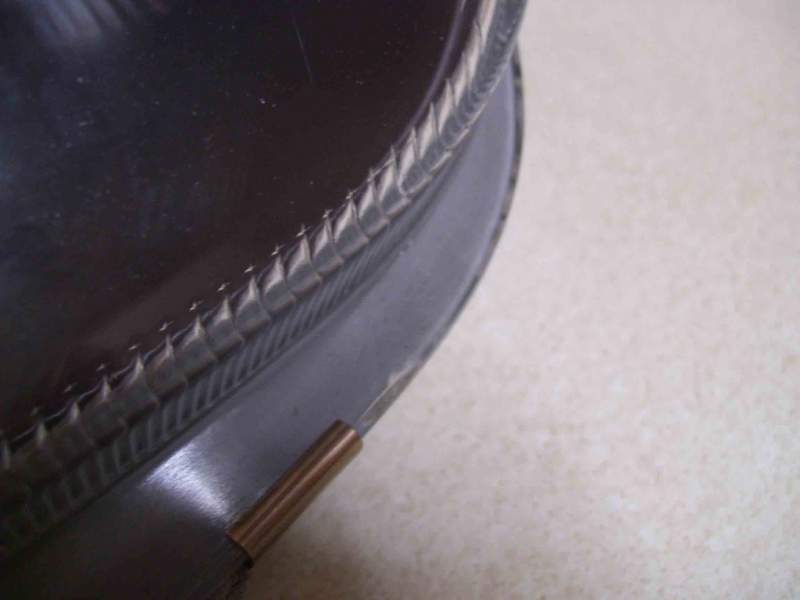
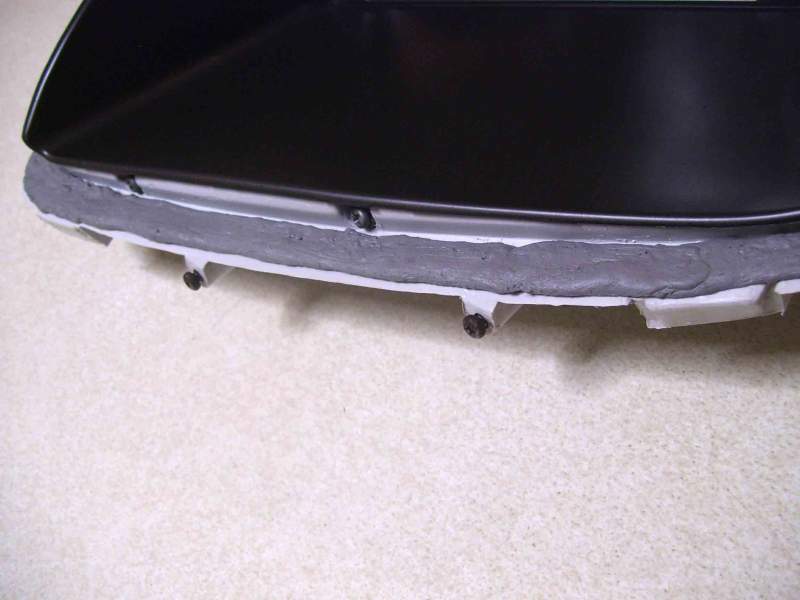
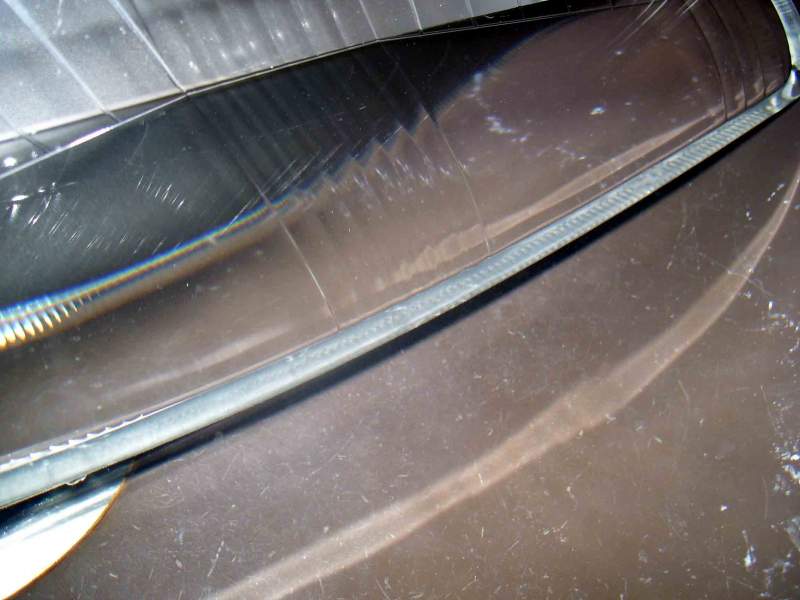
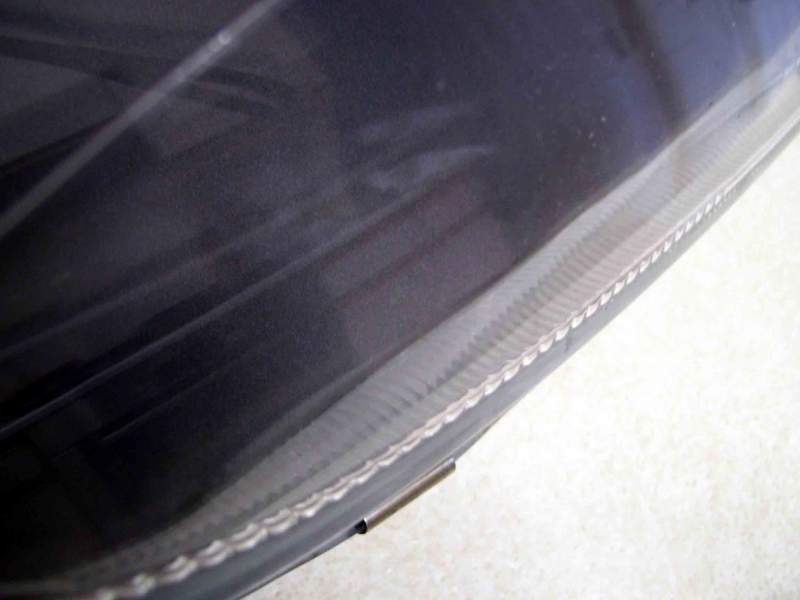
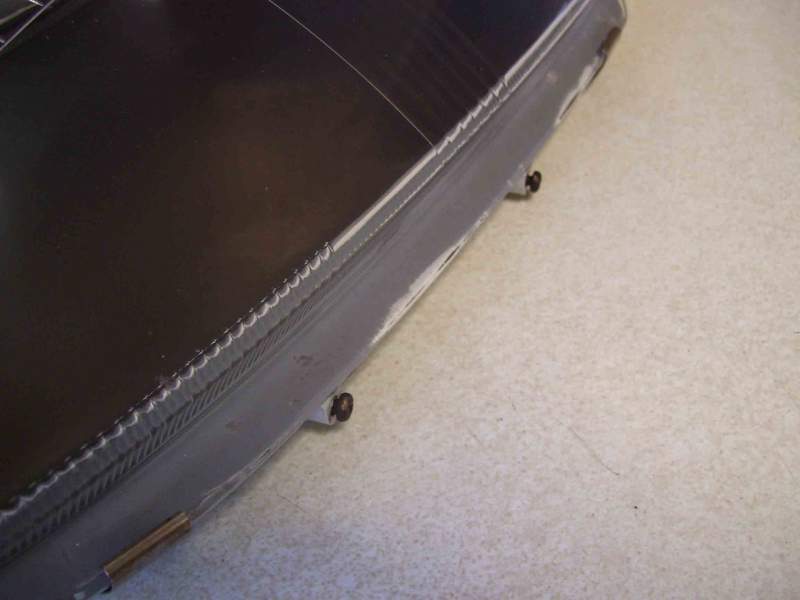
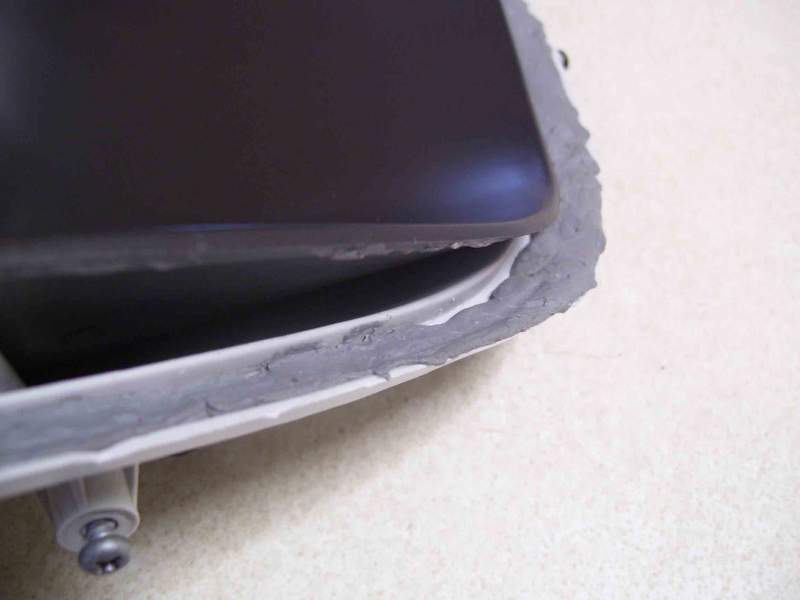
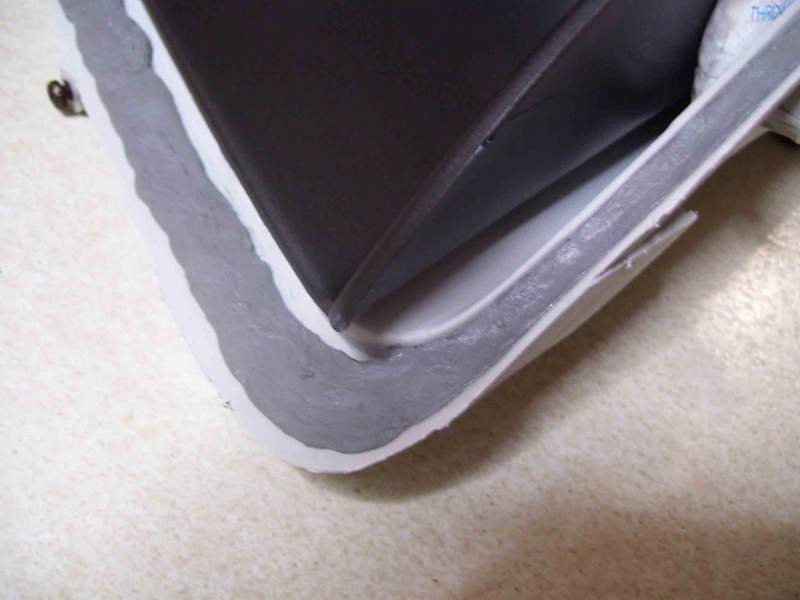
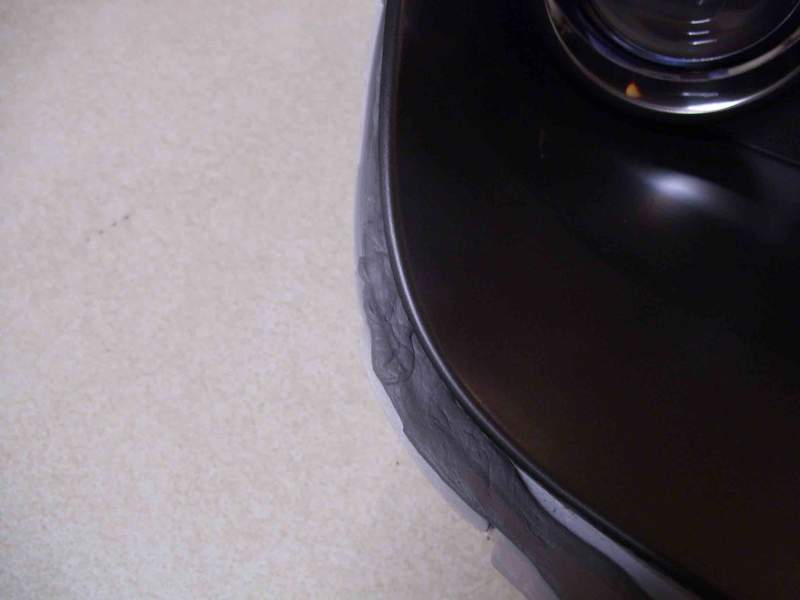
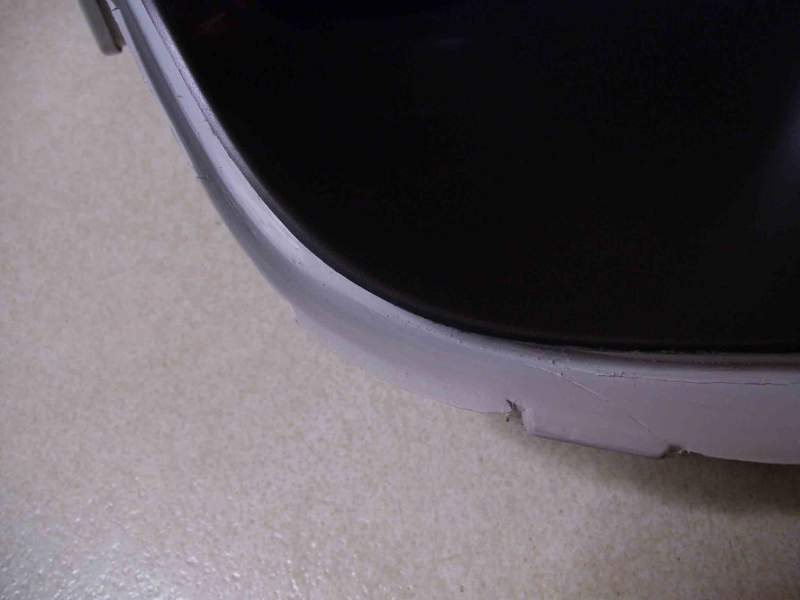
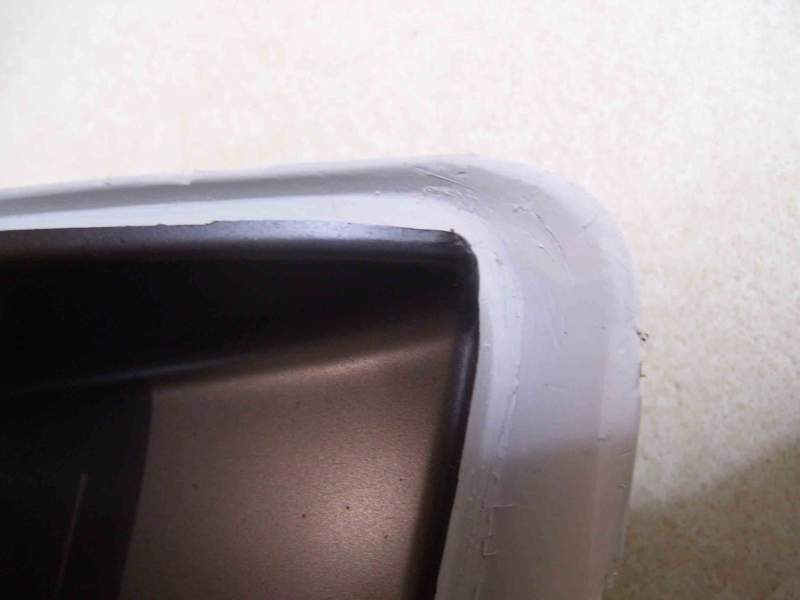
So, after what must be my fourth attempt, things are starting to look promising. I have managed to get a good seal to the top edge, top corners, sides and bottom corners. My only disappointment is the bottom leading edge. It looks like I was a little shy with the sealant. I thought that if it was going to seal, I might as well sit it in the sink full of water. At least although it does not look as good as the surrounding seal, if it kept the water out then it will do the job. So it is now sitting in 4 inches of water, fingers crossed.

-
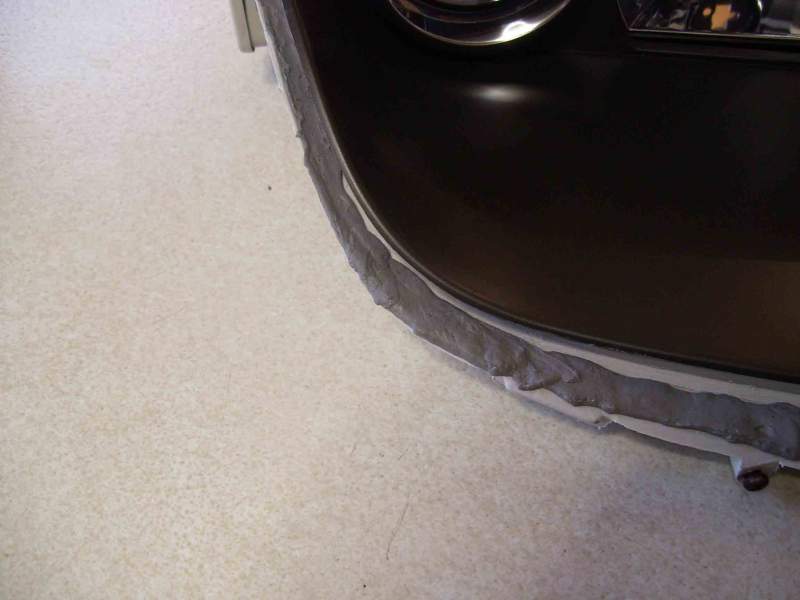
Nice idea znut. May try that when I re separate the first one I did. As you say, it certainly would save a lot of messy cleaning. Before I try yet again to seal the glass on this one, I shaped the sealant just a little more so as to get closer to the edges as opposed to just laying a round bead. I just hope that I have got the balance right between too much rubber and not being able to close the thing, and not too little so as to not give a good all round seal. I am beginning to regret bl**dy starting this. lol
-
This link may be of help with regards to error codes. http://z32.wikispaces.com/Automatic+Transmission+Diagnostics In the mean time I will try and find a "how to" with regards to filter change. I think it is a matter of dropping the oil pan but will check. Another link that maybe of use.. http://z32.wikispaces.com/Factory+Service+Manual
-
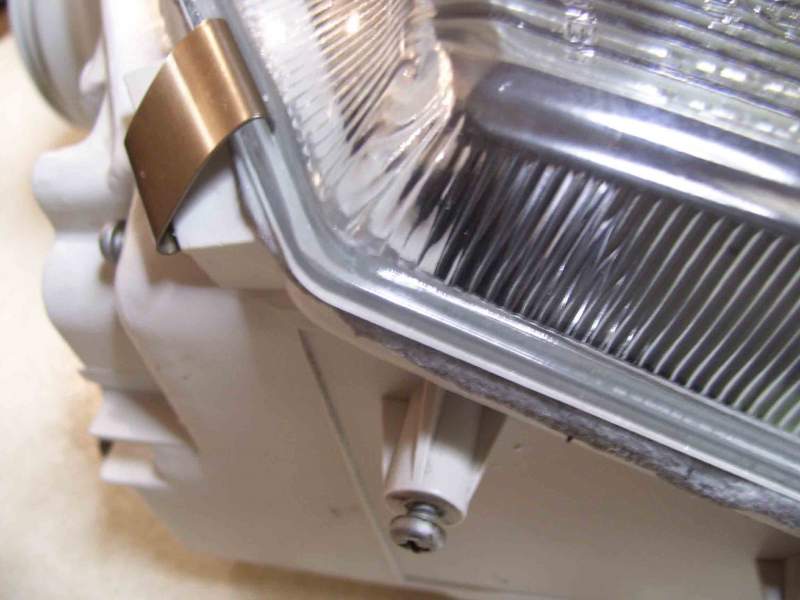
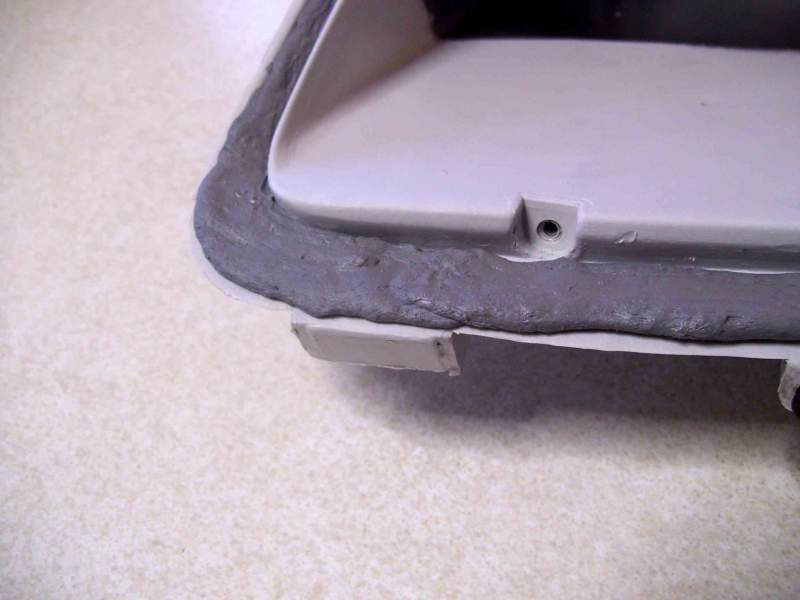
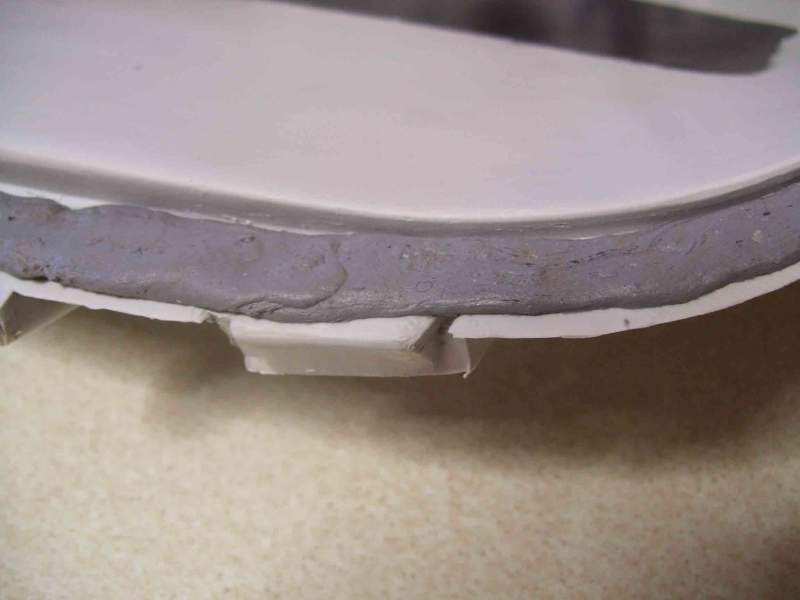
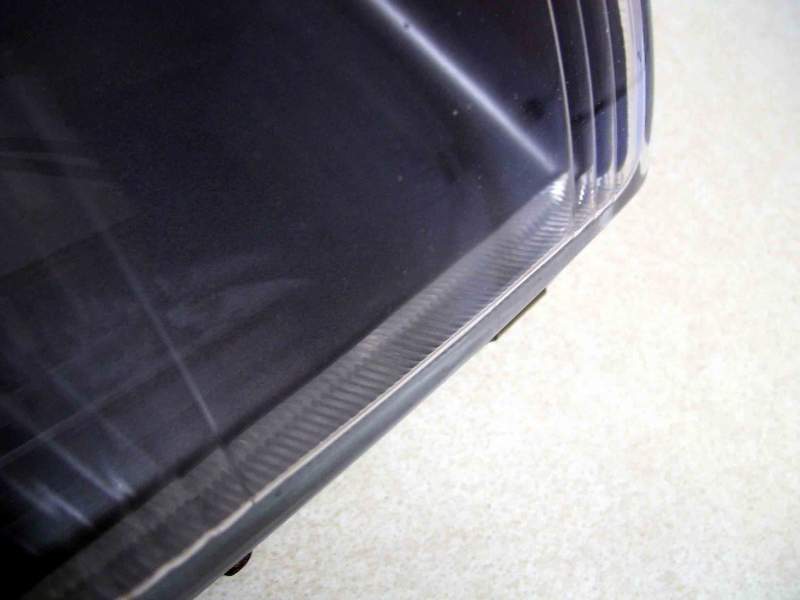
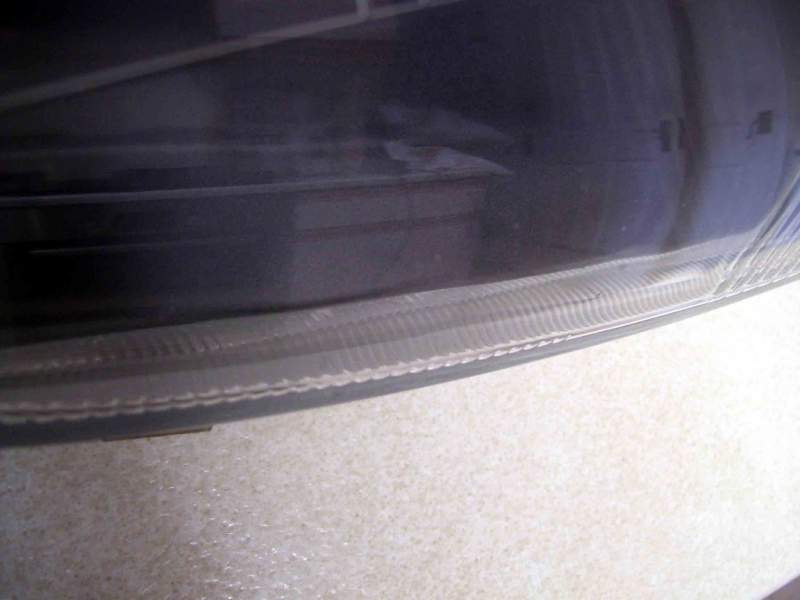
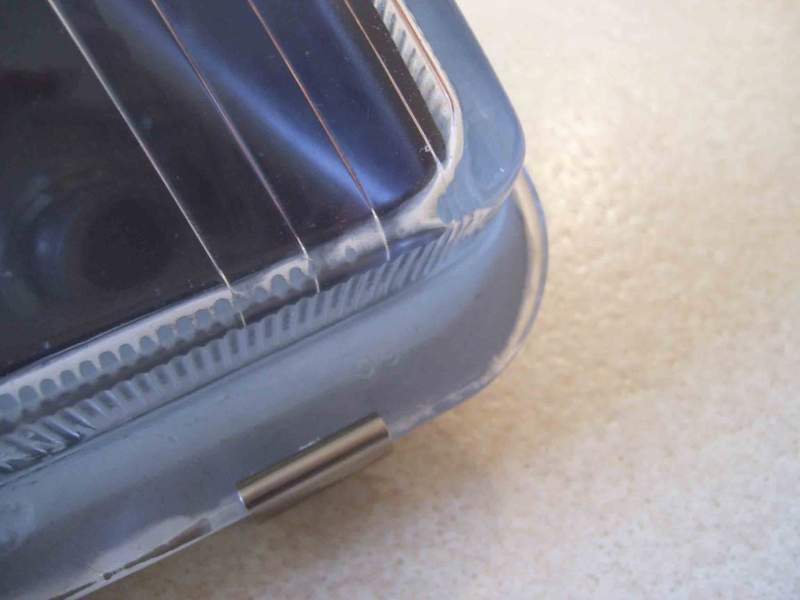
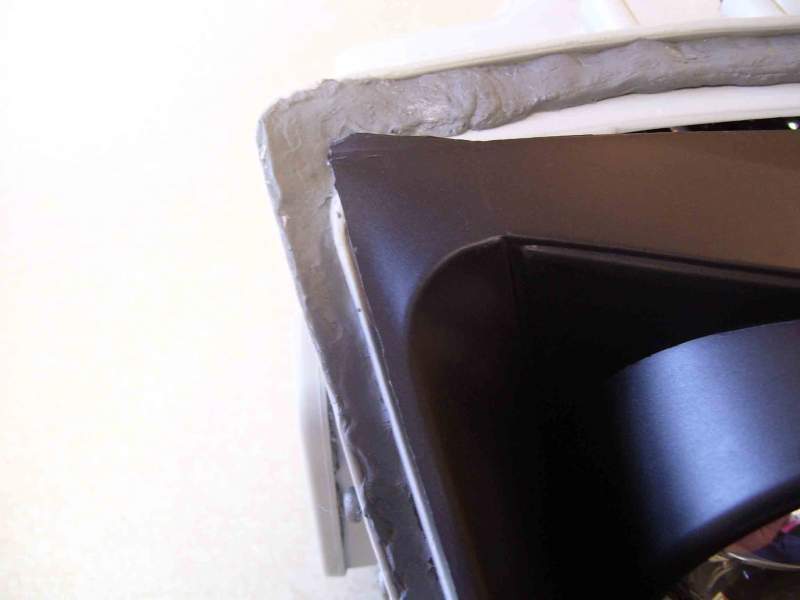
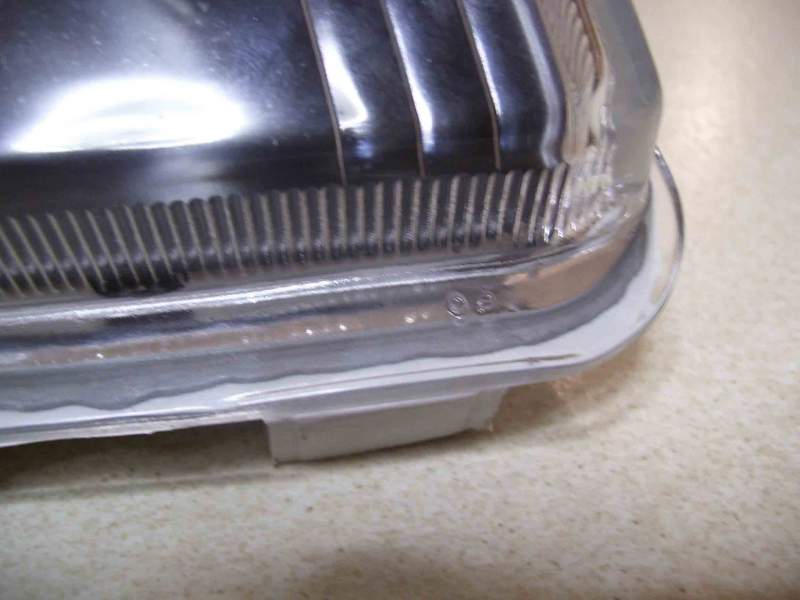
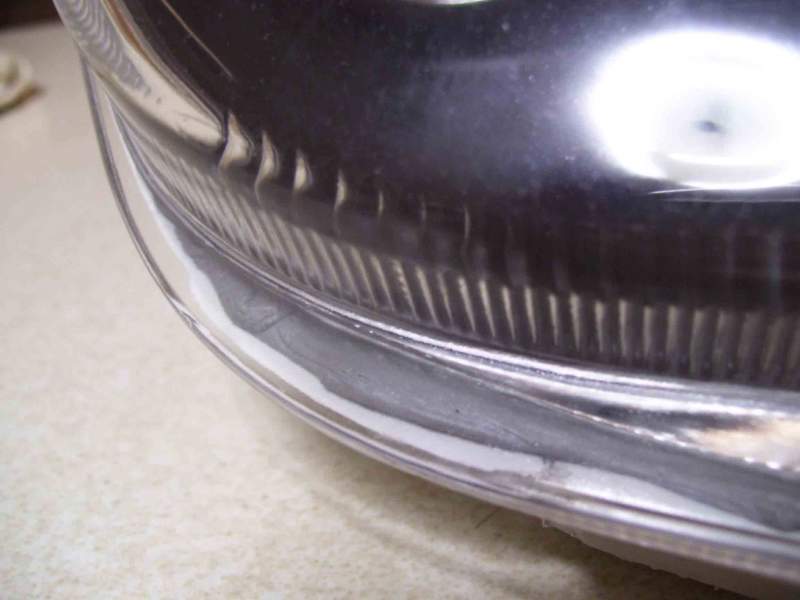
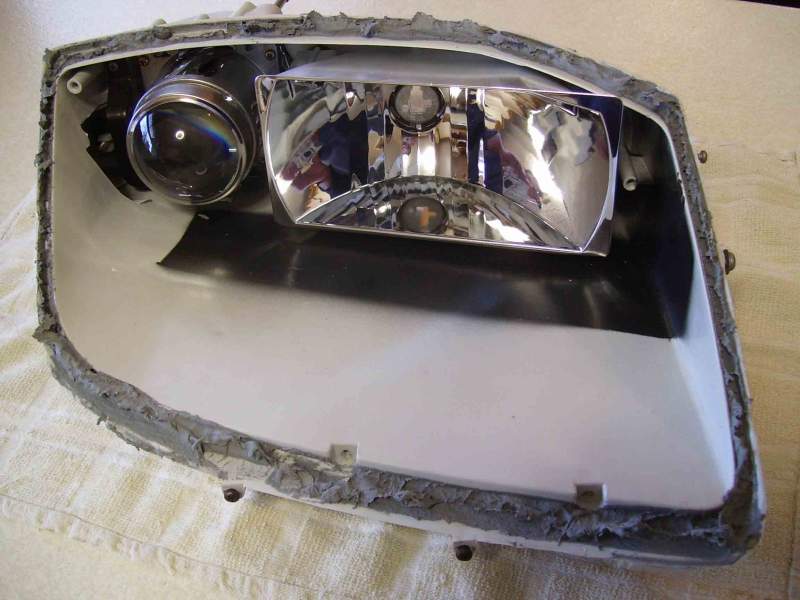
Decided to take a bit more of a practical approach this time as I know a little bit more about how the glass sits in the housing. Apart from being a bit more precise with regards to not only the amount of rubber I put down, (I think on my previous attempt there was too much) but also tried to place the sealant exactly in line with the sealing lip of the glass. I did this by placing the glass on several times and adjusting the position and amount as I went. I still have some smoothing and adjustment to do but I am almost there.
-
How is the fluid level in the box? Also, a bit of a long shot I know, but it may be something as simple as a clogged filter within the box itself.
-
Well, decided to split the headlights yet again in the hope that I can achieve an all round even seal. Looking at certain areas, I have since noticed that the sealant was not laid down correct on my previous attempts. I have since discovered that the overhang of the black insert varies, especially near the bottom corners. So rather than pushing the sealant up against the vertical wall of the casing, I will stay away a few millimetres. Not only will this contact the glass better, it may even allow more room for displacement. I can but try.
-
I too have had a viscous coupling engaged from cold, but it did not result in belt squeal. The one time I did have a squealing issue from cold was from a slightly loose adjusted belt. The other thing of concern is that you alternator might be on the way out and causing undue load on the belt itself.
-
Mmmm ok, good point. However, there are several belts that maybe causing the problem. It maybe a case of a process of elimination. Once you have determined that it may not be the fan belt, we may need to look at the power steering/alternate belts etc'
-
Are we sure that it is in fact that fan/coupling is the problem? May be worth removing the fan and coupling altogether and firing her up, sounds like a belt/pulley problem with regards to squealing. Even if the coupling is driving the fan or not, you should not have noise issue.
-
Nice video Jeff. I know our boys in blue come in for some stick, but it is in events like this that really show their ability and camaraderie. I thought the cooperation of the general commuters was fantastic also.
-
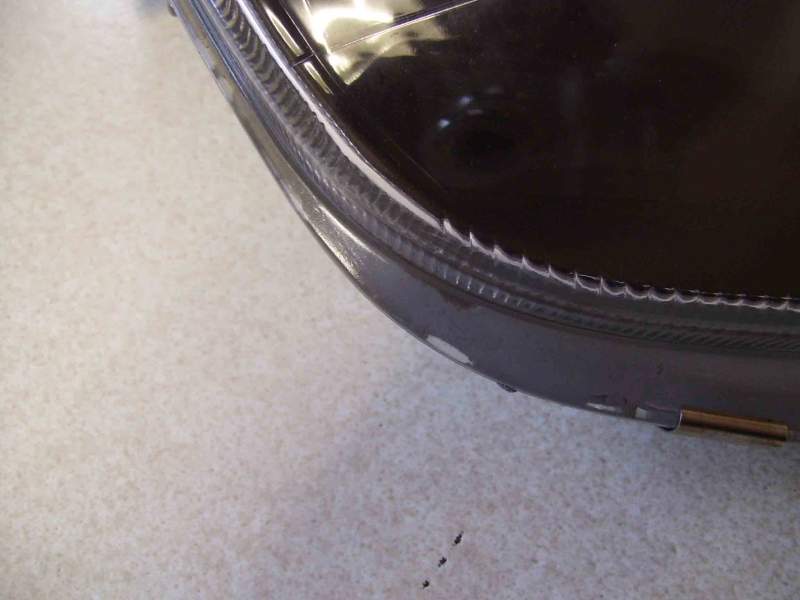
Well can not believe it!! failed a second time. That said, this attempt was better due to the better placing of the sealant but still I have gaps!! Looks like they will both be coming apart for yet another go. I will get there in the end. I hope.