Everything posted by redwine300
-
True, but I have had it 12 years now and I know the underside like the back of my hand. It has only just appeared, that's what is so puzzling.
-
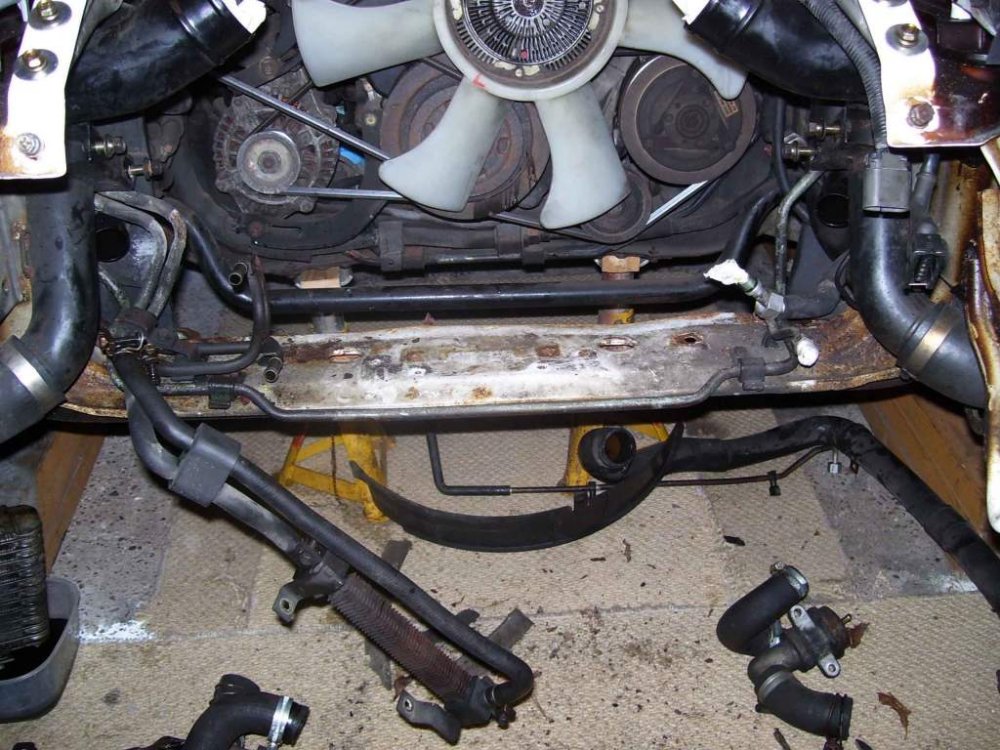
I take your point Hellraiser, but the car has never been jacked up using the cross member, I always use the sub frame along with a block of wood to spread the load. I just can not understand why the suspension arm appears to have moved upwards, it looks so robust in comparison to the rad support. looks in very good condition also. Maybe it is the fact that the centre part has dropped down under the weight of the radiators? I just want to be sure than when I unbolt the suspension arms nothing moves, I will need to take accurate dimensions before cutting out.
-
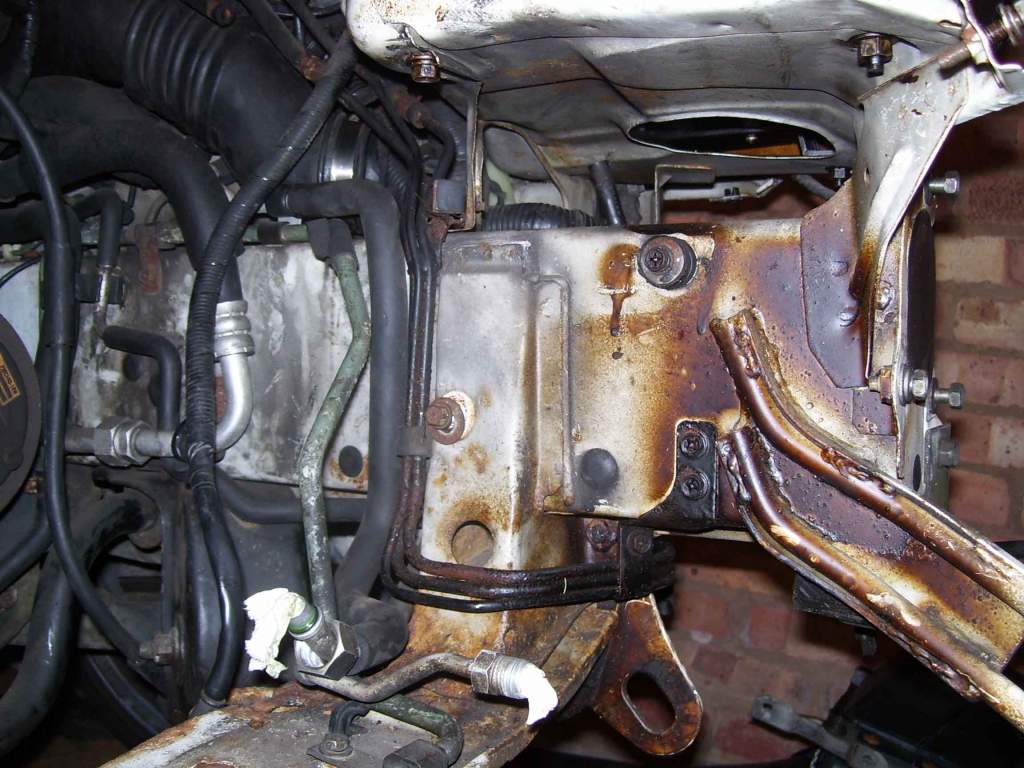
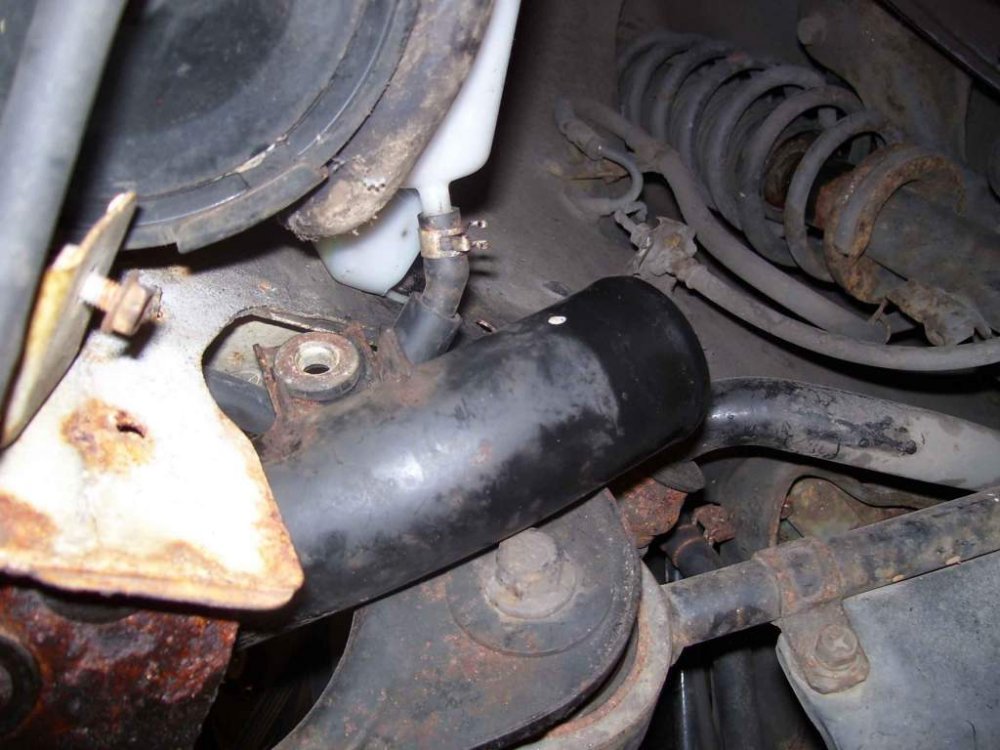
Cheers Mantav8, I think we may have some laying around at work. One thing that is concerning me is this, how come the underside of the cross member has collapsed upwards at the anchor points that are directly attached to the chassis? I am reluctant to release these as I am worried they may be under tension. You can see the right hand side one in post #28 coloured black. Should I disconnect the suspension arm first ?
-
Nice idea Steven, I'll have a look at that.
-
That's a great idea mate, they are over 10 years old! :oops: I like the idea of welding in a brace bar, nice one.
-
:biggrin:
-
Called it a day at this point. Enough's enough!
-
More photo's

-
Cheers guys, I think I am going to need therapy after tonight's exploits, talk about frustrating. Anyway, after 3 hours of agonisingly slow progress, I managed to wrestle free a couple of more bits that were in the way. If this little lot ever goes back together right, I will eat my hat!

-
Yeah, I know what you mean Steven, it just seems a distant thought at he moment. Still, l have tackled worse. Well that's what I keep telling myself.
-
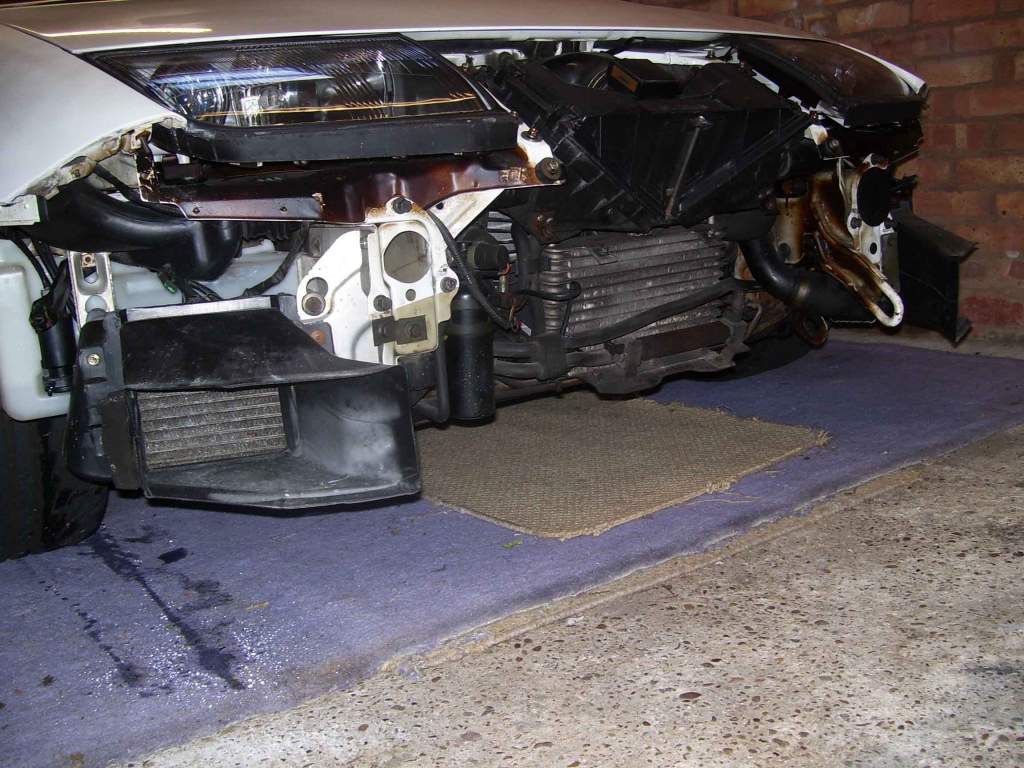
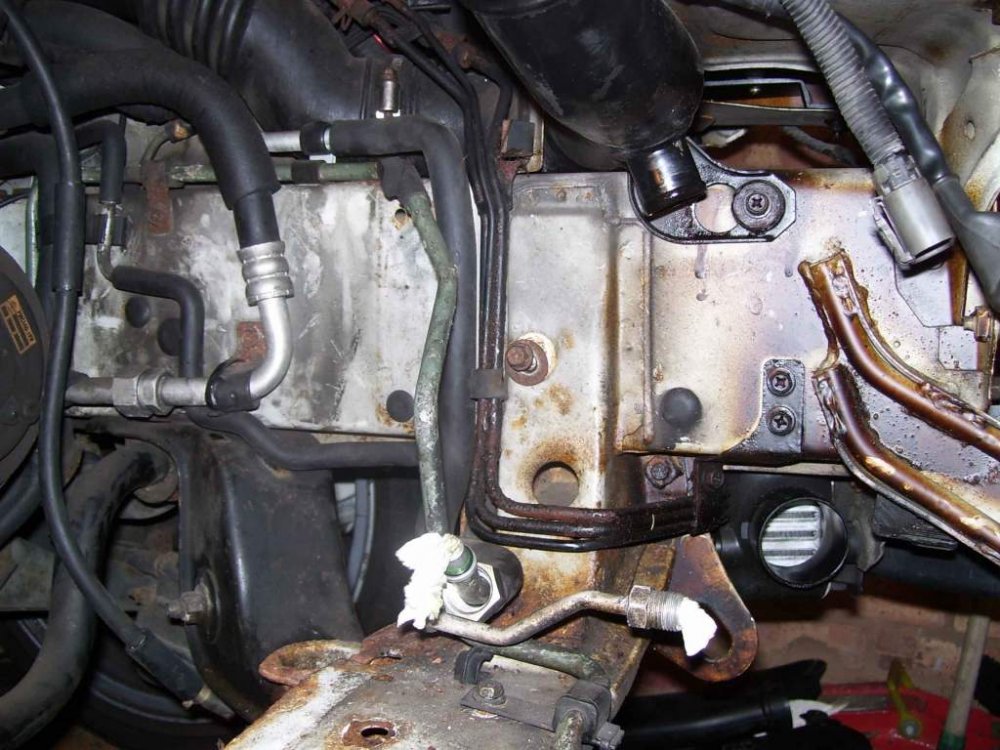
Well, after a 2 hour spell, I managed to get most of the remaining obstacles removed. This left me a clear sight of the corrosion, depressing. No turning back now!
-
Thanks Steven, I'm not sure what to make of it all. In the last 18 months my zed has only covered 1500 miles max and the oil smells and looks as though it is new. However, the oil I drained from the cooler is significantly poor in both colour,clarity and smell. To me it looks just the same as the original oil I drained a year and a half ago.
-
That's interesting Steven, my oil pressure hits 90psi when cold, drops to about 15psi when warm. I need to do some investigating as my oil was changed 18 months ago and is still in very good condition. Not to dispute previous thoughts, but surely the oil cooler would have activated during that time if this is the case? The last thing I want to do is to do is disrespect previous advice, just want to be sure that the oil system is performing as it should.
-
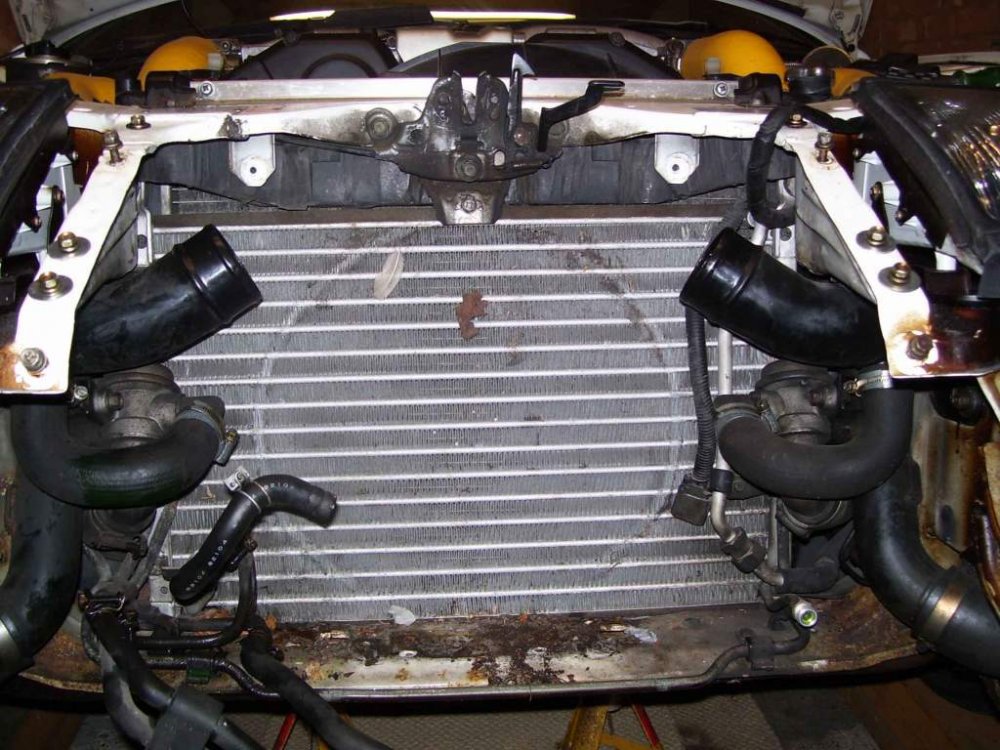
Thanks again Lymon for your continuing advice, appreciate it. So, hopefully I will drain the main coolant radiator and remove it tomorrow evening. From there on I should be able to remove he condenser? I have as you suggested, soaked the connections with penetrating fluid, should be good for tomorrow. I am looking forward to seeing the cross member and how it is attached to the shell.
-
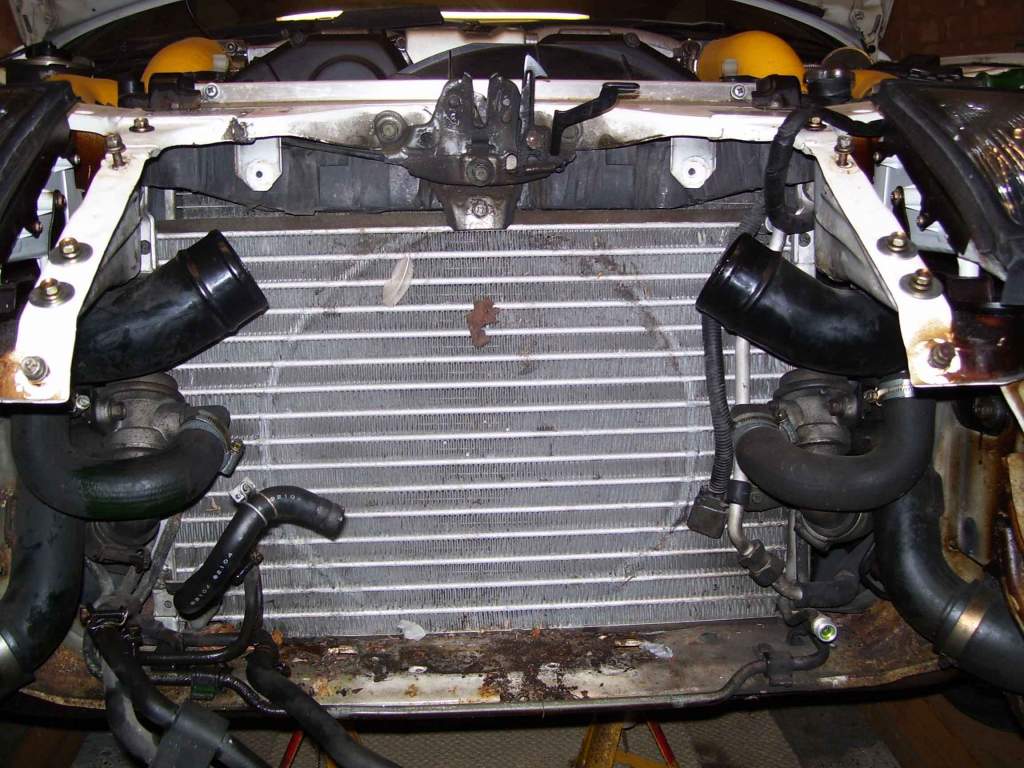
Cheers mate, Having had a closer look, it looks like I will have to take the main rad out so as to access the condenser from the engine bay side. In the mean time, as you say, the recircs and associated pipework can come out.
-
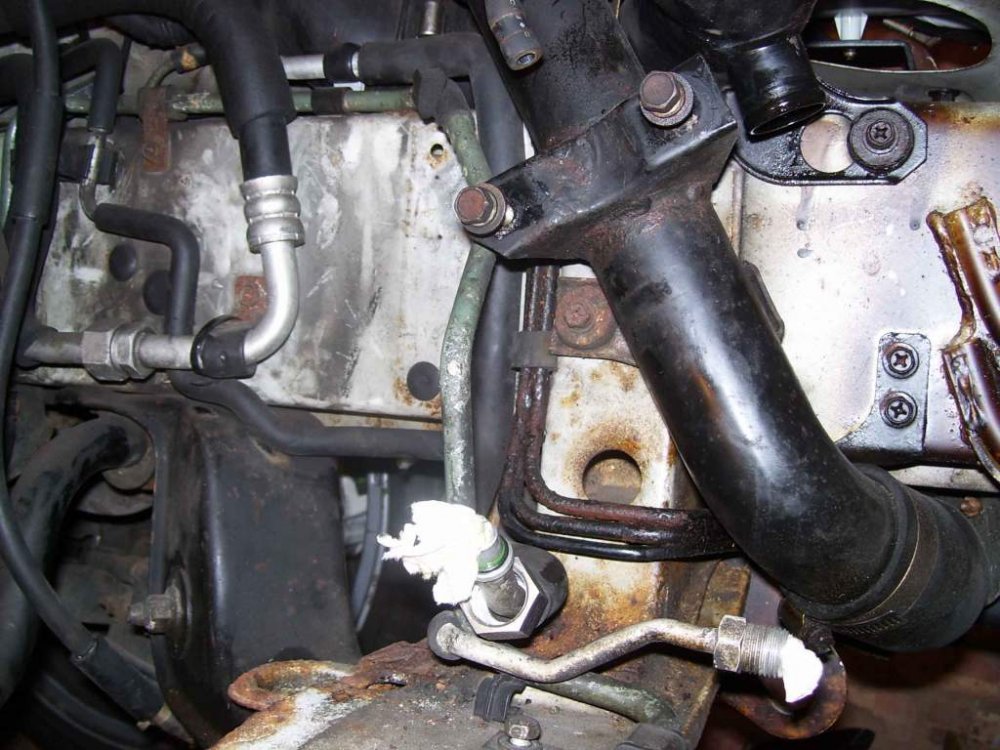
Well, got a bit stuck, so called it a day. Need to step back and figure my next move. Here's where I ended up.
-
Thanks Andrew, That helps me understand greatly. Is there a possibility that the regulator to this may not be working? It's just that I don't necessarily drive her hard, but would of thought hard enough for the cooler to play it's part? Something I would like to check whilst everything is accessible.
-
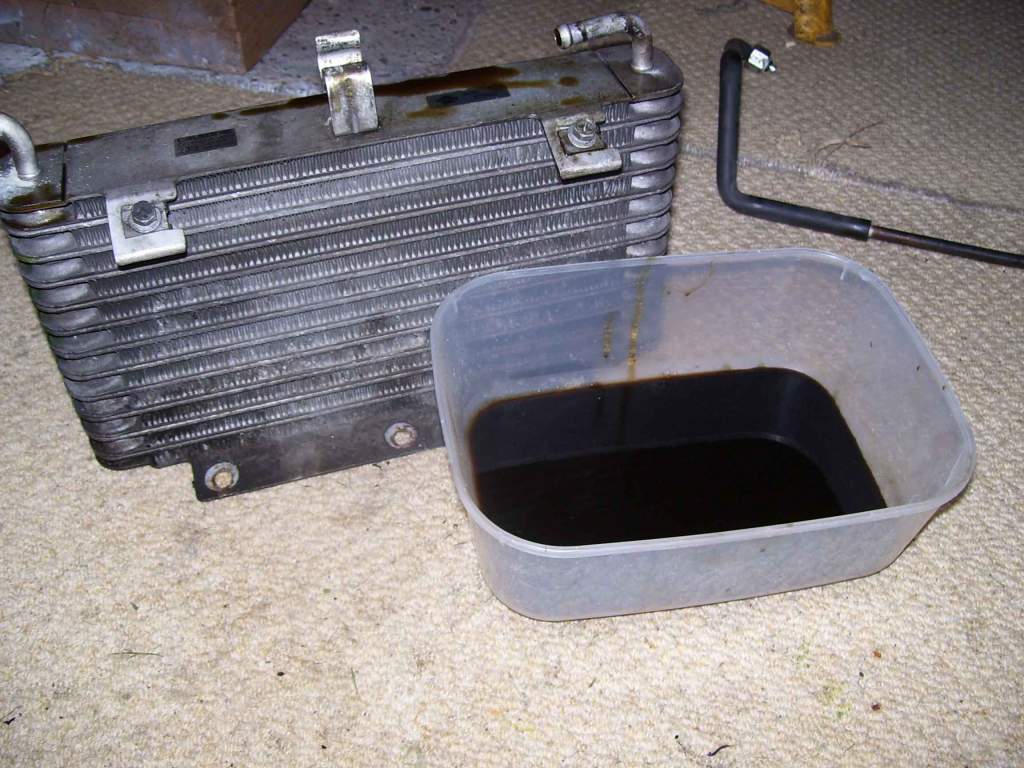
Again, thanks Lymon. When you say, pressure regulated, what circumstances would activate the flow of oil through the radiator? I know it's a little way off, but what do I do when it comes to re assembling? fit back empty? Here's a picture of the colour, not good. I would of worried if this had re entered the system.

-
Thanks Alic. I am puzzled as to why it is so dark/dirty as my oil is so fresh and shows really clear when viewed from the filler and on the dipstick. Does it work by way of a temperature controlled valve somehow? ie only comes into use when extreme temperatures are seen.
-
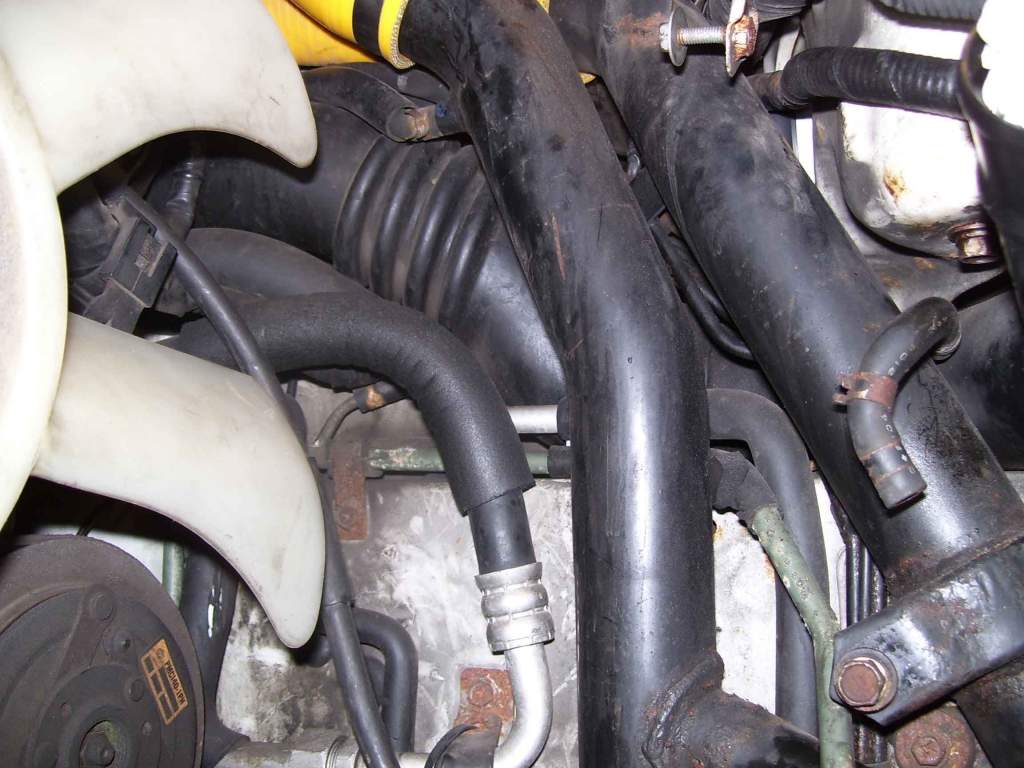
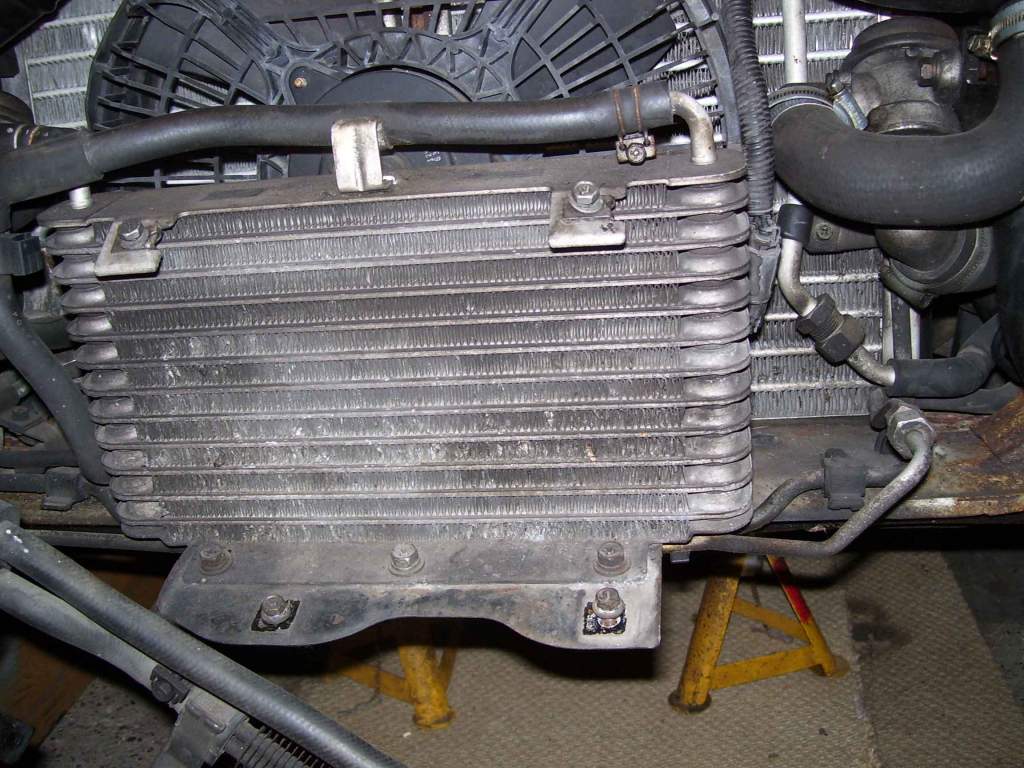
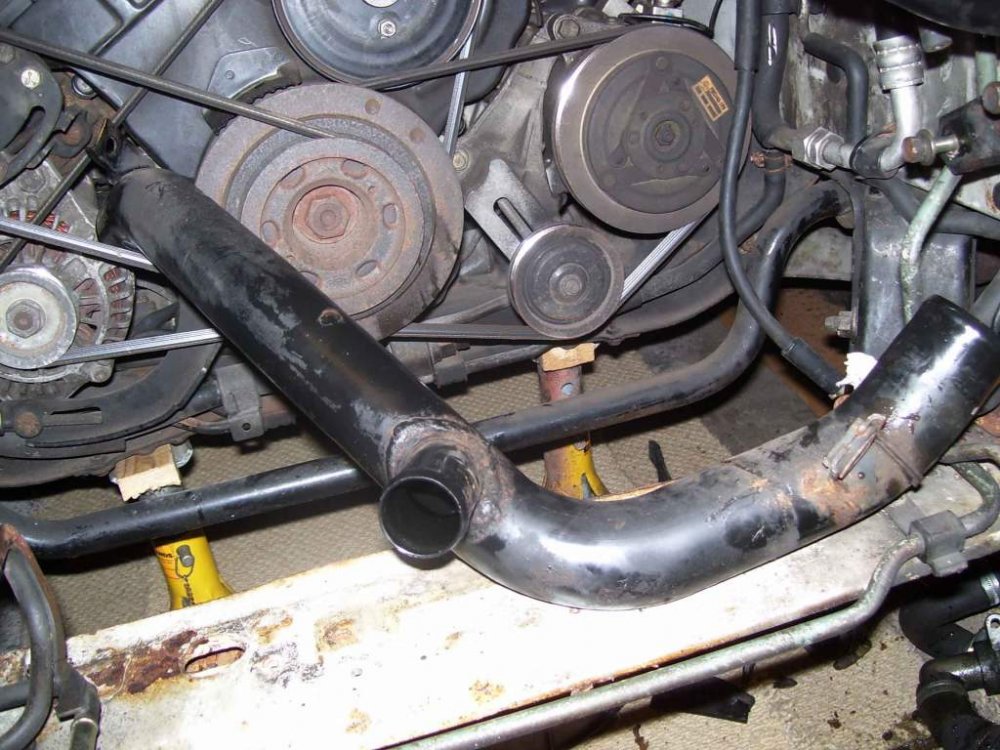
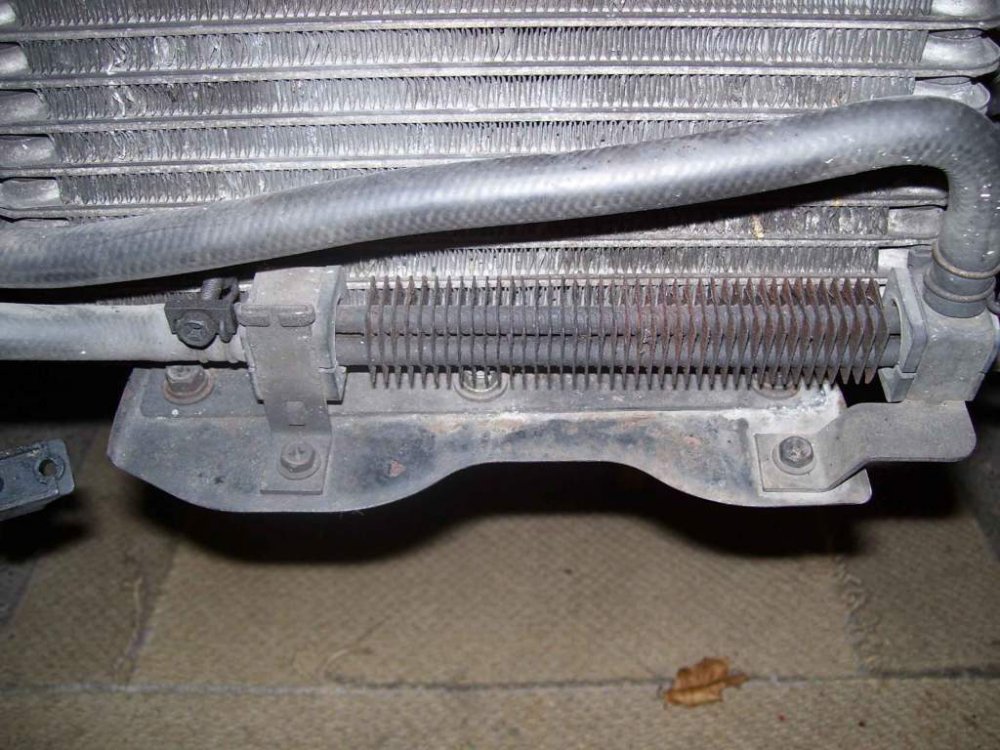
Can someone explain the purpose of these 2 radiators please? I have cracked the top hose of the larger one of the two, and really dark oil is dripping from it.

-
Safe enough?

-
Thanks Lymon, Your advice is very much appreciated, as always. :thumbup1: Will I be okay to put my axle stands equally spaced on the steel section crossmember that attaches to the suspension etc'? I am just a bit nervous about supporting that much weight on the chassis rails. Thanks for the tip with regards to relocating all the nuts and bolts from where they came from, i'll carry that through the disassembly process. Also, I will make a stage by stage picture diary for reference later. Again, thank you.
-
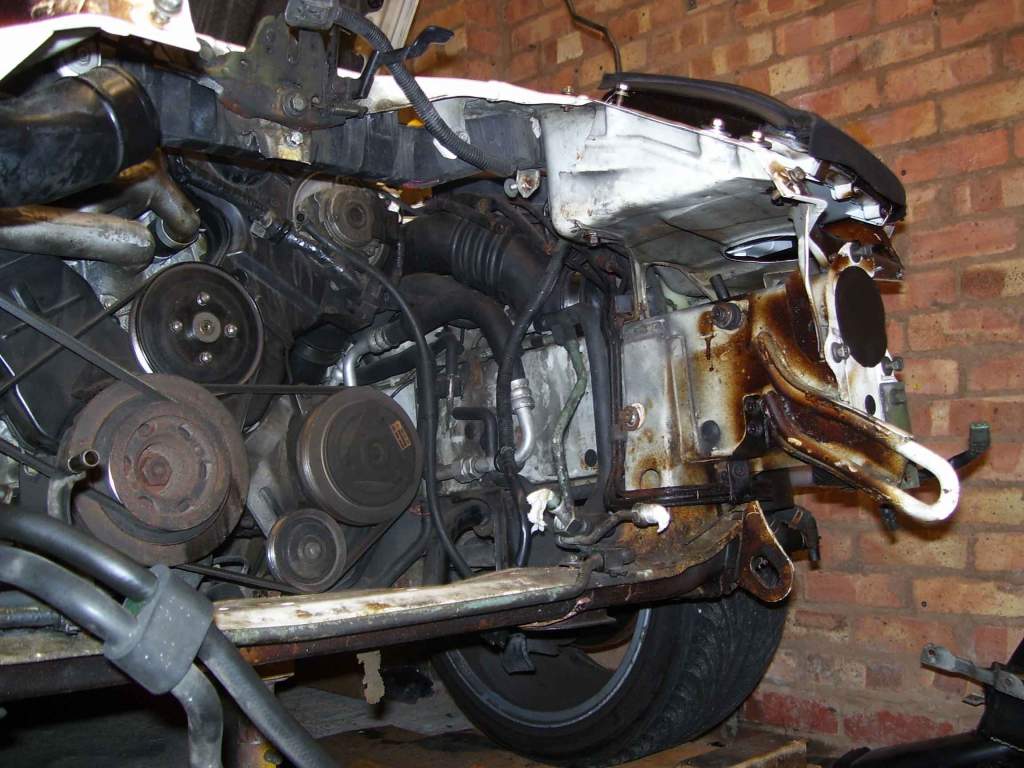
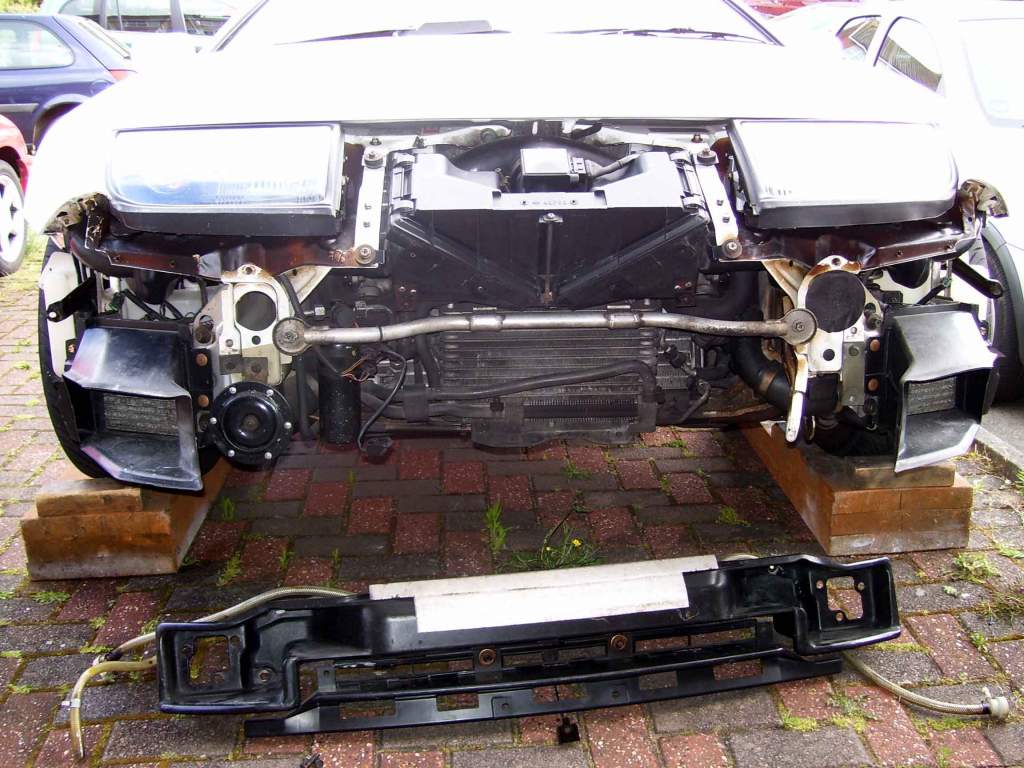
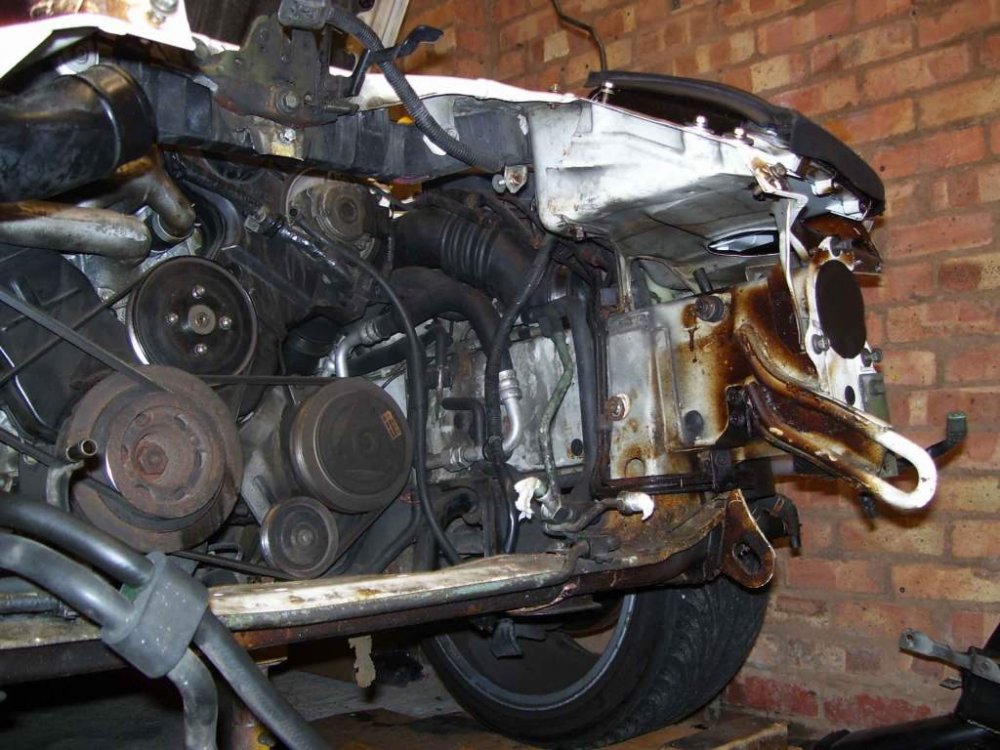
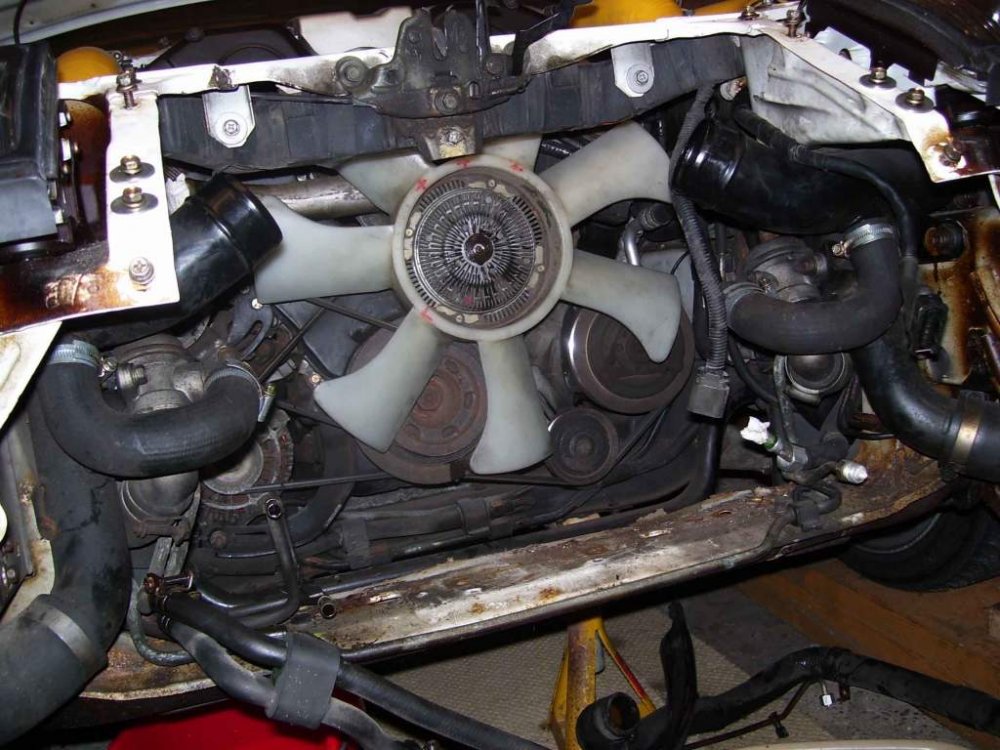
Well, as many may know, I have recently discovered that my lower radiator cross member has finally succumbed to the dreaded tin worm. Hopefully, this is day one of my journey to successfully repairing it with a suitable replacement. Wish me luck, I think I will need it. So, today I started the dismantling of the front end, and within a couple of hours I had removed the front bumper etc' This was done on the driveway, and I hope to complete the rest of the work in the garage, hopefully. I have reached the point where I am unfamiliar with most of the critical items that now stand in my way, and would seriously appreciate some advice as to how I should proceed. First question/concern that springs to mind is... Can I continue successfully with the car being in the garage? The last thing I want to do is get half way through the strip down only to find that I do not have the correct access. The car is drivable at the moment, but once I start taking various parts off she will become immobile. Your help and advise would be very much appreciated. Please see photo's attached...


-
Thanks Andrew, Looks like I will have to take plenty of reference dimensions prior to cutting the original out. In a strange way, I am looking forward to this repair. I remember the trouble I had to got to when fitting new inner and outer sills etc', getting the shut lines and door gaps within spec was a nightmare.
-
Hi Rob, I think that the dona part will be supplied with some of the excess inner arch still attached, that way I can carefully drill out the existing spot welds. Good point about removing mine with regards to grinding the spot welds as opposed to drilling them, as you say, no drilled holes to account for should I accidentally drill through. Nice tip. Cheers,