


Everything posted by phutumsch
-
It's not a big size at 19mm, in fact I think a lot of cars wheel nuts are this size :cool3:.
-
Very nice, balance bar is that going to be chrome ?
-
Right I see now.....you got that ballast wet :laugh:.
-
No Graham - not a problem with roof leaks with mine :tongue:.
-
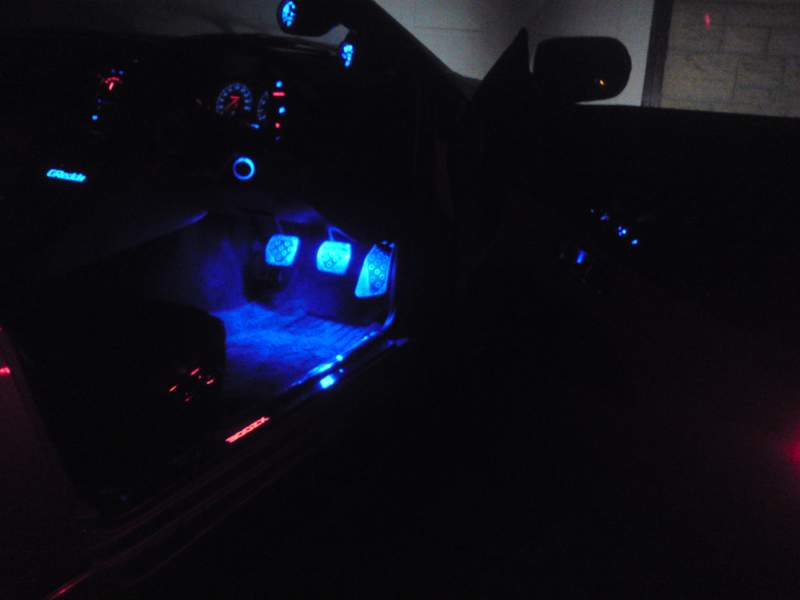
I took the 12v to run the inverter for the sills direct from the courtesy light relay, which is behind the passenger seat on my SWB, believe its behind your rear pass seat on a LWB. Took power from the same for my foot well blue lights, both then turn off when I manually push home the door switch.
-
Picture doesn't really do these justice as they're very nice :yes:.
-
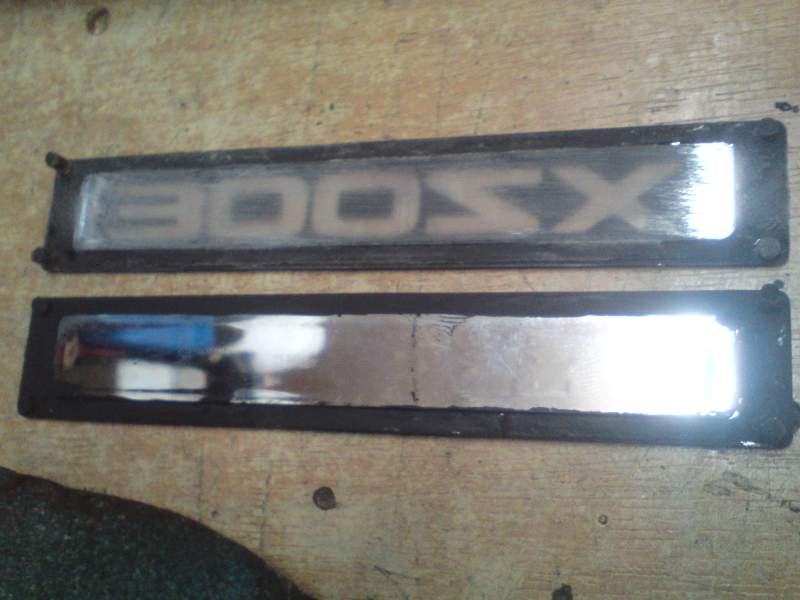
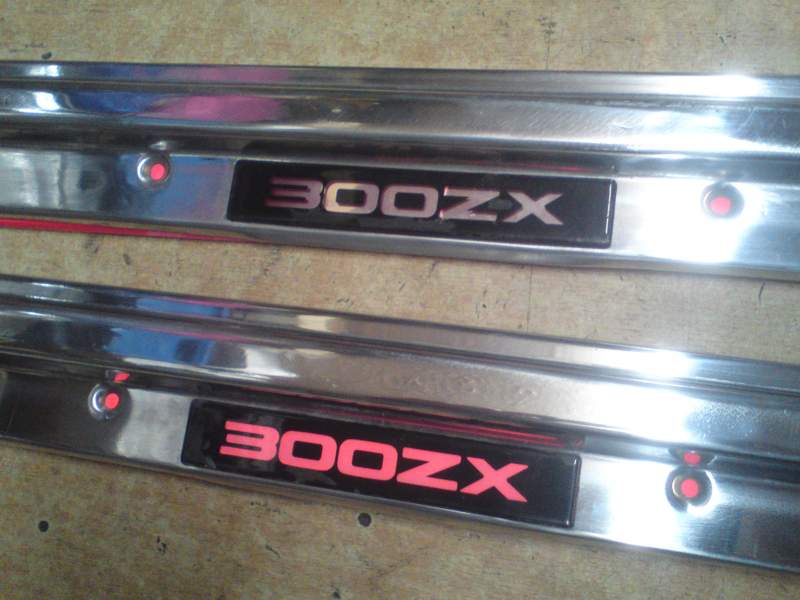
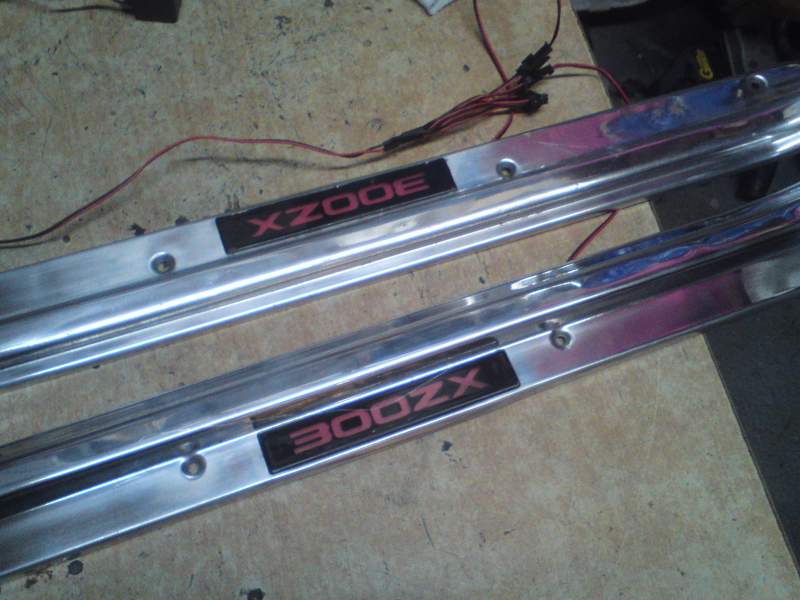
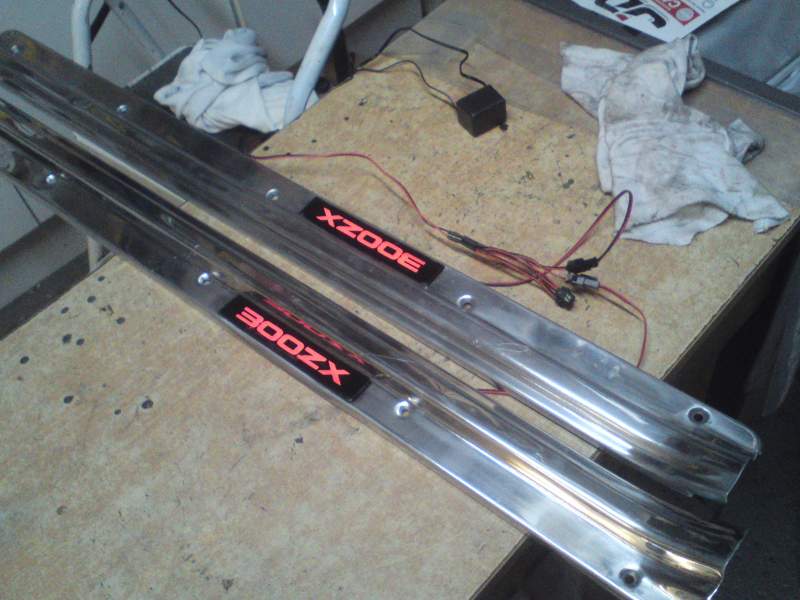
After a good old polishing to a mirror finish, new red EL sheets and modded the plastic 300ZX logos to make them brighter........ basically a good old bit of refurbishment, refit my Altias :thumbup1:.

-
They fit no bother in the car Steve, passenger side and in daylight :wink:. Then of course drivers, couldn't be much more happy with these and I chose well with red as I was contemplating going for blue.
-
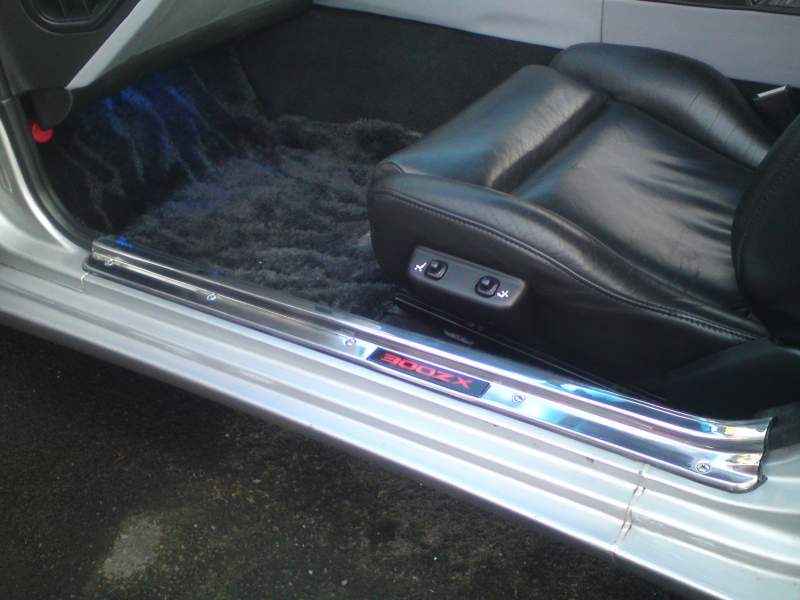
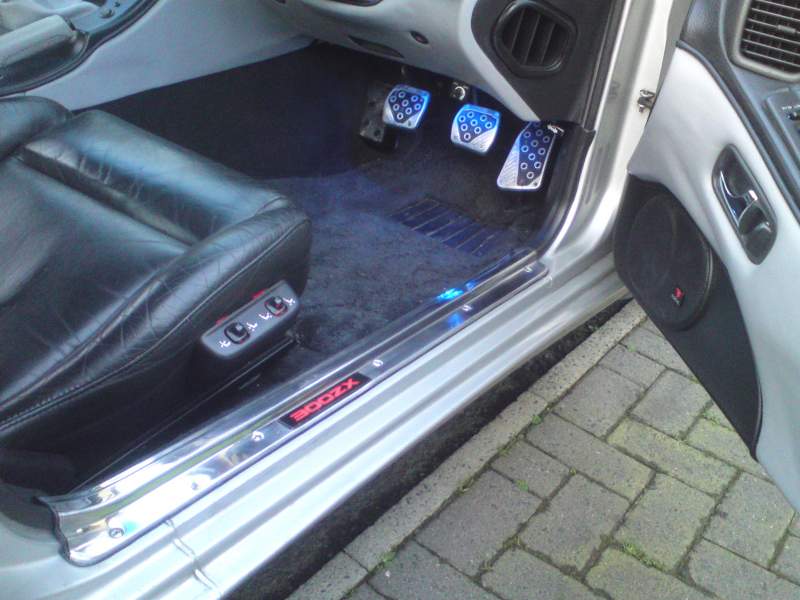
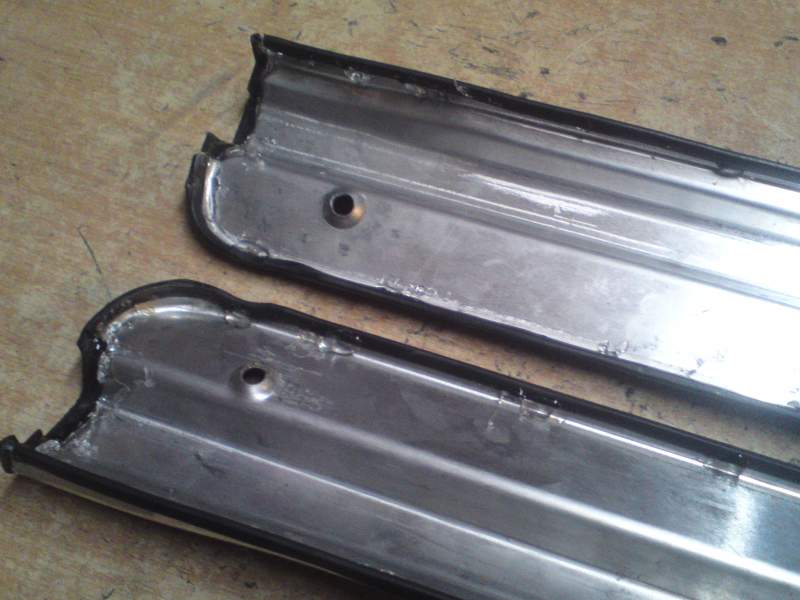
I still have all these edge rubber pieces that finish them off, I have looked after them with my life !!! Then again down each side, of course they sit on these when fit, I applied a little hot glue every few inch or so :yes:.
-
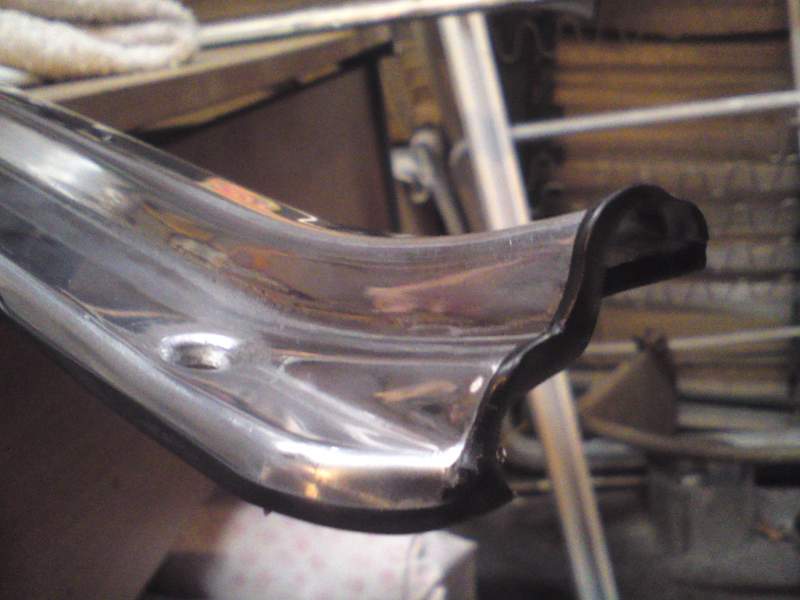
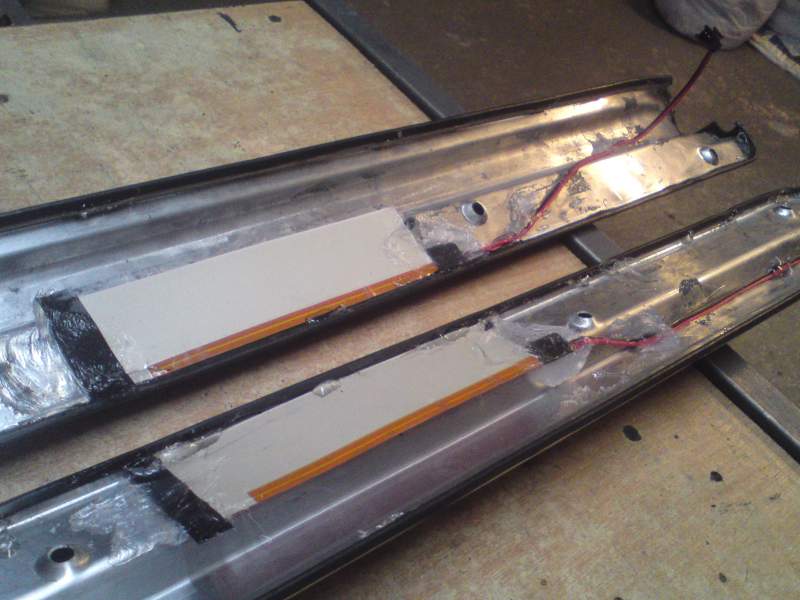
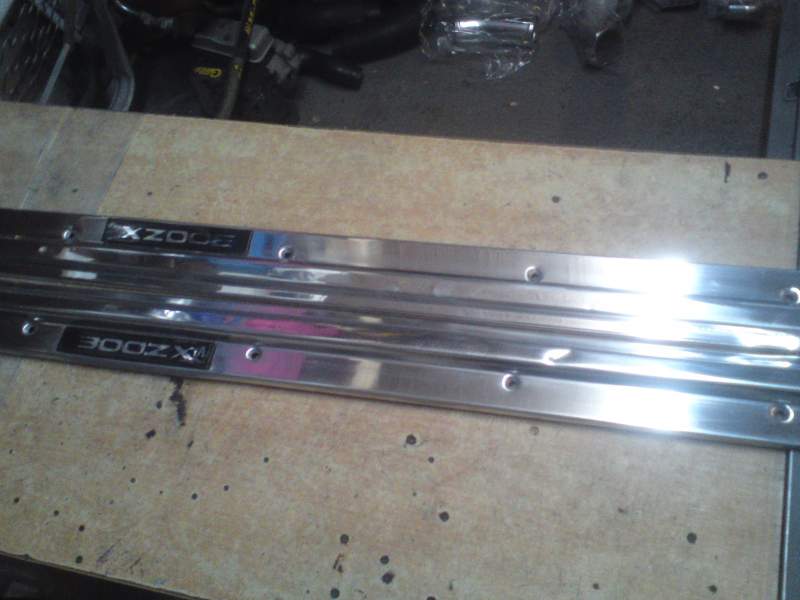
Firstly today I put a EL light under both the logos. I noticed on one there was a little pin prick of an hole bothering me, what had happened was the mirror backing on the underside of the 300ZX had come off, without any messing I decided to take this mirror finish off. These Altia sills were always a very subtle illumination, maybe too subtle IMO and it had to be completely dark for the colour to be seen. This is showing in process one with mirror removed with emery cloth and then wire wool, nothing fancy used here and as done no harm. Now with a light under each, the mirror was clearly stopping all the light from getting through, this is in my well lit garage, both mirror backings were consequently taken off on both. You want at this point take the opportunity to dab some black paint on the underside of some damaged areas to improve the appearance. The EL strips were then attached, firstly with some hot glue and then some dollops of silicone. These were longer sheets that I cut down and then some black insulation put on the severed edge. This is what they look like when off, the redness of the sheet can be seen. And then lit up, again under my bright flourescent lights :thumbup:.
-
Nice work Ian, you keeping up with me or am I keeping up with you :biggrin:.
-
Could well look into that but I inherited them in the scratched condition so I am very pleased at where I'm at with them for now. I will red illuminate them and re fit as I have a lot going on at the minute, it will only take 30 mins tops one day to again remove them to take to someone, so not a big issue :thumbup:.
-
No !!!!!!!!! I have them all over in the bay Bri :biggrin:. Think you might of missed that boat by about 20 years..........................very rarely come up for sale 2nd hand and expect to pay well in excess of £100.00.
-
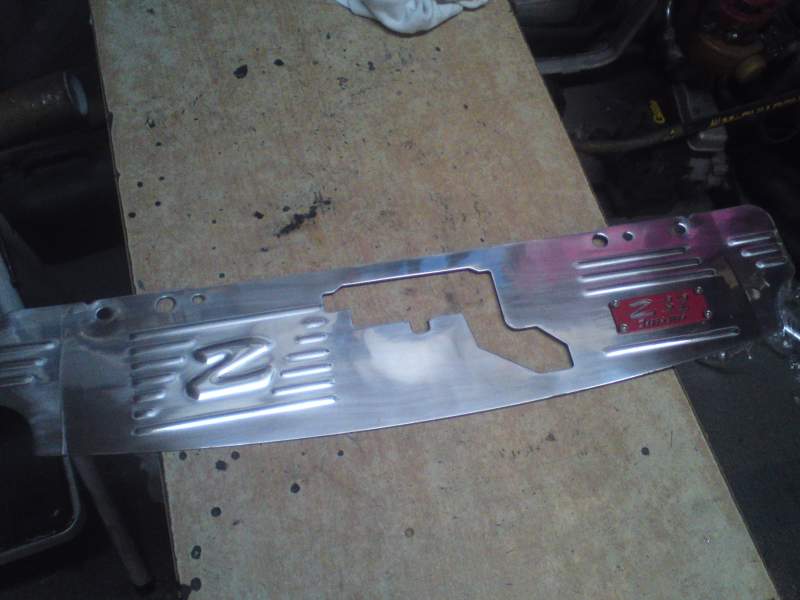
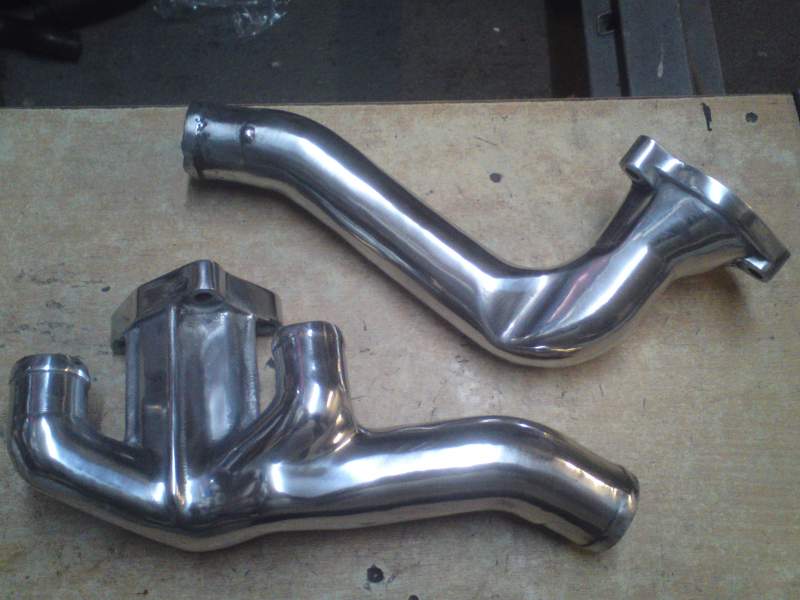
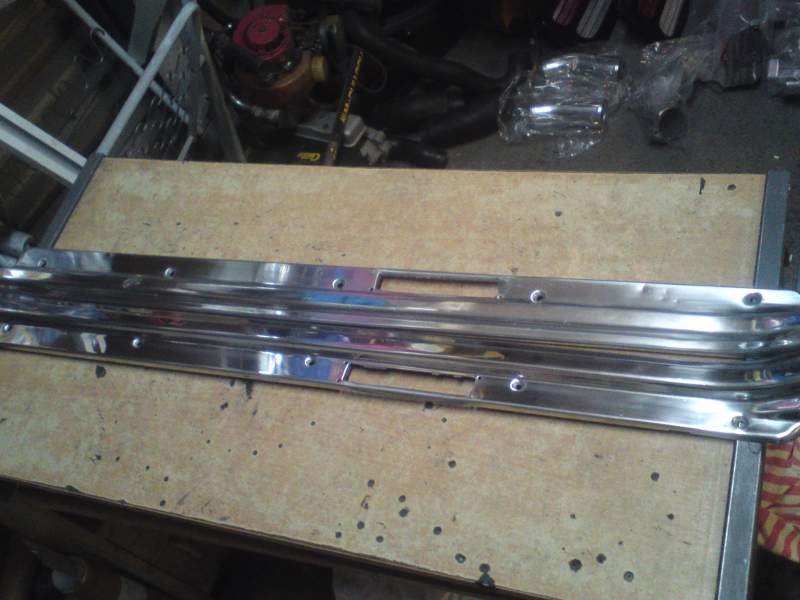
Took many items off my engine and have sent them to a metal polisher just a few miles from me and below are the results of his and my work :cool3:. This is my aftermarket radiator bracket, it was or is stainless steel but now highly polished. The SLICKTOP plate was made by TwinTurboRich and I've had this powder coated and bolts on with some stainless steel allen capped nuts and bolts. This is my Tokyo Auto cooling panel, original these come in silver or blue from z32-zone in Japan, mine was silver and the polisher told me it was anodized but now polished up as you can see. The logo was originally silver and riveted on, I drilled these out and had it powder coated, again bolted on using the same attractive stainless bolts. Then the usual polished up water pipes, these will be used with red silicone hoses and mikalor t-clamps Finally for this post, had my Altia sills polished, this removed many many scratches incurred from over the years, now I have a mirror finish.

-
Nice workshop John, a blank canvas for you, even room for a bed :cool3:.
-
Got mine back from the polishers today, I had them done with other stuff so I am gauging these cost me about a tenner for the pair. He told me they were lacquered, many of the scratches have come out, here and there I have some dents or imperfections but I am left with a wonderful mirror finish - extremely happy. Also, I dabbed a bit of black paint on the underside and in places on the 300ZX logos and these are now more than acceptable to be put back, much rather this option than butchering out to fit my non original ones.
-
It as been mentioned about making the top chambers red, these diffusers can be cut out of the stock red ones from the tail lights. therefore a perfect match. I have some clear diffuser plastic that matches perfectly so these can be used for the lower two. However, all these 4 will need glueing, bonding whatever, in place and as the stock 4 pieces sit in a touch and then lock in each chamber, botching would be in order, it's certainly something I could look into but I don't think Z owners are losing sleep over it so therefore demand will be very low as stock 99 rear 3 pieces are incredibly popular and universally desired.
-
I've just checked the UPS site and it looks like they'll be in at your shop on Monday....sorry to disappoint :sad:.
-
Glad he's not my postman :2guns:.
-
Thank you for the comments, I've even put in the little square diffuser on the indicator lens, look closely on the far right tail light, not only does this mimic the genuine ones it does 'hide' the bulb when it's burning and so all you see is amber light in that chamber :yes:.
-
And it's been picked up from my shop, hopefully be in yours Sat for you :yes:.
-
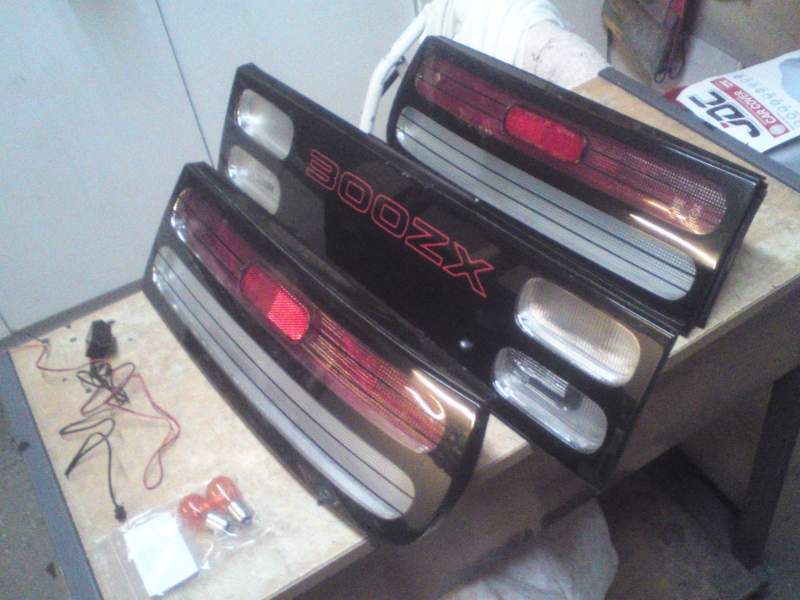
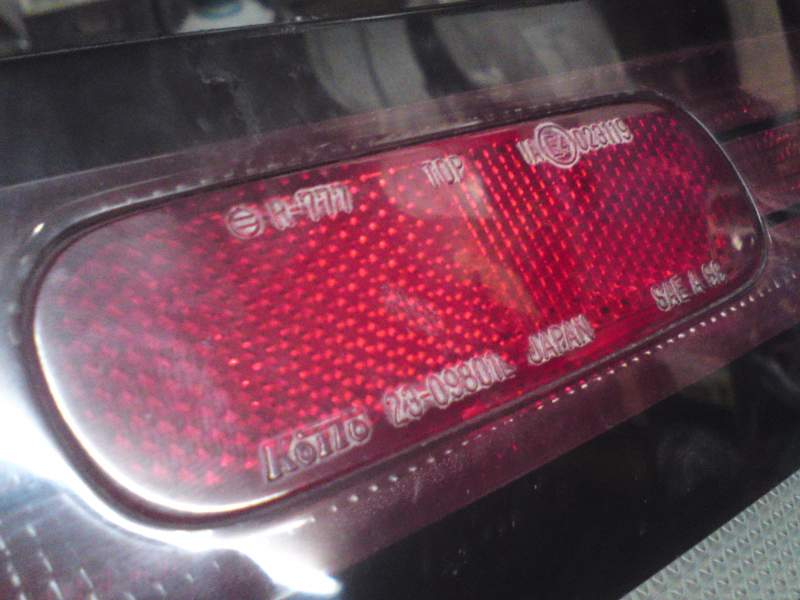
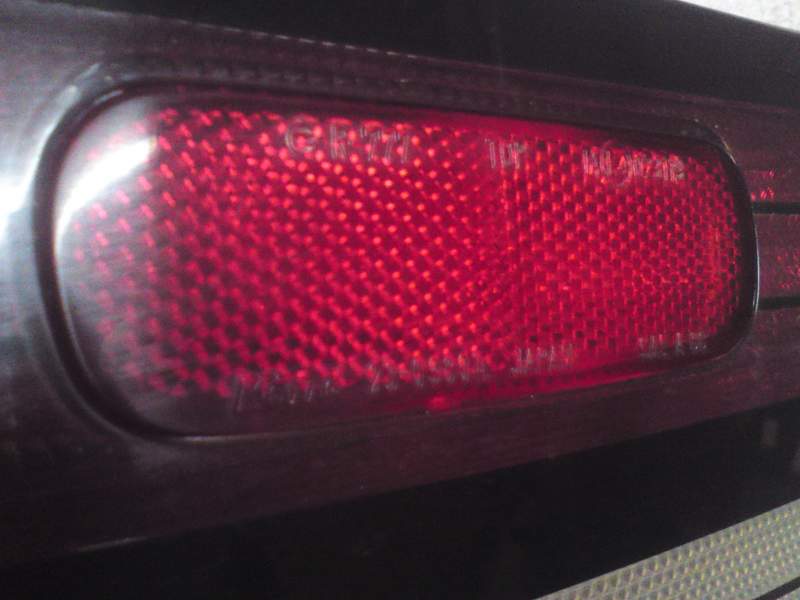
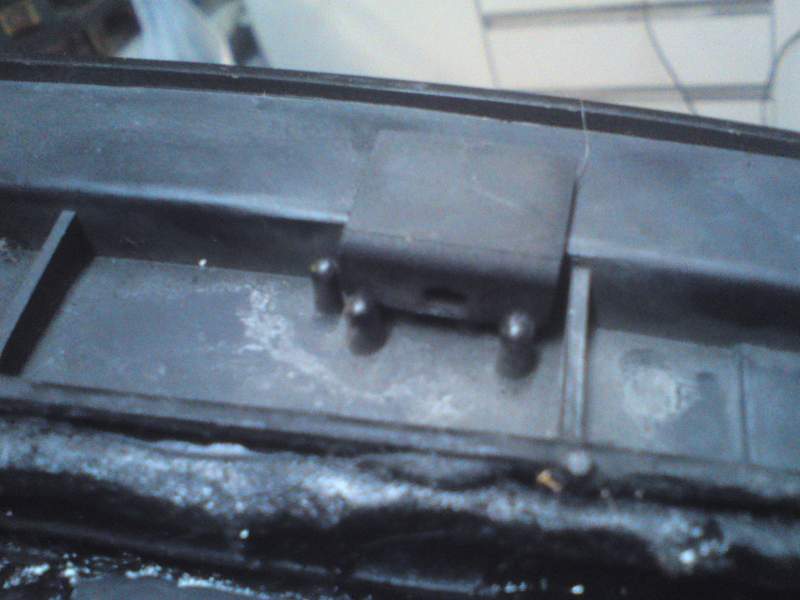
These are for someone on here, I picked them up from the couriers on Tuesday and here they are just before I packed them All the 3 pieces were or are in very good condition and well worth the expense of conversion, sure he'll be pleased :yes:. As you can see supplied with amber bulbs and EL invertor to light up the 300ZX. I like to think I do a good thorough job even getting rid of the wax in the lettering on the reflectors :thumbdown:. To this :thumbup1:. Even making sure all 3 tail units have these rubbers glued in place on the underside, nearly always some are missing :wink:.
-
Yes all different types, for the purposes of HID's, type H3 is required for both dipped and front fogs. As would an H1 kit work for our main beams. The pic you put is correct fitment for the filament bulb type for the fogs....confused.
-
You're looking at the holes on the one on the left, even more as been opened up on the one on the right, whichever you choose will allow light to shine through and give the buttons some illumination, then you put a 3 smd strip light along that full edge, one each side and try your best to countersink it down.
-
I'm the same waiting for 1st April to come round or maybe even 1st May but no later. Taking the opportunity to get a bit of engine bling work done, bit more re trimming inside by Mondo and I need some fresh rubber all round, it's nice to do this type of work atm without any time restraints.
