
Everything posted by veilside01702
-
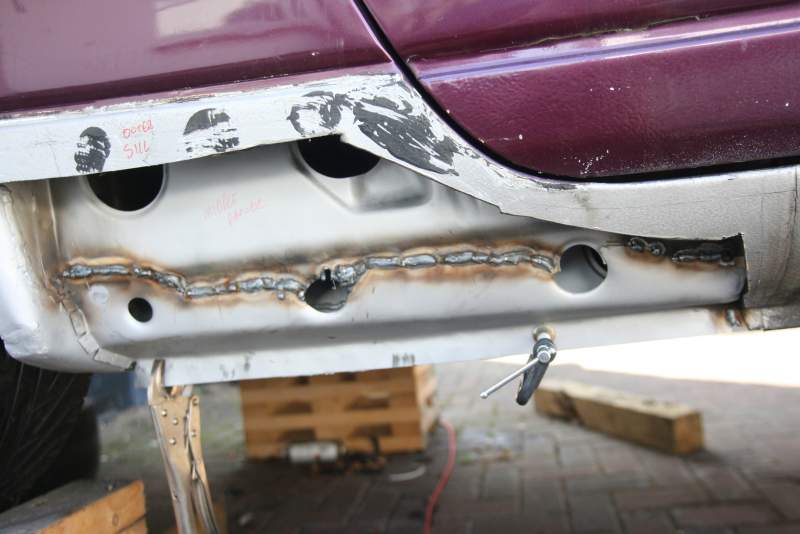
Hi dougal200, I did the first repair panel by butting it up to the old section and tacking it on with a small gap between pieces and then filled the gap with a seam weld between the tacks. I moved from one section to another to keep the heat down as well as compressed air to cool the welds. I did the middle section with the 3 holes as a butt weld on the ends and an overlap at the top, but overlapped from the outside so I could seam weld the gap to stop water being trapped in there. I can get to the inside through the rear quarter panel so I can get a bit of seam sealer and paint on it. The overlap is like this.... Then everything I can get to has been painted with zinc paint.... Going to do hole in front sill section today and see if I can jack up the car to remove rear wheel and finish up wheel arch today.....

-
Cheers Paul.... I just took the top off the welds and painted them straight away to keep them rust free....lol I am now trying to work out if I should use a joggler to attach new outer panel edge to original rear quarter panel.... I was thinking of using it on the original panel and creating a flange to overlap the joint for the outer skin? Or should I just seam weld it and butt it up? I am getting nervous now as this will be the panel you see and it needs to look right......lol I was amazed how comfortable some of the welding felt today.... It actually flowed nicely and I had some nice seams with good penetration for once.....lol I have found that I need to take off the rear wheel to get to the arch to weld..... Nightmare.... As car is already over the max height of my trolley jack and on big wooden blocks under wheels.... so need to loosen wheel bolts, get jack + wooden beam under jacking point and remove wheel.... Guess what I'm up to tomorrow.....lol
-
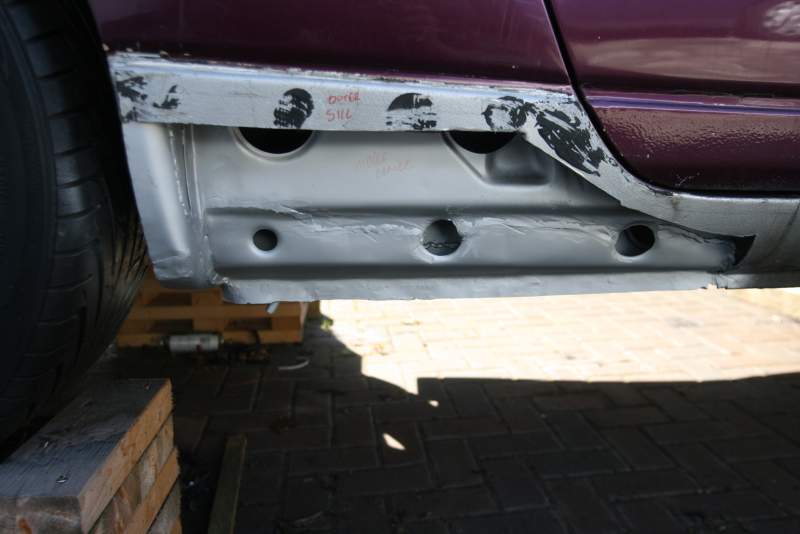
Well I have been grinding and welding since mid day and have finished for the day as I ran out of mig wire.....lol Here are a few pics of todays work.... Before... Wheel arch and first panel welded in.... Middle panel welded in place, looks rough but ground down looked a lot better..... Ground down and painted with weld 2 zinc primer.... And kids are home, so have stopped till I get wire and time to carry on.....

-
http://www.ebay.co.uk/itm/221268375948?ssPageName=STRK:MEWAX:IT&_trksid=p3984.m1423.l2649 Has new MOT and looks quite clean, nice wheels..... I can't afford to buy it and wondered if anyone on here was looking? Hope this is okay to post up..... I am not the seller, just been watching it and thought it maybe worth a look.... Russ
-
Happy Birthday Paul......:happybday:
-
Happy Birthday Buddy........:happybday:
-
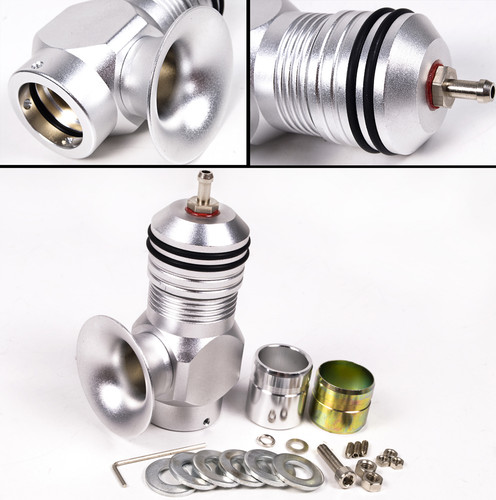
http://www.ebay.co.uk/itm/UNIVERSAL-TURBO-VENT-ATMOSPHERIC-TRUMPET-RACE-BLOW-OFF-DUMP-VALVE-SILVER-BOV-/390643145773?pt=UK_CarsParts_Vehicles_CarParts_SM&hash=item5af4255c2d Is this it???........:tt2:
-
I'm 41 and been a full time foster carer for nearly 7 years now, staying at home looking after children while my wife goes out to work.... Feels like I retired years ago.....lol I am going back to work in the next few weeks after 10 years of ill health.... So I will finally be able to start saving and planning my retirement..... I want to retire to a nice quiet rural house with a big barn or workshop and make, design, mend things.... I like problem solving, designing solutions and generally working with my hands......lol So a fully kitted workshop will do me for my retirement......lol Unlike my dad who started playing golf when he retired and hasn't returned from the golf course for 20 years.......lol I know I am going to grow old disgracefully.....
-
Yep..............
-
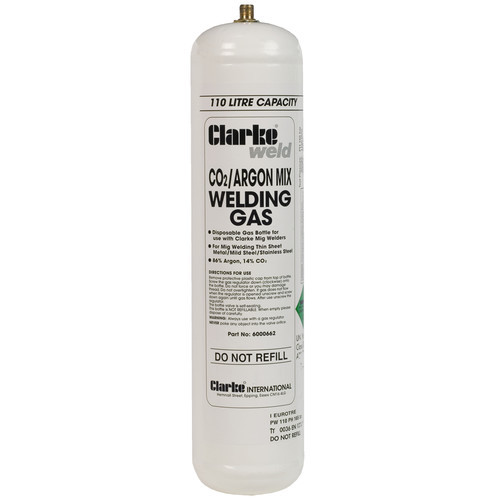
Well today I have kids all day on my own so only got to cut off water pipes under plenum and throttle bodies, remove windscreen trims and wash them ready for wrapping with a bit of carbon fibre 3D film... Better than what they currently look like... Just got to strip the targa's now and do them as well as recover the inside as they are all wrinkly.... Tomorrow is grinding and welding day...... Yay..... I am going for closing the first repair panel and fitting the home made Targa drain tube..... Made from one of the many pipes deleted from my plenum.... Turns out it is the same size as the rotted original metal pipe.... I have cut it and painted in zinc primer.... it is going to protrude from the sill by a couple of cm..... should help with rotting problem.... I have also considered using some silicone hose to replace the original clear plastic pipe.... If I get time I shall be tacking in the bottom wheel arch repair panel and the middle panel, just expecting this to take a while as I want it right...... Also where is the cheapest place to get disposable Argon / CO2 Gas bottles? I am paying £14.39 for 110 Ltr bottle from Machinemart.... I looked at renting a big bottle, but would need a bottle and valve.....
-
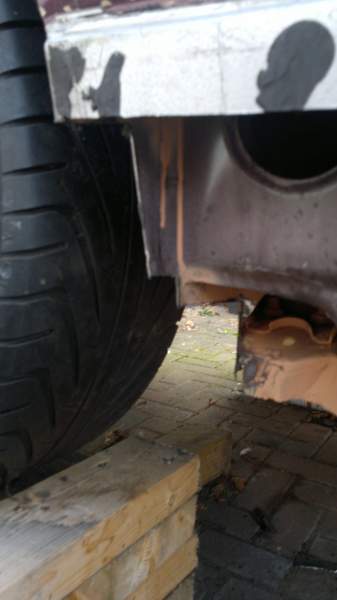
The rear drains cone out of rear sill at bottom ..... Front ones are behind wings and water runs down in the inside of wing....

-
Grrrrrrr.......lol I covered every bit that wasn't already sound deadened, plus some that was already done to make sure.....lol It doesn't need to be totally covered, just enough to stop resonance of the panels.....:tt2: I have also just sat at dining room table and removed all water pipes from under my plenum I pulled the other day.... Do you cut off the water pipes to the throttle bodies or leave them?
-
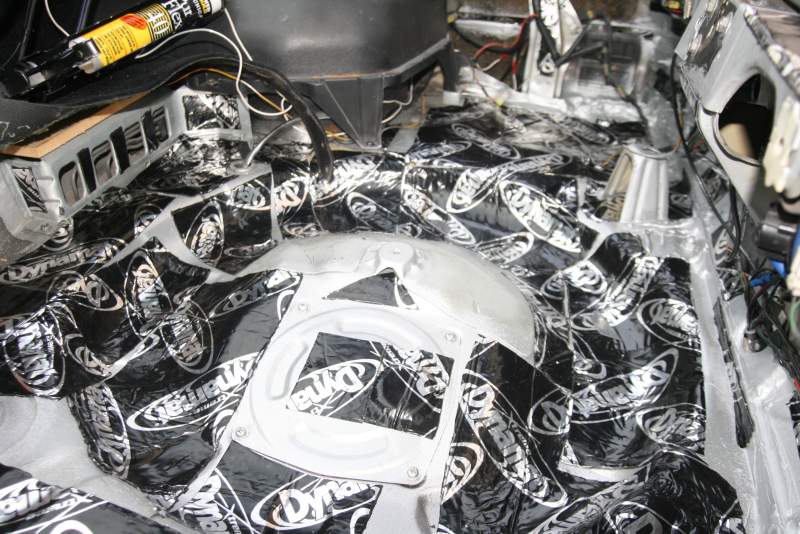
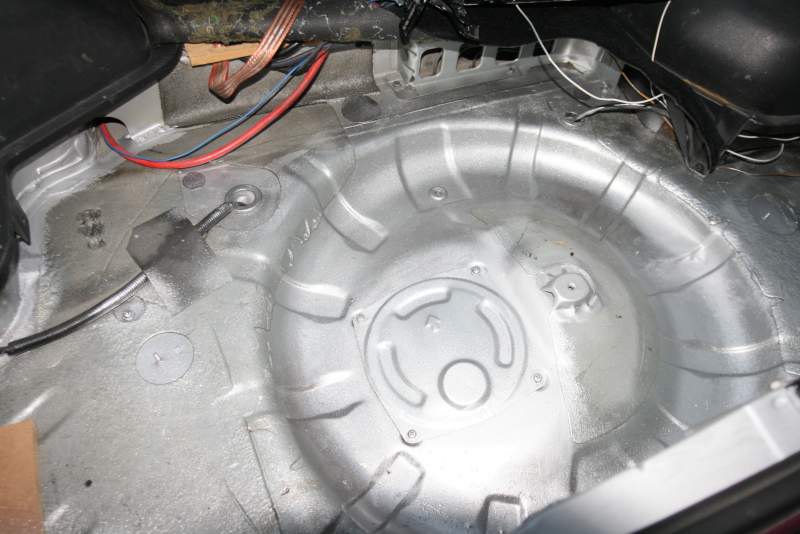
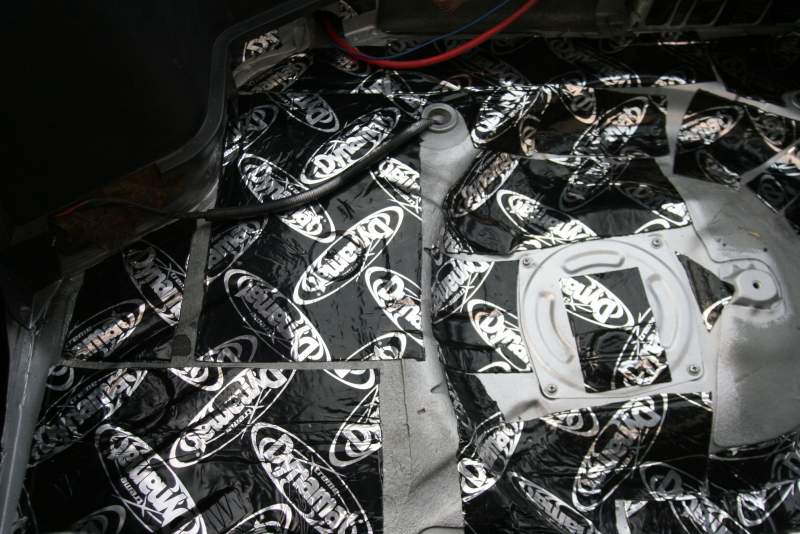
Well I finished the Dynamat in the boot...... Before..... After....... before..... After.......
-
Happy Birthday...............:happybday:
-
Happy Birthday.........:happybday:
-
ooooppppsss........sorry mikey.........lol
-
Fitted dynamat to 1/2 the boot ready for the audio system to be built and fitted....... and sliced my finger open on the sound deadening as it is foil backed and very sharp on the edge.....lol
-
PMSL.......damn.......I was going to do this next.... @mikey bean: @mikey bean: @mikey bean: @mikey bean: @mikey bean: @mikey bean: @mikey bean: @mikey bean: @mikey bean: @mikey bean: @mikey bean: @mikey bean: @mikey bean: @mikey bean: @mikey bean: @mikey bean: @mikey bean: @mikey bean: @mikey bean: @mikey bean: @mikey bean: @mikey bean: @mikey bean: @mikey bean: @mikey bean: @mikey bean: @mikey bean: @mikey bean: @mikey bean: @mikey bean: @mikey bean: @mikey bean: @mikey bean: @mikey bean: @mikey bean: @mikey bean: @mikey bean: @mikey bean: @mikey bean: @mikey bean: @mikey bean: @mikey bean: @mikey bean: @mikey bean: @mikey bean: @mikey bean: @mikey bean: @mikey bean: @mikey bean: @mikey bean: @mikey bean: @mikey bean: @mikey bean: @mikey bean: @mikey bean: @mikey bean: @mikey bean: @mikey bean: @mikey bean: @mikey bean: @mikey bean: @mikey bean: @mikey bean: @mikey bean: @mikey bean: @mikey bean: @mikey bean: @mikey bean: @mikey bean: @mikey bean: @mikey bean: @mikey bean: @mikey bean: @mikey bean: @mikey bean: @mikey bean: @mikey bean: @mikey bean: @mikey bean: @mikey bean: @mikey bean: @mikey bean: @mikey bean: @mikey bean: @mikey bean: @mikey bean: @mikey bean: @mikey bean: @mikey bean: @mikey bean: @mikey bean: @mikey bean: @mikey bean: @mikey bean: @mikey bean: @mikey bean: @mikey bean:........:lol:
-
so @Car.Mad: will make @Car.Mad: get an email? That is going to drive @Car.Mad: MAD........lol
-
Wasn't me..........lol........ I am skint...... can't even finish my Z's welding now....... Had to pay £620 contents insurance for the house..... So Z is now dead in the water and my life on hold.......lol
-
he he he.........
-
Well done and congrats mate, hard work over and Now let the fun begin..............
-
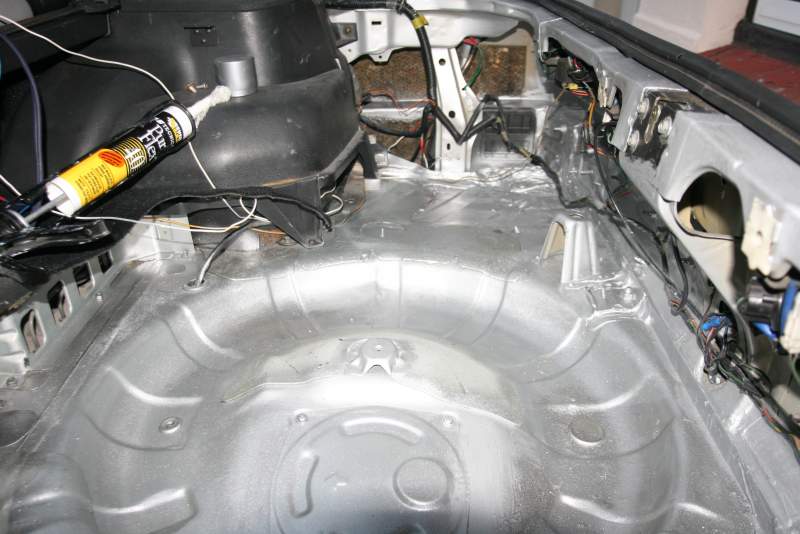
Right Driver floor now had coat of Kurust on any surface rust after I wire brushed it...... painted entire floor with silver hammerite.... I did find a big round lump sticking up where someone has jacked the car on the chassis rail at the back and it slipped off..... perfect indentation of trolly jack cup.....lol It was where the rear seat curves up..... Used a bolster chisel to work it round and rubber mallet to ease the floor back to shape..... Really happy as you can't even see it was there now and underside looks perfect..... Going to dynamat the floor pan later and refit carpet after the welding and grinding are finished, just in case of a spark or heat...... I have been trying to work out what to do about the drain for the targa.... I thought about changing exit point to wheel arch or using silicone hose..... But have opted for using a water pipe from the plenum delete and cutting it down, running it out of original hole and extending it from sill by a few cm......??? I will try and get a pic of my idea later........ Out with kids today, so won't get much done till this evening and then it will be dynamat floor and boot, make sub box templates and work out boot install layout.....lol
-
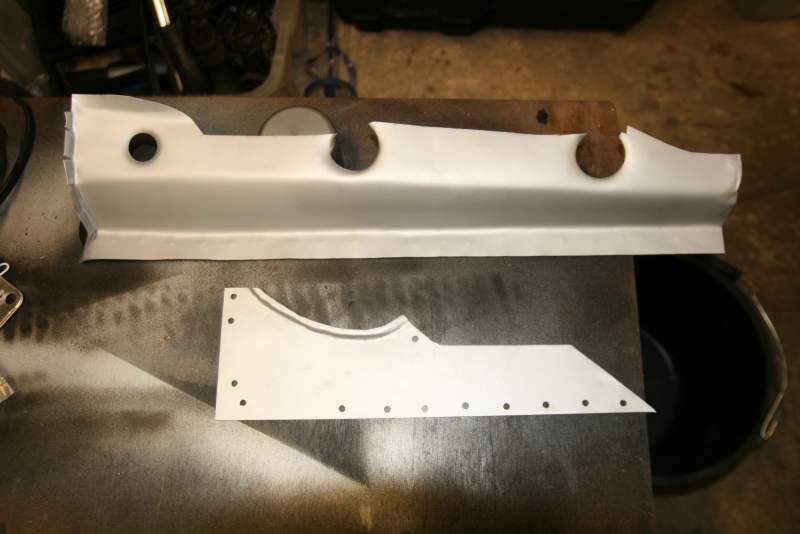
Thanks for that.... I keep looking at everything and thinking I could do better..... and then thinking it won't be seen again till it too rusts away......lol But then I think, what will the next person repairing her think of my work?......lol Little bits that show tooling marks or aren't quite straight or curved as I would like..... I nearly re-did pic 2 of the inner section with holes as they are a few mm off of perfect, then decided I will adapt them when I go to weld it up or adapt the original piece I am welding to..... Can't wait to get grinding and welding again now......lol I must return the compliment Car.Mad as your spoilers are superb.......
-
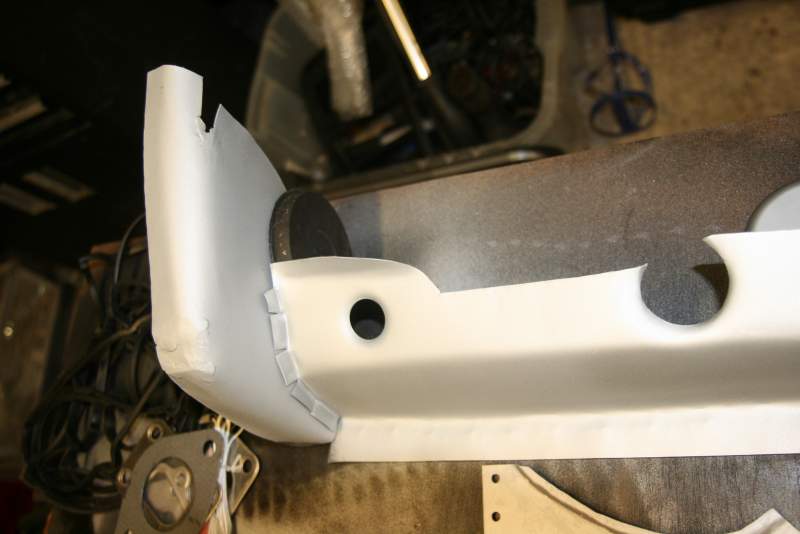
Hi Dave, It doesn't look good in that picture now I had a look.....lol The wheel arch piece was tested against the original piece, as I left that in place till the last minute and made a template from inside the wheel arch of the radius and where that is in relation to the bottom sill joint and the end of all the sill pieces..... If that makes sense....lol I used a piece of card, drew the curve and marked the ends of all the pieces of the sill on it.... if that makes more sense....lol I then carefully removed as little as possible from the wheel arch and checked my marks were all the same.... I carved a wooden copy of the original piece with the same radius / curve, length etc and carefully beat the flat steel sheet over this former.... I did have to make 2 cuts that in that picture look bad.... Since the picture I reworked the bend and welded up the cuts.... I will go and take a picture in a moment and try for a better angle so you can see what I did, hard to photograph this piece well.....lol I do appreciate the help and advice and am taking everything onboard..... Thanks for the complements on pic 2.....lol That was fun getting the correct bends, length, etc..... the easiest part was making the holes and flanges.....lol Sort of like this.... roughly placed.... Painted with Upol weld2 I took loads of pictures and they all came out blurred with the flash and silver spray....