Leaderboard


Popular Content
Showing content with the highest reputation since 05/05/23 in all areas
-
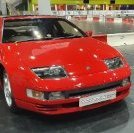
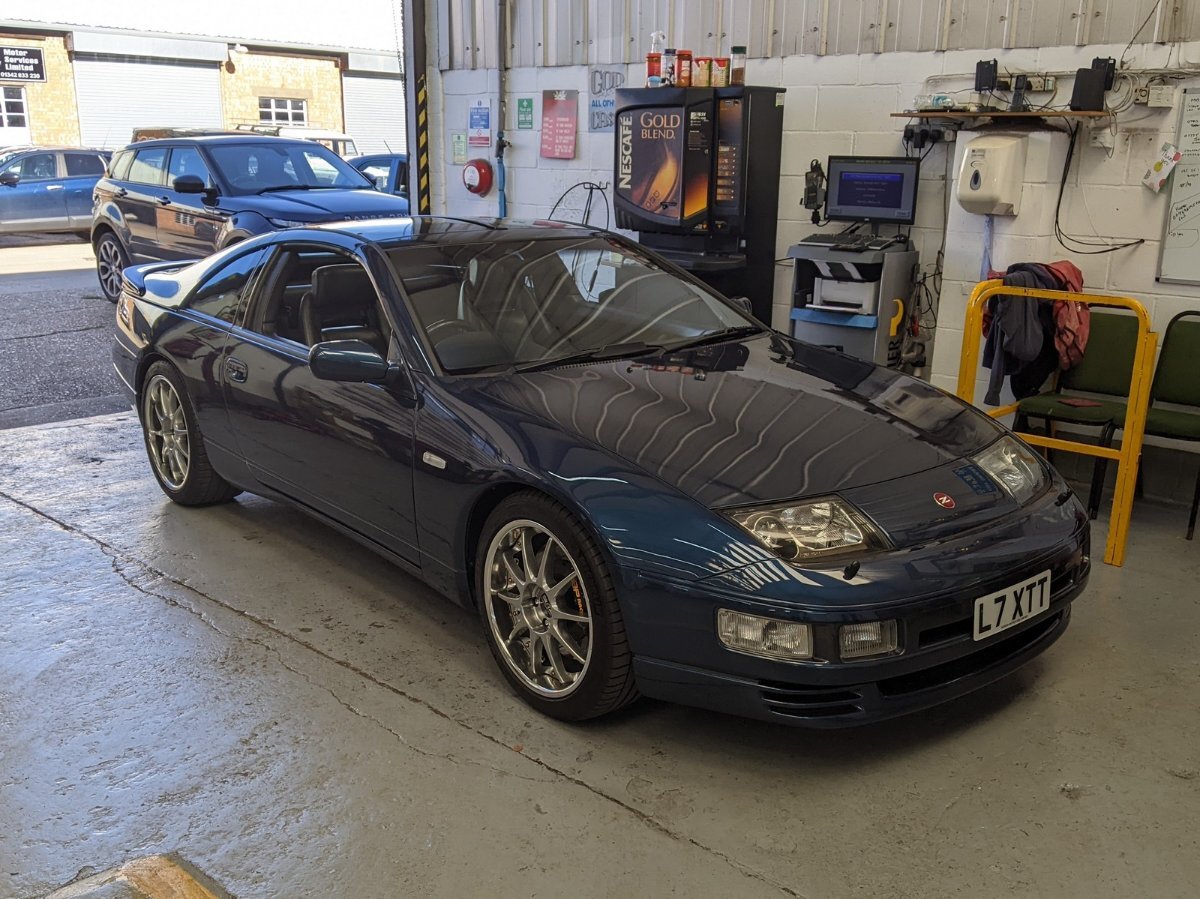
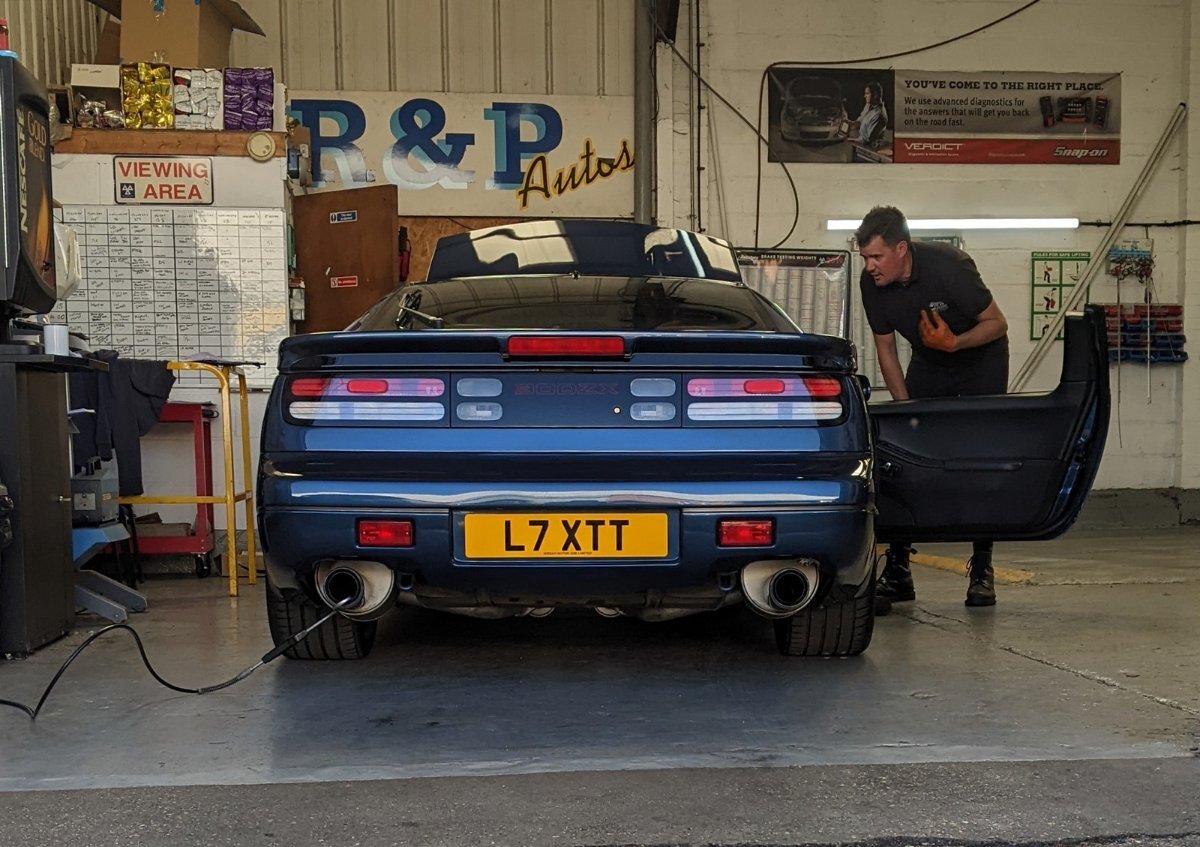
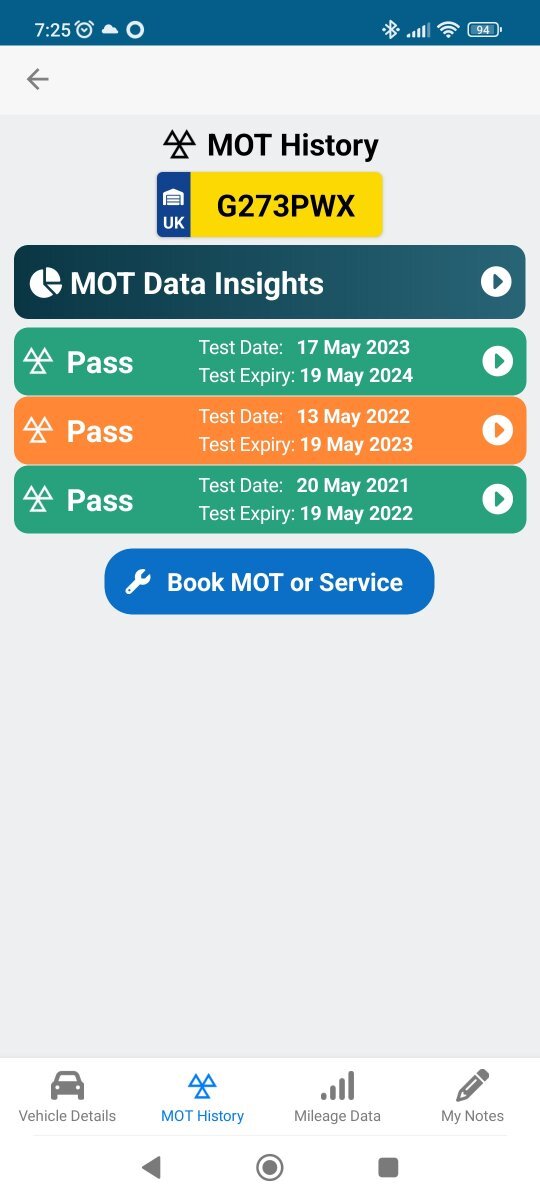
MOT pass today with no advisories. Always a nice feeling to drive away with that result.
 11 points
 -
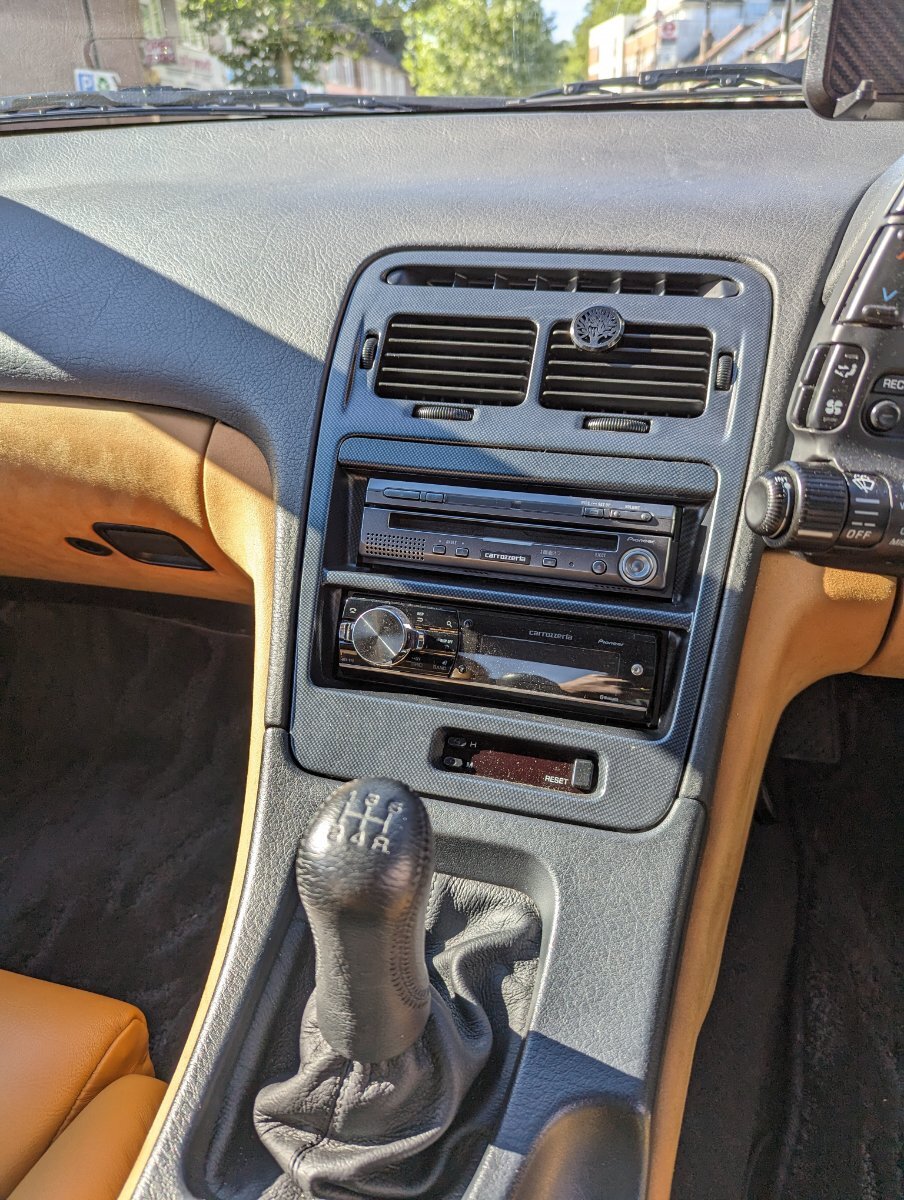
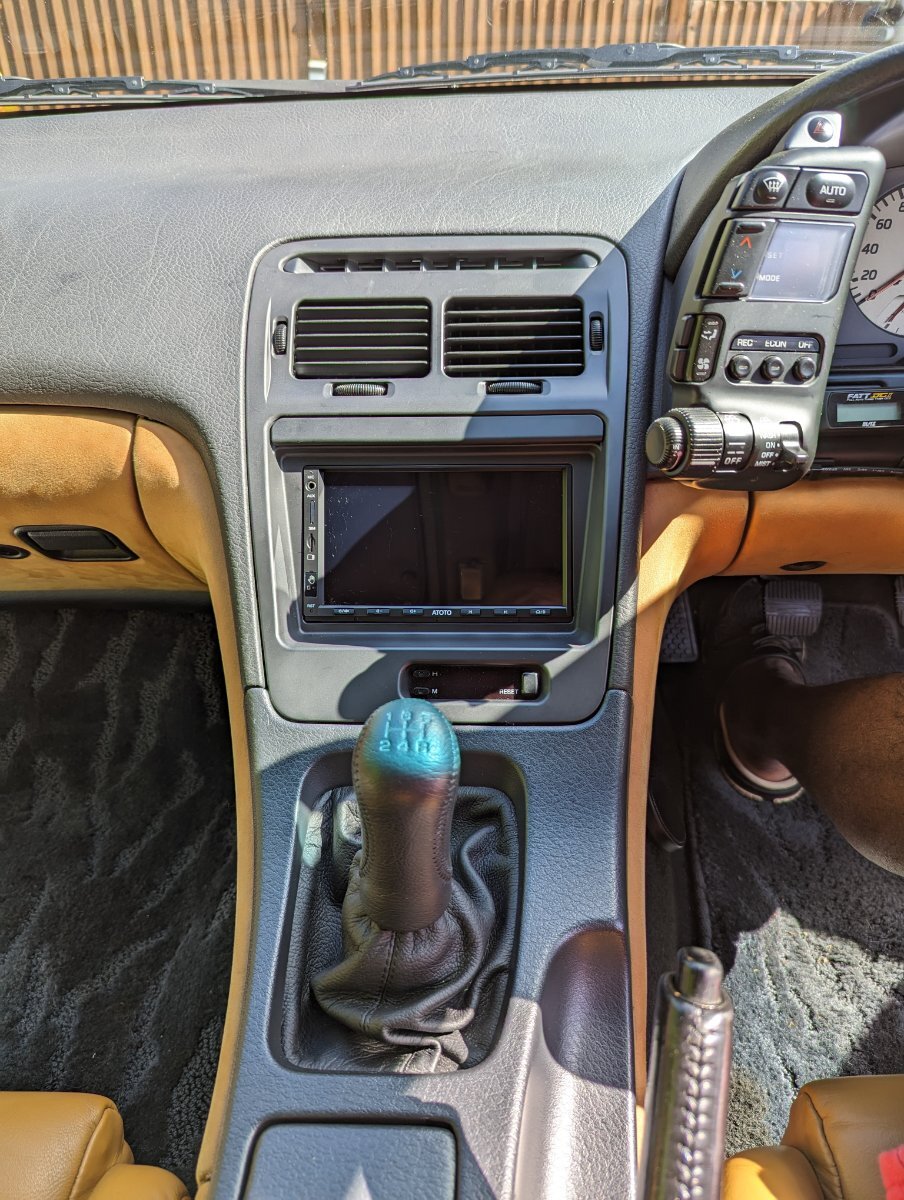
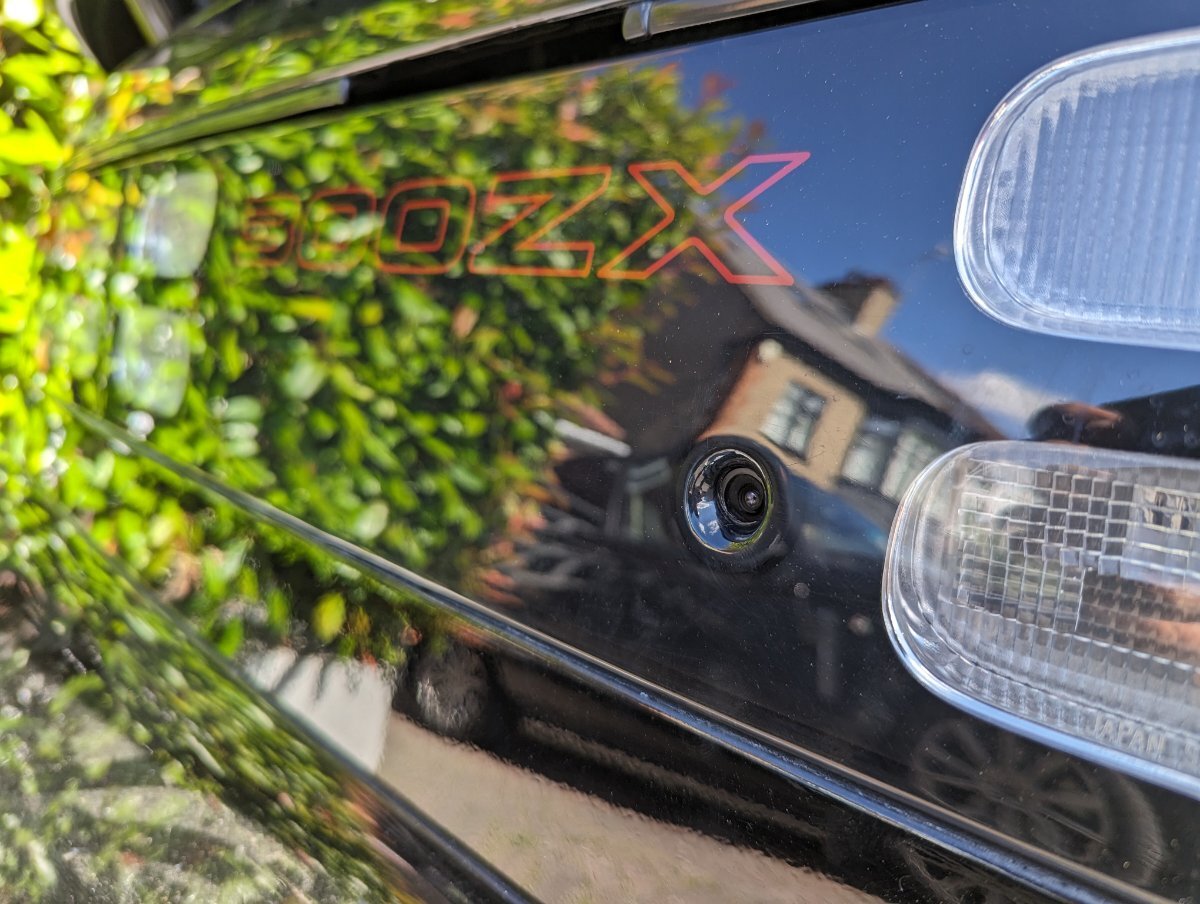
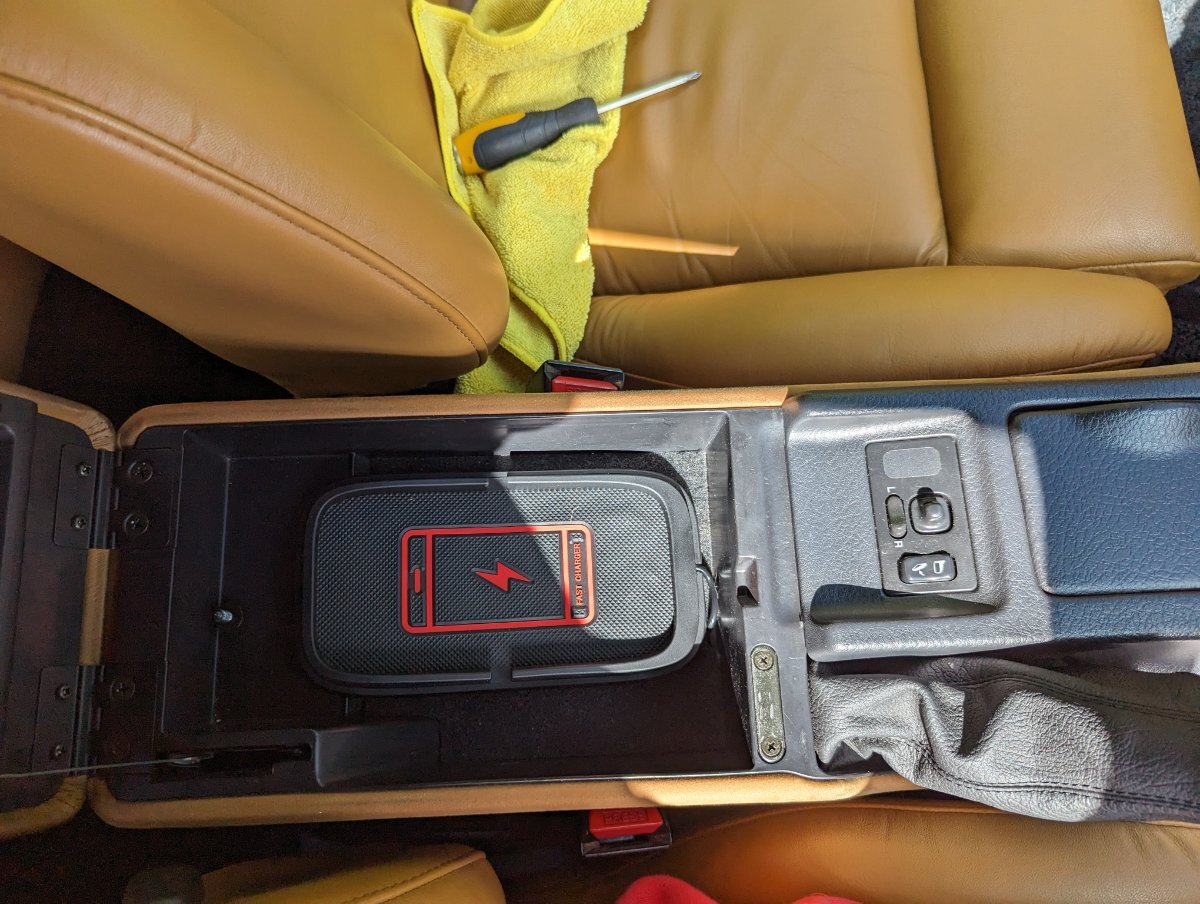
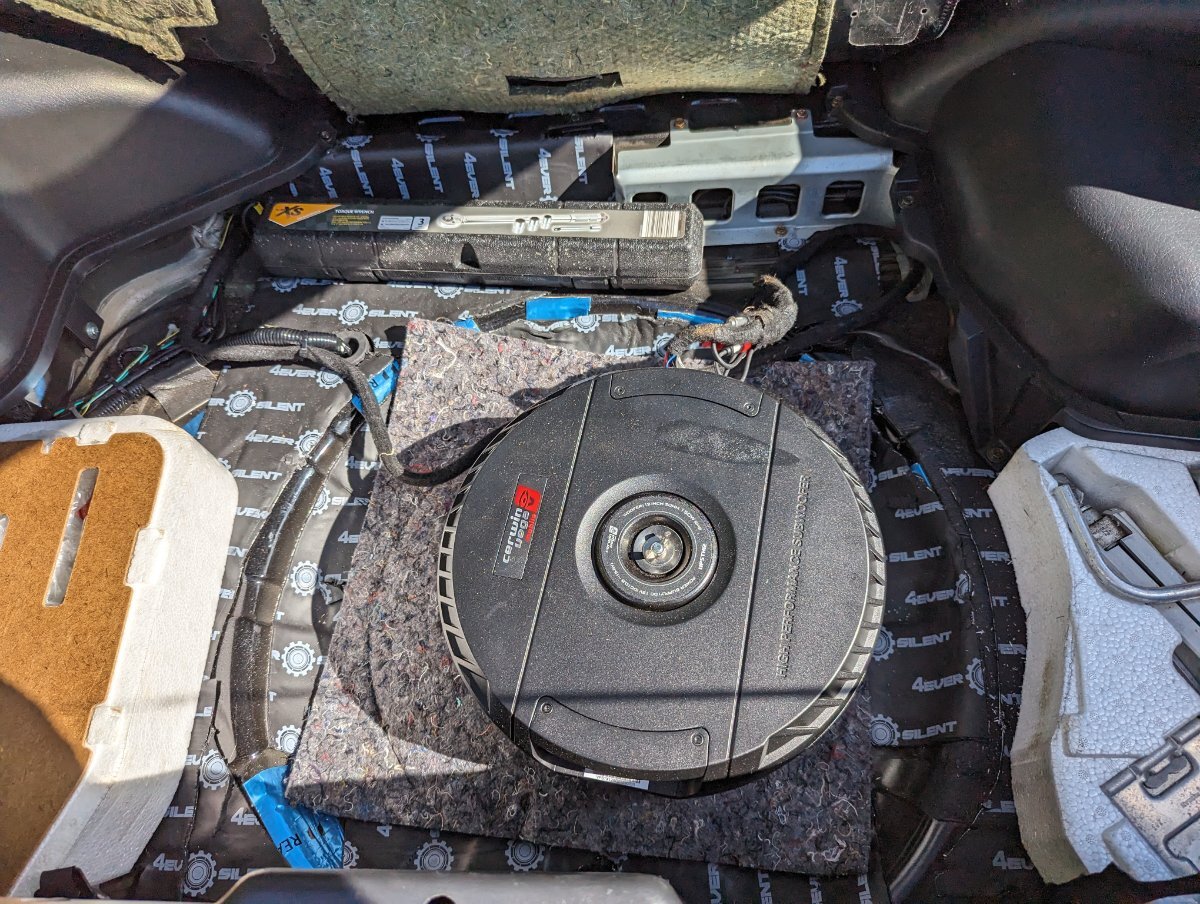
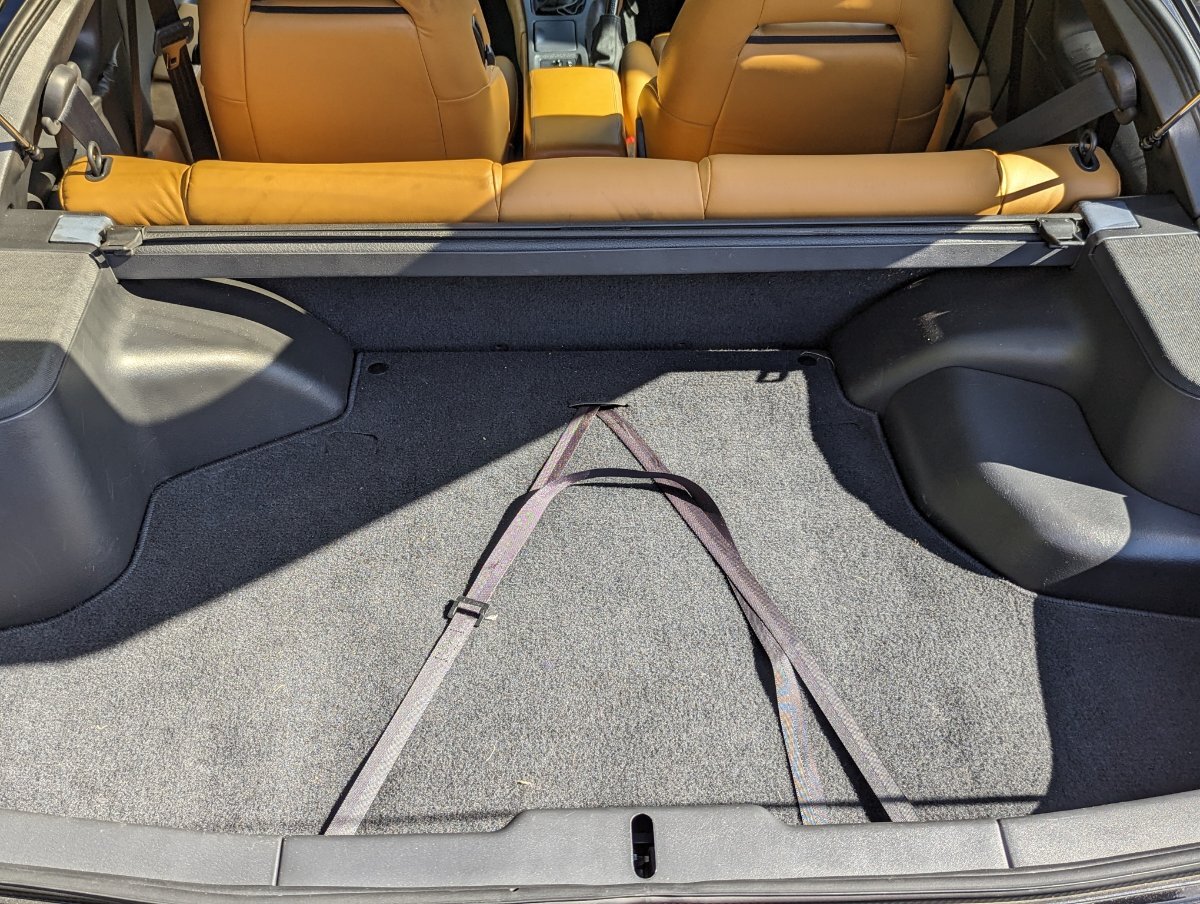
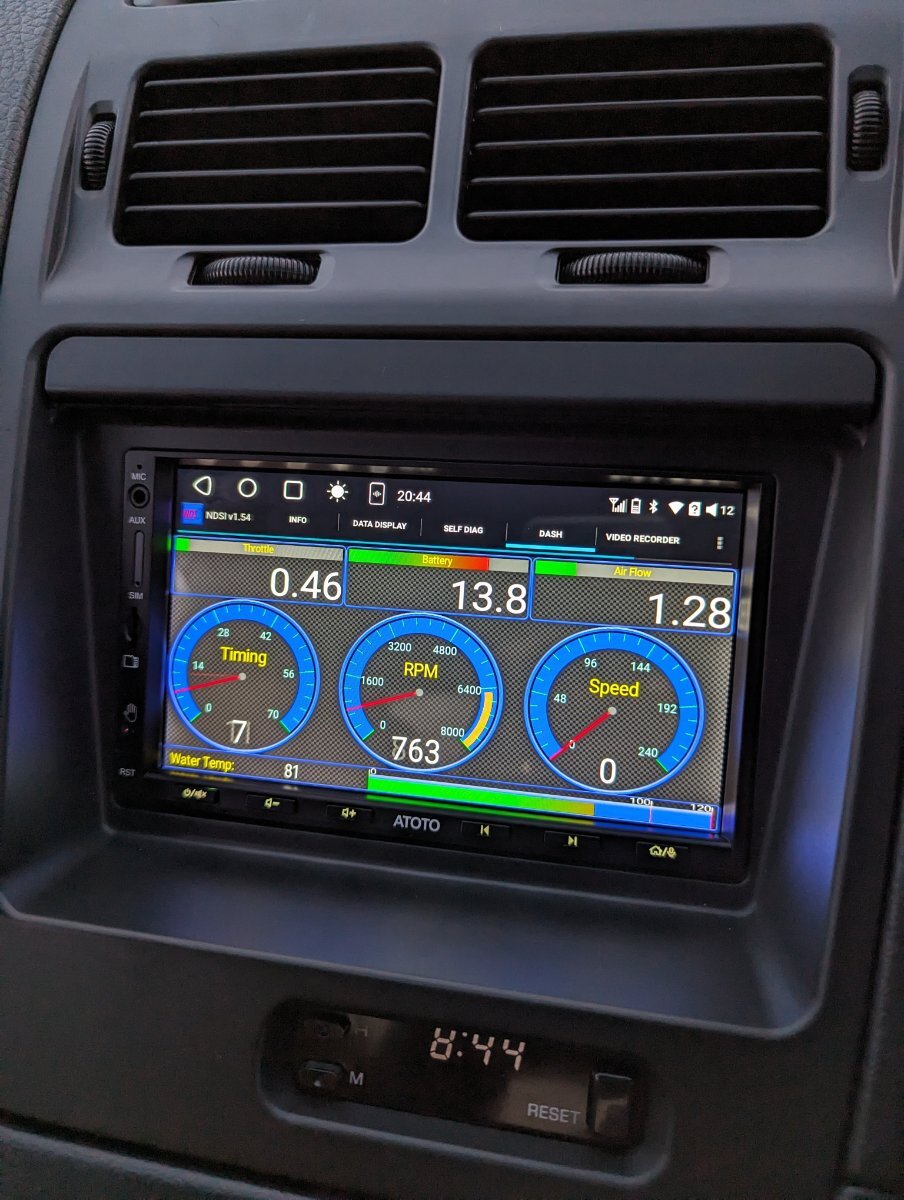
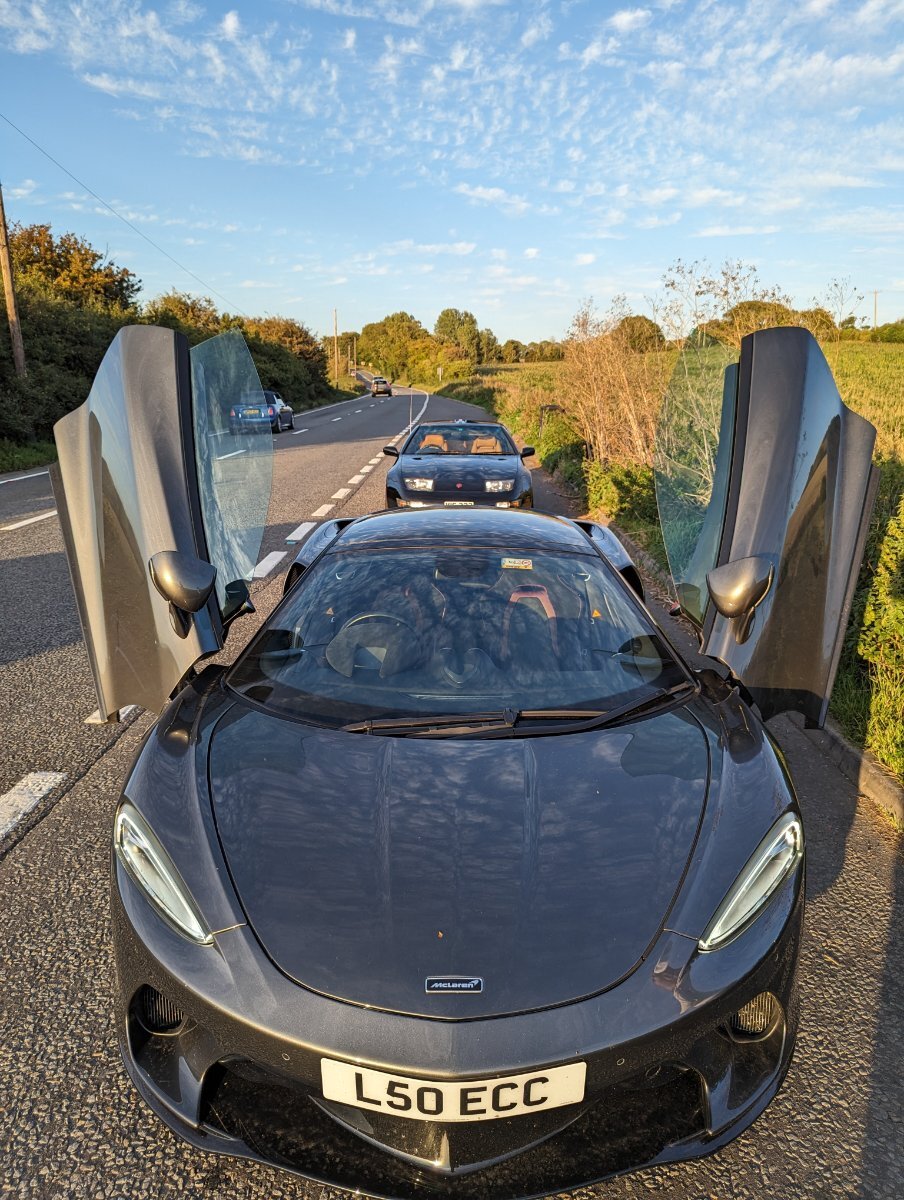
Despite owning a 300zx for almost 12yrs, I've never had a fully working sound system. I wasn't too bothered as I quite like taking in the sounds of a full throttle driving experience but with a Euro road trip coming up and lots of motorways til we reach our destination I decided now would be a good time to replace the redundant Japanese system with something more modern. I had attempted to modernise my last 300zx as well, identifying the components I'd need for my build and even having someone fabricate a double din android tablet holder but I never managed to finish the job before selling. Fast forward to 2023 and there is a lot of choice when it comes to Android headunits which are plug-and-play. The headunit runs Android and can take it's own data-enabled sim but I just hotspot off my mobile instead of having to pay for another mobile contract. My phone also connects via BT for calls, messages, etc. As an Android unit, I can also use all the other usual apps - Waze and GMaps, Whatsapp, GMail, YouTube, Netflix, Prime, etc. I've also installed NDSI for live diagnostics. For speakers, I've kept what was in the car already. I believe the fronts are aftermarket but the rear are stock. I've installed a Cerwin Vega spare wheel (slim) sub which is immense. I contacted CW and discovered that they do not ship or support sales outside the US so I had to do some digging to find a supplier Stateside who would ship to me. In terms of accessories / peripherals, I've installed a USB ODB adapter to work with the NDSI app. It works perfectly except for not reading speed but I'm aware of the fix and just need to get around to doing it. It's proven so shouldn't be any issues there I hope. I've also installed a bullet-style reverse cam fitted in place of the tailgate lock. It's not the highest resolution but much better than expected and is very, very useful. Finally I've installed a wireless charge-pad connected to the quick charge port of the Atoto and situated it in the centre console. The idea is that when I get into the car, I turn on hotspot and then put the phone away in the console, using the Atoto for anything and everything whilst driving. I've been able to do away with the unsightly phone holder and charging cables entirely. Removing the old stuff was also very good as there was a LOT of stuff...the previous owner was definitely running some sort of big AV setup as well as the Japanese told card reader, etc. One thing that has stopped working is the melody box. It must have been wired into the old system but we couldn't figure out how to refit so I'll be looking into replacing that as I loved the authenticity it gave the car...or feeling of! The finished product sounds and performs incredibly well so I'm absolutely chuffed! So is my 2yr old who came for a ride today and was quite content sitting in the back watching Paw Patrol on the HD screen..lol . . .
11 points
-
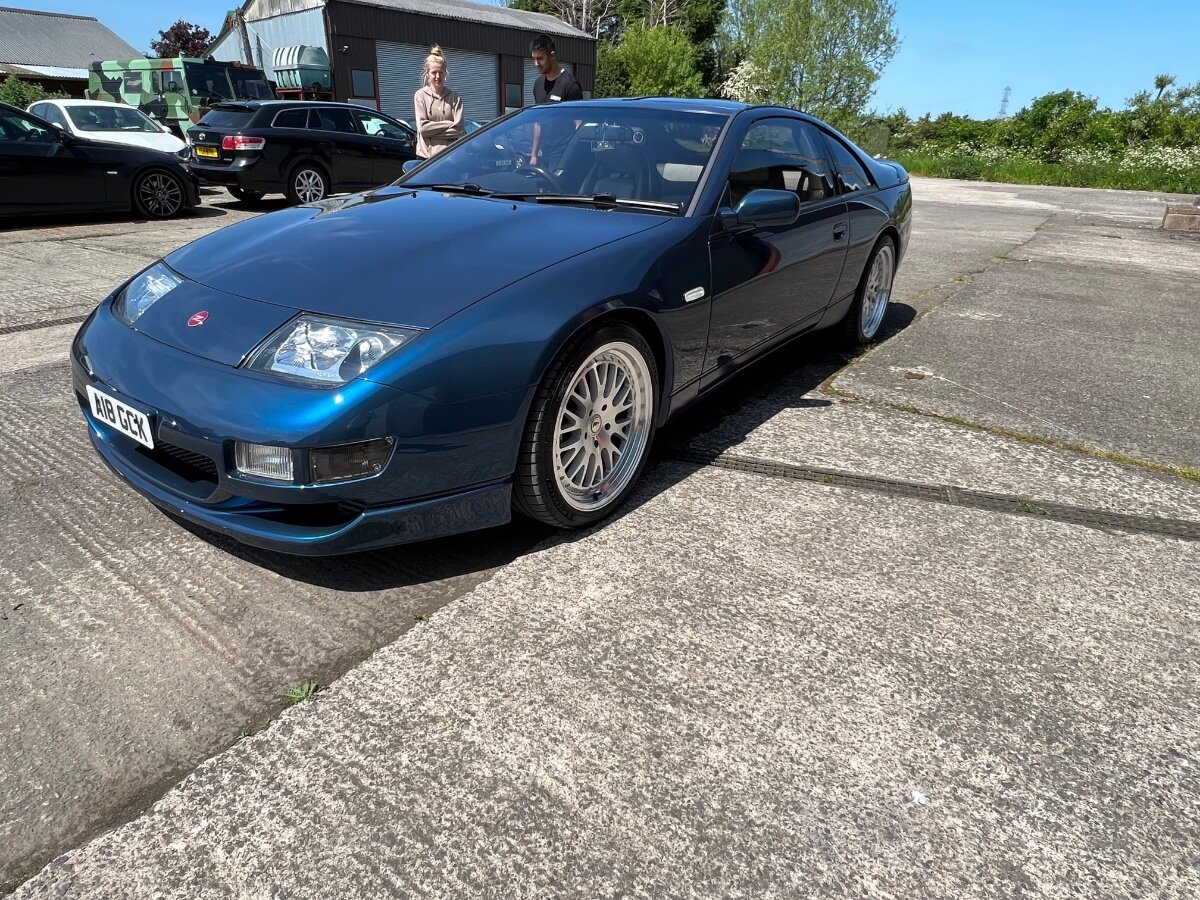
A few months ago now, when getting an MOT for the Z, the tester left the jacking pads wound up on the sliding jack that sits under the 4 poster lift. Consequently, when the car was reversed off, the jacks were at the perfect height to catch my front bumper lip. 🤦🏻♂️ Luckily it was at a very low speed so no structural damage was done to the bumper, however the deflection exceeded the flex of the paint! Some hairline cracks in the paint appeared around the arrested areas so it was off to the bodyshop to refinish. Fast forward missing the AGM, a drive out with Vig and Andrew (in the Z at least), Simply Japanese, some local shows, cars and coffee and I finally have the car back, almost in 1 piece! Just the pin stripes and clusters to go on and it’s good to go again. 😎
11 points
-
Nothing today (yet) but on Saturday, I replaced my heater control pod with a shiny new (well second-hand form Ebay) one..... The text around the washer controls had faded over the years, so this is a big improvement!! I then polished the headlamp/cruise control pod with some Autoglym paint renovator so they both match once more 😉 One thing I learned about the heater control.... The actual control switches/display unit come out of the control pod.... So you can buy either a series one or series two, remover the four little screws that hold in the switch section and replace it with your original one. Handy to know, if you can't find a nice example of the right one for your Zed 🙂
10 points
-
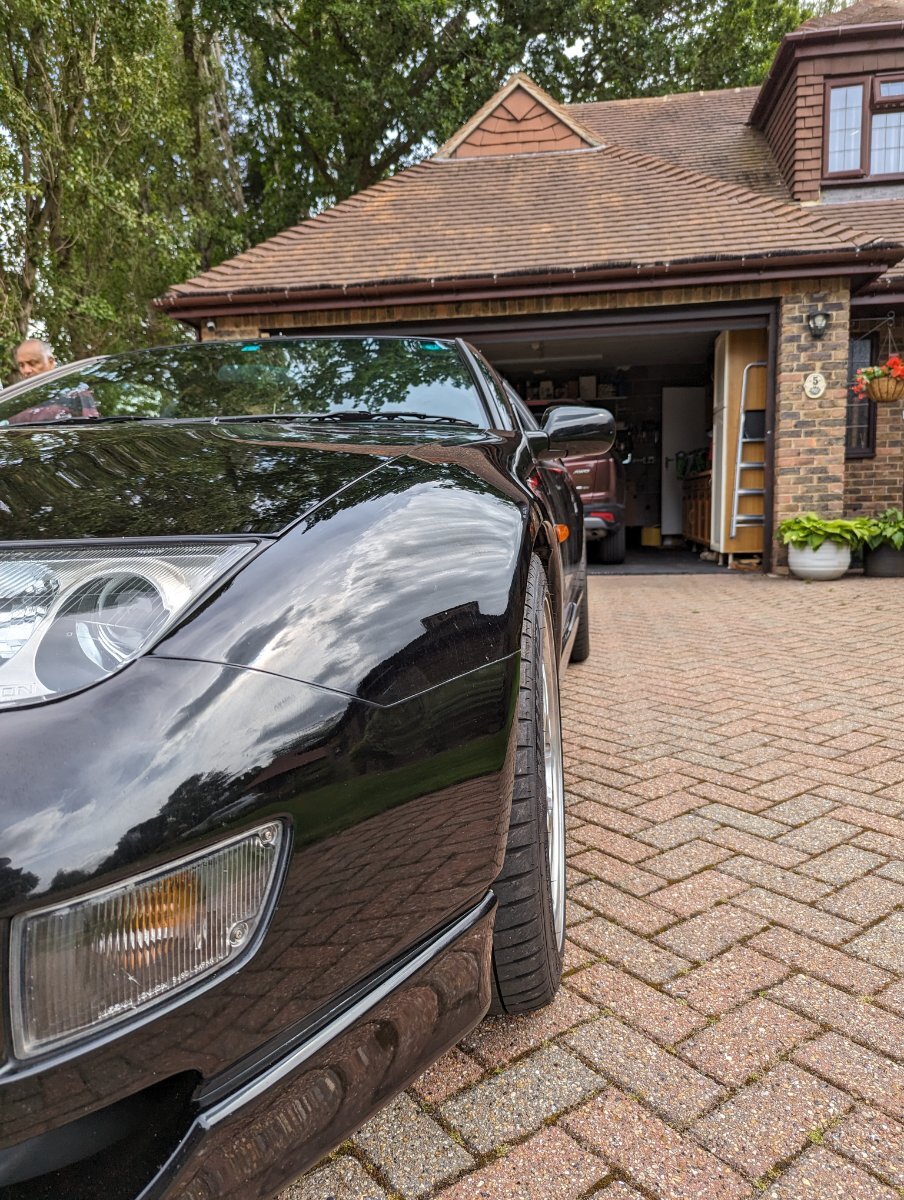
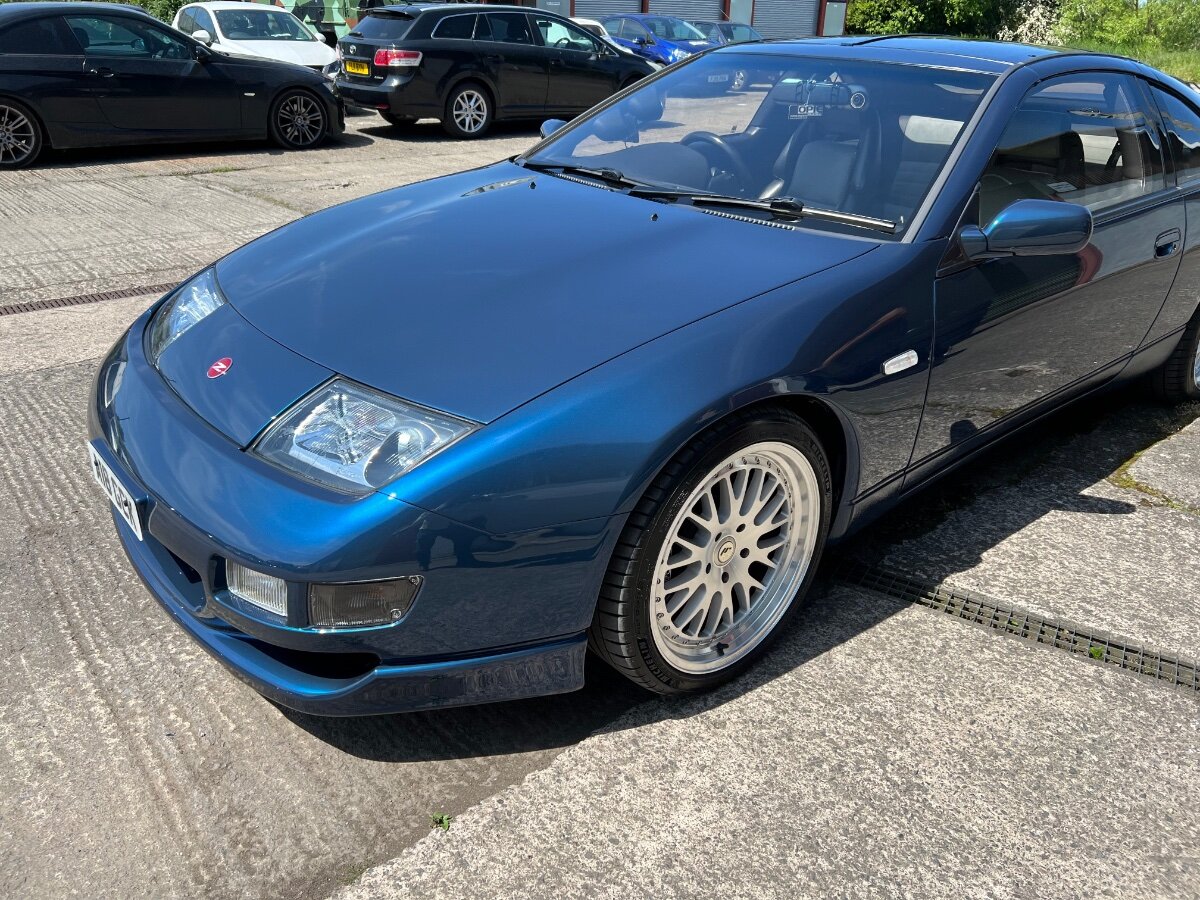
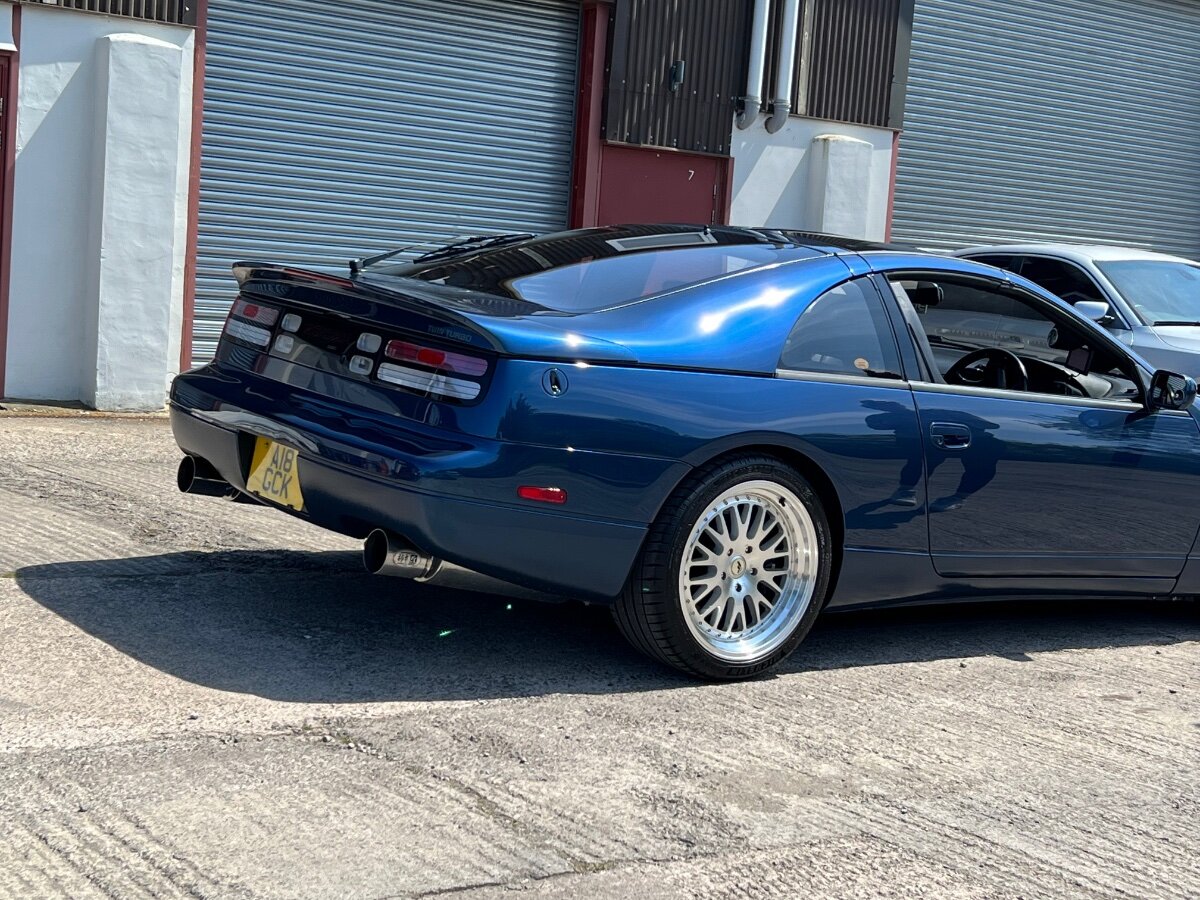
Hot on the heels of the AV setup, I also wanted to adjust the stance. I had been looking into BBKs such as the Akebono and when I discovered that they wouldn't fit under my BBS LMs, the thought did cross my mind to replace the wheels but wanting to delay that expense, I opted for spacers. The fronts, as they are running Porsche calipers, already had 10mm spacers on them but the rears were not. I opted to go 20mm on the front and put the 10s on the rear. I think the rear sits perfectly now but the fronts could do with some positive camber adjustment BEFORE AFTER . BEFORE AFTER . BEFORE AFTER
10 points
-
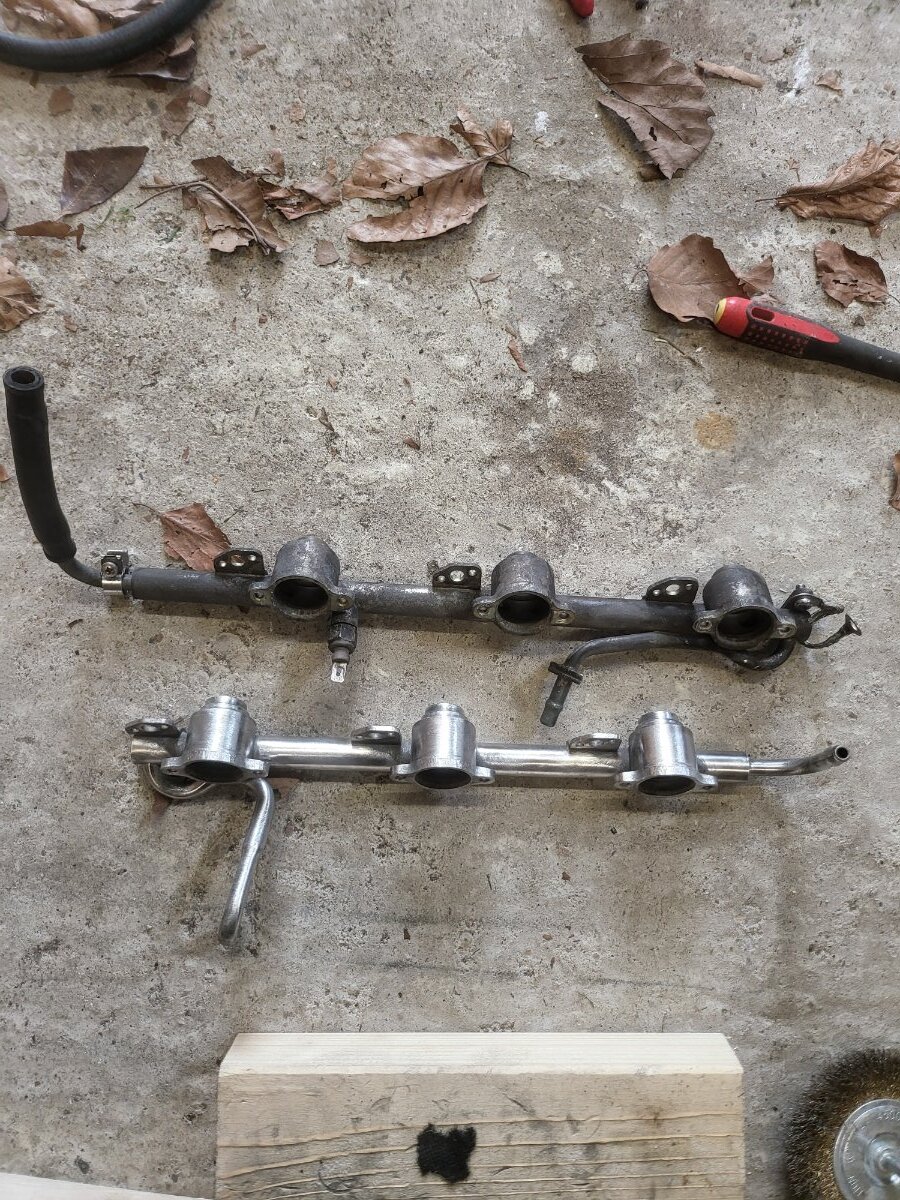
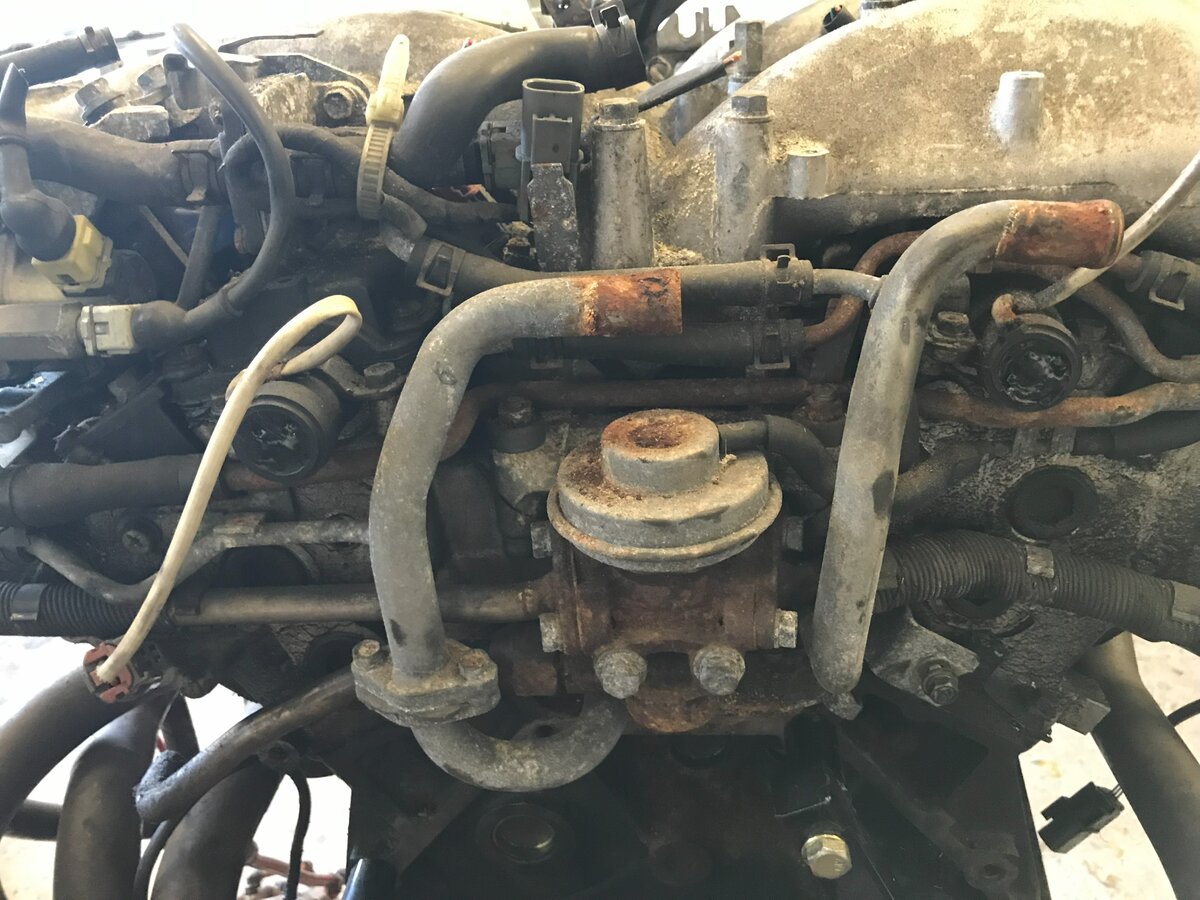
Also cleaned up the fuel rail as that looked a bit worse for wear. Here's a before shot Before after is to be continued once all cableing sorted...
10 points
-
Assorted pictures from this years show (click for hi-res). And of course no NEC show would be complete without...9 points
-
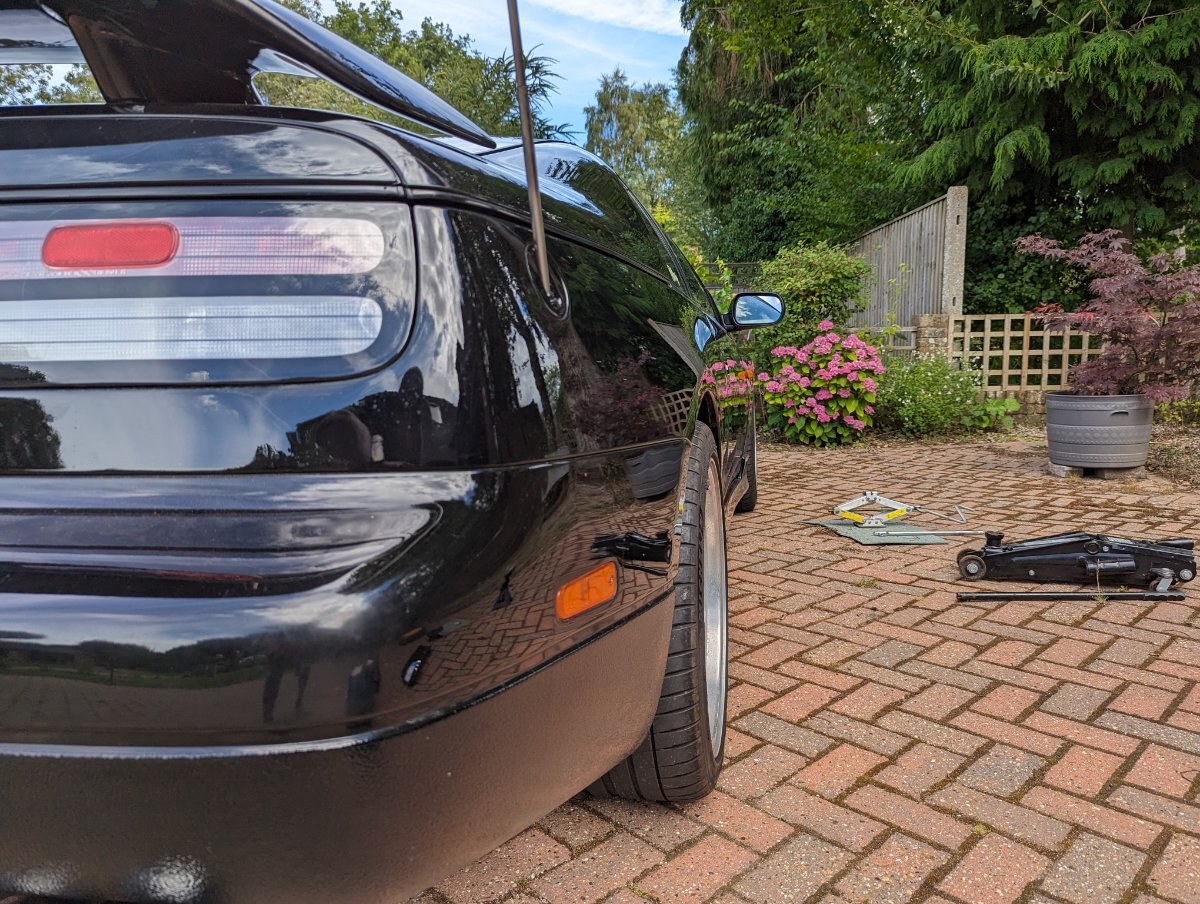
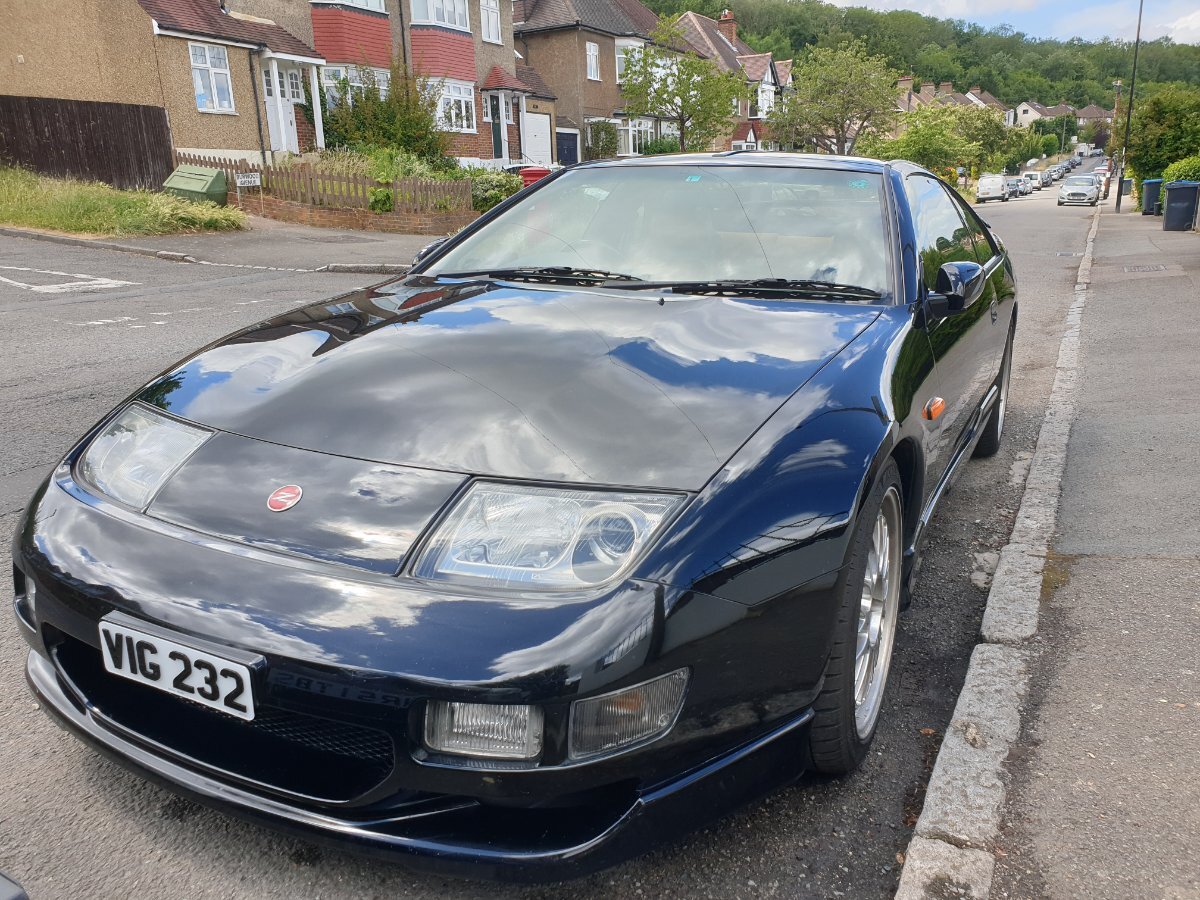
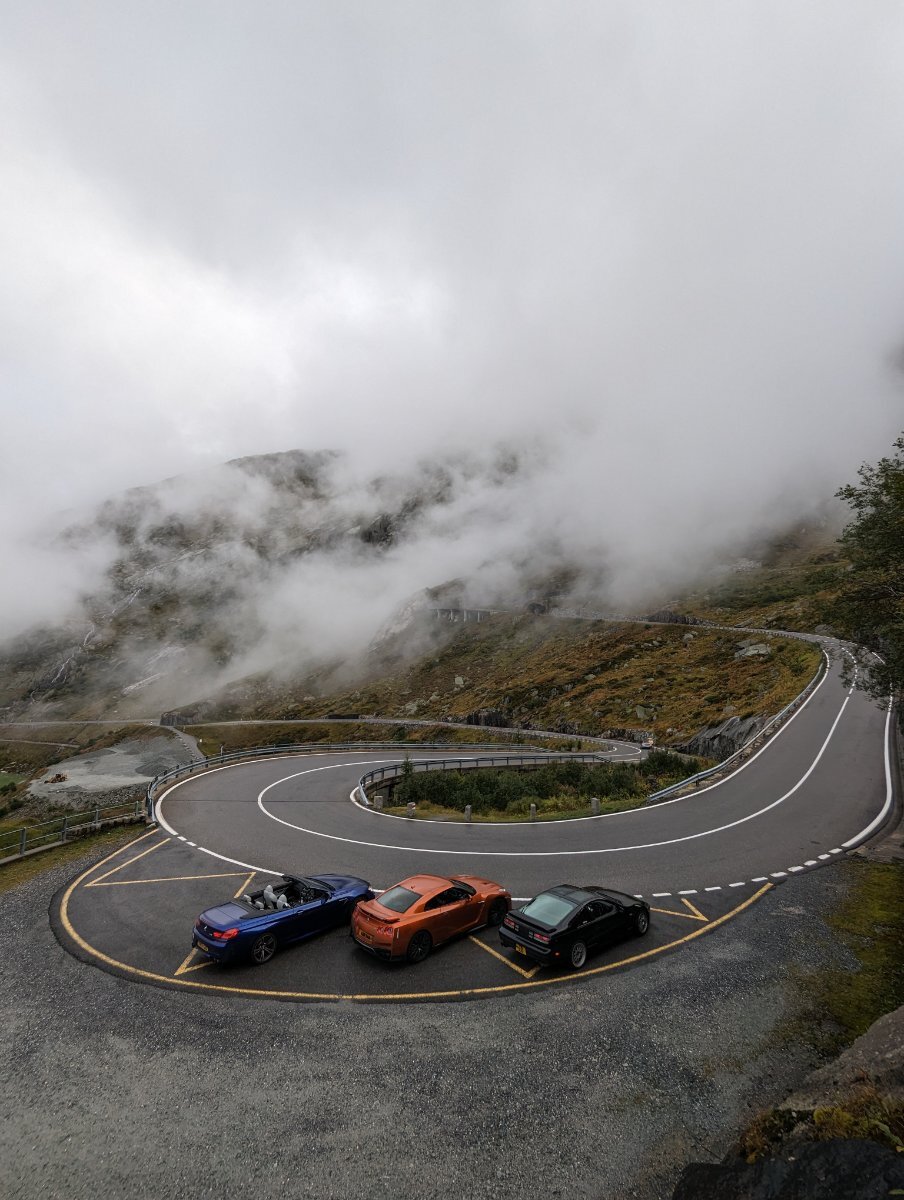
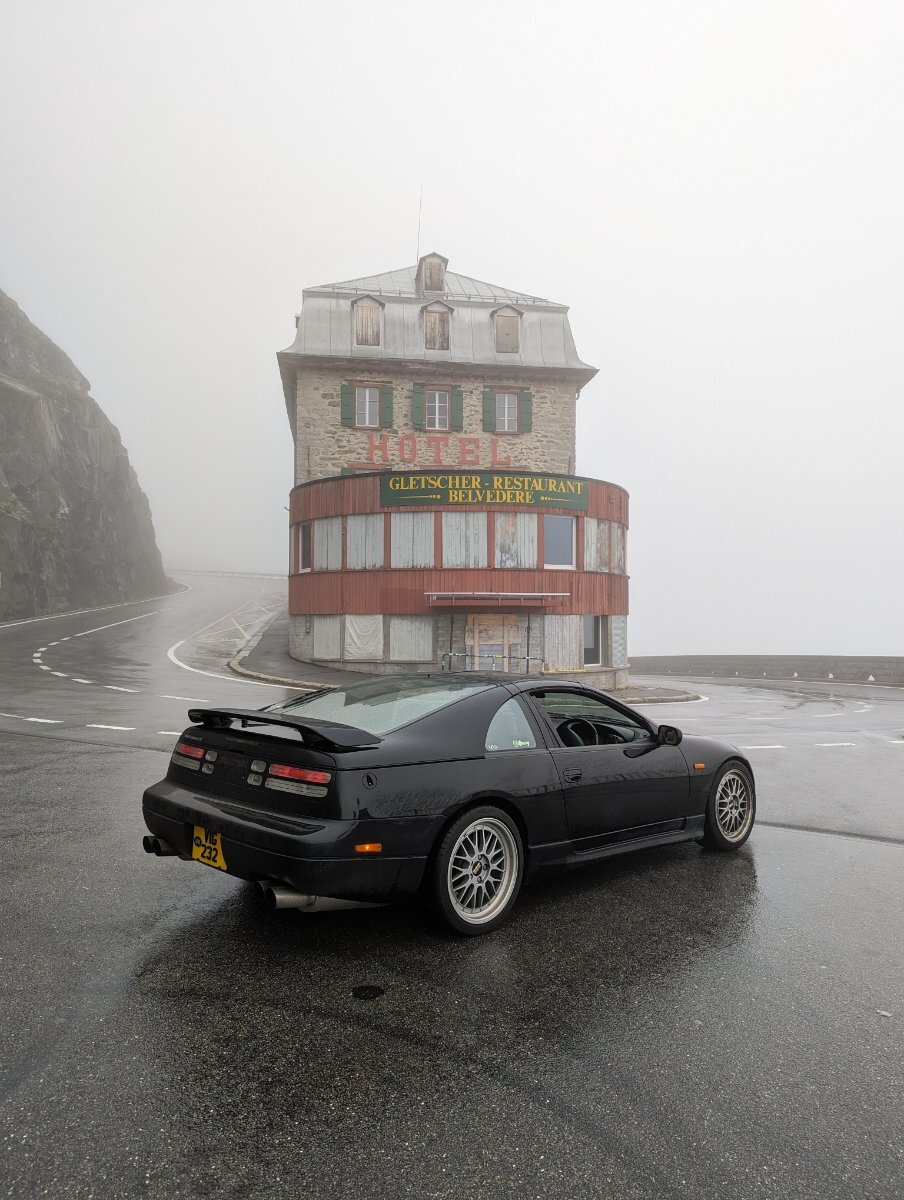
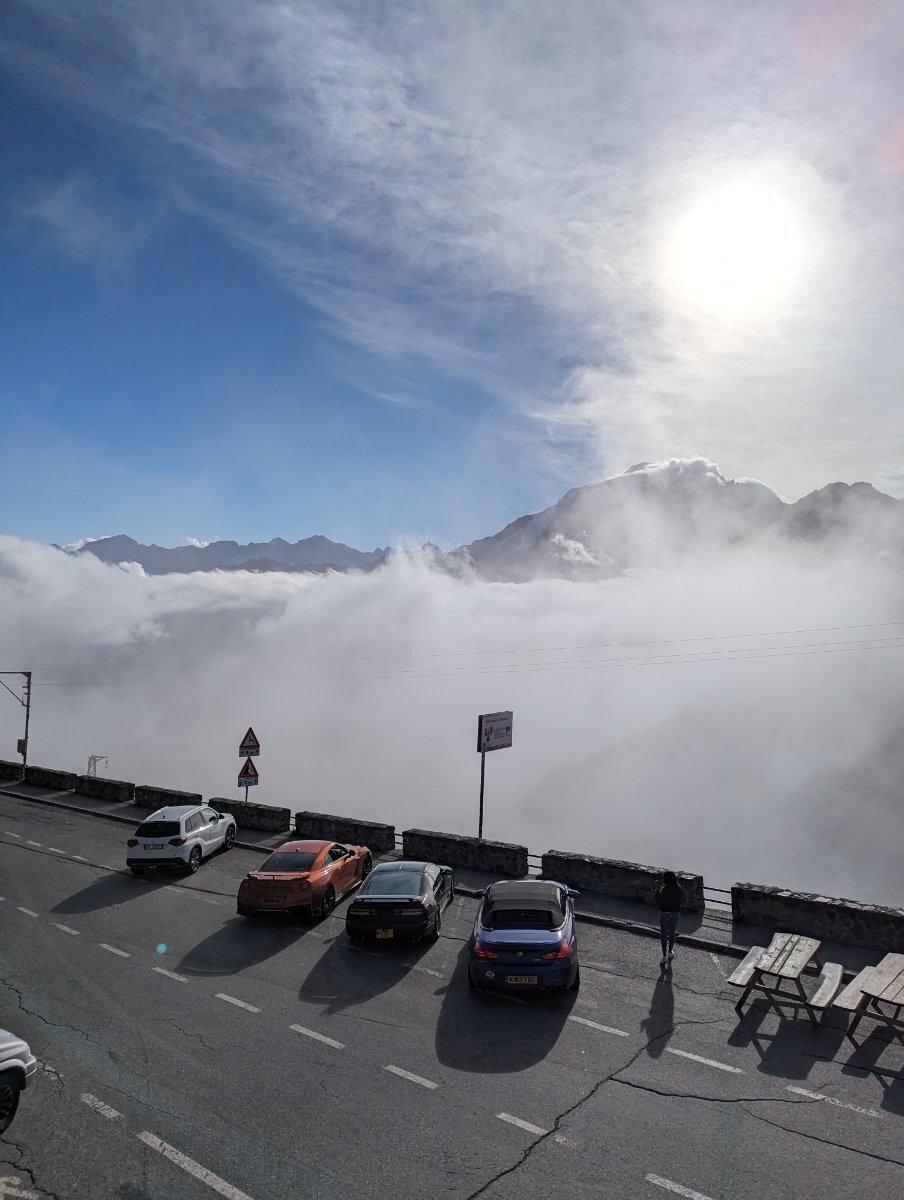
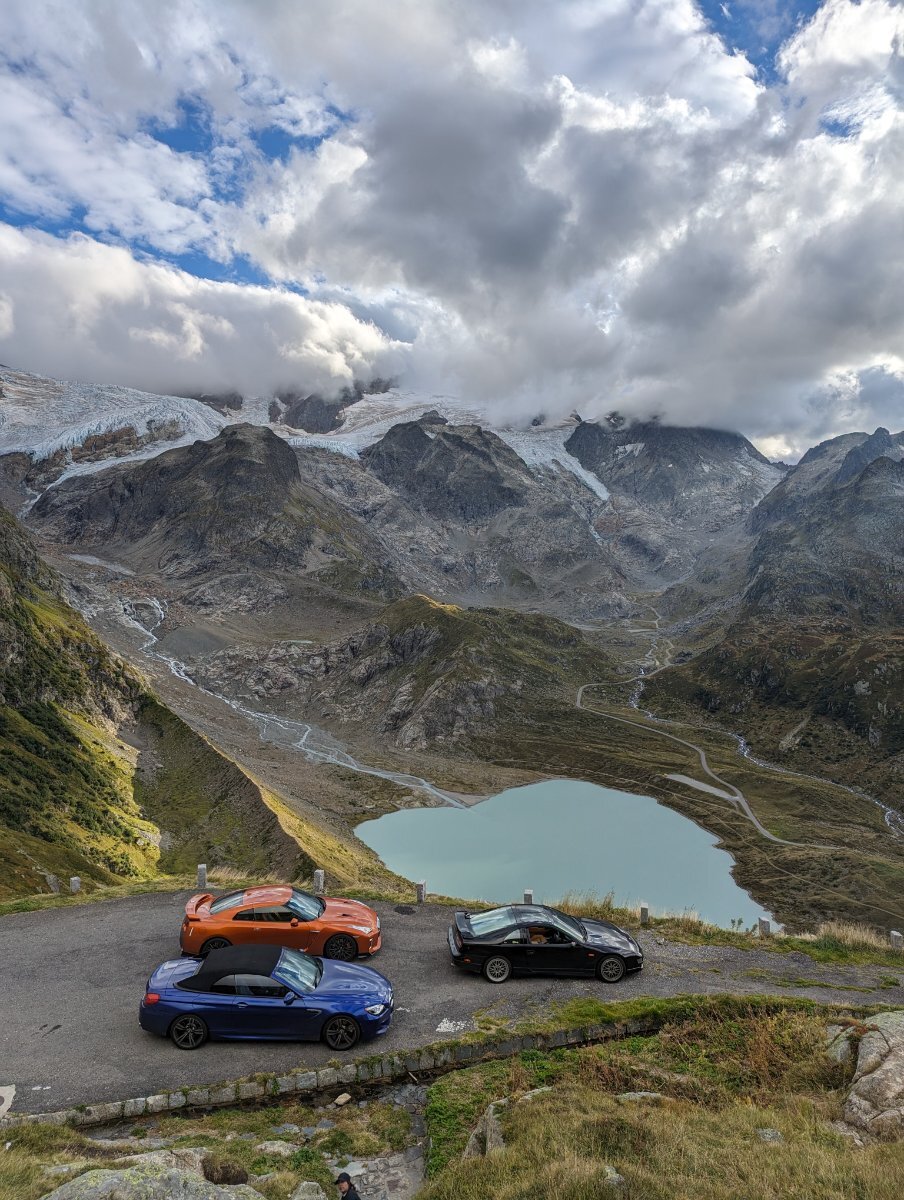
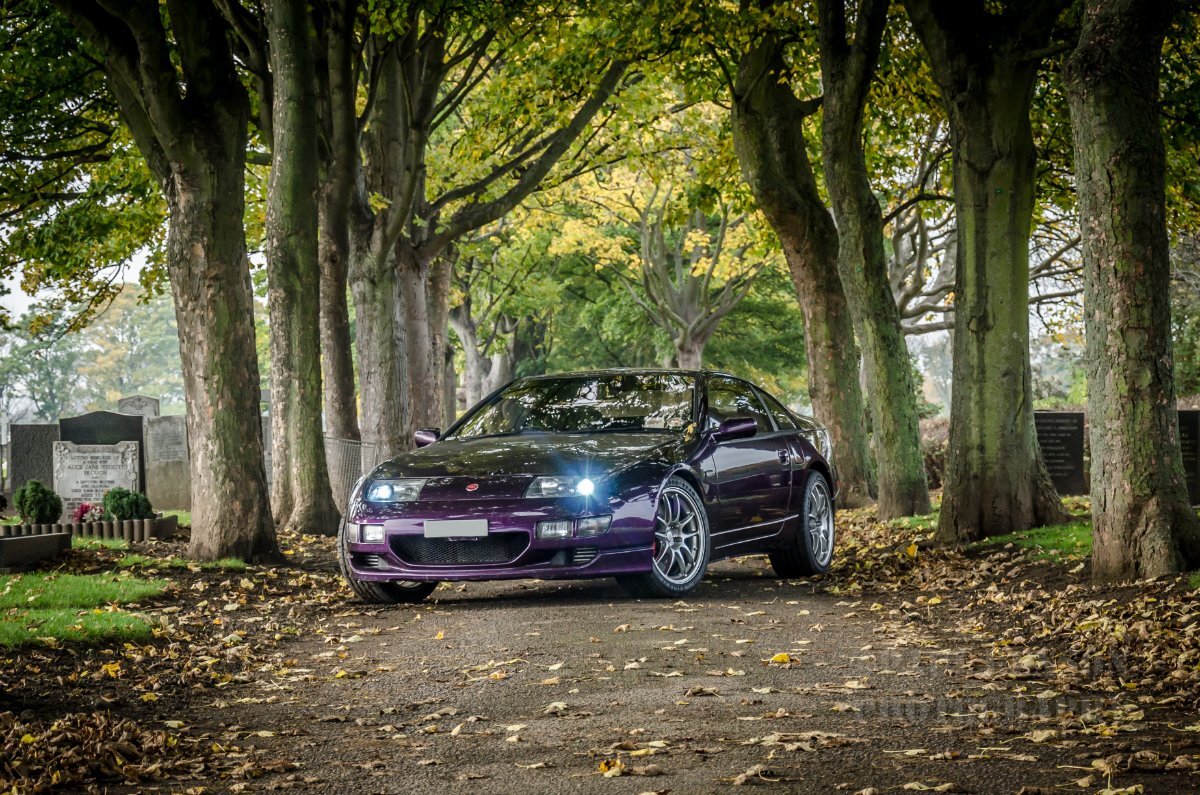
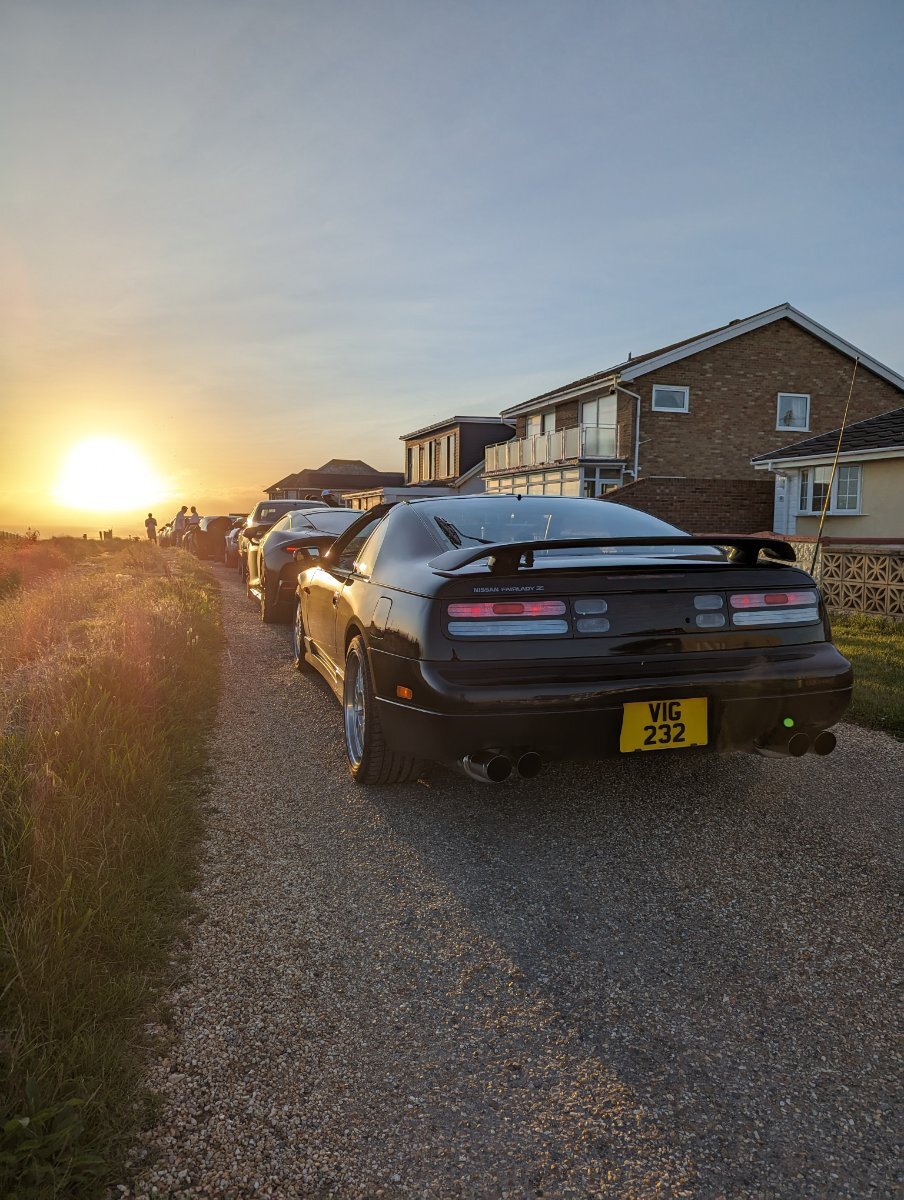
Fresh from my 5day and almost 1700mile trip to Switzerland, my overwhelming takeaway is that the 300zx, even in near stock form is an absolute delight to drive (and drive v v hard!). I went down with a modified R35 GTR and a stock V8 M6 which meant on the straights and motorways, I was nowhere near being able to keep up on pulls but once we were on the Alpine passes, it was a totally different story! The lower power and lighter car, the 300zx was incredibly nimble and at reasonably high speeds. The car never once stepped out on me, even in the wet (except when intended for some cheeky sideways action)! The only problem was a tyre blowout on the first full day due to hitting a rogue rock which had rolled across the road. A huge annoyance which almost ruined the trip and the day but we managed to salvage and get a replacement fitted the same day. It did however damage the rim slightly and I have a very small leak as a result but this didn't cause any issues for the remainder of the trip so I'm not rushing into an urgent fix but am considering binging the refurbishment f the rims forward in my plans instead. I think I may upgrade the brakes at the same time. The only thing stopping me from getting a BBK previously was that the ones I was thinking of wouldn't fit under my 18" LMs but if I'm changing those anyway, then I may as well hange the brakes now too. I'm quite happy with the power but may also sort out an EBC and get it installed and mapped (and the 115mph limit removed!!). There is so much I could recount but most of it is documented on my IG - I'll include some links below with some of the best photos which sum up the trip. https://www.instagram.com/itsmrvig https://www.instagram.com/reel/CxWLqYdtQj9/?hl=en https://www.instagram.com/reel/CxY1xlstQvA/?hl=en https://www.instagram.com/reel/CxbfKsjt4Wq/?hl=en https://www.instagram.com/reel/CxgsQgkNl3r/?hl=en https://www.instagram.com/reel/CxjUAf2NS4O/?hl=en Grimsel Pass Furka Pass San Bernadino Pass Zernez (next to our hotel or the night) . Stelvio Pass Top of Stelvio . Gotthardstrasse (just outside Andermatt) Susten Pass . Susten Pass around Golden Hour Arch Dam - Lukmanier Pass - it was blowing an absolute gale so the drone was really struggling. The videos have come out better than the photos .
9 points
-
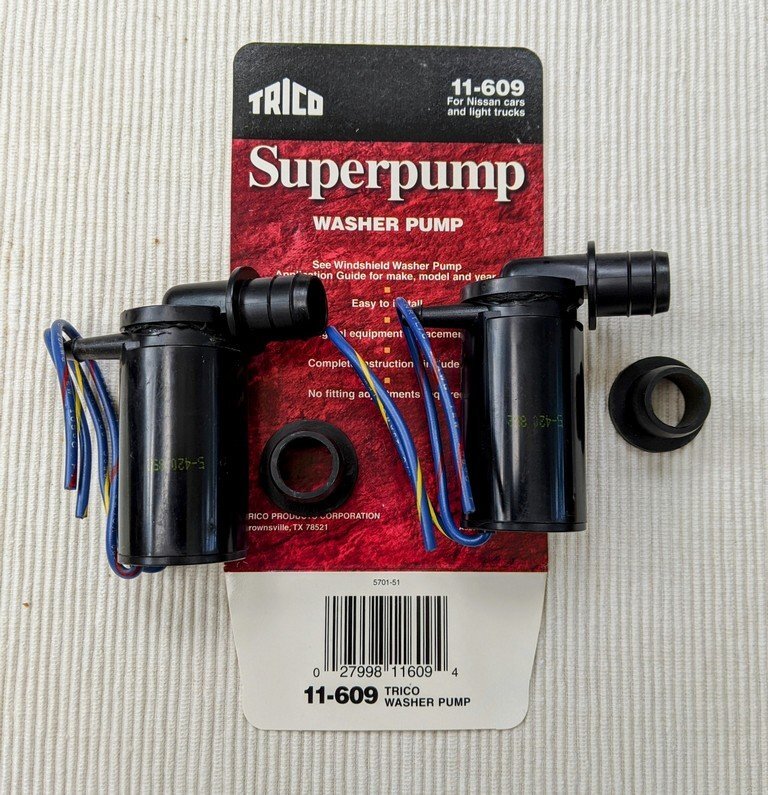
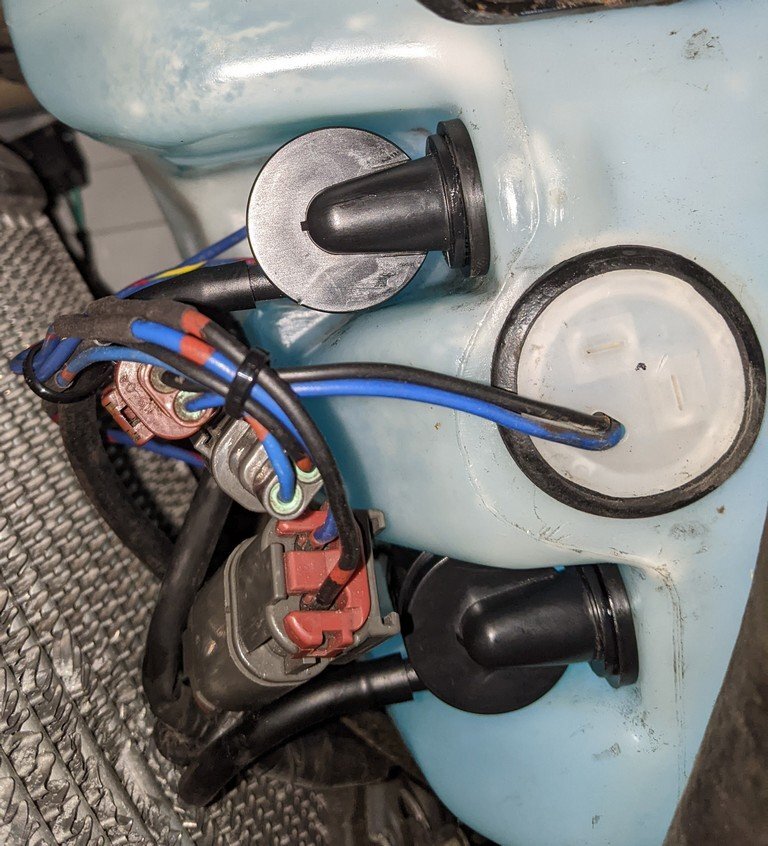
Replaced both OEM windscreen washer motors which (in my experience) are prone to seal failure and leak washer fluid onto the floor. Bought a pair of Trico aftermarket motors from the US. These are the exact same size as the OEM units and pop into place. I reused the short motor harnesses/plugs to wire up the motors to the existing body harness. For reference: Front washer motor: chassis/body harness plug LG/B (light green/black) wire is Acc switched +12v, P (pink) is switched ground signal. Rear washer motor: chassis/body harness plug LG (light green) wire is Acc switched +12v, LG/B (light green/black) is switched ground signal.
9 points
-
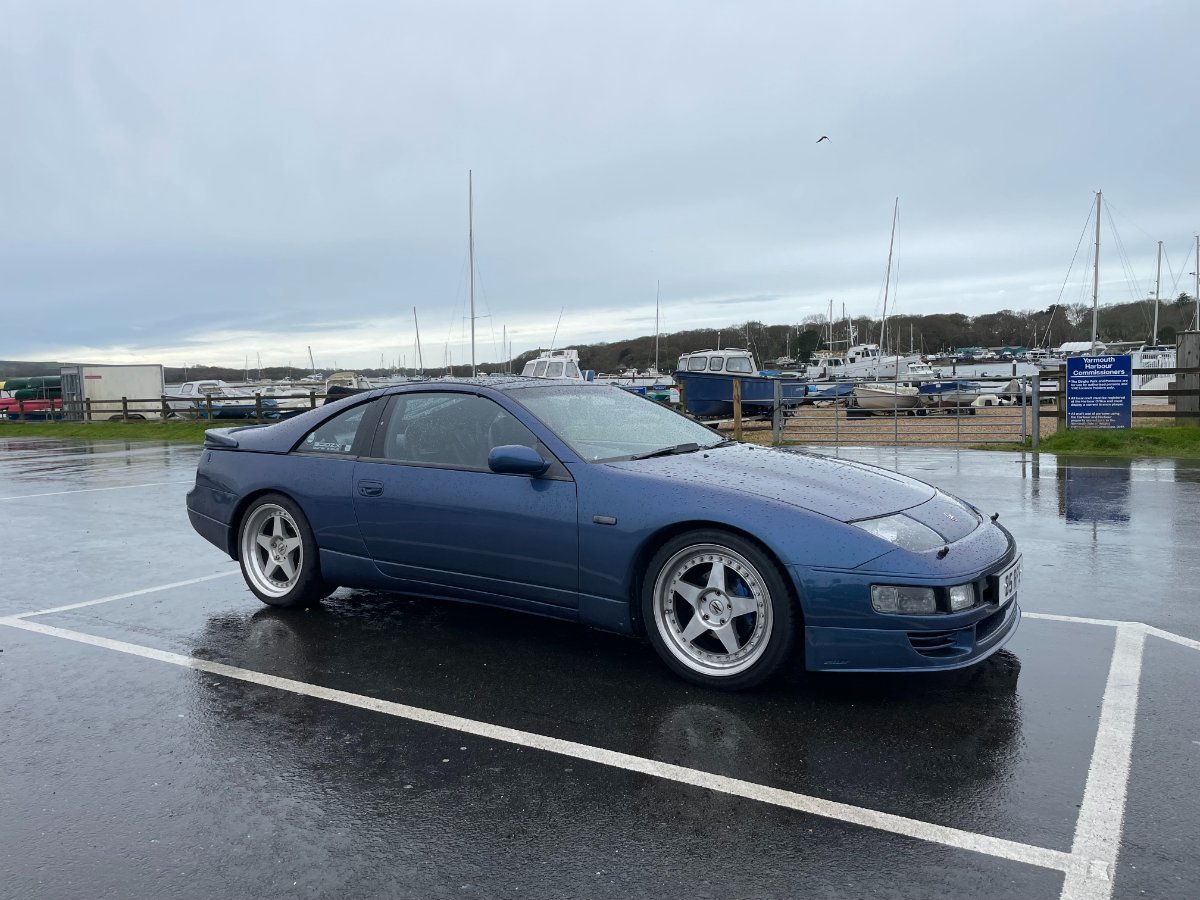
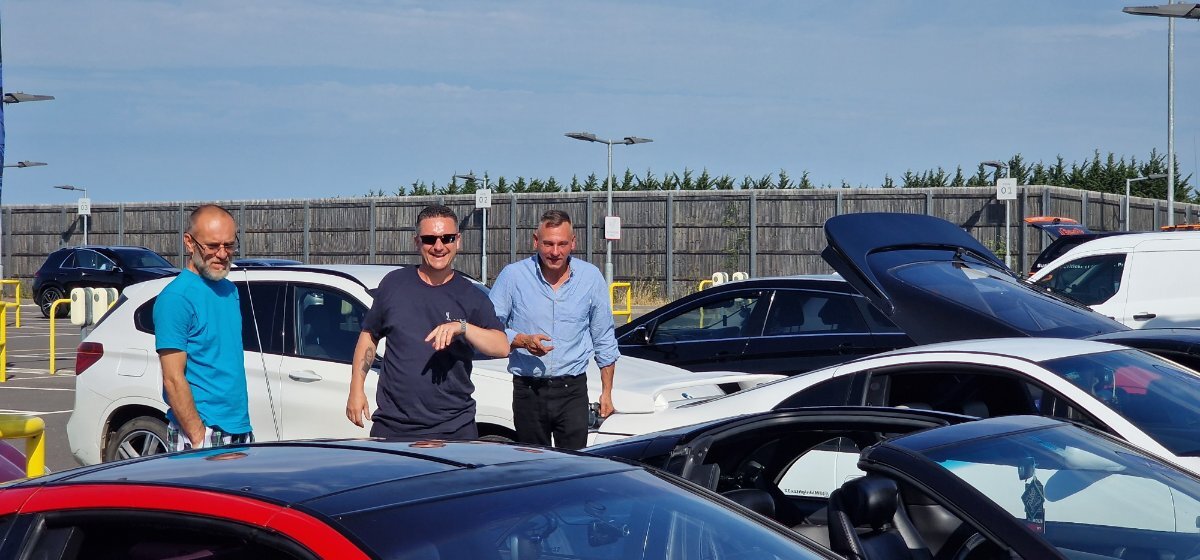
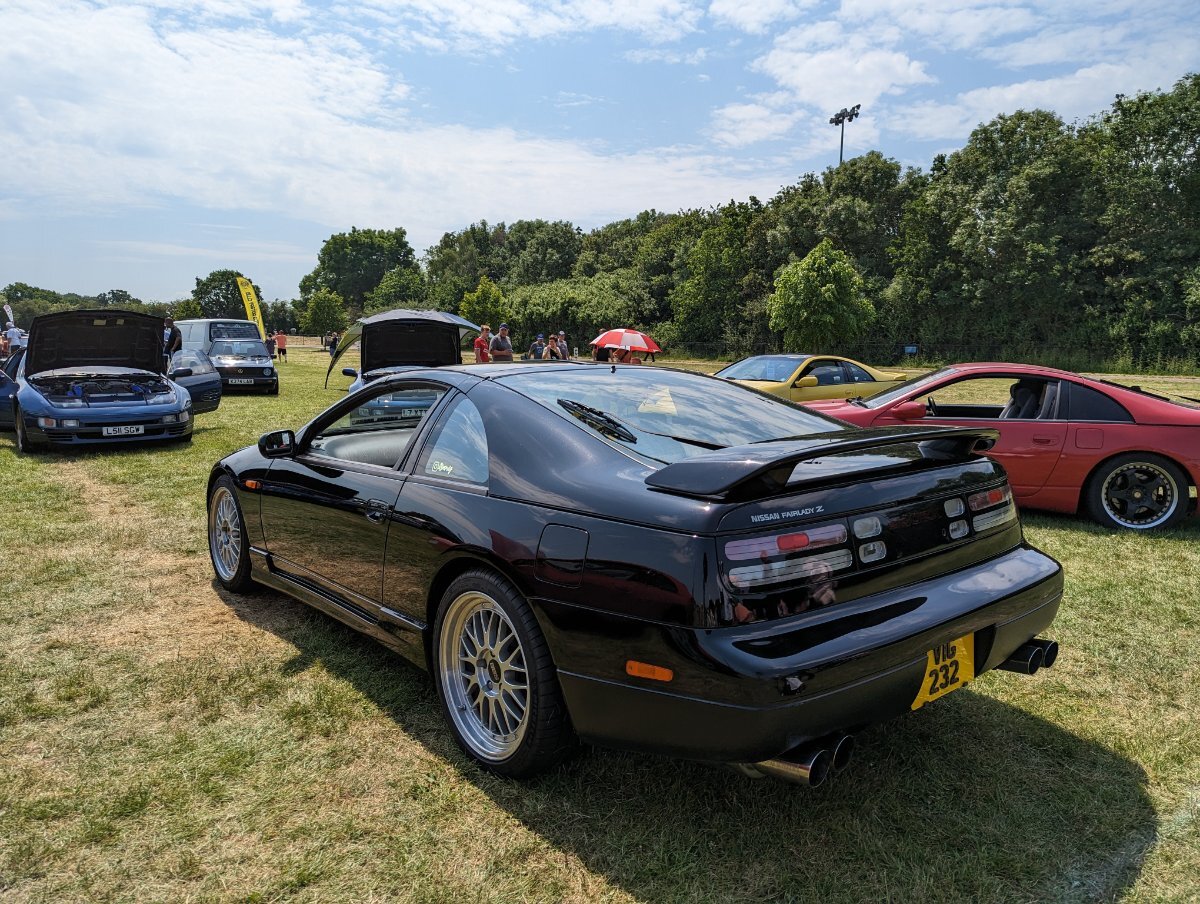
Hi all, Not a newbie but a returning member. Hope everyone is well. Here are a couple of pics of various things 🙂
9 points
-
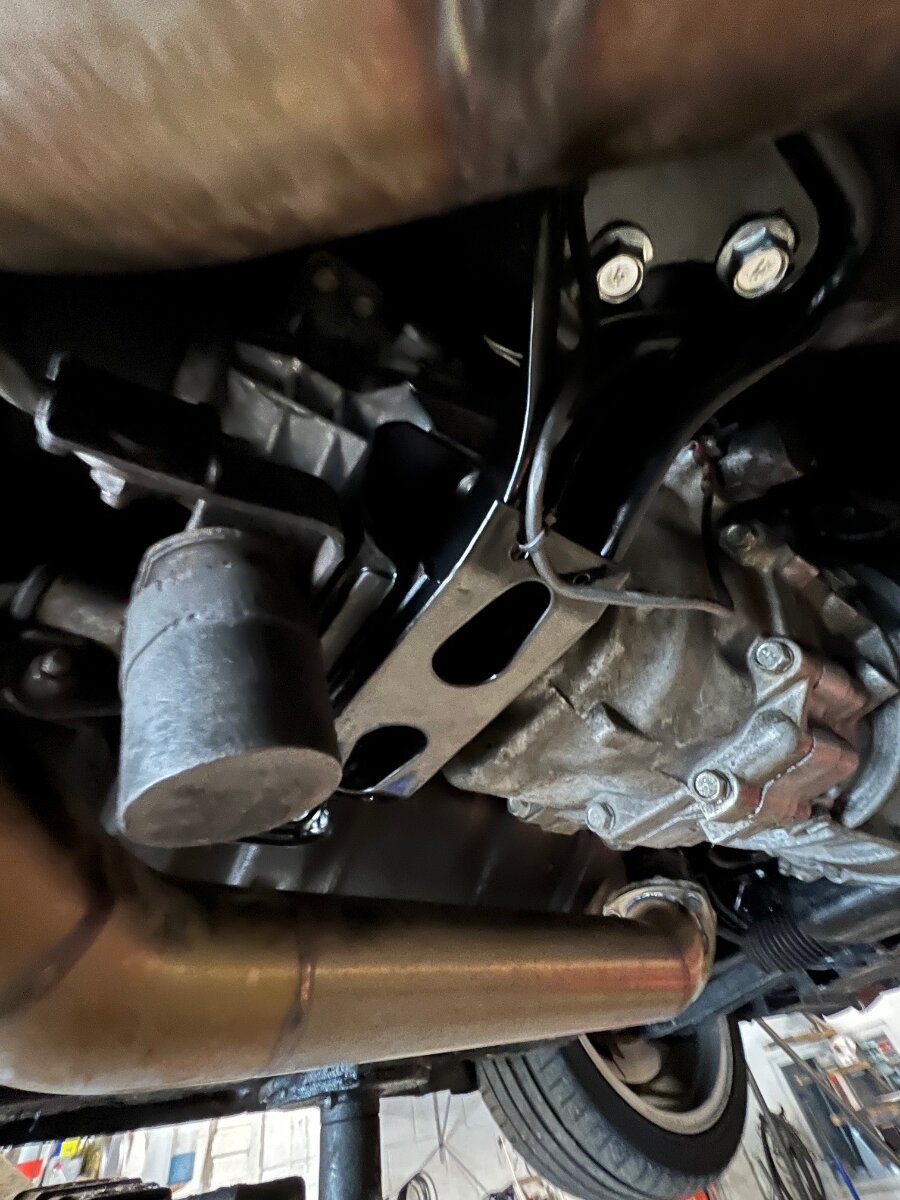
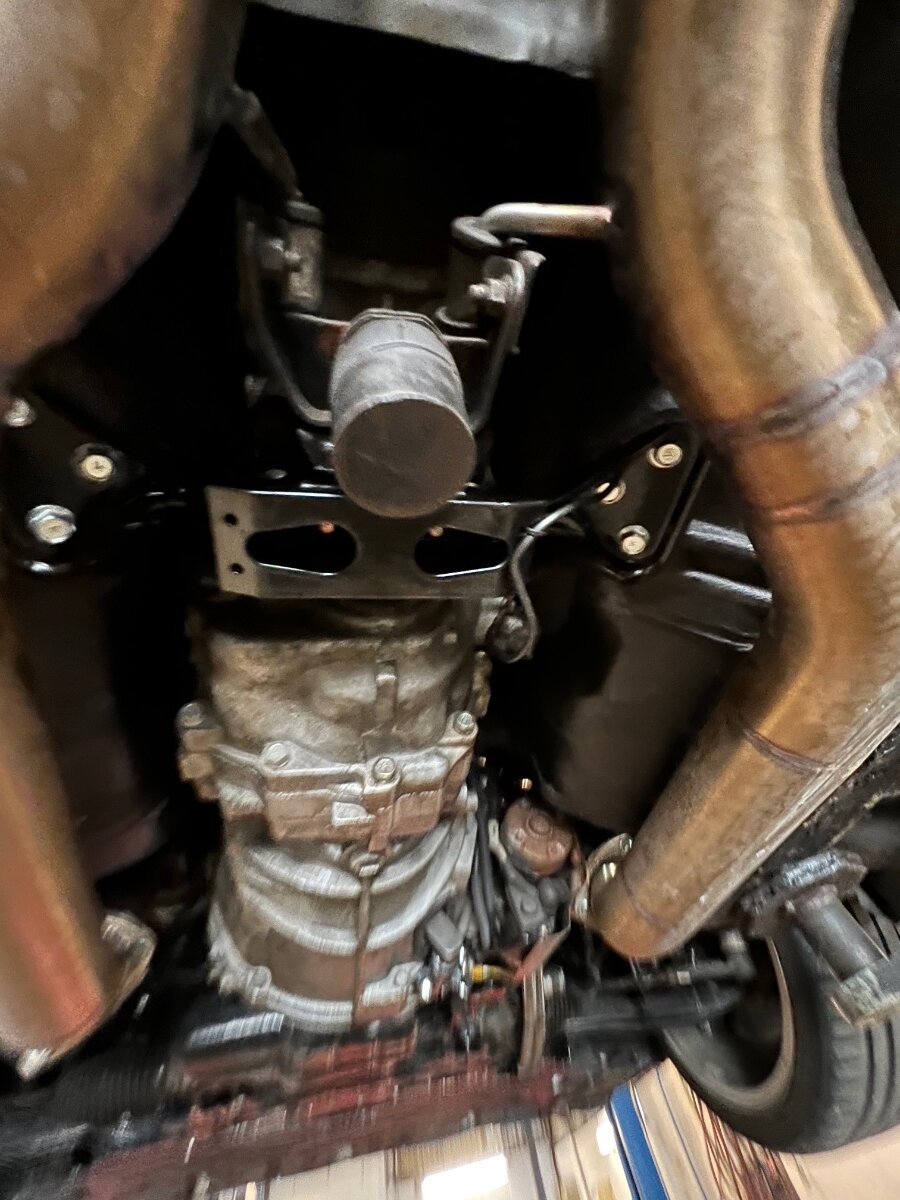
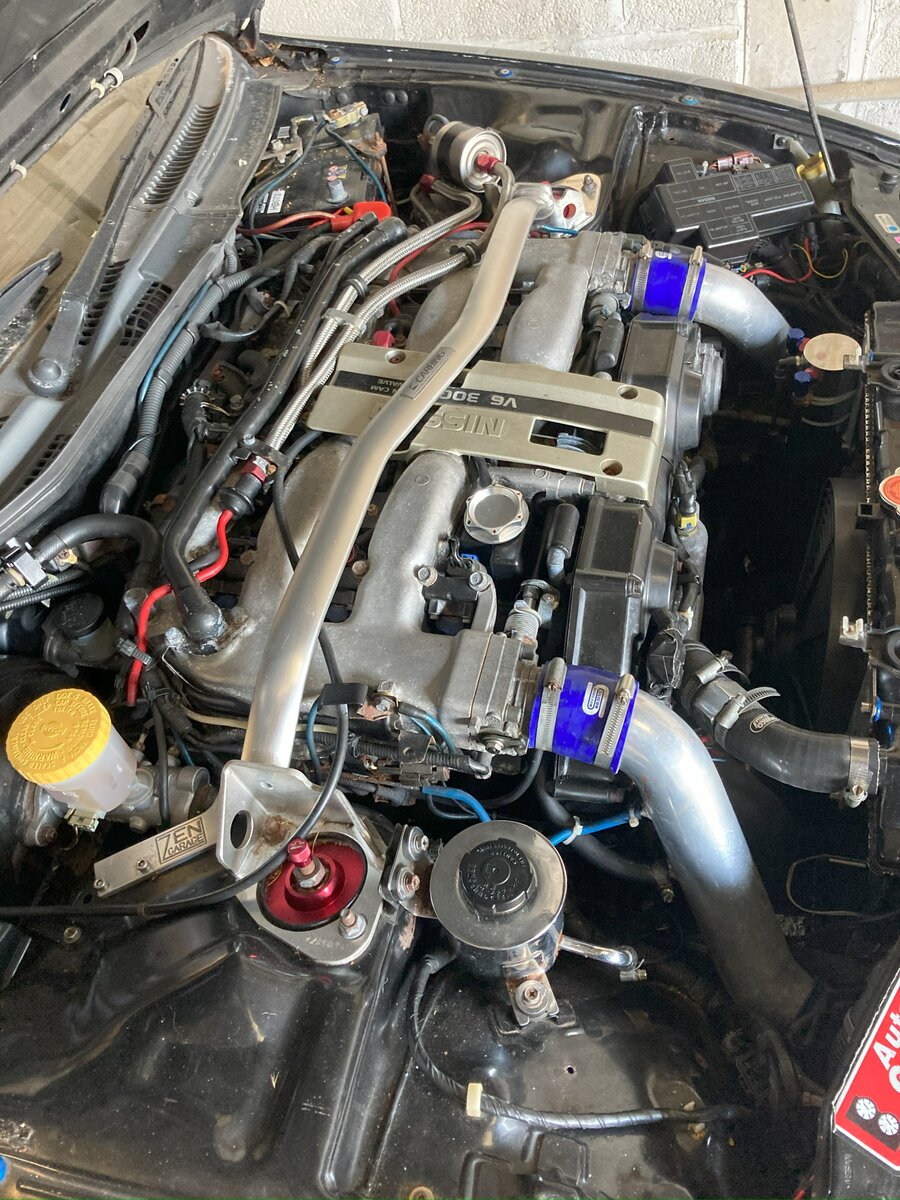
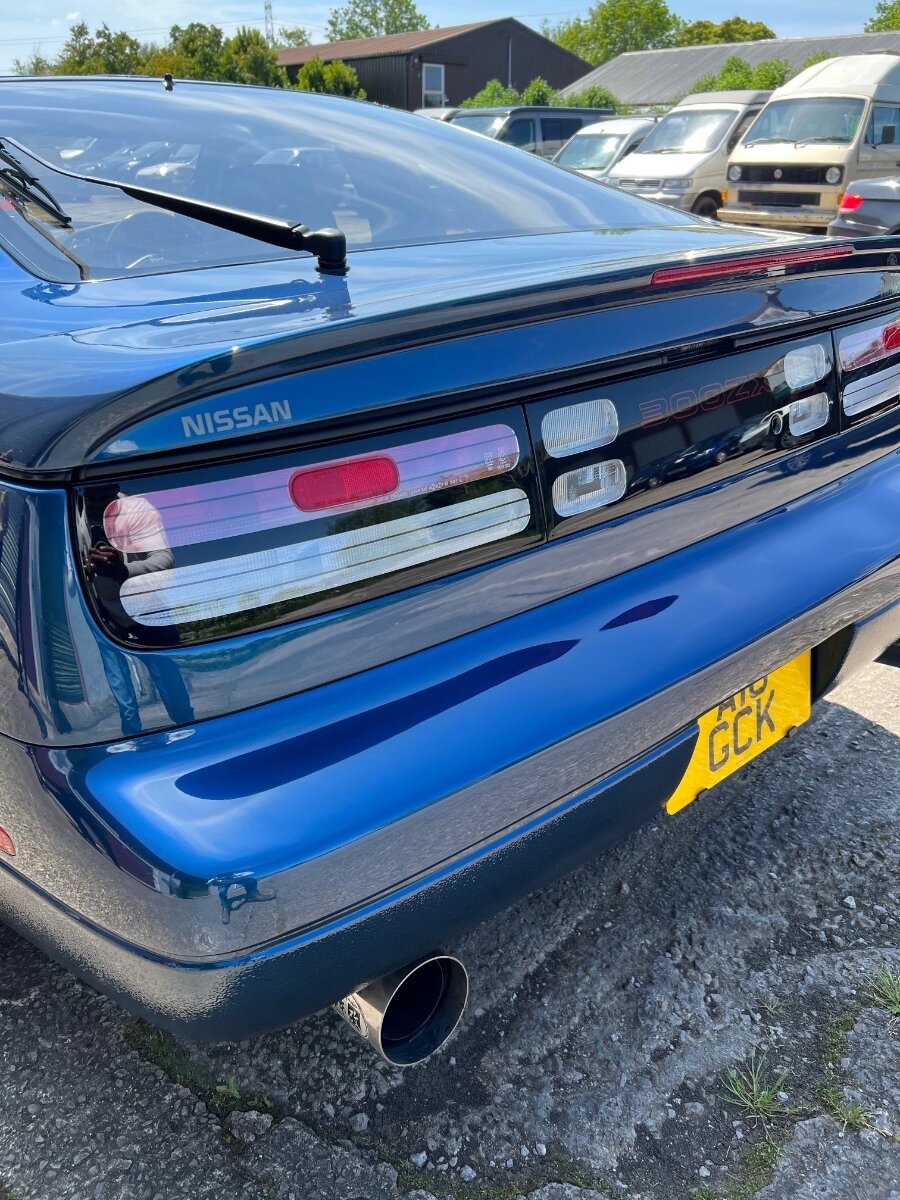
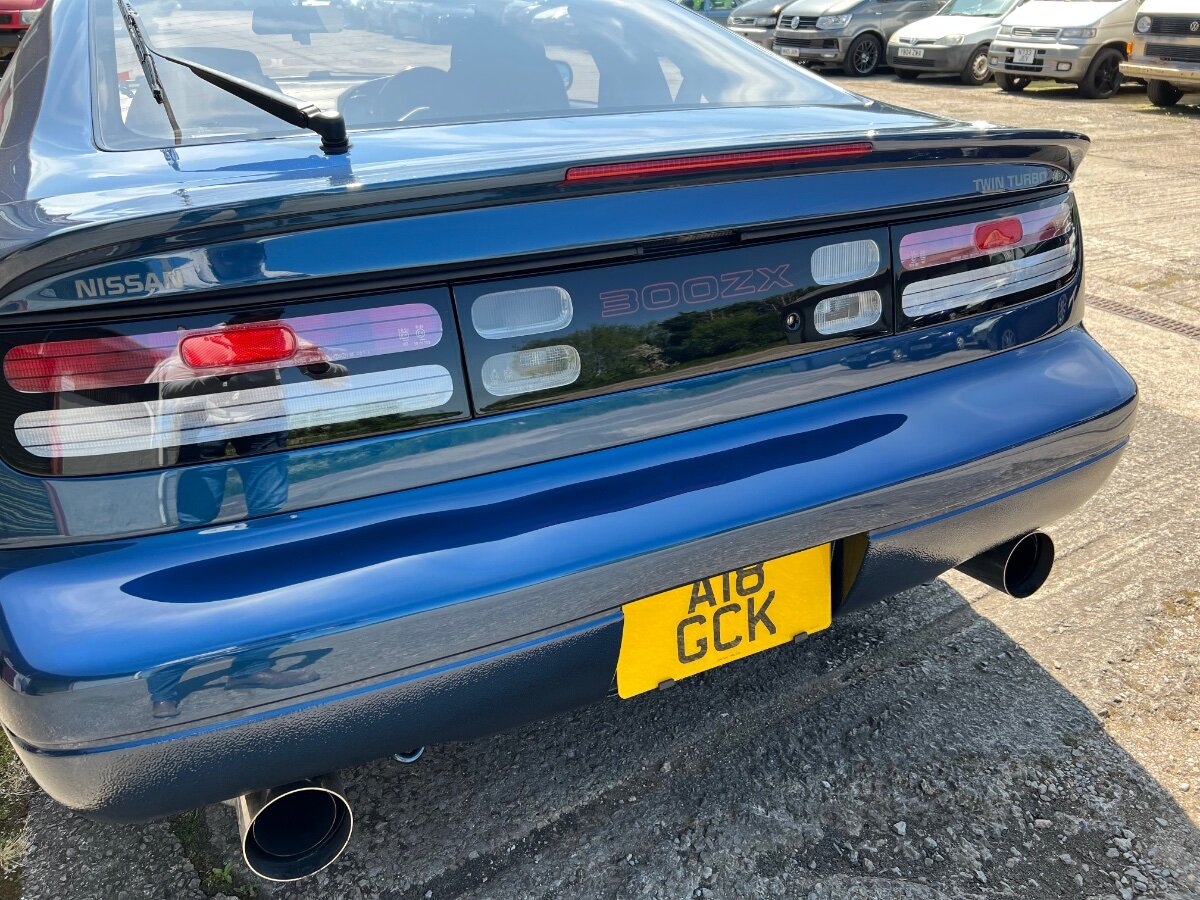
Went down to PowerZed on Wednesday, left at 5:30am with my friends driving my daily down in a convoy. Always a good drive down the M4 😁. Got my oil and filter changed, power steering J hose swapped for a genuine item, coolant leak fixed which was due to my original rad to engine coolant pipe pitting by the hose join, letting fluid seep out and my BDE transmission mount swapped for a new Nismo one. My old transmission mount was powdercoated and new hardware was sourced, so all fitted squeaky clean. I polished the beautiful Kakimoto exhausts with some Autosol, whilst they were off the car and they look brand new again! Dropped the Z off at the bodyshop afterwards to:- - refix the targa A pillar rubber which wasn’t put on right on the passenger side - fit replacement tail lights as my original ones cracked when the tuner left it out for a month in last years august heatwave - fix the drivers side sill which the tuner bent, minor straightening of the passenger one - sort some heat damage to the T bar area paint from last august and polish out some lacquer burn. They’ll finish it off by a 3 stage polish to the areas not PPF’d (from the doors and back) and new ceramic coating. Hoping to pick up next weekend and enjoy for the rest of summer 😍😀. Jim donated a used engine harness bracket for the left of the plenum as the loom is loose currently - worried it may damage the left strut tower paint from rubbing. Going to powdercoat and fit it soon. Got a plan to refinish all the throttle linkages - Jim suggested he could send me some spare bits he’s got so I can refinish at my local metal platers, then I can go down to him to simply swap it all over, rather than have any downtime.
9 points
-
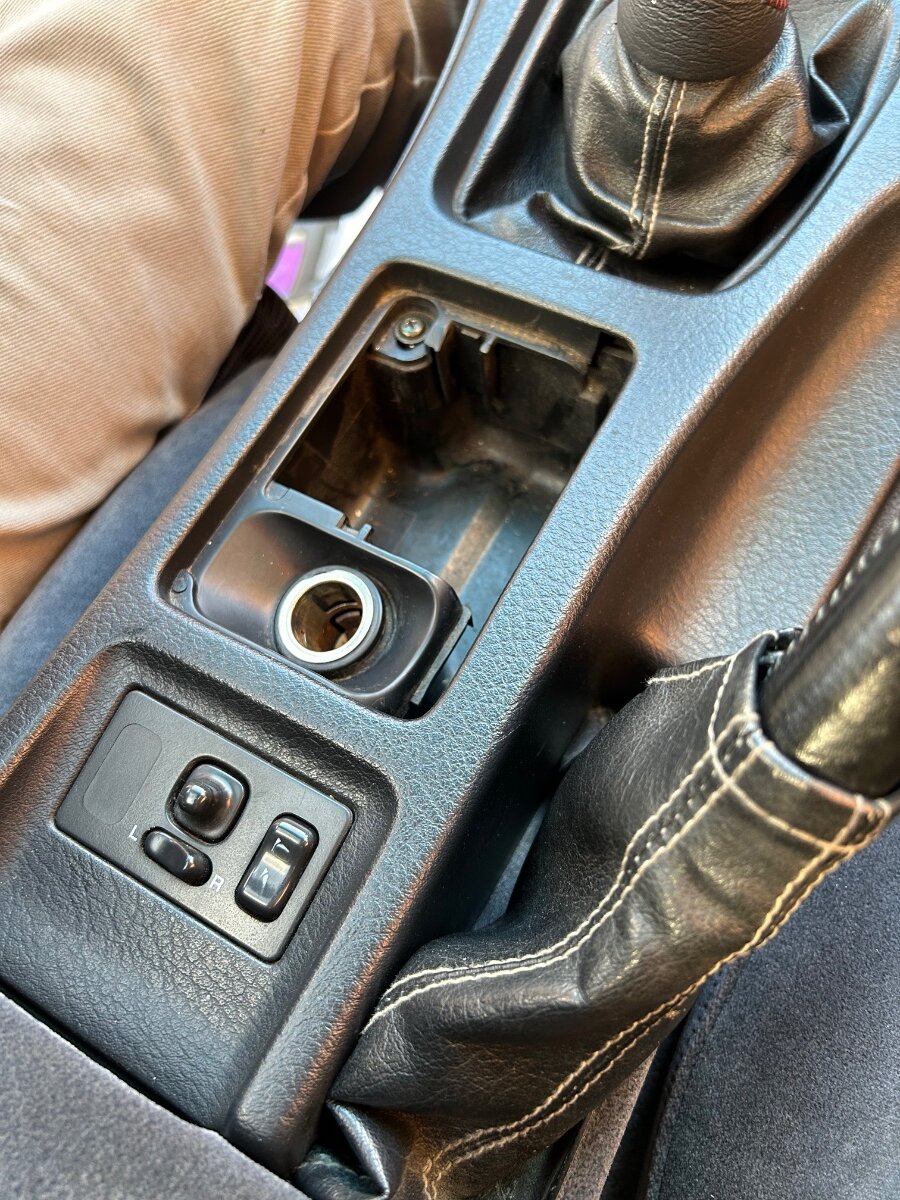
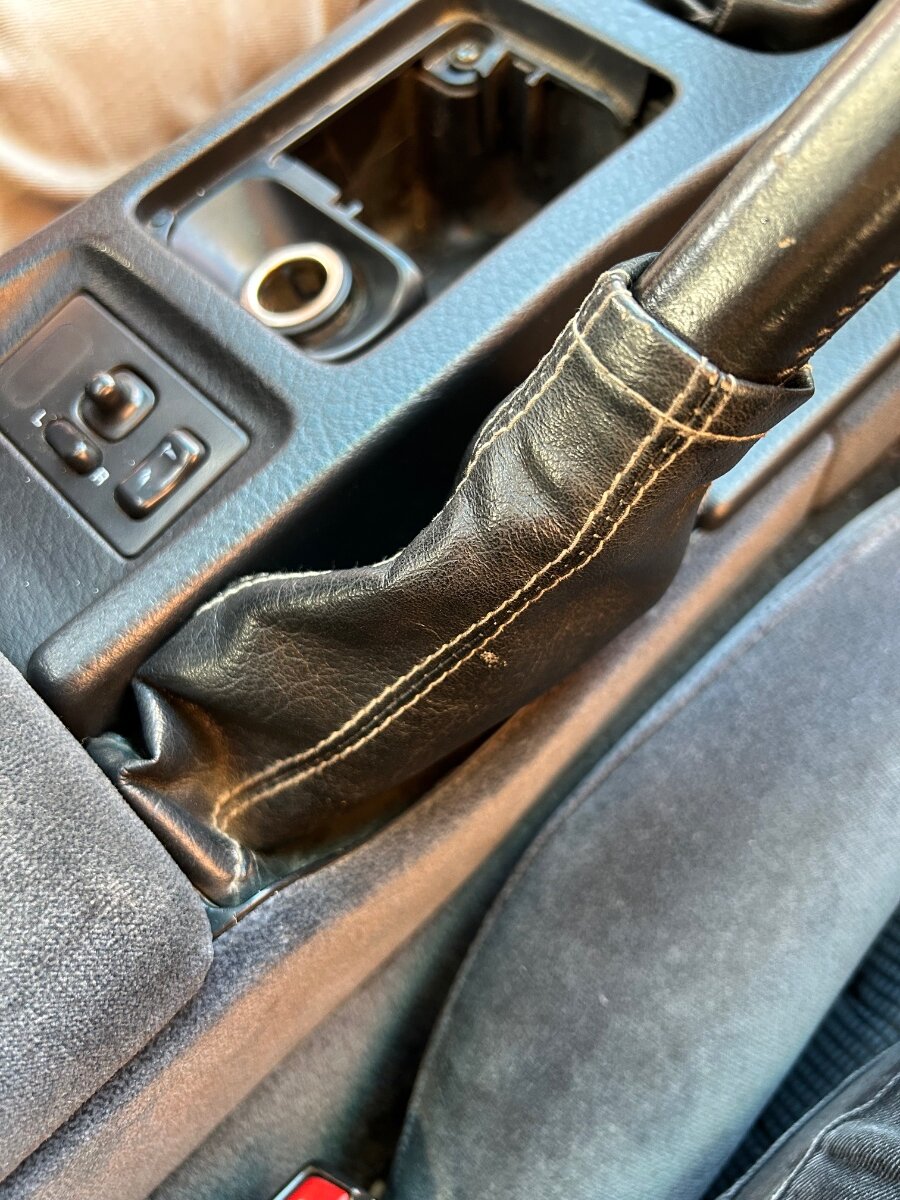
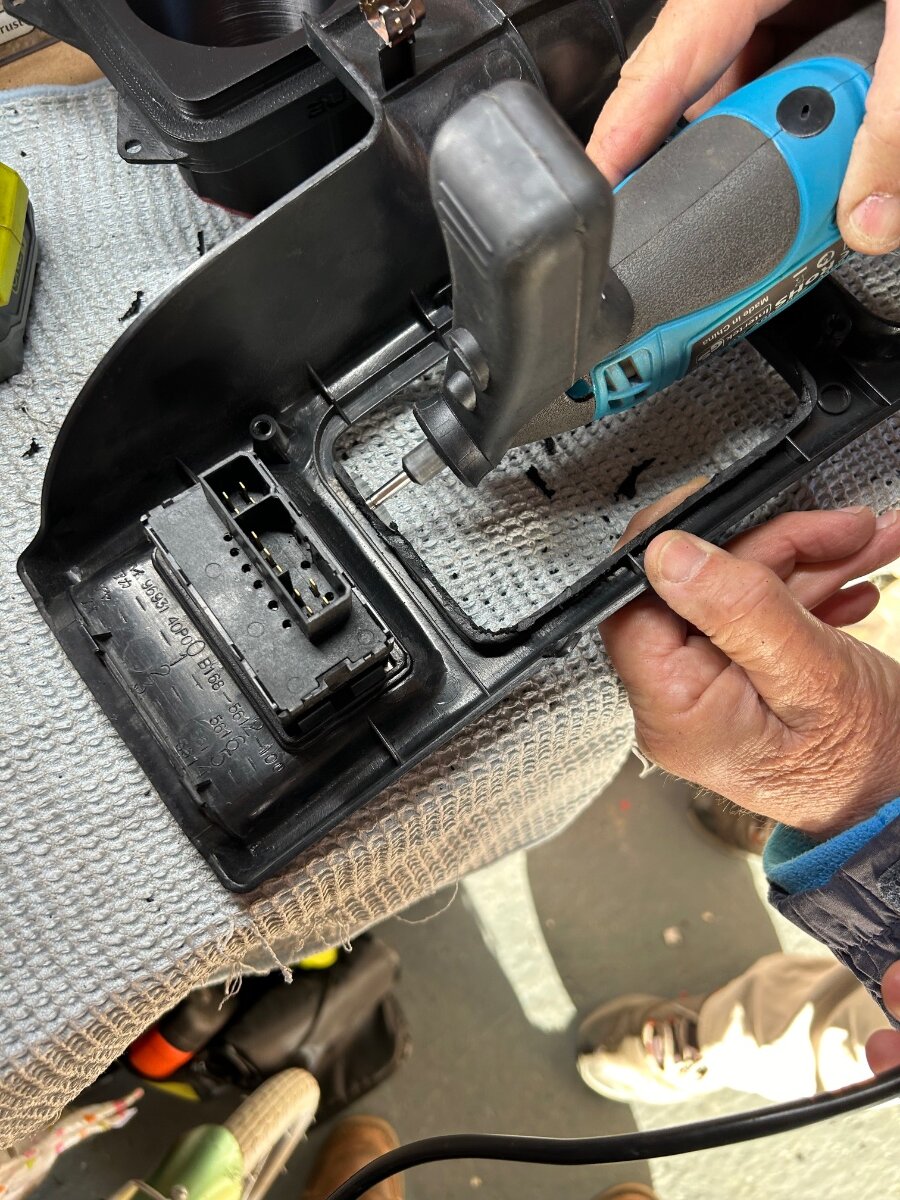
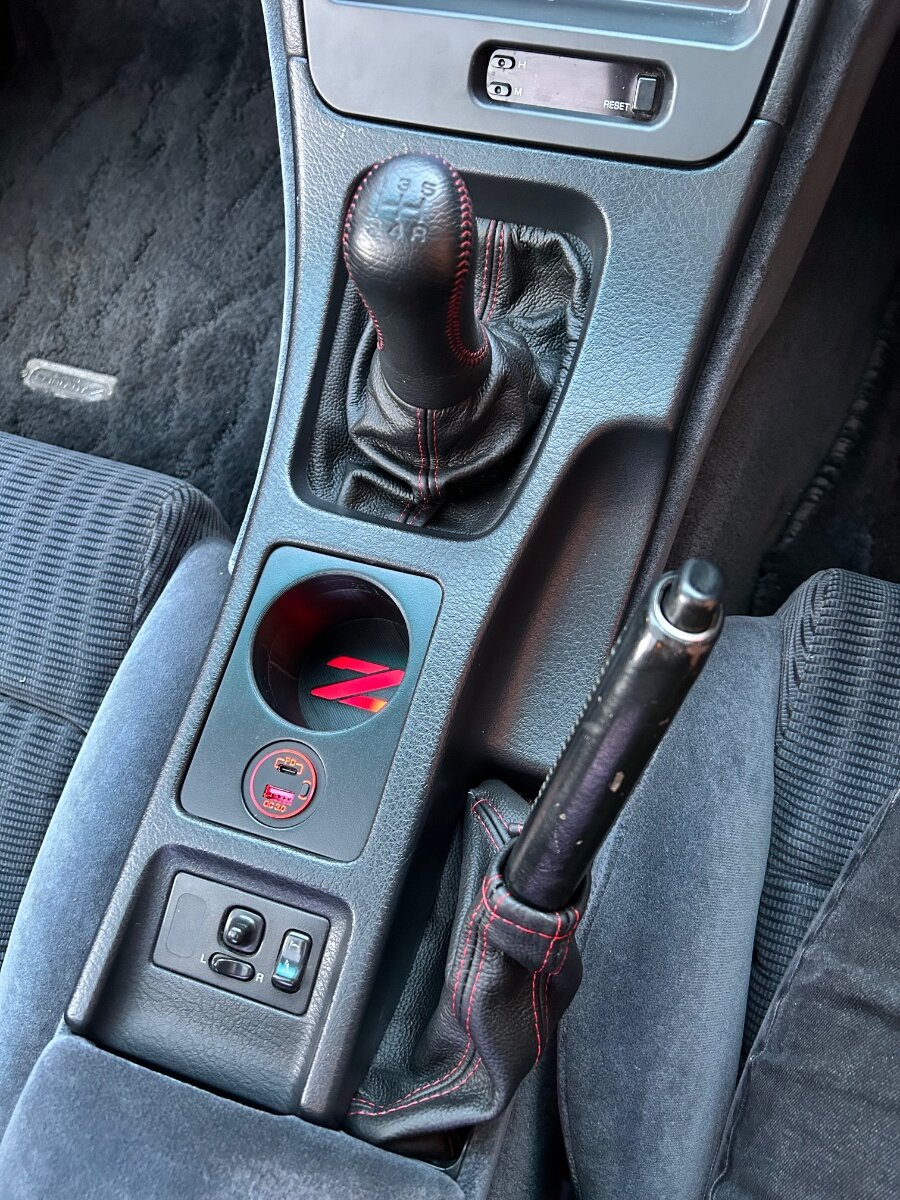
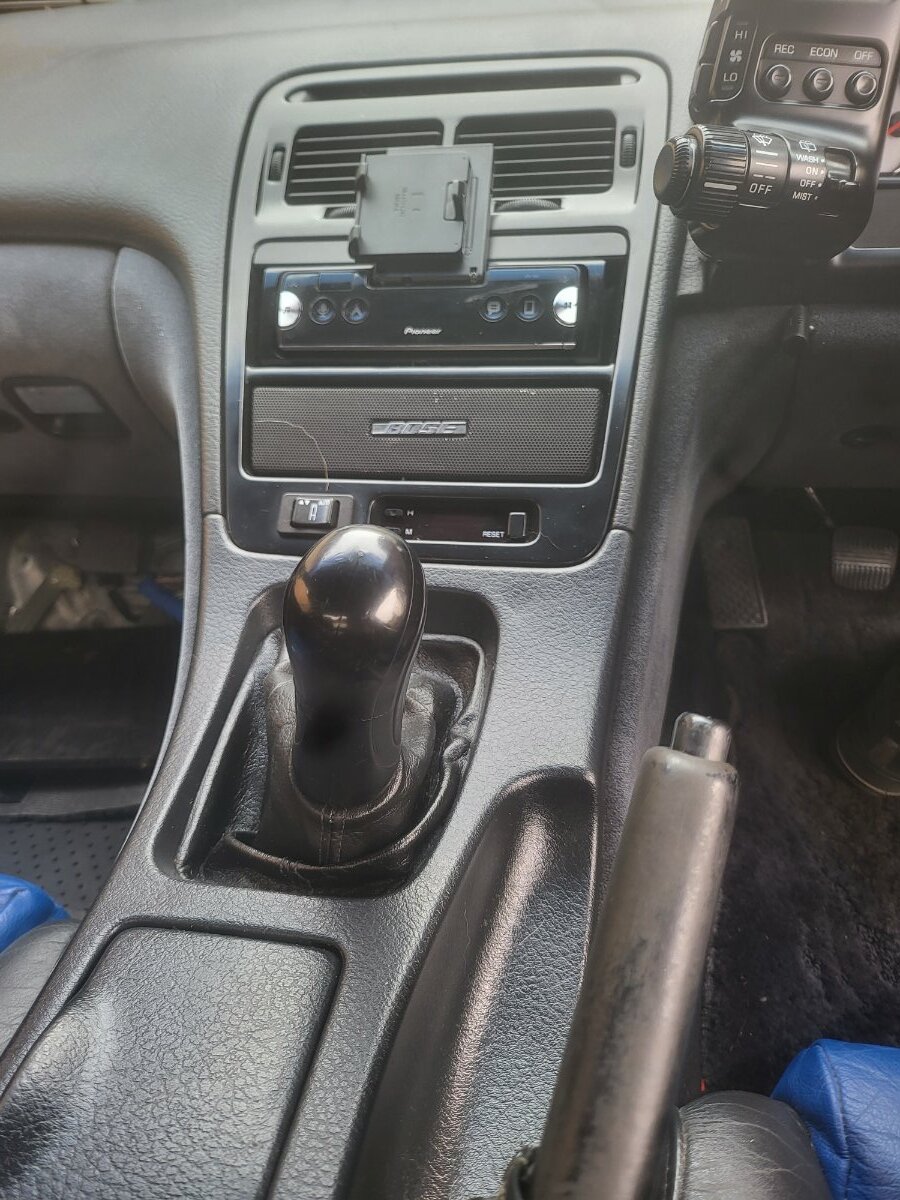
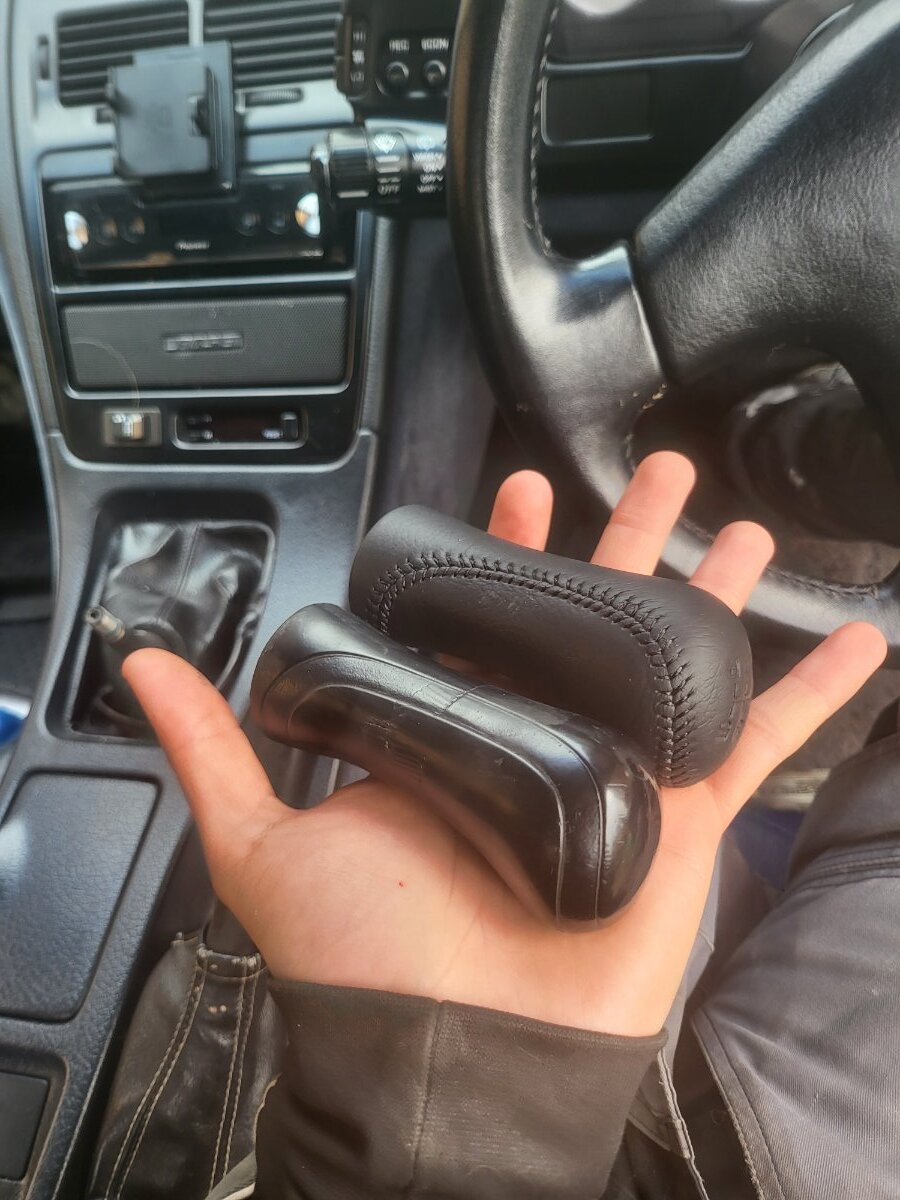
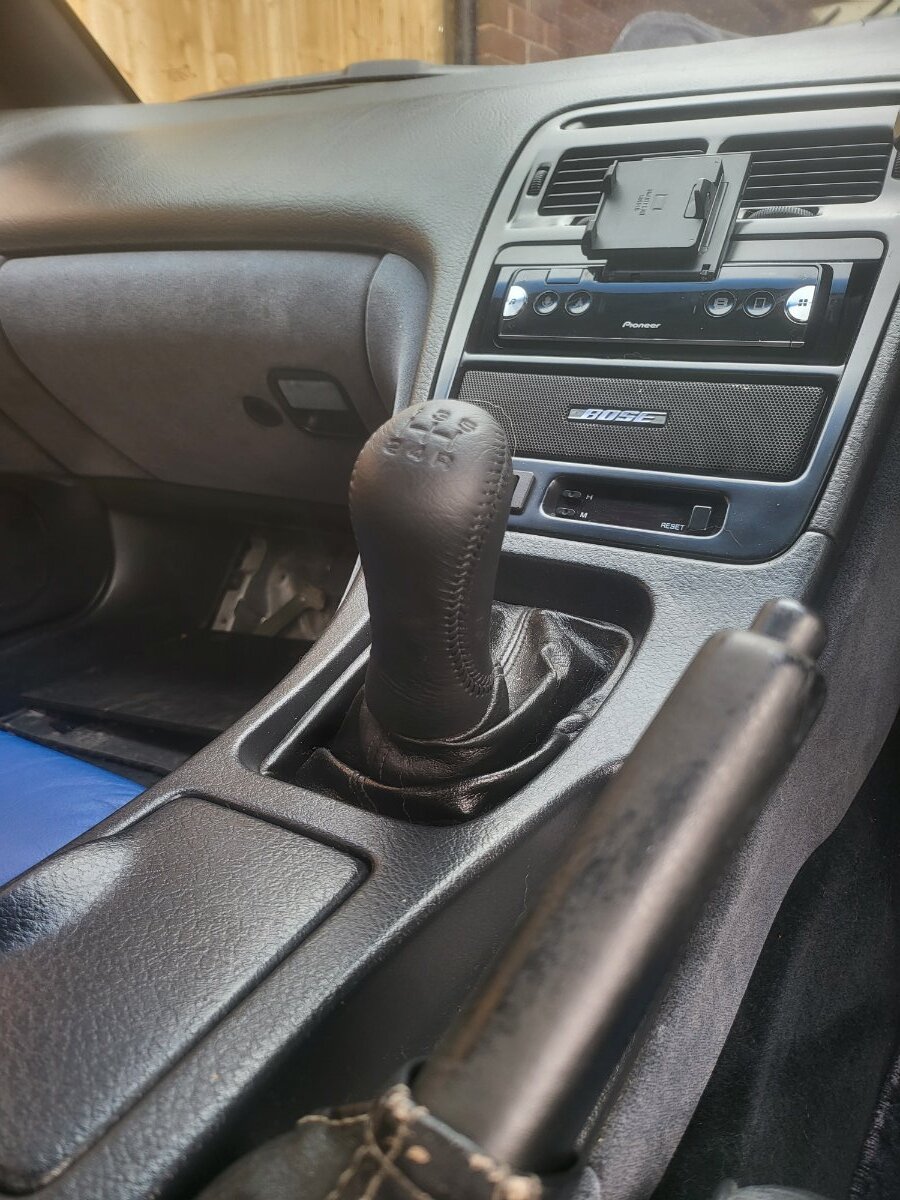
Installed a new gear gaiter, handbrake gaiter and 3D printed cup holder! I’m so excited to try out the cup holder! Nice and straight forward for the gaiters, just taking off then middle trim pieces, just a few screws and fitting the new leather eBay special ones. They got nice red stitching like my gear knob now and replace the really tired old ones. The cup holder I bought from a forum member, Peage, who makes them and sells them on Etsy and it replaces the ash tray. its excellent quality and came with detailed instructions but it’s just a case of cutting away some of the old bits and it slots right in to place. The USB is plugged in to the ciggy lighter and has an on/off switch and cover and was very easy to do, even the connectors were supplied!
8 points
-
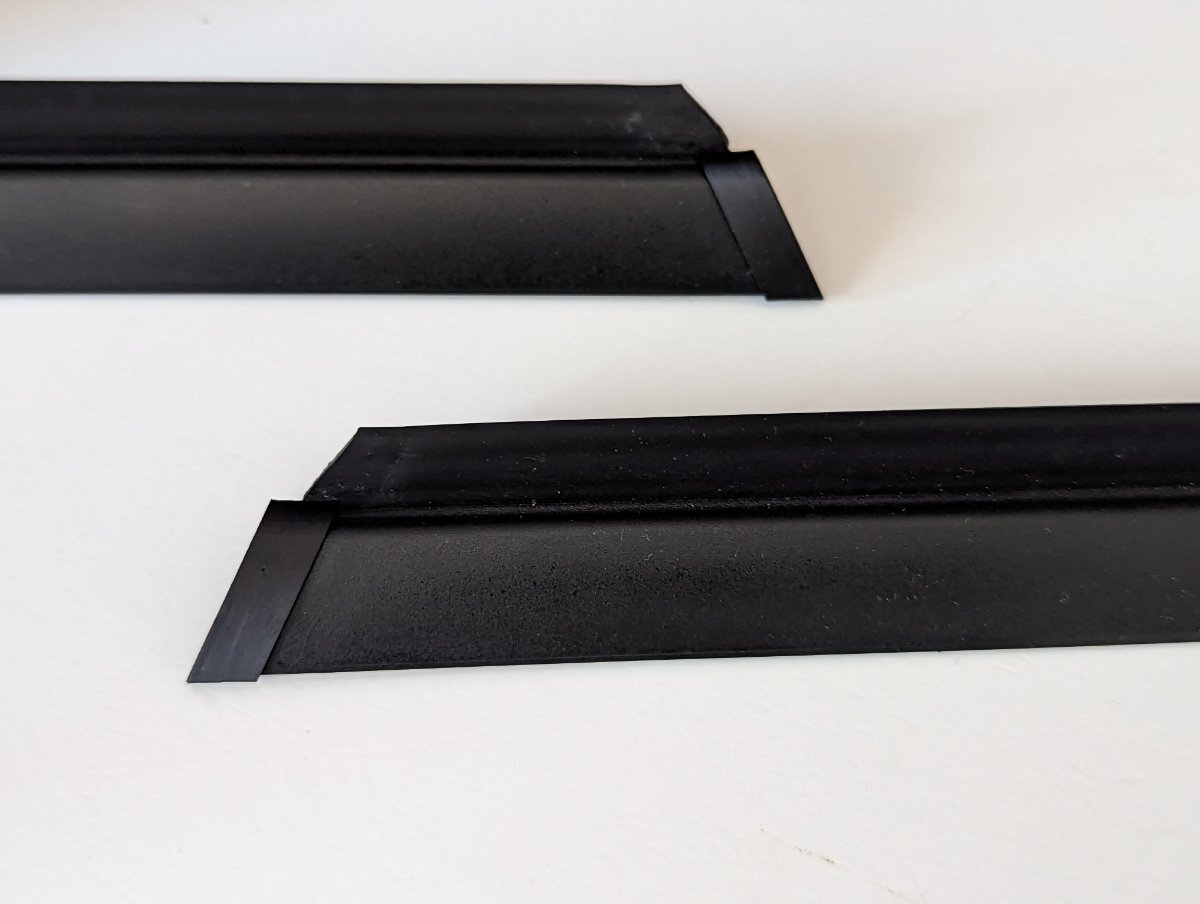
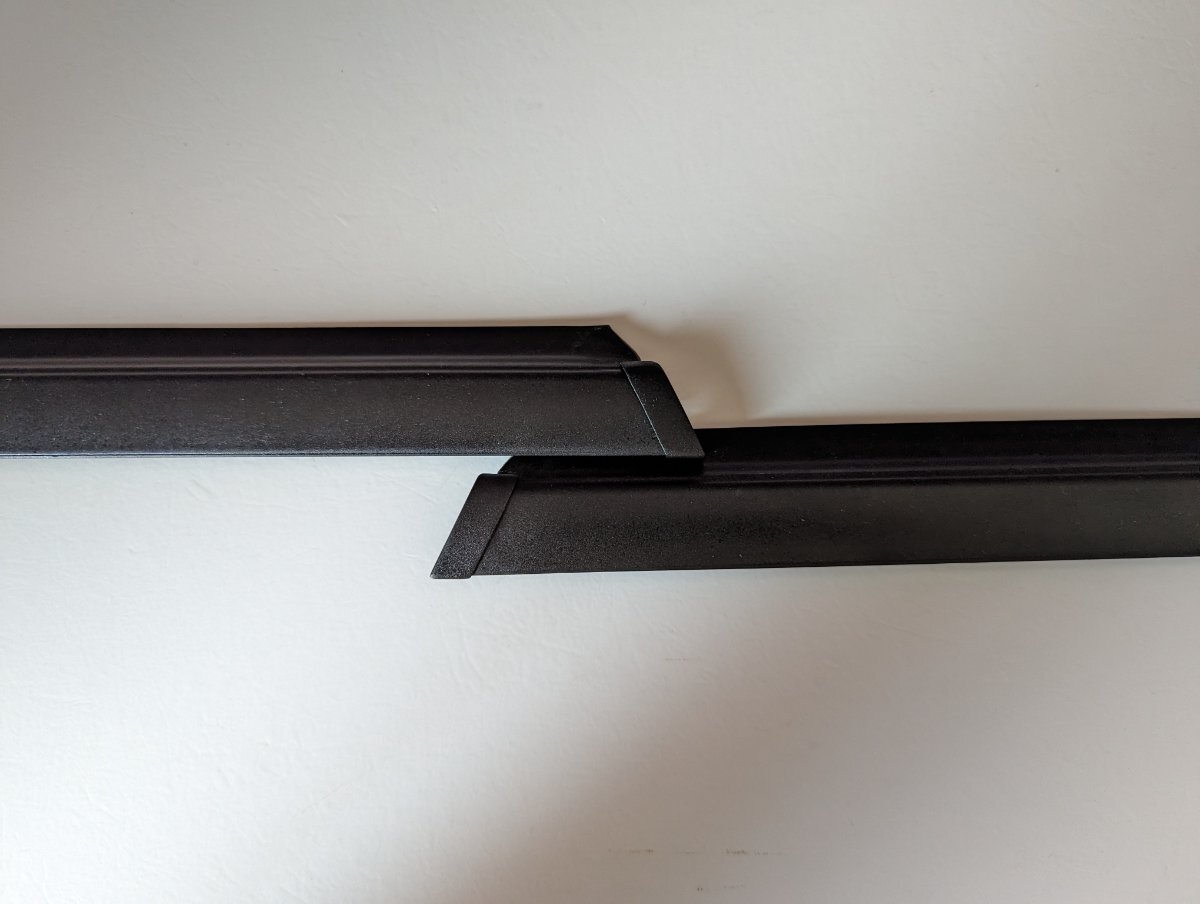
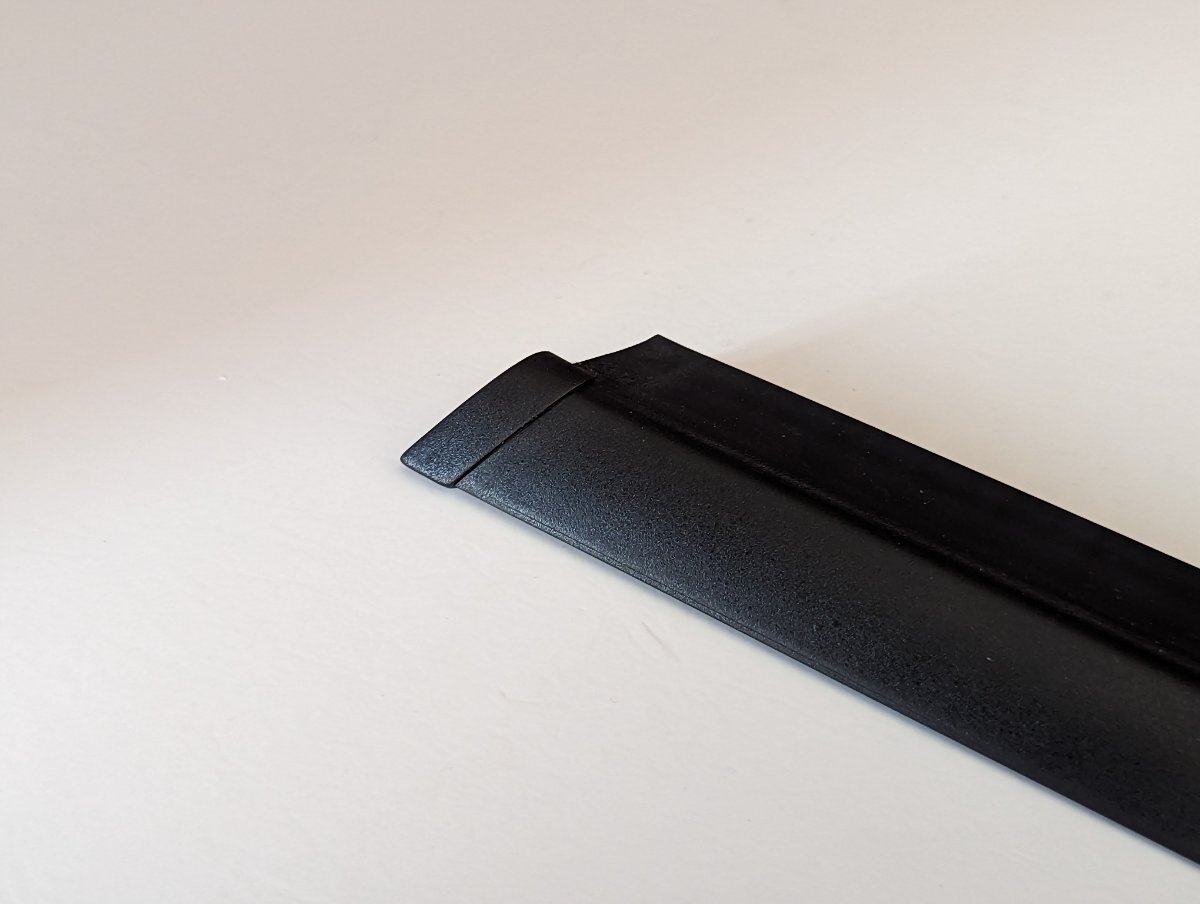
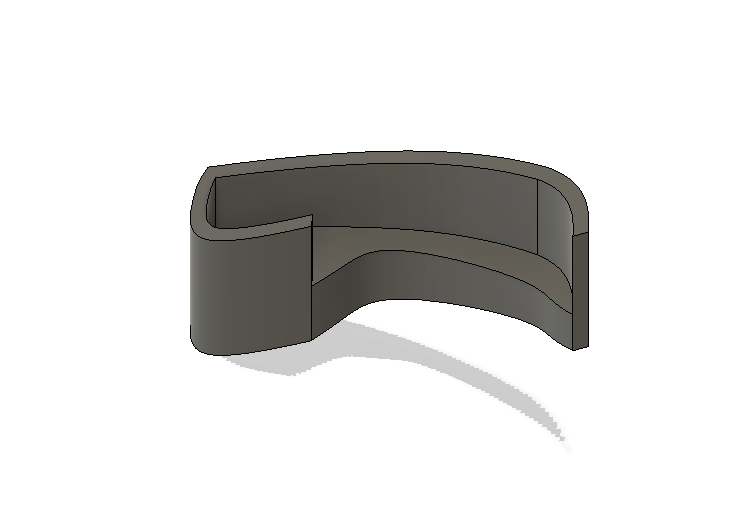
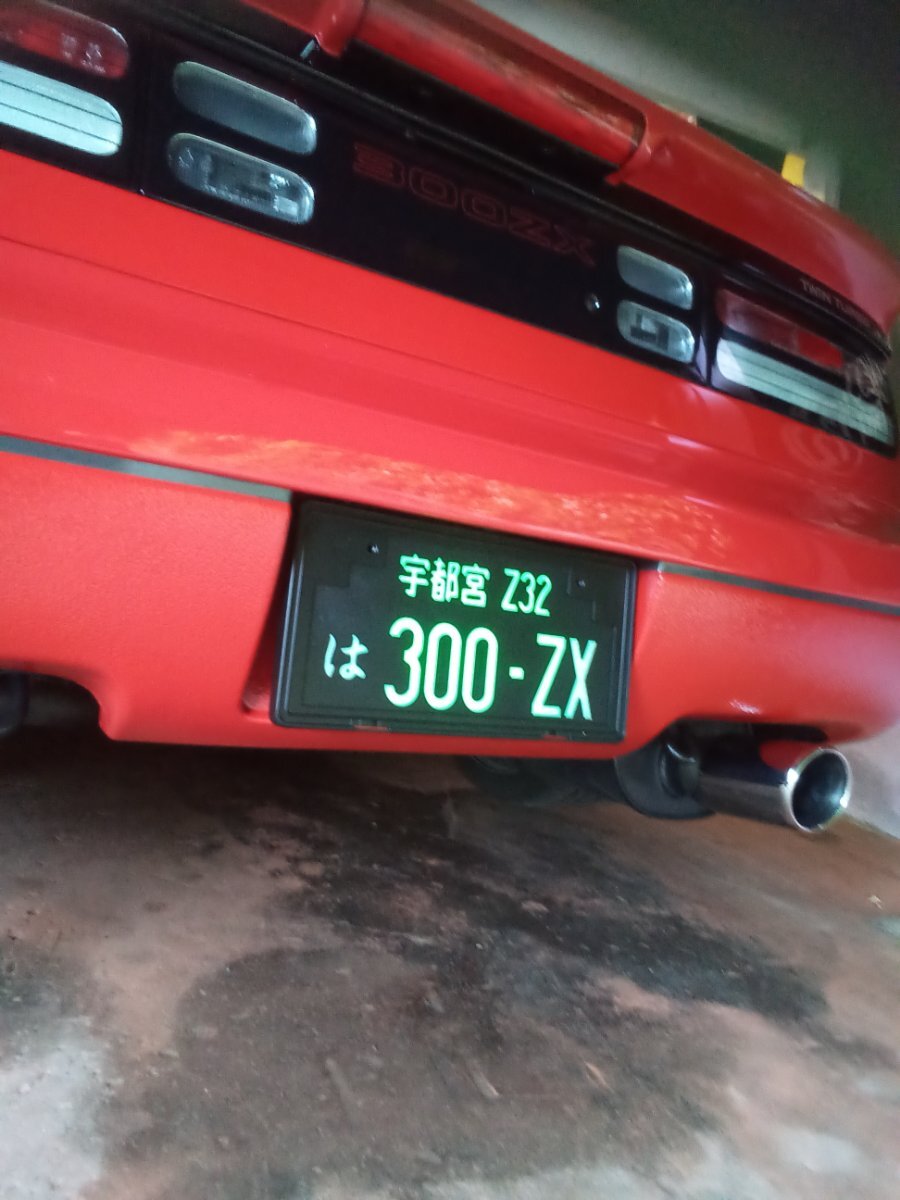
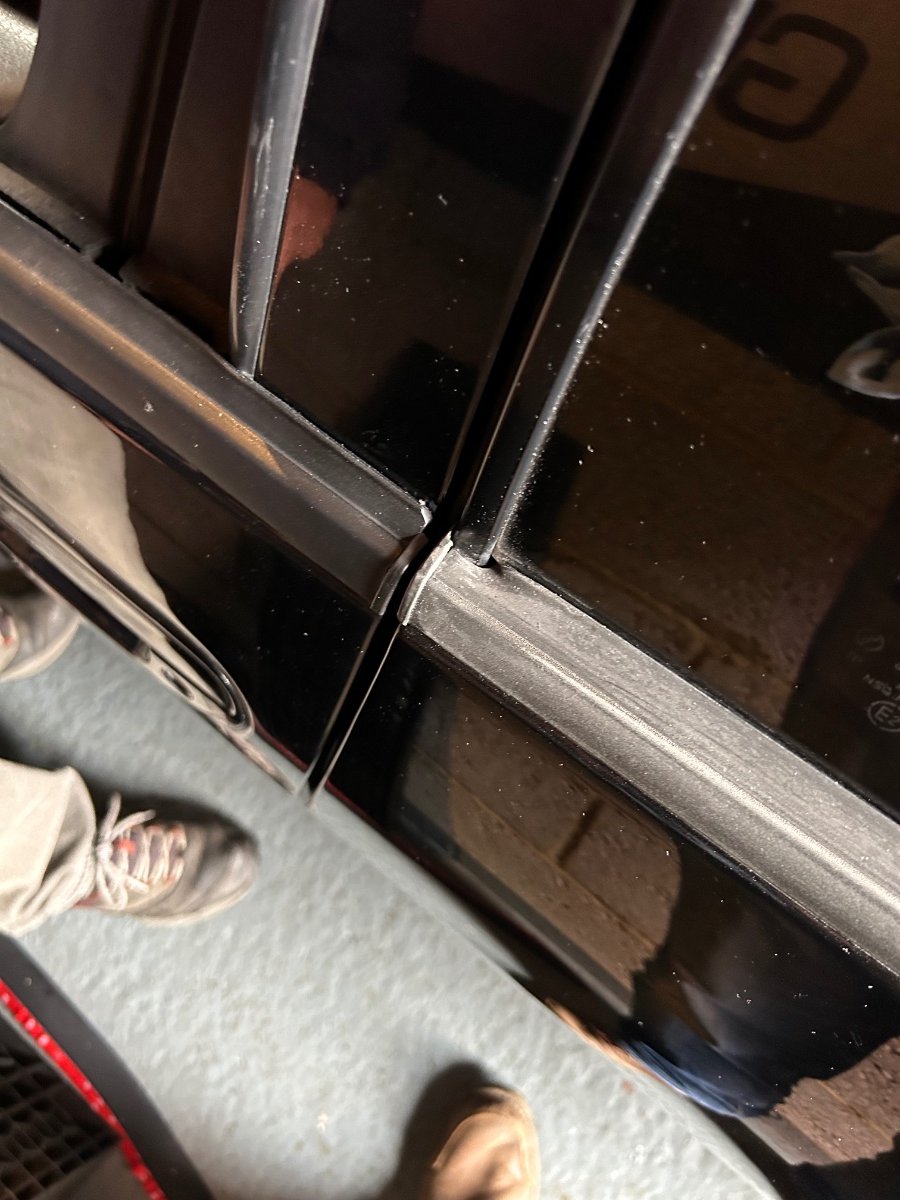
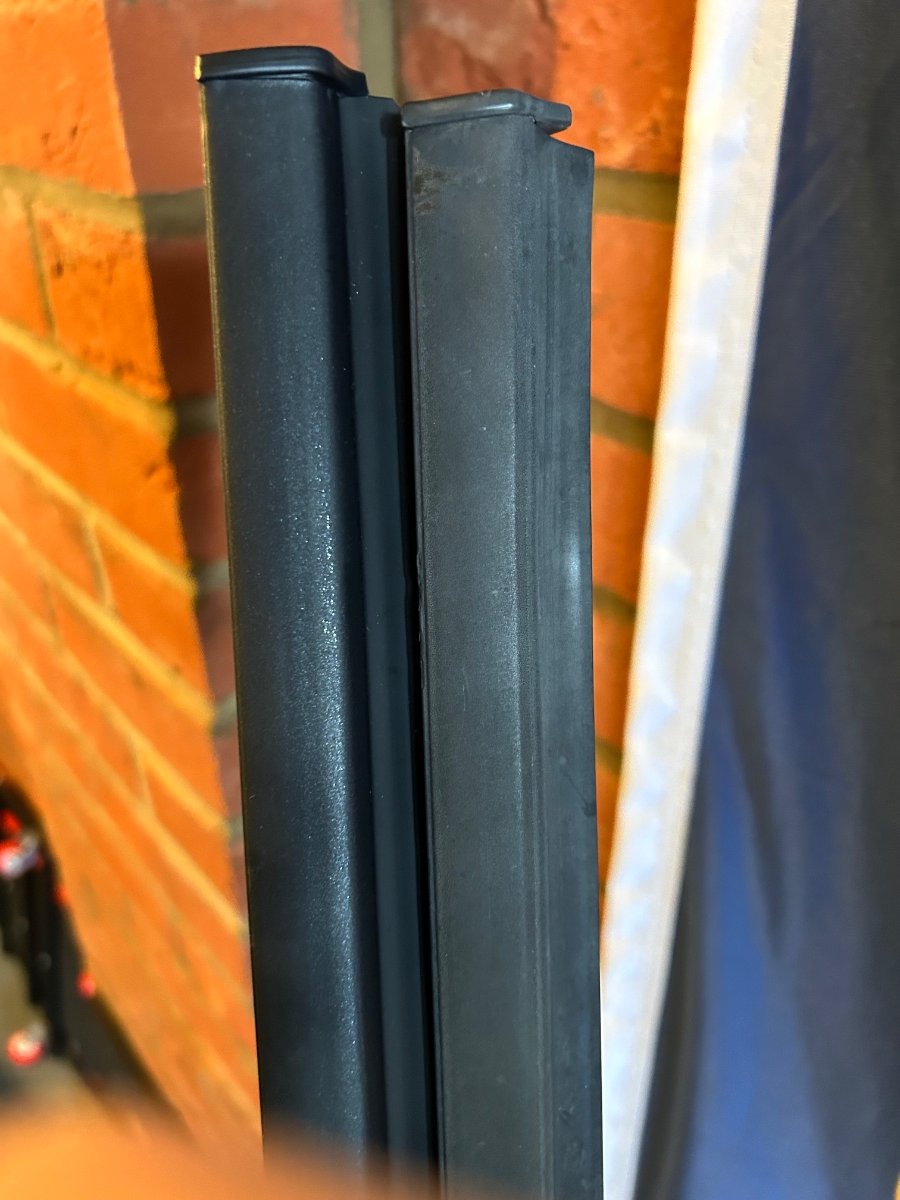
I have been working on a replacement end cap for the quarter window moldings for our cars. The ends of these moldings are covered by the weather stripping of the quarter window originally but these are sometimes torn and missing (as mine were), especially when the moldings have been removed, either for replacement with Kuruma Z items or when someone is refinishing their OEM moldings. This means you are left with a pretty ugly looking end of the trim and quite a large gap to the hatch, with a cut angle on the end of the molding which does not follow the angle of the hatch lid either. My design covers the cut of the molding, fills most of the space back to the hatch lid and matches the angle of the end of the molding to the hatch lid too. I have created the design using my own 2+2 and with my hands on a Kuruma Z set as well as OEM. What I am looking for (and I realise this may be hard to find in the UK and I may need to find someone in the US), is someone with a 2 seater who is in need of a set and would like to test fit my part to ensure good fitment on a 2 seater. It does not matter whether you would be fitting them to an OEM set or Kuruma set of moldings. They both measure the same, have very very similar profiles and the angle of the cut on the end is the same and this piece is designed to accommodate both. The cap is designed to seat itself correctly but requires the application of a small amount of black silicone or similar applied inside the cap to ensure final and fixed fitment. As with all of my parts, these are made with ASA plastic, which has high heat and UV tolerance, unlike ABS etc. What you will get is a set of free end caps, of course 🙂 If you'd like to see some of my other work, theres some here: autotun3D (@autotun3d) • Instagram photos and videos Here is a look at the product below. All pictures are shown fitted to my own refinished set of OEM moldings... 3D Model: "Raw" finish: Refinished to match my own refinished trims:
8 points
-
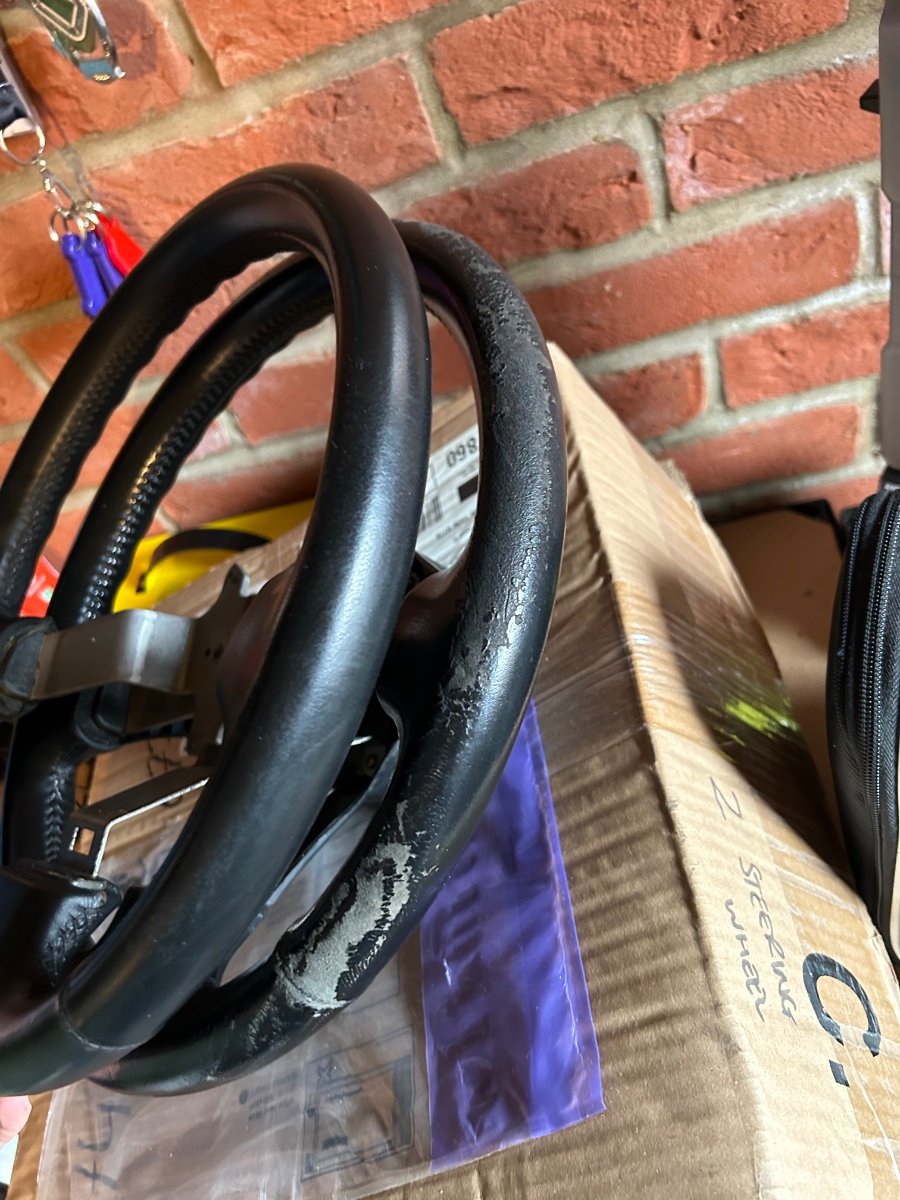
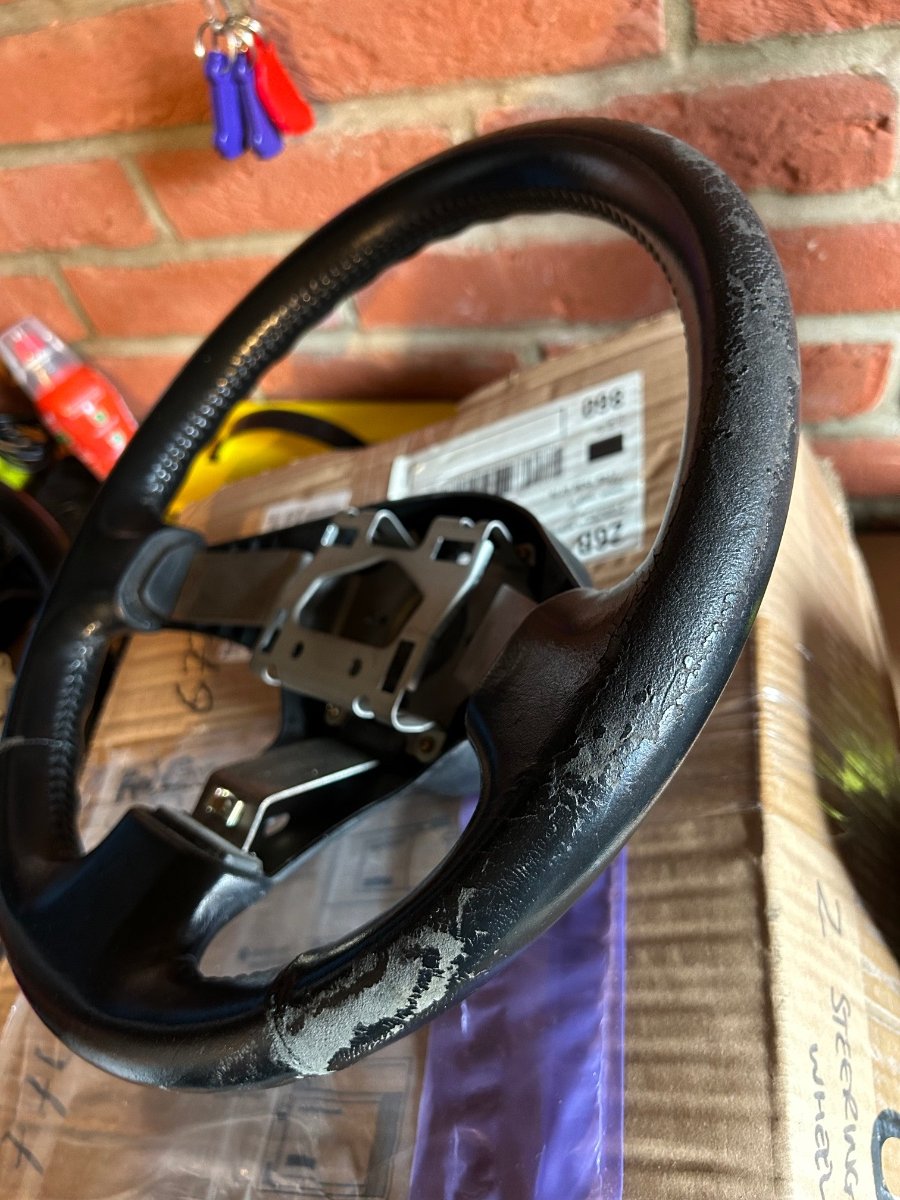
Today I got hold of this rather tidy steering wheel. Mine is flaking and in a sorry state and needs recovering. I nearly tore RichardS’s arm off when he said he was selling his old (refurbed) one! Not fitted it yet but will soon, thanks Rich
8 points
-
Had this box a few years now but the acrylic face was just plain white. So with a big indoor Jap show this Sunday I got the acrylic face laser etched. Well impressed.
8 points
-
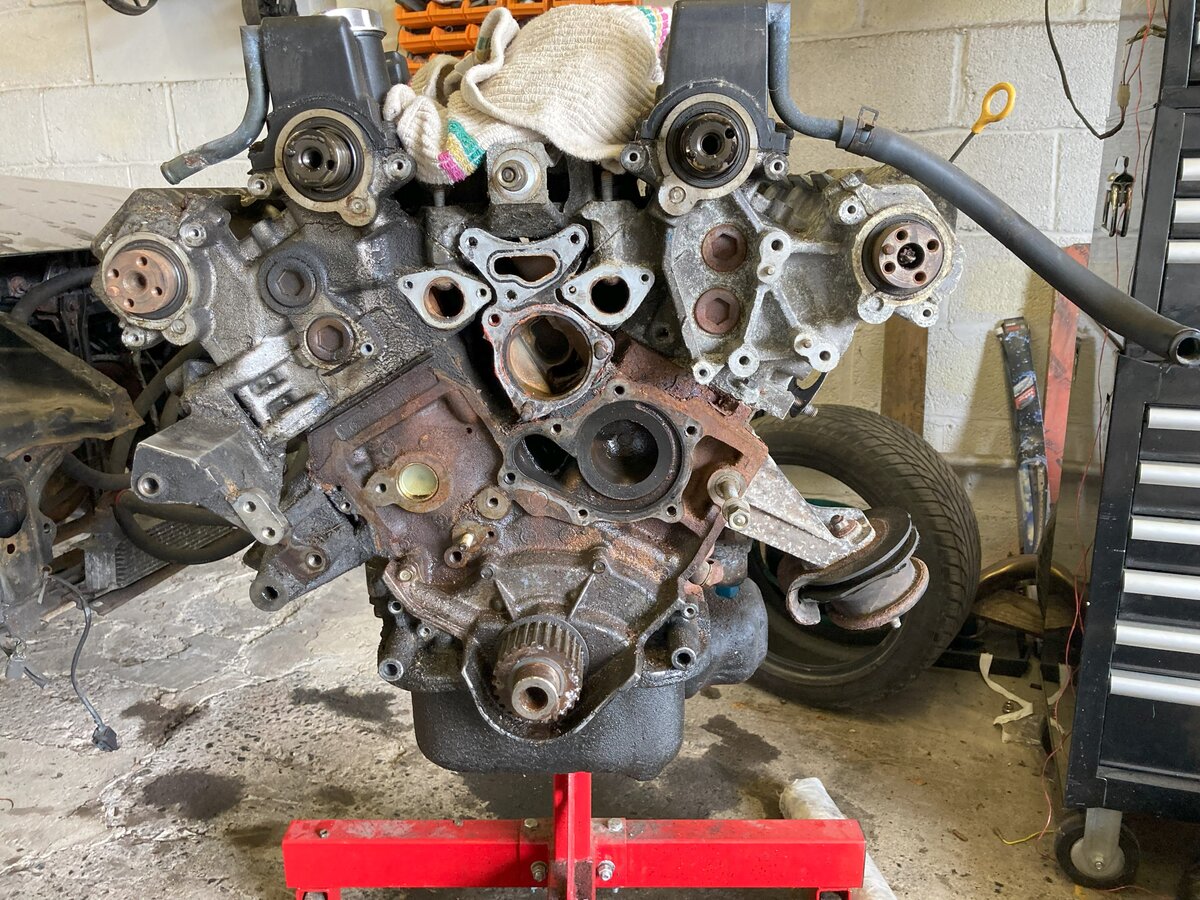
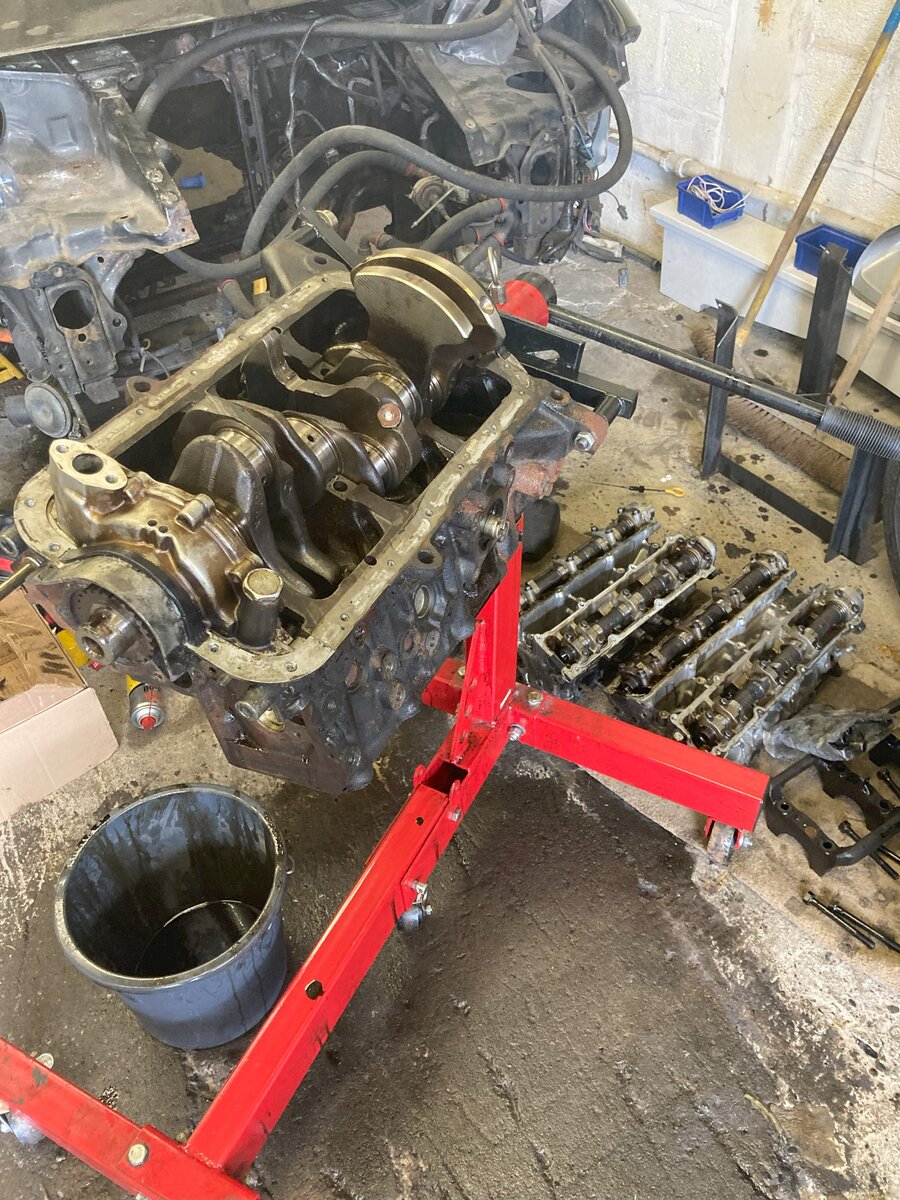
Just a few pics covering the tear down plus the last pic I have of me driving the Z from Oct 2017. Engine looked OK when mounted but pretty worn as it was exposed. Bearings showed some wear after over 200K miles but not bad considering how hard I pushed at track days. t
8 points
-
My zed is here is spirit.
8 points
-
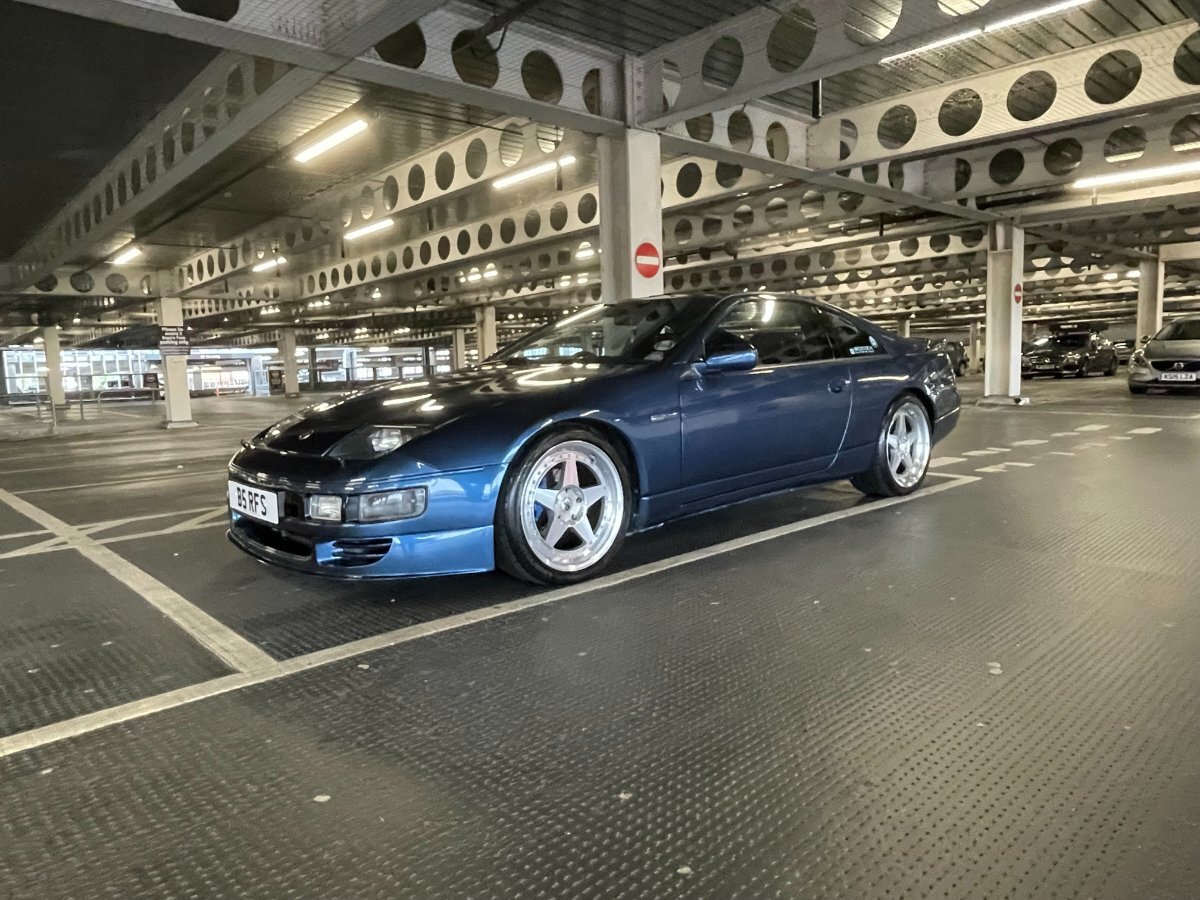
Sainsburys run first thing this morning - then a quick fuel top-up, ready for driving to AGM tomorrow...... 🙂 ........I just could not resist looking back and taking a couple of pics under the car park lights LOL!!!
8 points
-
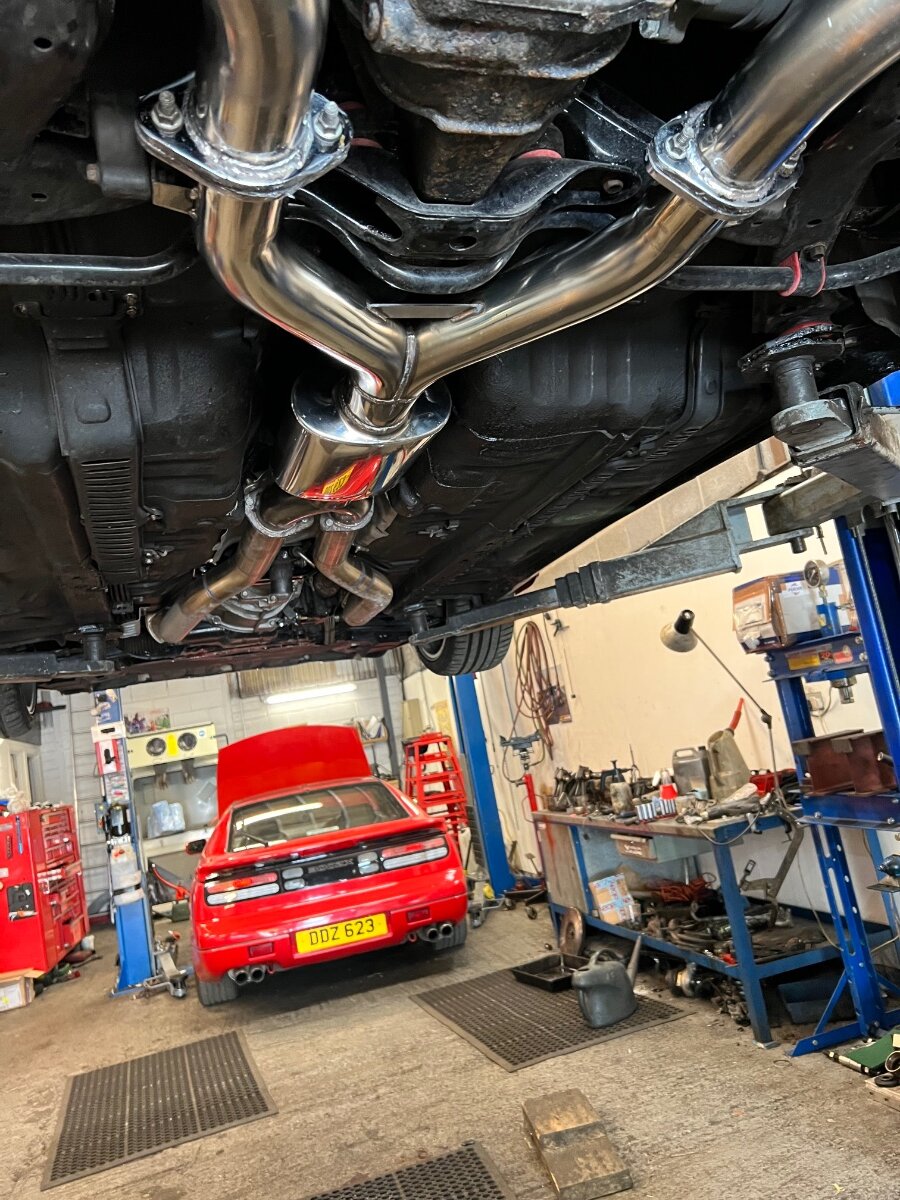
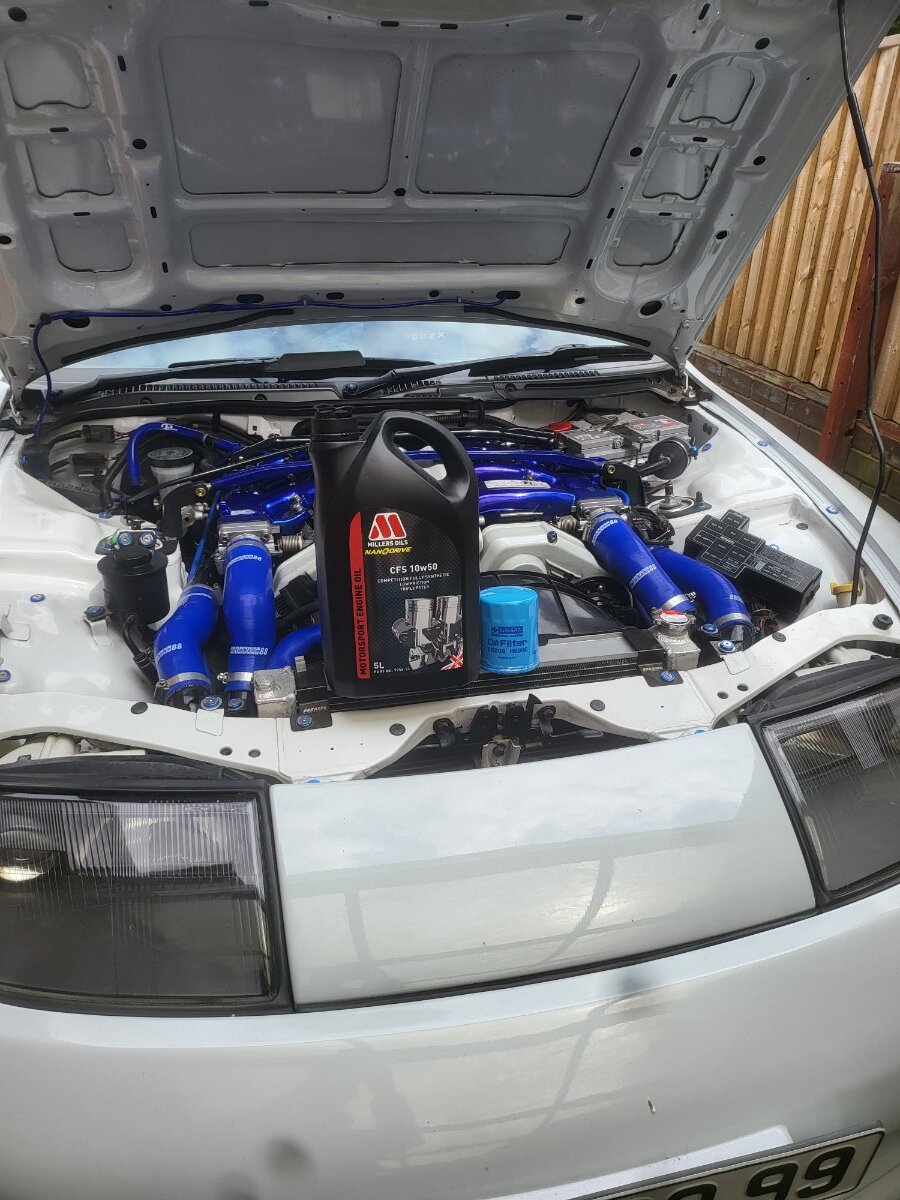
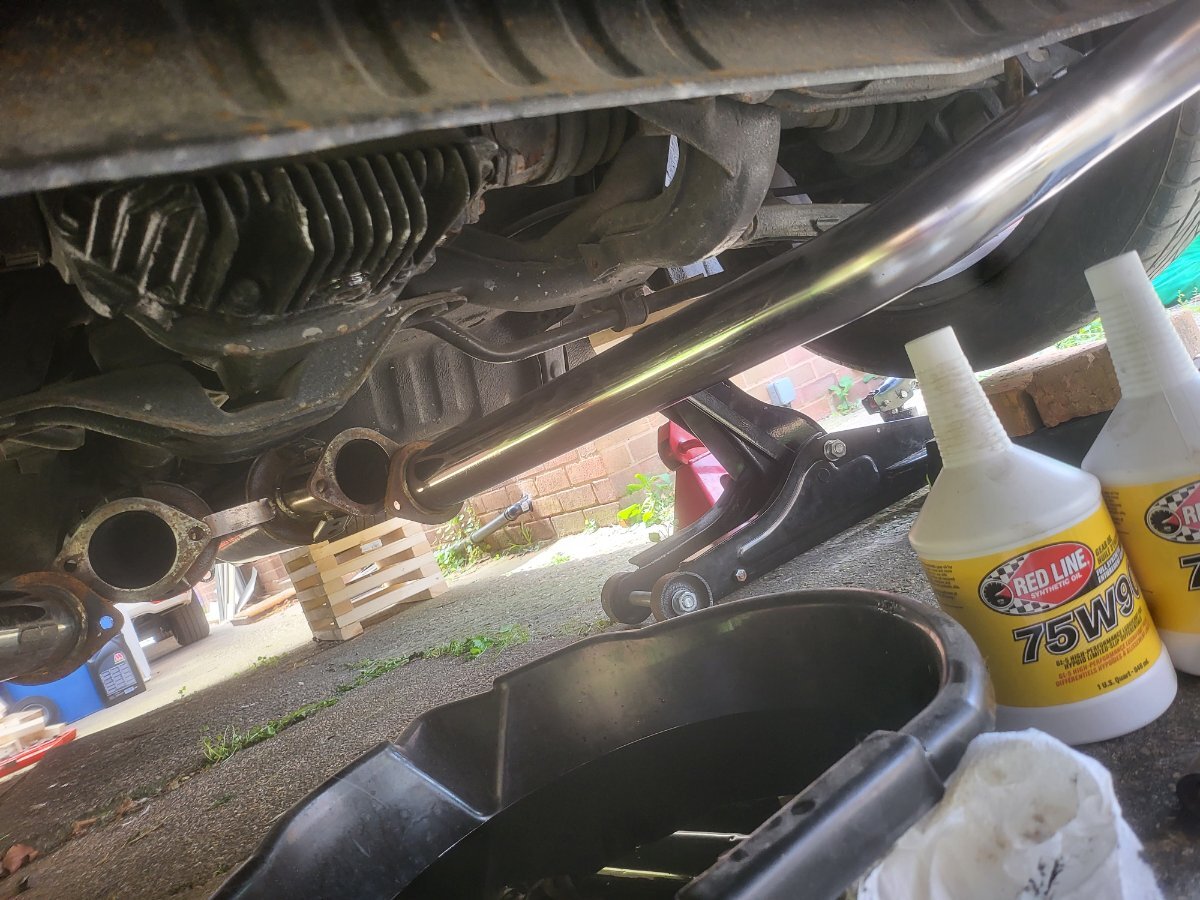
Had some spare time over the weekend so while I wait on a new ecu for the car I got down to business fitting the new kakimoto exhaust and I cannot wait to hear this thing! Also did an engine oil and filter change along with the diff , transmission to follow next weekend 👍 dahm I miss driving it now the sun is here! 🌞
8 points
-
And these on and after collection
8 points
-
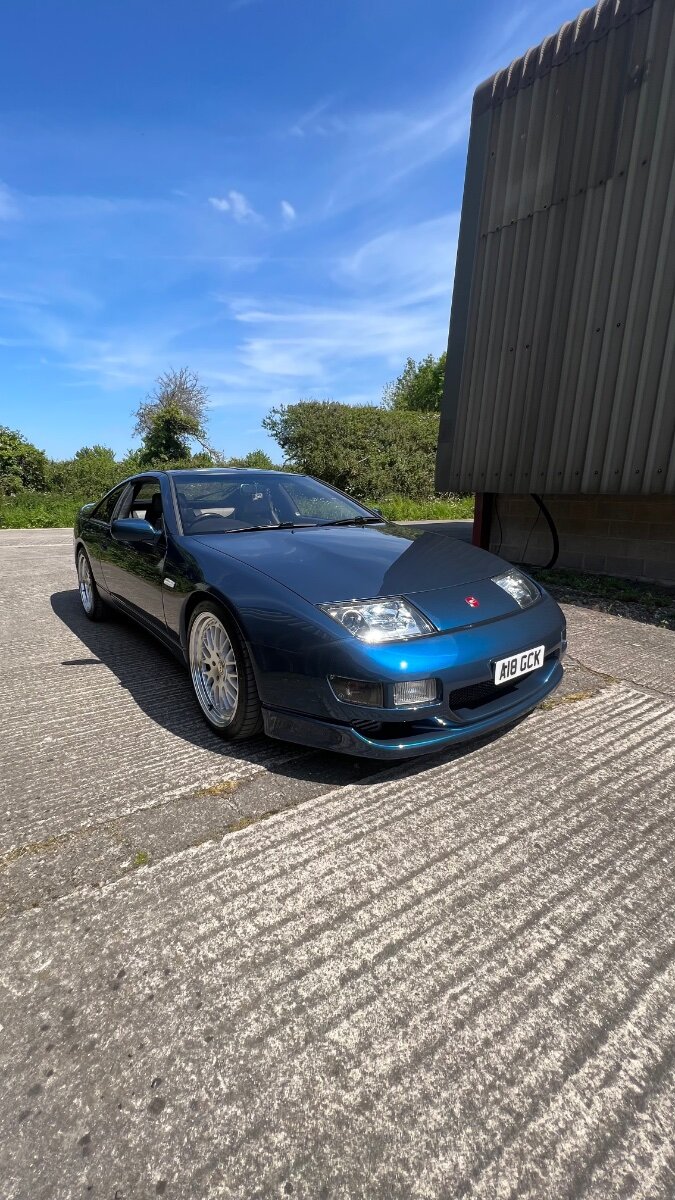
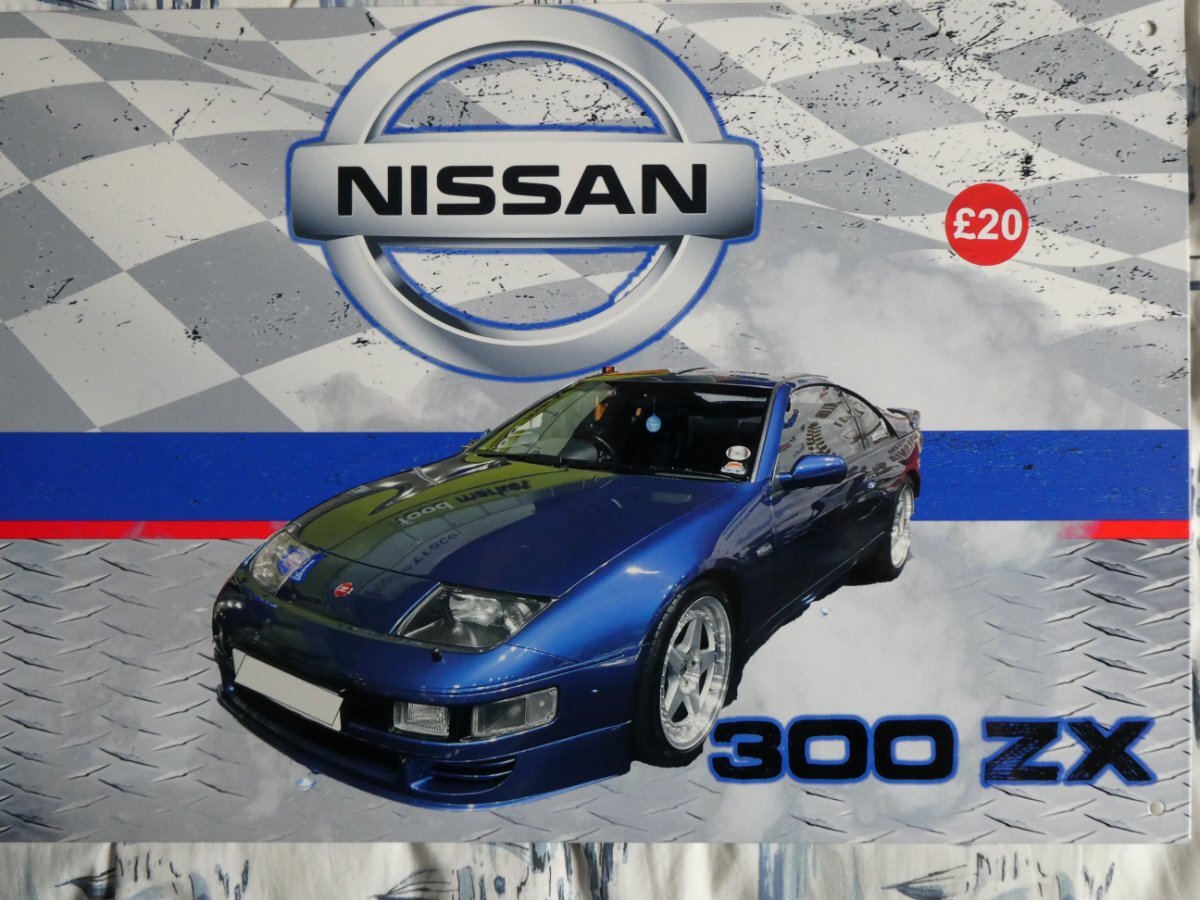
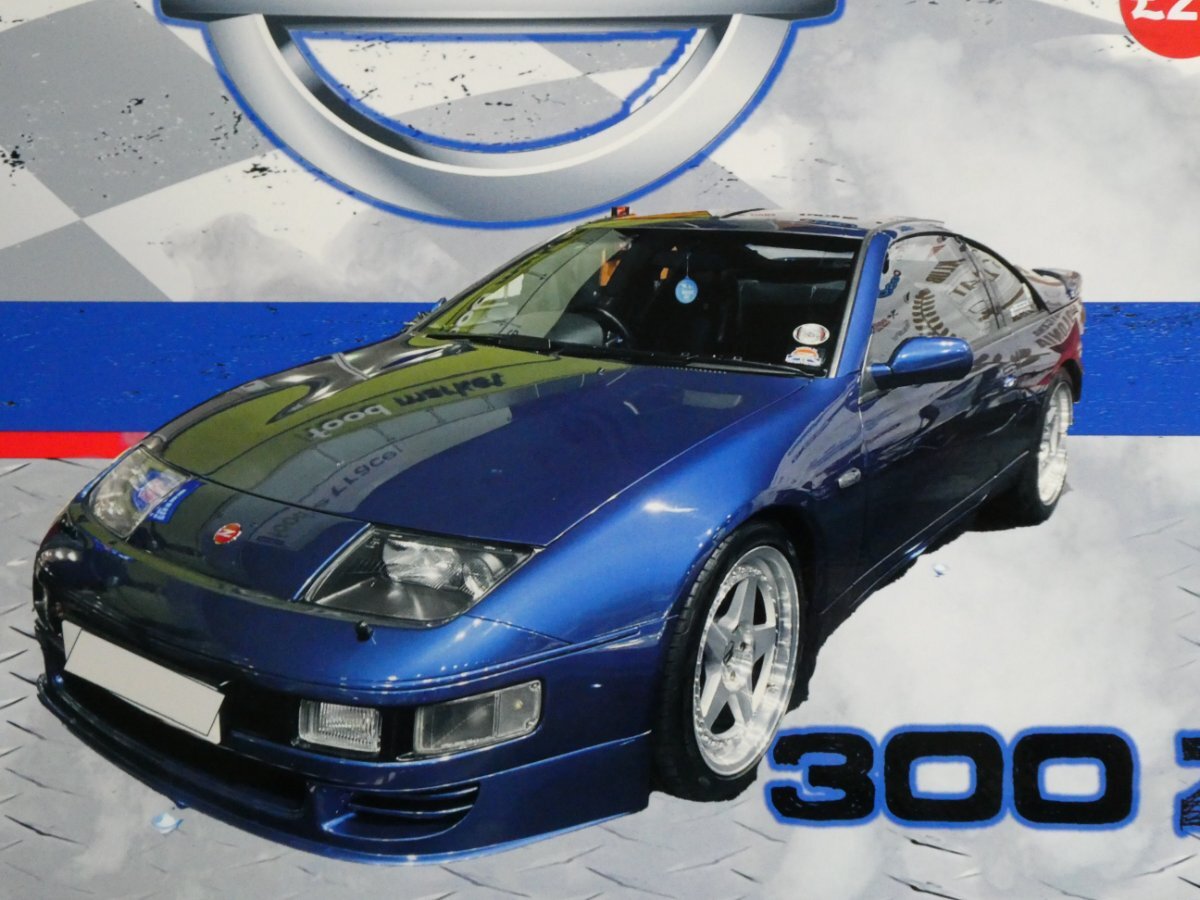
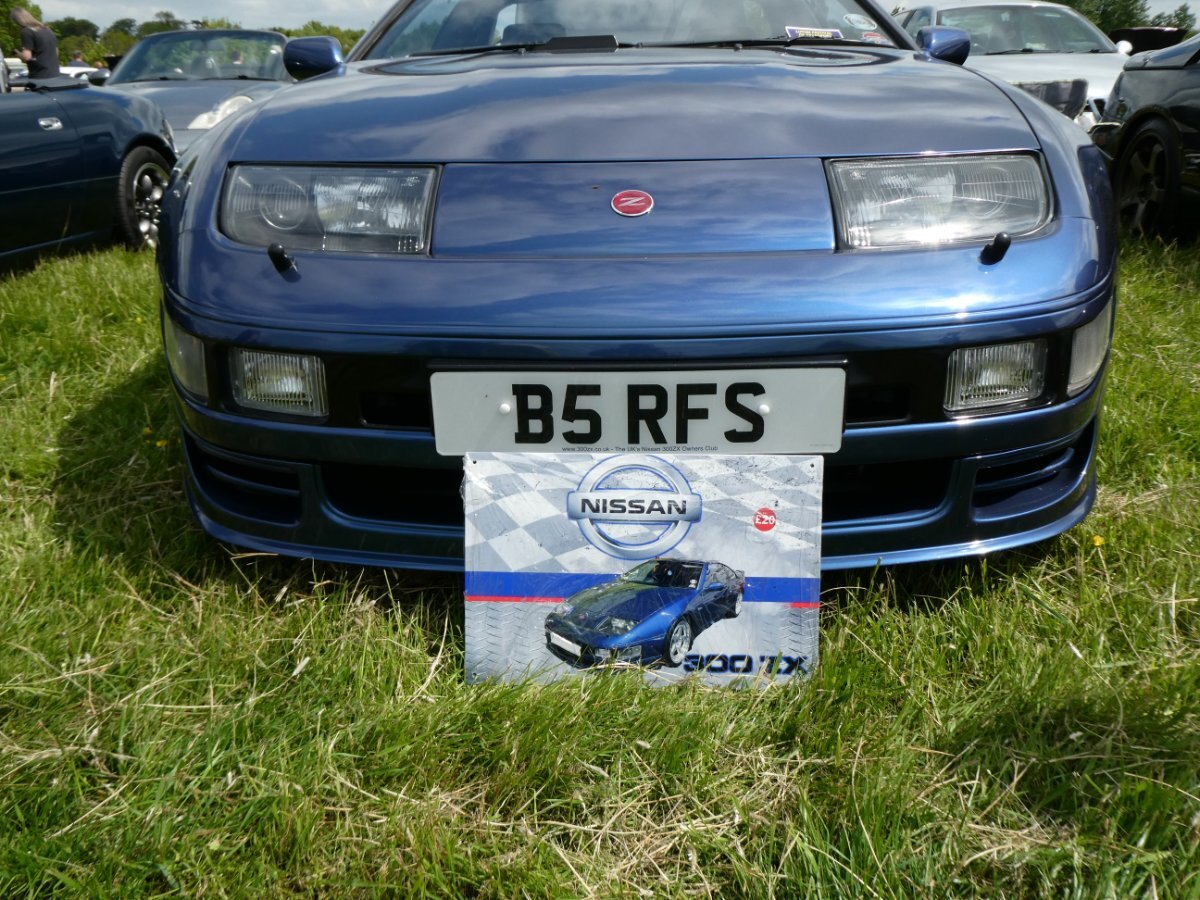
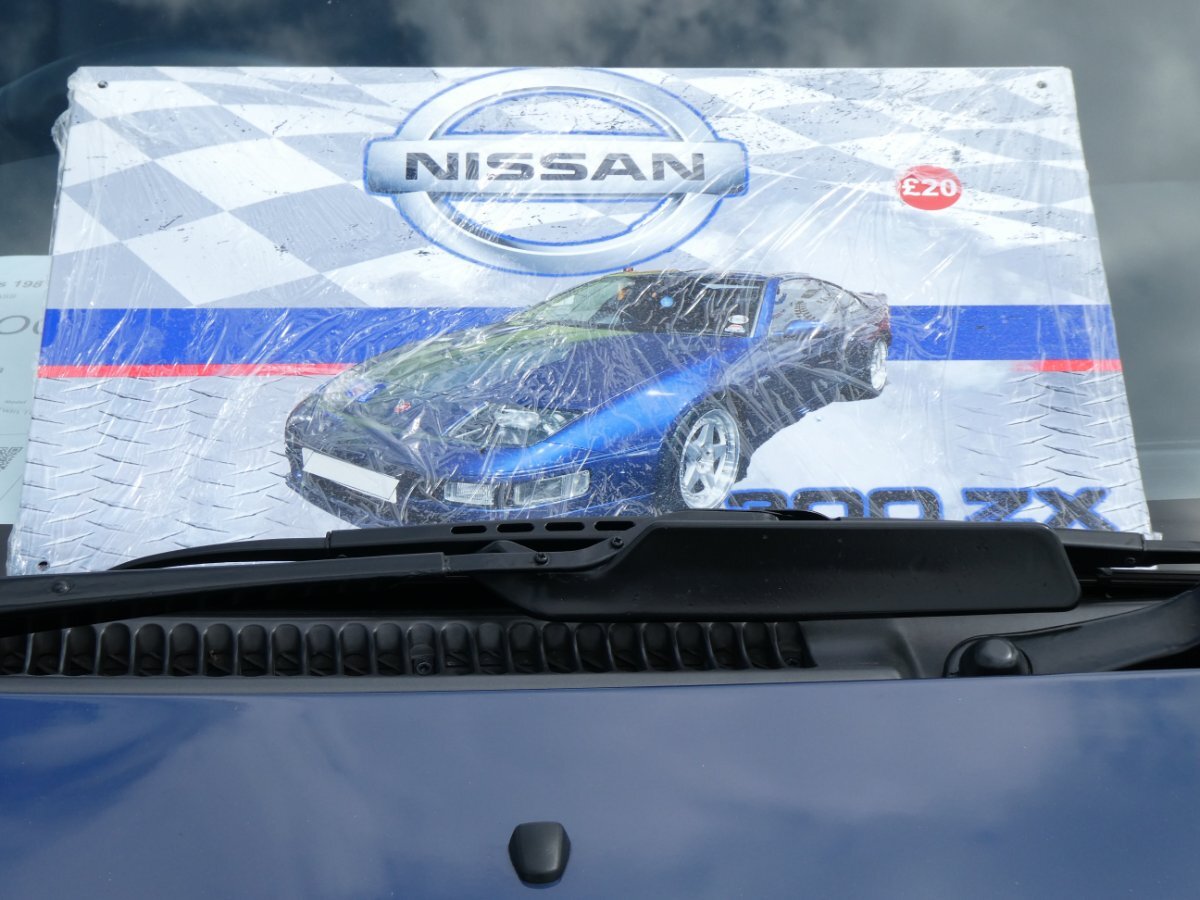
Whilst at the Chiltern Hills Rally yesterday (more on that shortly....), I was looking around a trade stand that sold garage signs, on the remote chance they would have a 300zx one...... ......To my surprise, they did - for £20! The only one I found, by lucky coincidence, happened to feature a blue Zed. Whilst waiting for the card machine to connect, the seller and I got chatting and he joked about charging me double because my Zed was the same colour....... Then upon looking closer, I spotted the featured Zed had the same wheels as mine. And the same Stillen front lip - and then, I noticed it sported the very same two stickers I have in my windscreen. It was a picture of my own Zed - from the reflections in the paintwork, I could see it was taken at the NEC last November. How cool is that??? I have a garage sign featuring my own Zed - and it is out there on sale!! Naturally the conversation changed from the seller joking that I may want to pay double, to me asking for royalties 😄
8 points
-
It was that time of year again on Thursday. Happy to say that 4261 miles driven and a nice green pass! I also managed to sneak a look underneath and there was nothing to worry about. All underseal still perfect, not a hint of rust anywhere. All good for another year 😁
8 points
-
Probably the easiest mod I'll ever do 🤣 seen this pop up on fb and I couldn't say no, might sound stupid but feels so much nicer!
8 points
-
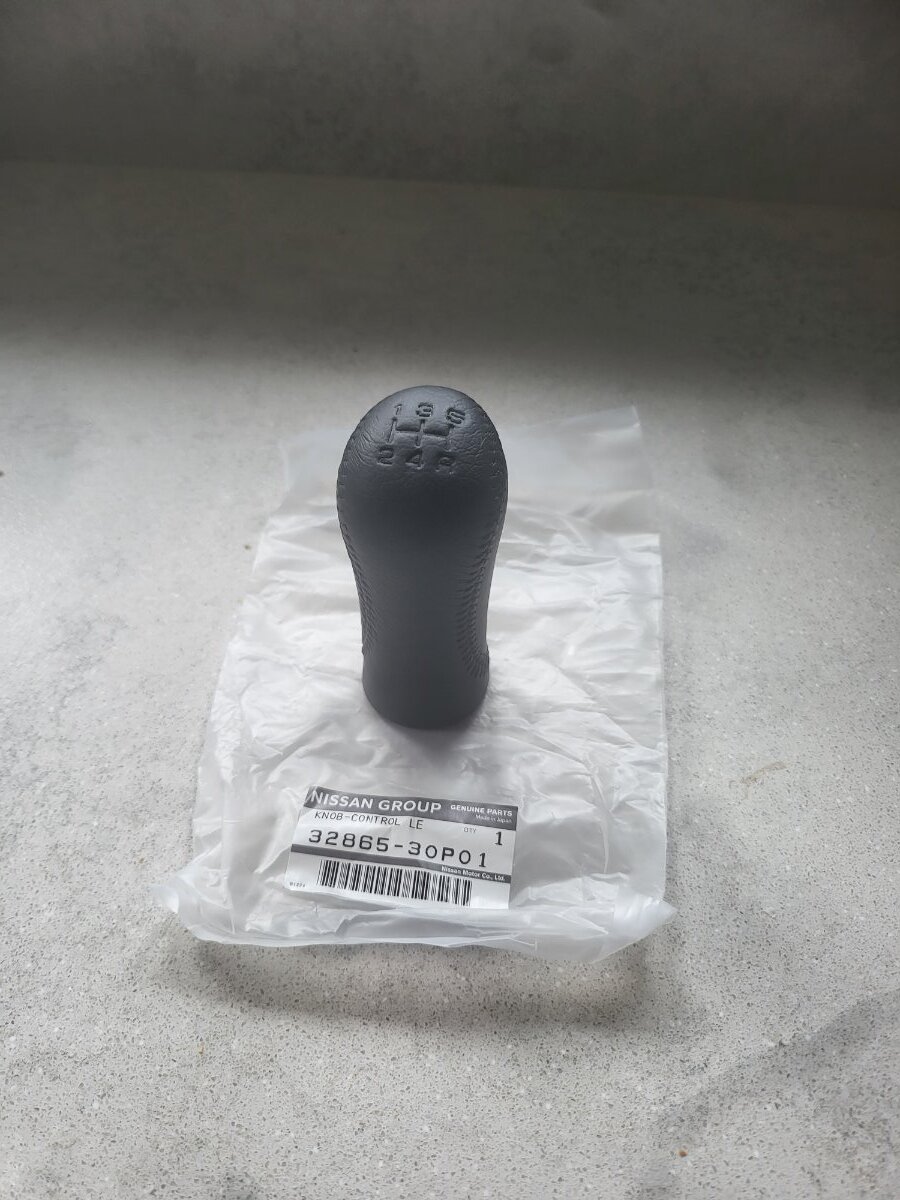
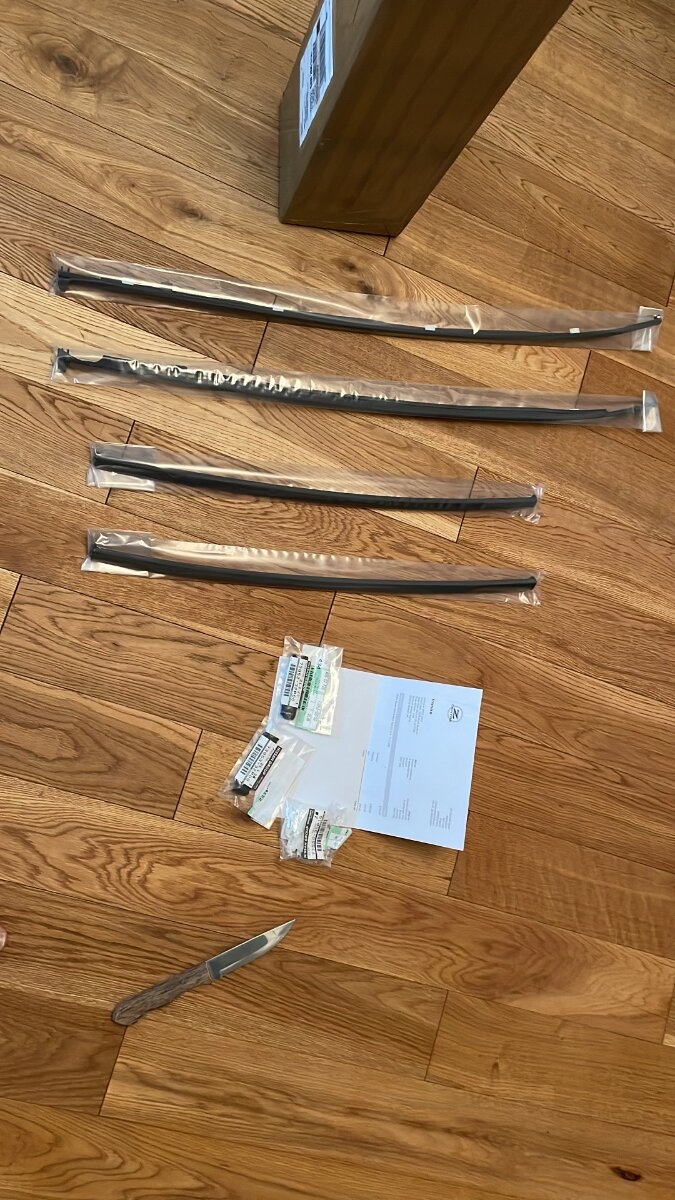
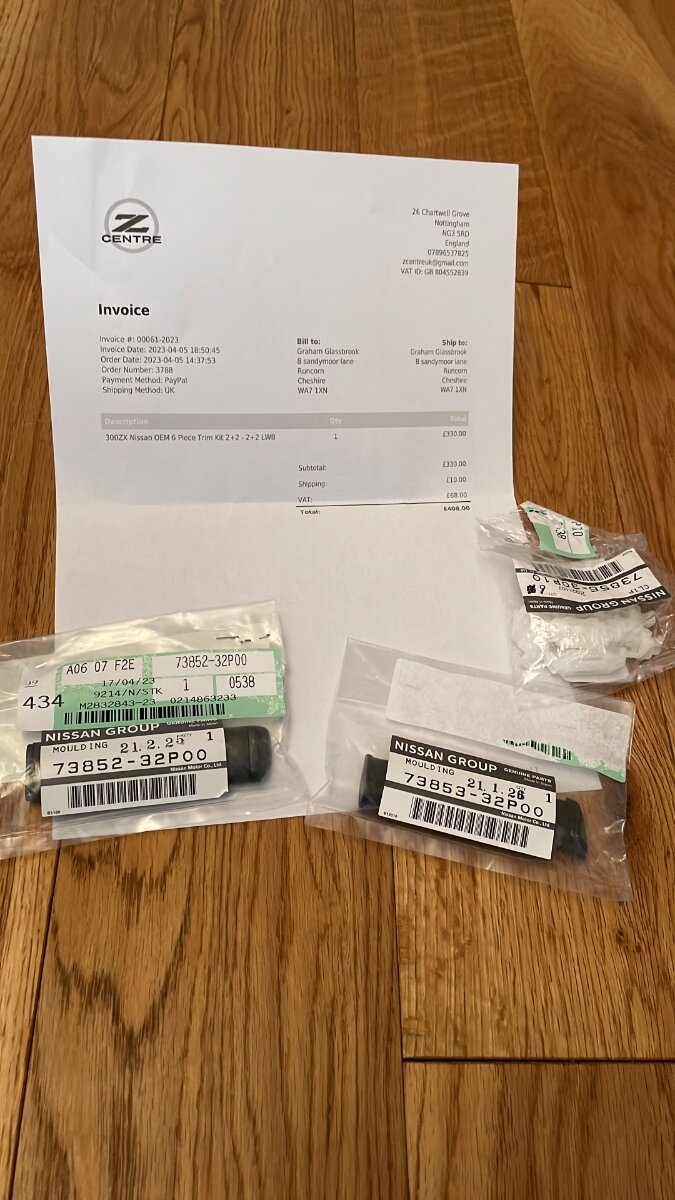
Got myself some nice new trim parts from Luke aka zed centre….probably never get round to fitting them but at least I made the final effort of purchasing them 😂
8 points
-
Happy easter everybody, hope you're all well. After 3 years in climate controlled storage the Z is back in her new home at my new house. Currently replacing all the timing belt components and doing a full service, MOT being done in the week. So I will be out and about when the sun finally makes its appearance. Hope to start attending shows and meets again and catch up with the Z scene.7 points
-
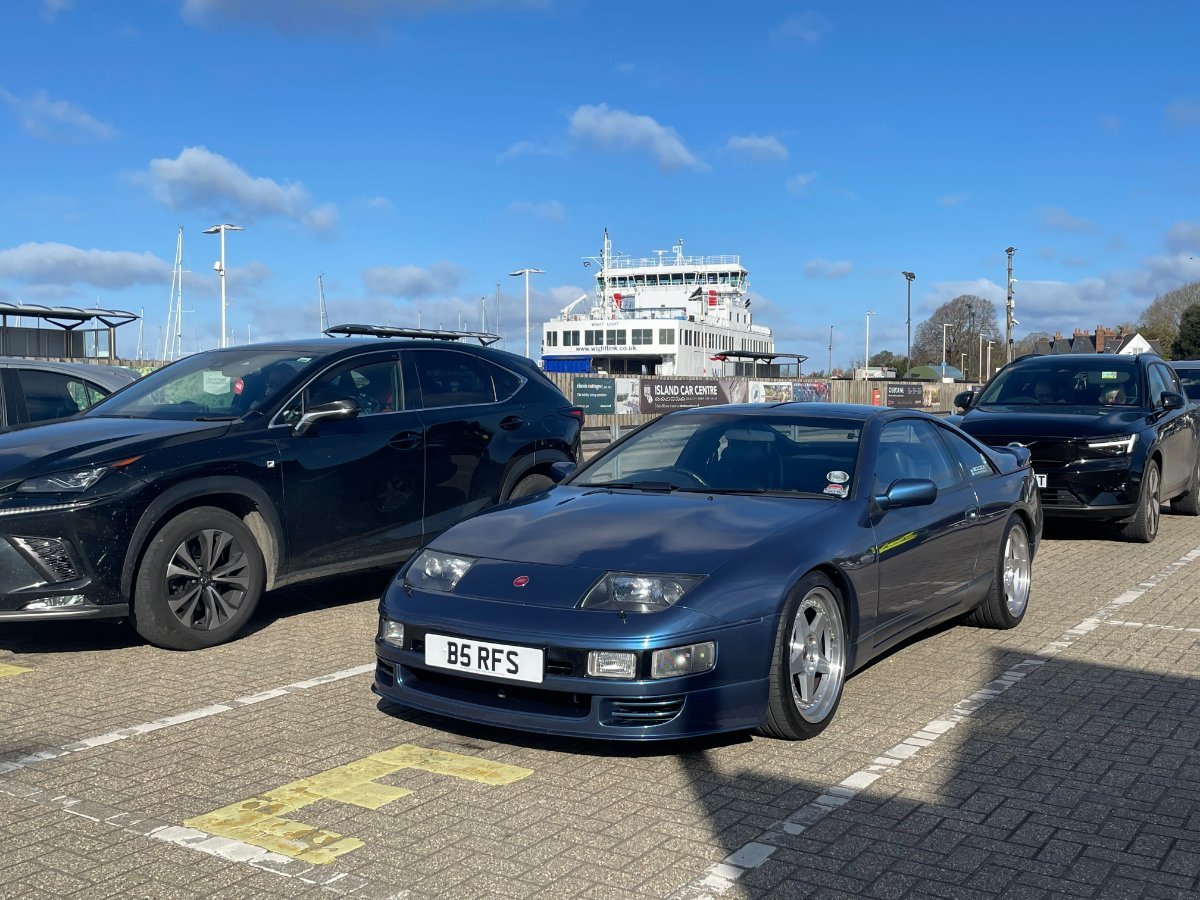
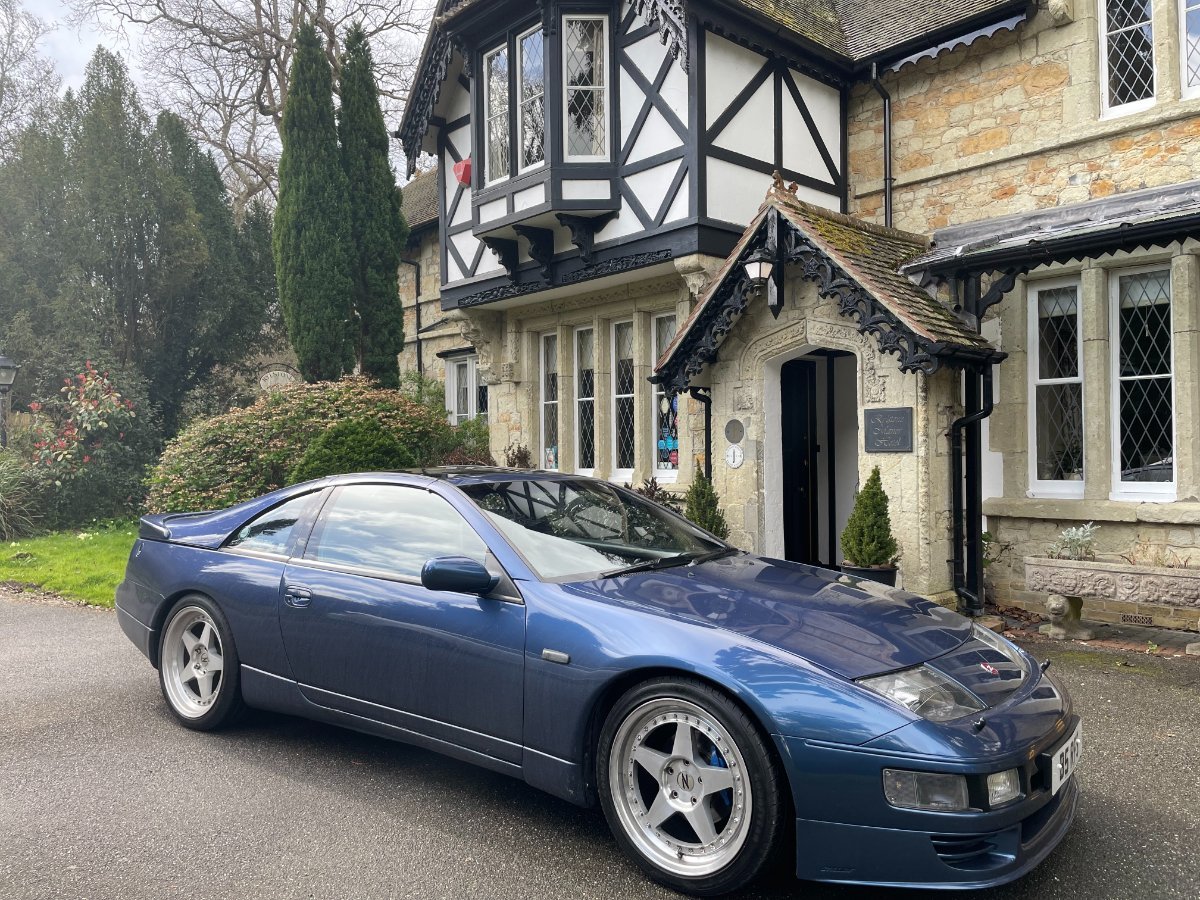
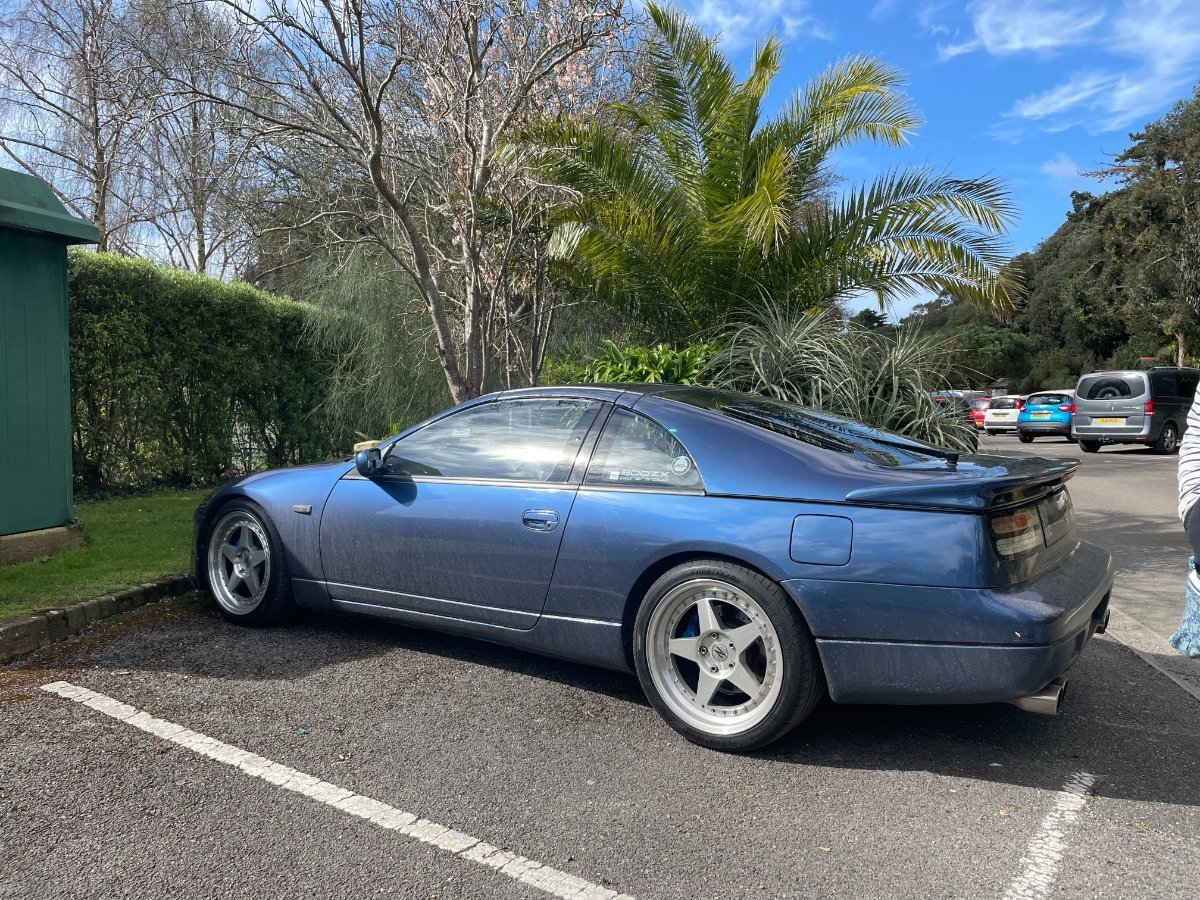
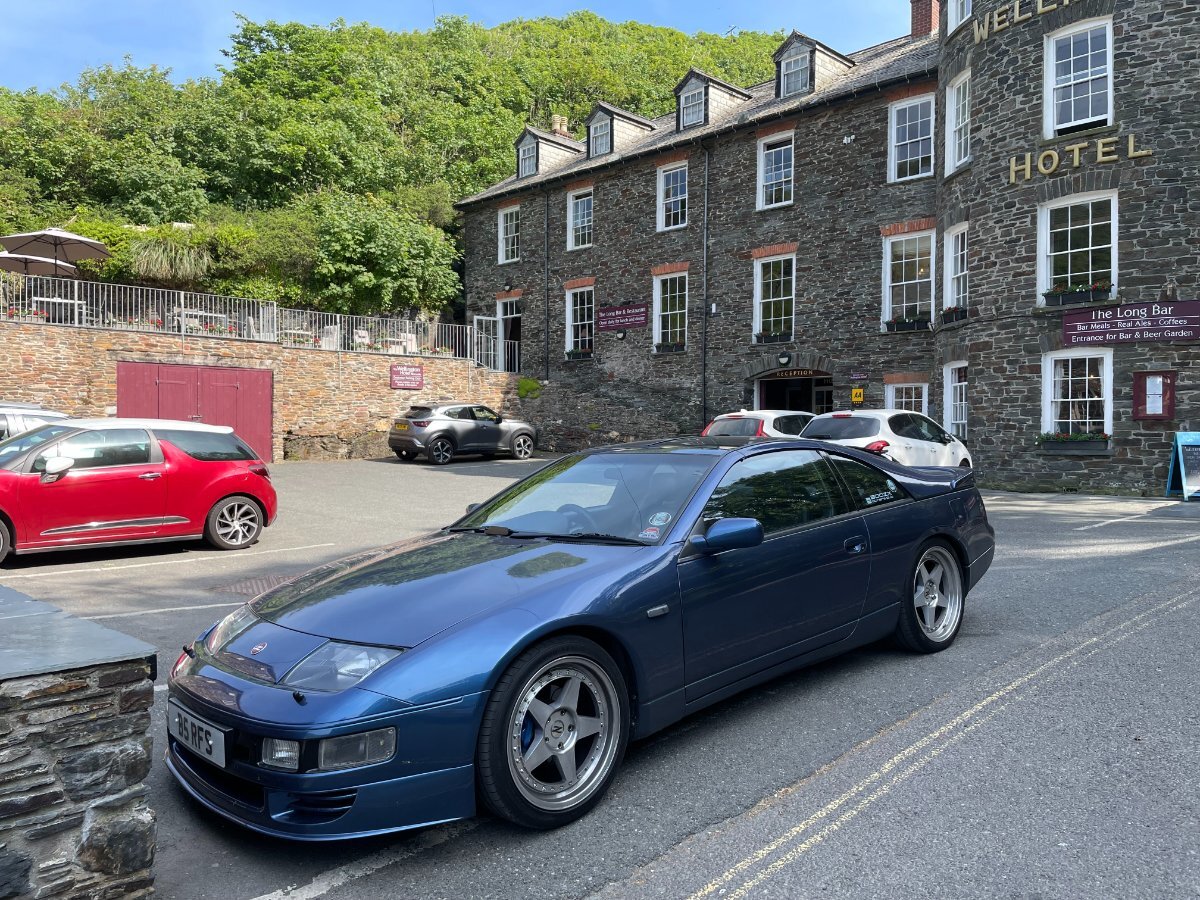
Last Saturday, Julia, The Zed and I took a little trip over to the Isle of Wight for a few days.... The weather wasn't too bad - it only rained as we were leaving..... We got given a good spot on the ferry both ways and our hotel was empty apart from us, so my Zed also had the whole car park to itself 😄 The Zed attracted quite a bit of attention too - when we arrived at Lymington Ferry Port a young lad of about 10, out with his dad, was really taken with the car. He knew exactly what is was and asked if he could take some pictures. Then two guys in the car behind us in the queue got out to admire the Zed. And then when we were parked in Seaview on Monday, a group of young guys passing by stopped their car and got out to look around it too!! We also met up with an old forum friend - Groover (Graham) and his wife Julie. He still has his yellow Zed, although it's been off the road a few years now. He does have a couple of donor Zeds, so hopefully will get his car up and running when he gets some time 😉 So the important bit - some gratuitous Zed pics; albeit thy are from my phone, until I upload the ones from my camera later this weekend........😎
7 points
-
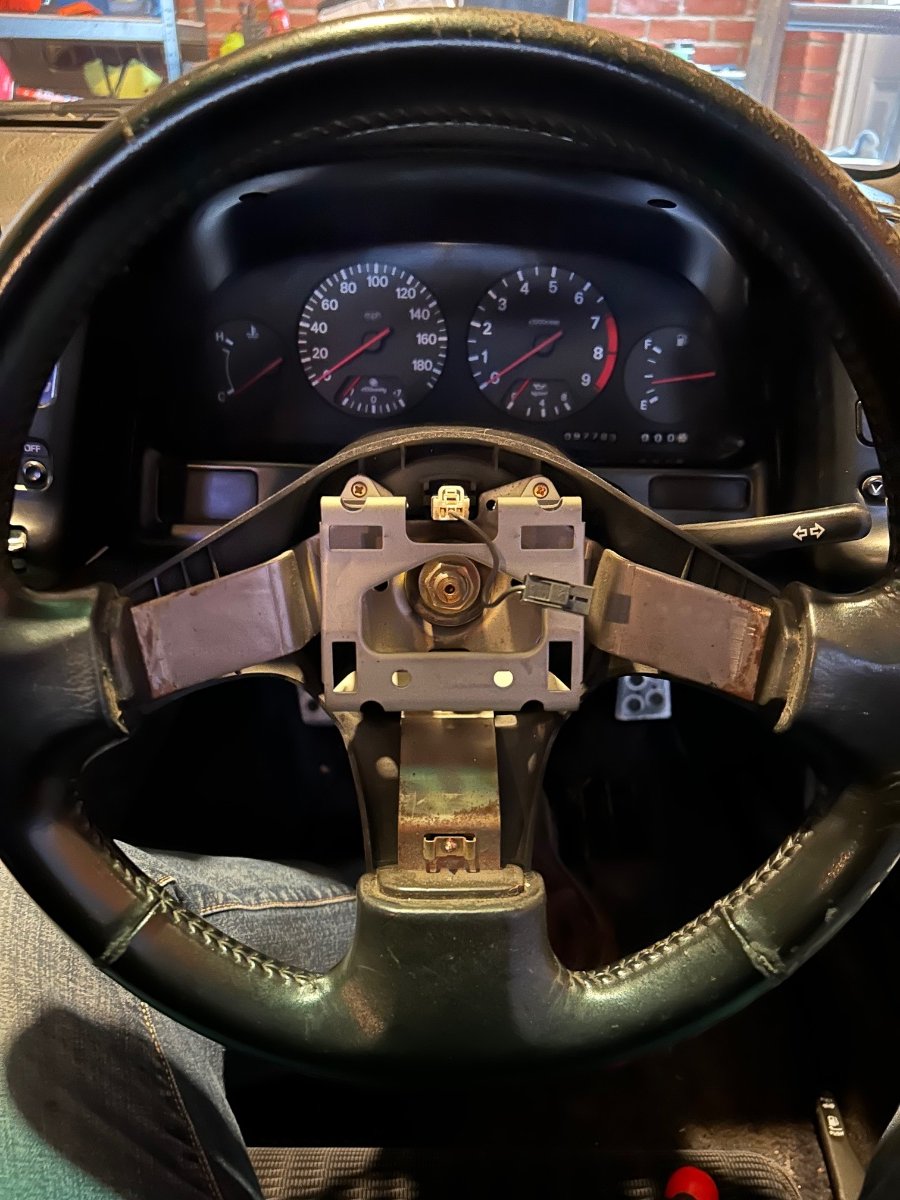
New steering wheel fitted (recovered genuine one, looks great!) fitted some new window seals and investigated the Speedo issue and am now pretty sure it’s the speed sensor that’s the issue.
7 points
-
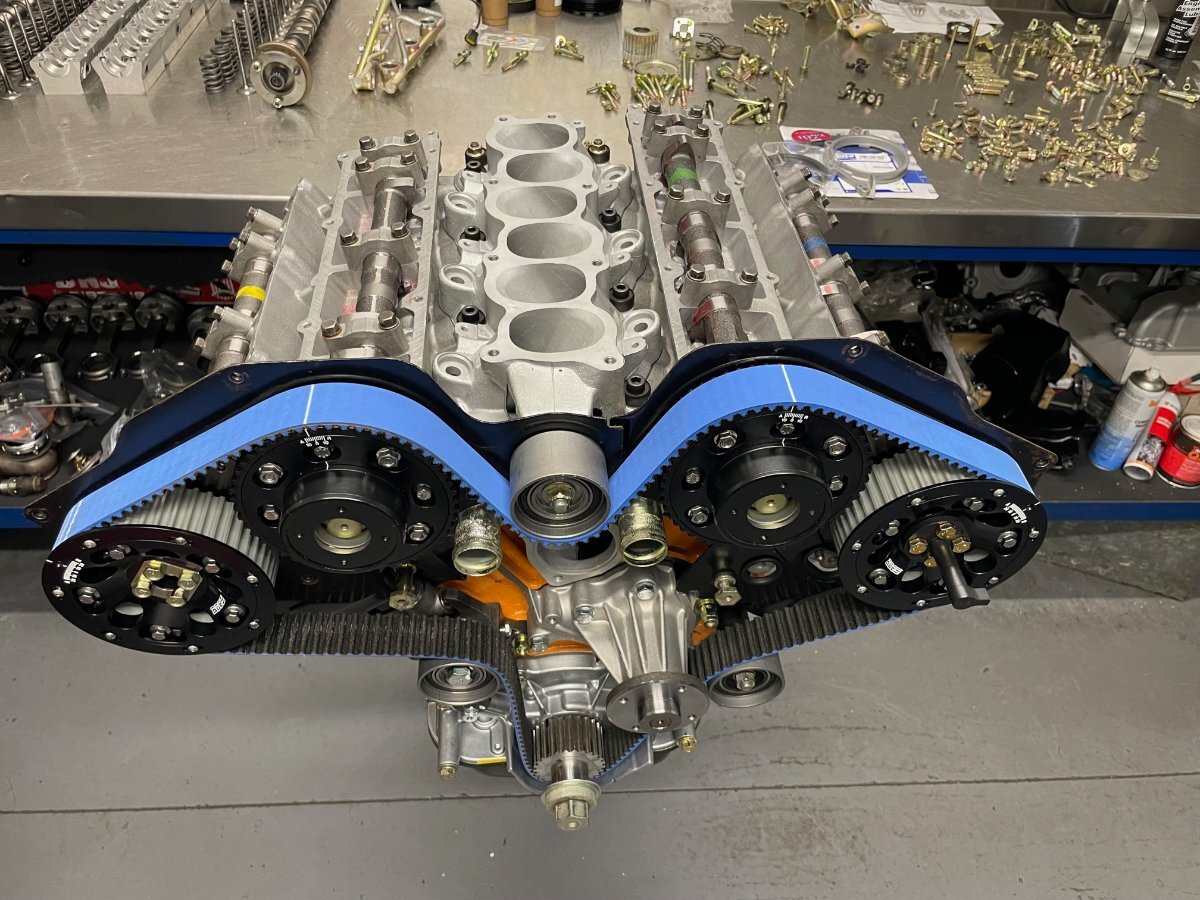
Intro - After more than 15 years of ownership, many great meets, road trips, and track days, my Fairlady is going through a full top to bottom rebuild. During many of the meets I discussed building the ultimate NA with Slick Pete as we shared the love of high revving NA motors. Almost everyone recommends going TT conversion or LS swap as the easy way to high power but I wanted something unique. So after securing some workspace with NickZ32 the tear down began. Its been slow going but continues to move forward. Step 1 - tear down Step 2 - build the motor Step 3 - replace or restore the drive train Step 4 - prep for paint and body work, paint Step 5 - Harness and ECU update Step 6 - Reassemble Step 7 - Tune Step 8 - Test Will provide updates as I pull together photos and details (Steps 1-4 80% complete).7 points
-
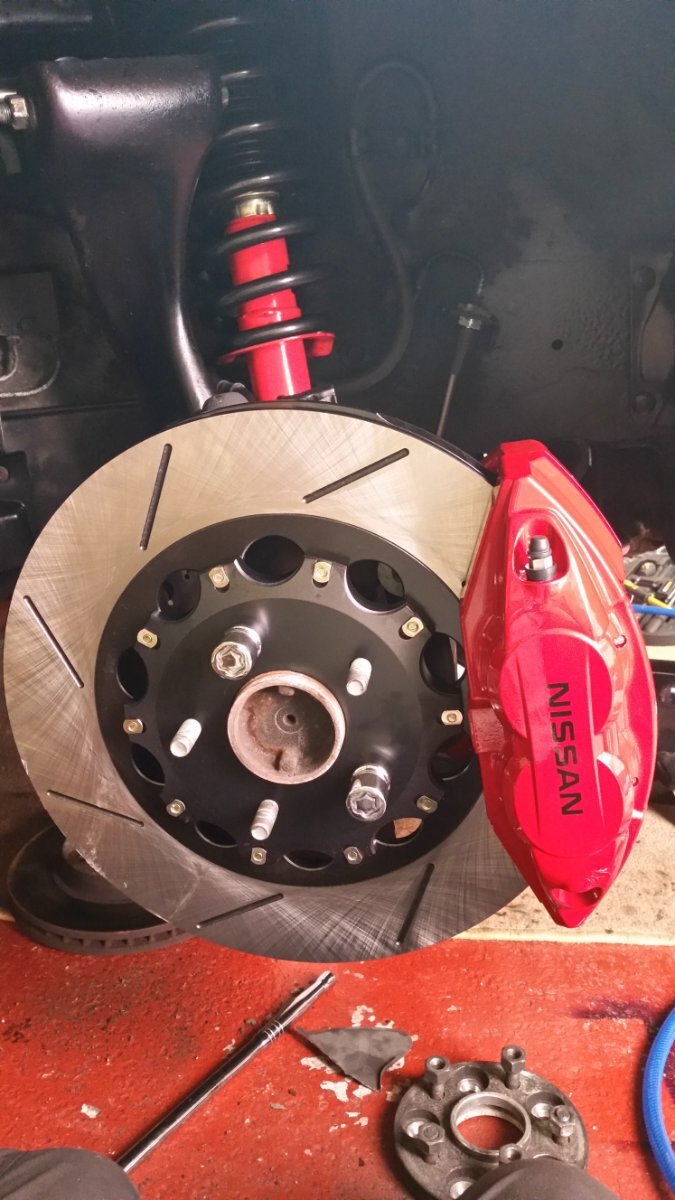
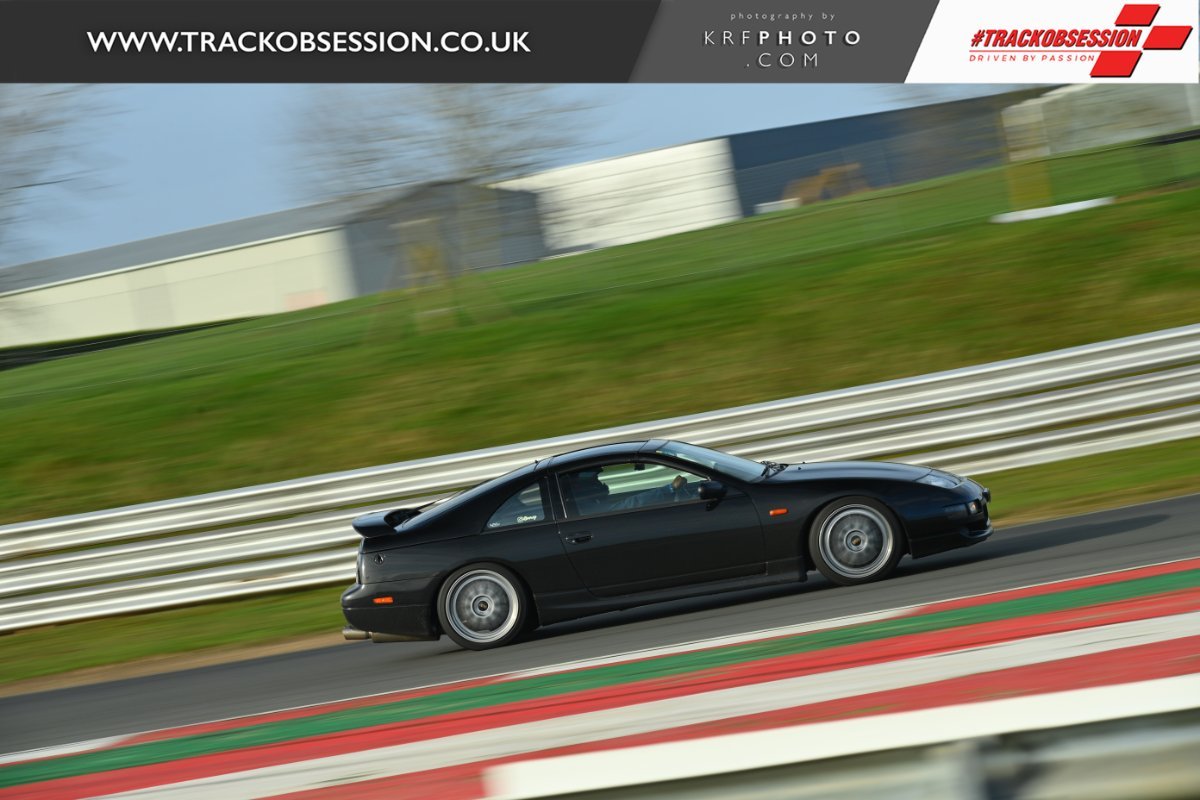
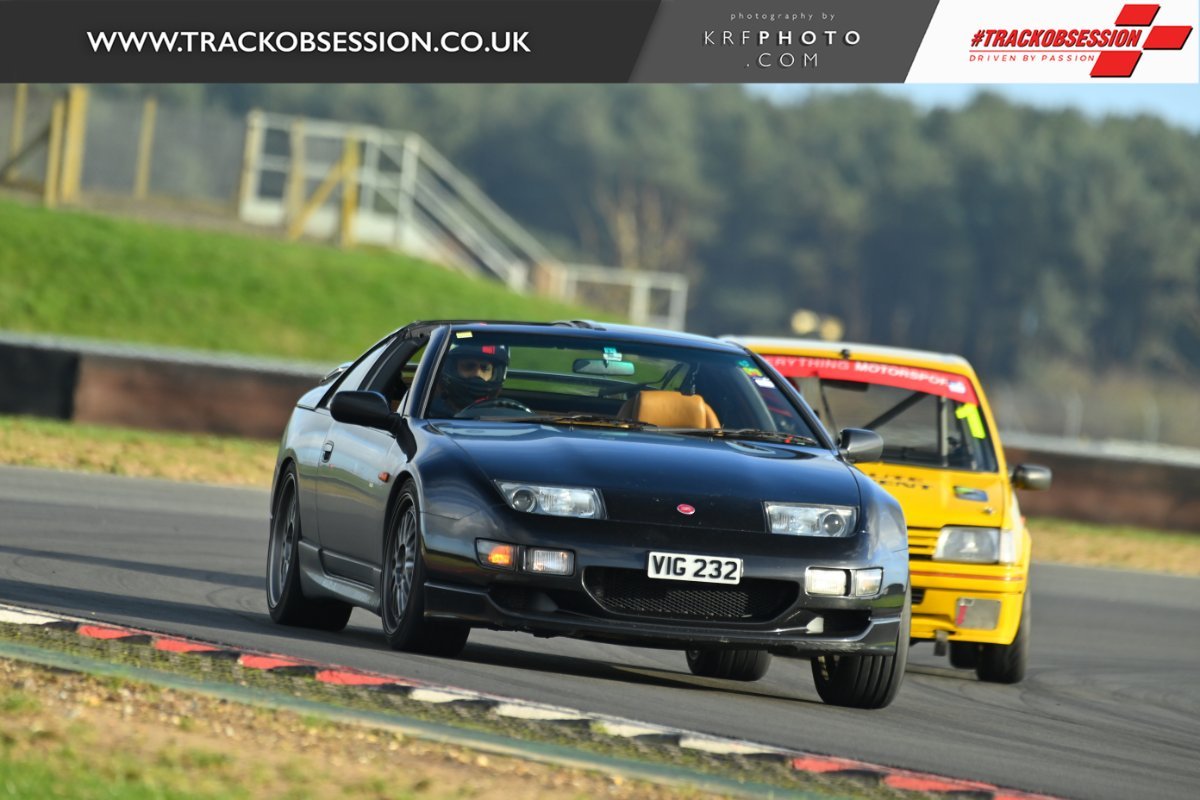
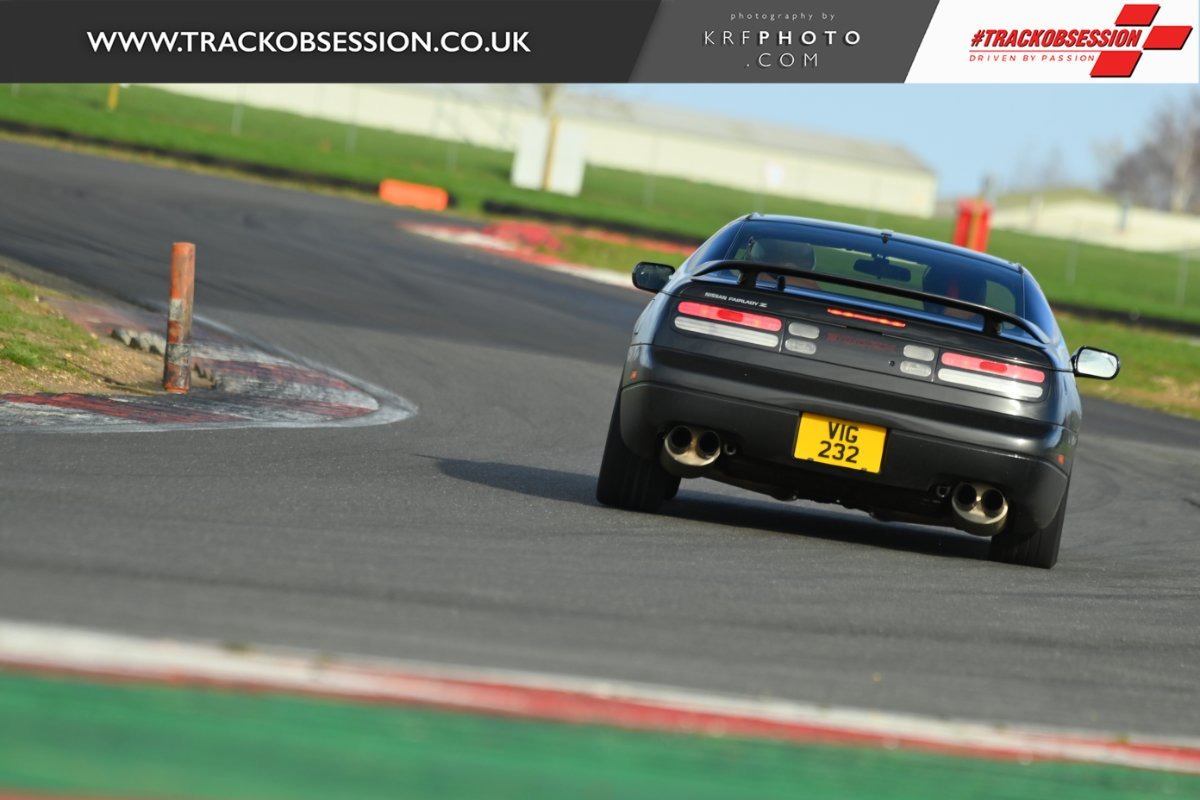
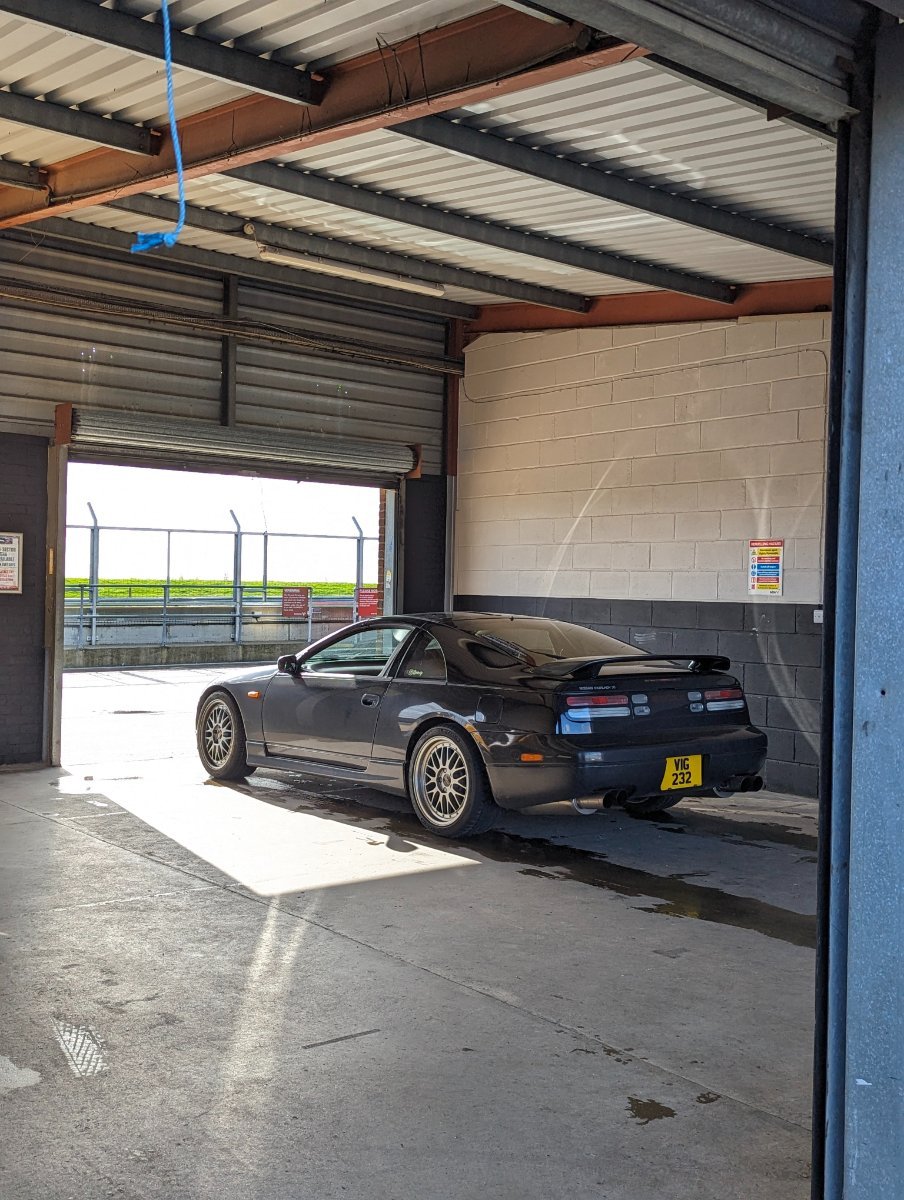
It's been a little while since the last update. The car spent the dark months in its cocoon on the drive but came out this week for it's first proper outing - a open pit lane track day at Snetterton with my car club. Following on from the epic'ness of my Swiss roadtrip last year, I was very excited to find out how it would handle on track. Bilstein shocks and stock springs, stock ARBs, stock power and working HICAS! Overall, the car was a blast to drive. It wasn't the fastest on track but I really didn't care as it FELT fast though I would definitely prefer a little less body roll in the corners!! I was also surprised that the brakes held up perfectly with no fade at all, even with at least 2 x 40min+ sessions on track. Then again, I wasn't hitting very high speeds and the morning was very wet and damp. Nonetheless, I have now sourced my new calipers and they'll ve shipped off to be refurbed imminently. More on that in future posts! For the first time in my driving life I span the car...3 times! The first 2 were on my first 2 laps of the day in pouring rain which made it feel like I was driving on ice. My intention was to take it slow and practice getting comfortable with the car going sideways but both times, it span so quickly that I wasn't able to keep it under control. I can't have been doing much more than 30-40mph each time and one of these saw me sliding across wet grass towards the metal barrier. Thankfully the car stopped a mere 2-3m shy. That could have turned out to be really shit day! I crawled back to the pits and decided to passenger in other cars until the track was dry. By the late morning the track started to dry and confidence (and speeds) into the corners increased which led to a bit of racing with others and the inevitable dry track spin. Very embarrassing as it really shouldn't have happened. Hey ho...was all a good experience and I'm itching for the next one! Currently planning for Bedford and Anglesey later in the year as well as a trip down to the Nurburging. A few photos from the day...surprisingly not the only JDM. I was joined by TWO MKIV Supras. Clearly we were the best looking cars on track that day but far from the fastest or most nimble! . . .
7 points
-
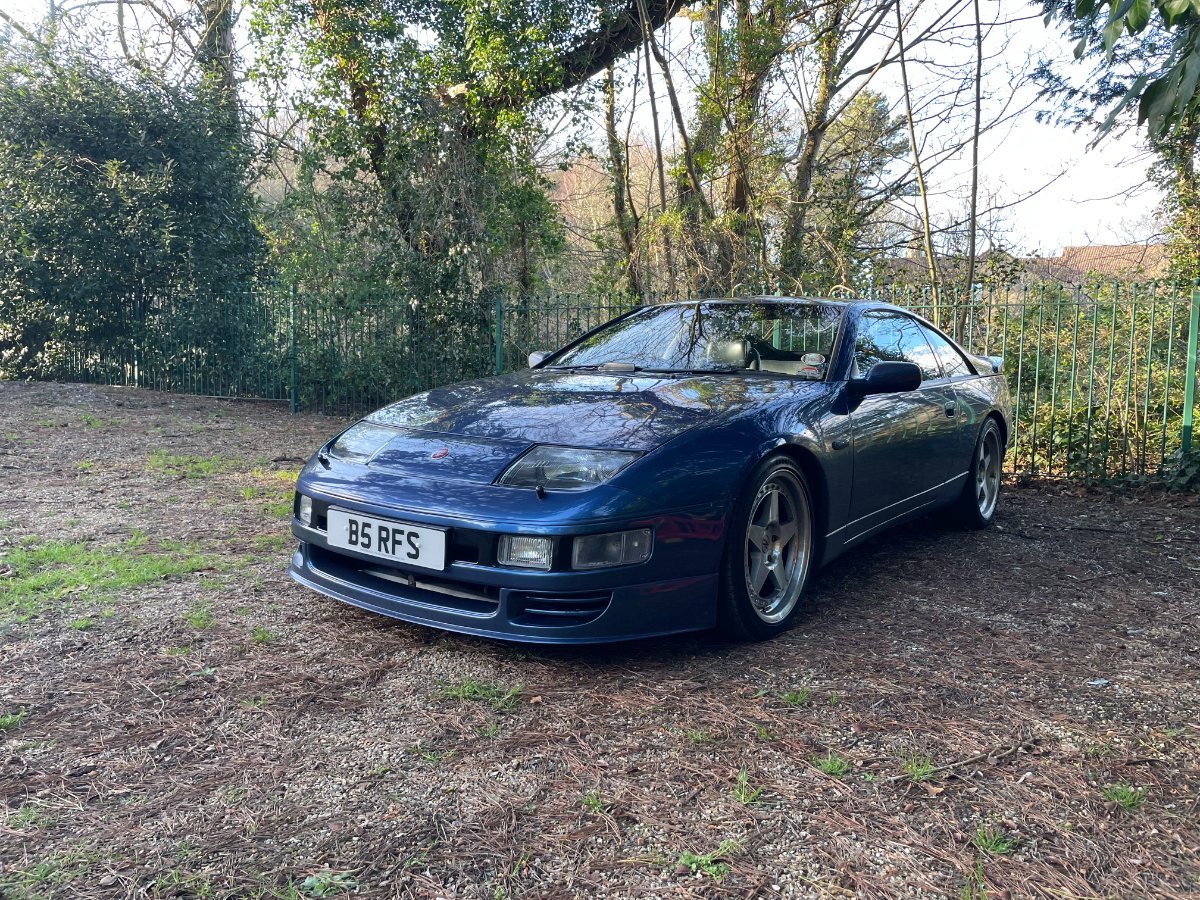
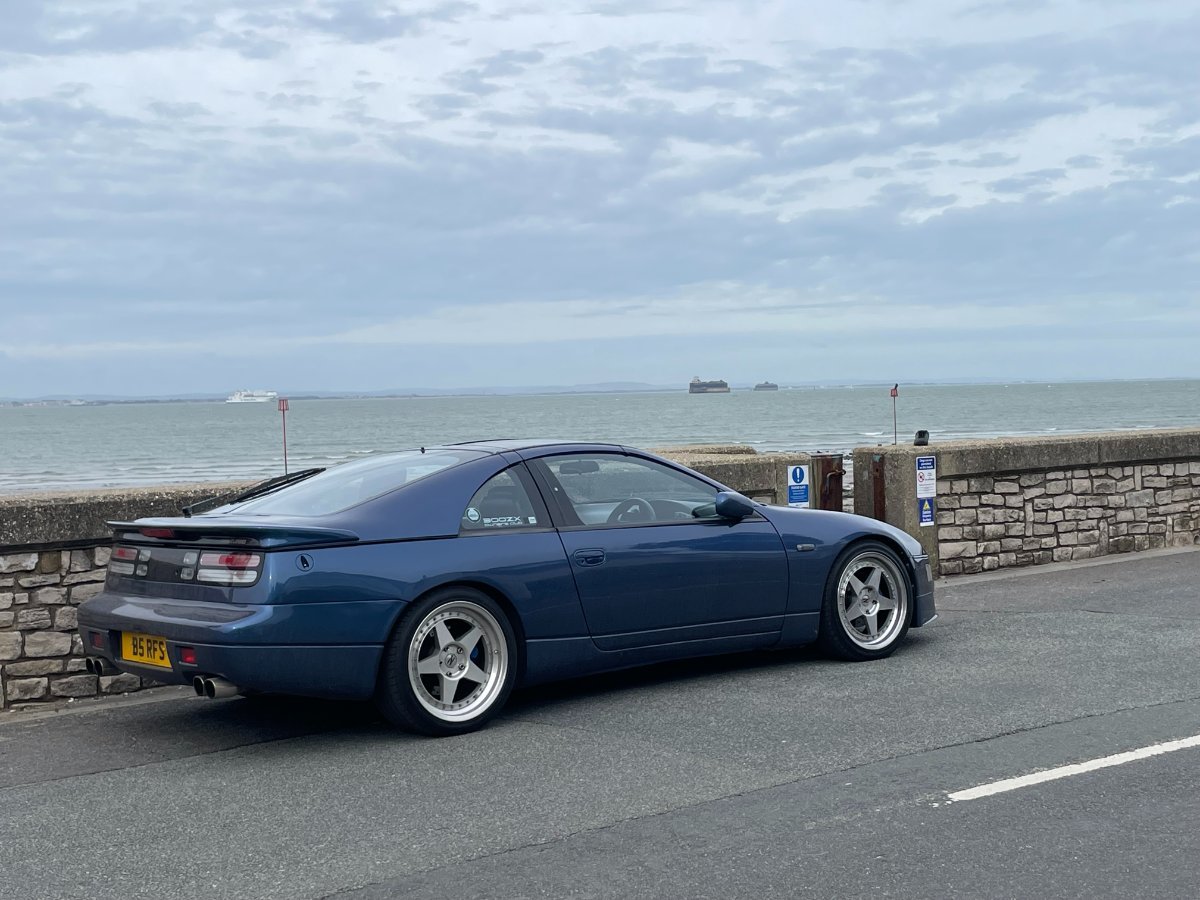
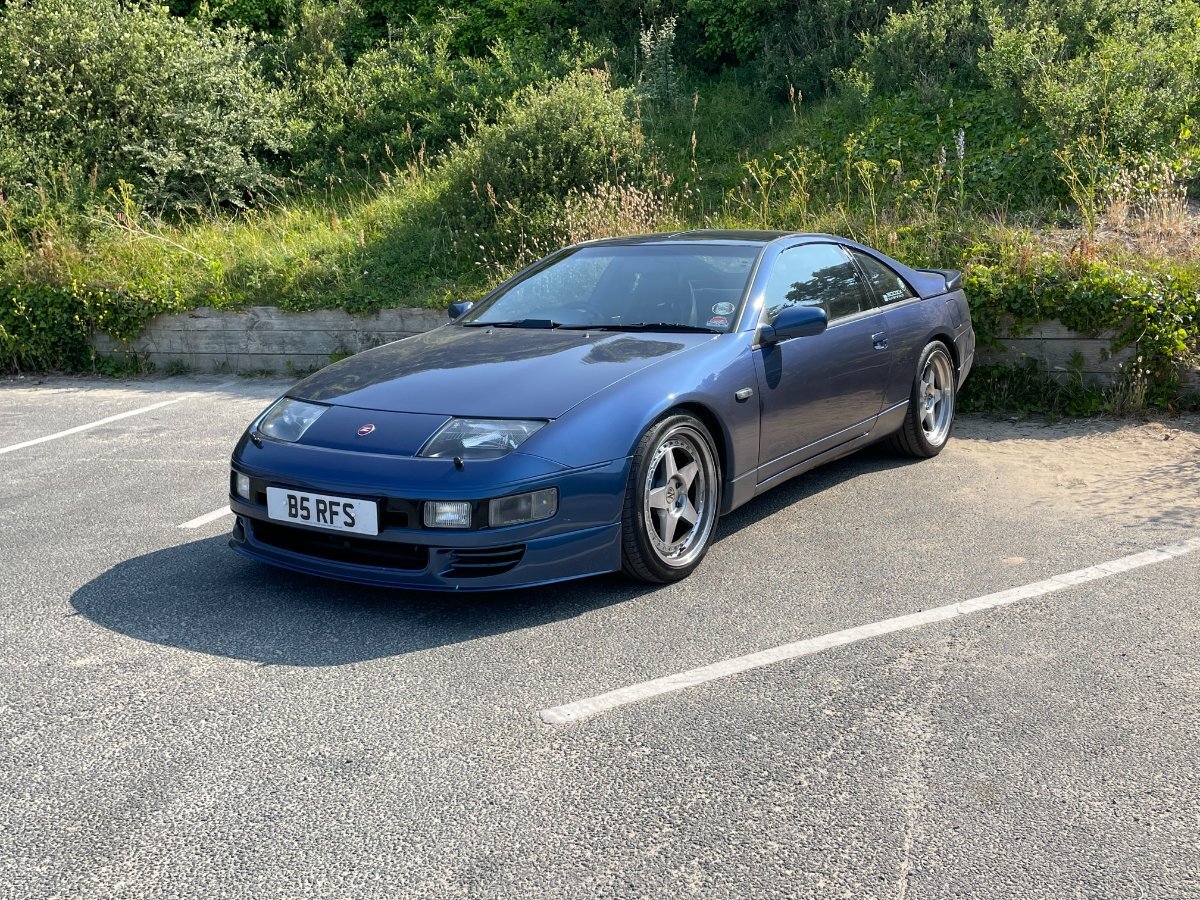
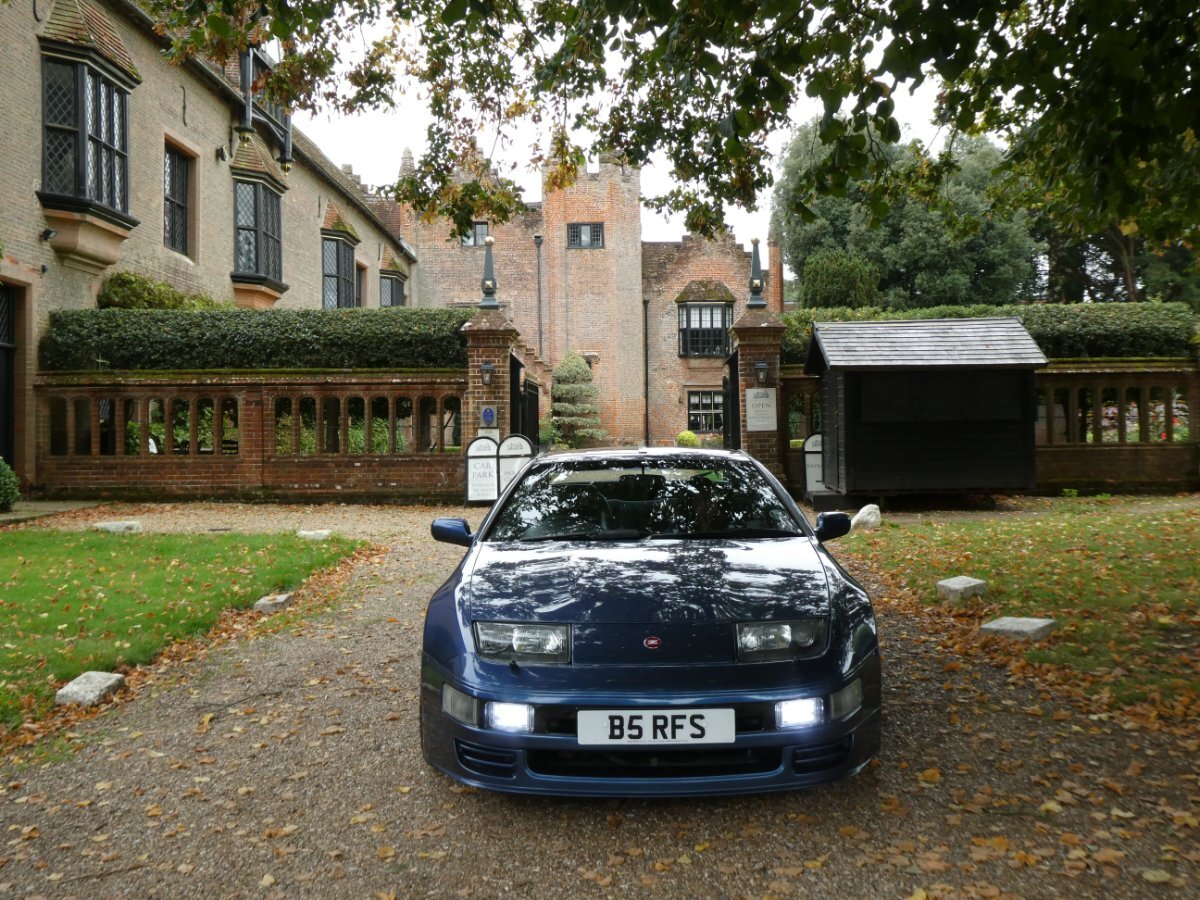
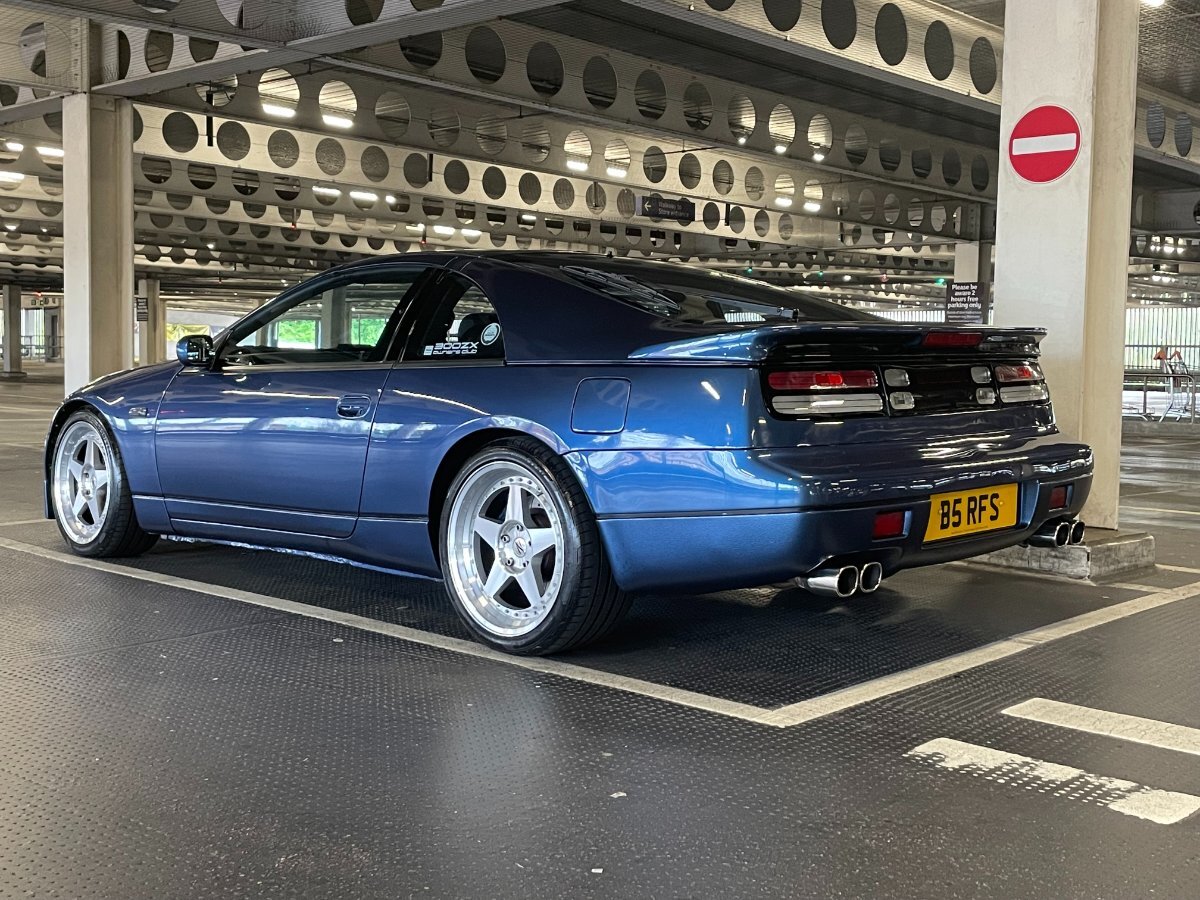
On 28th January 1994 L26VOY (as it was known then) was first registered..... So today my Zed hits the grand old age of 30.......! Happy Birthday B5RFS, is "he" is known today....🤩 Seems like a good excuse to share some gratuitous Zed pictures 😉
7 points
-
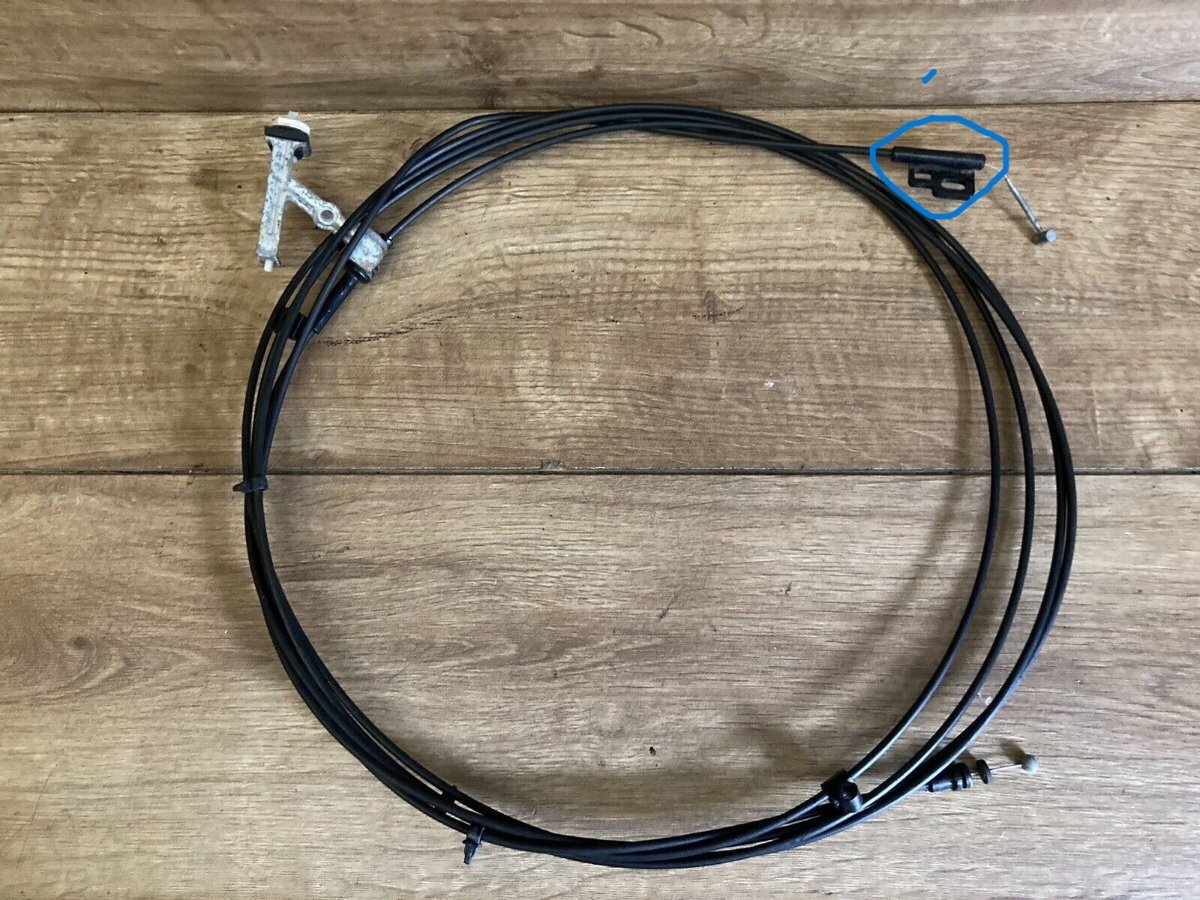
Yesterday, I replaced my fuel flap/boot release cable....! The little plastic retainer which gets bolted to the sill (circled) along with the release lever had snapped - possibly a delayed result of fatigue following the sill restoration work back in 2018. Luckily I had a brand new Nissan part, still in the original bag, in my garage! So I had some fun removing the interior trim, tracing the original cable and running the new one through. All done now though, I have the scratched hands to prove it LOL!!!
7 points
-
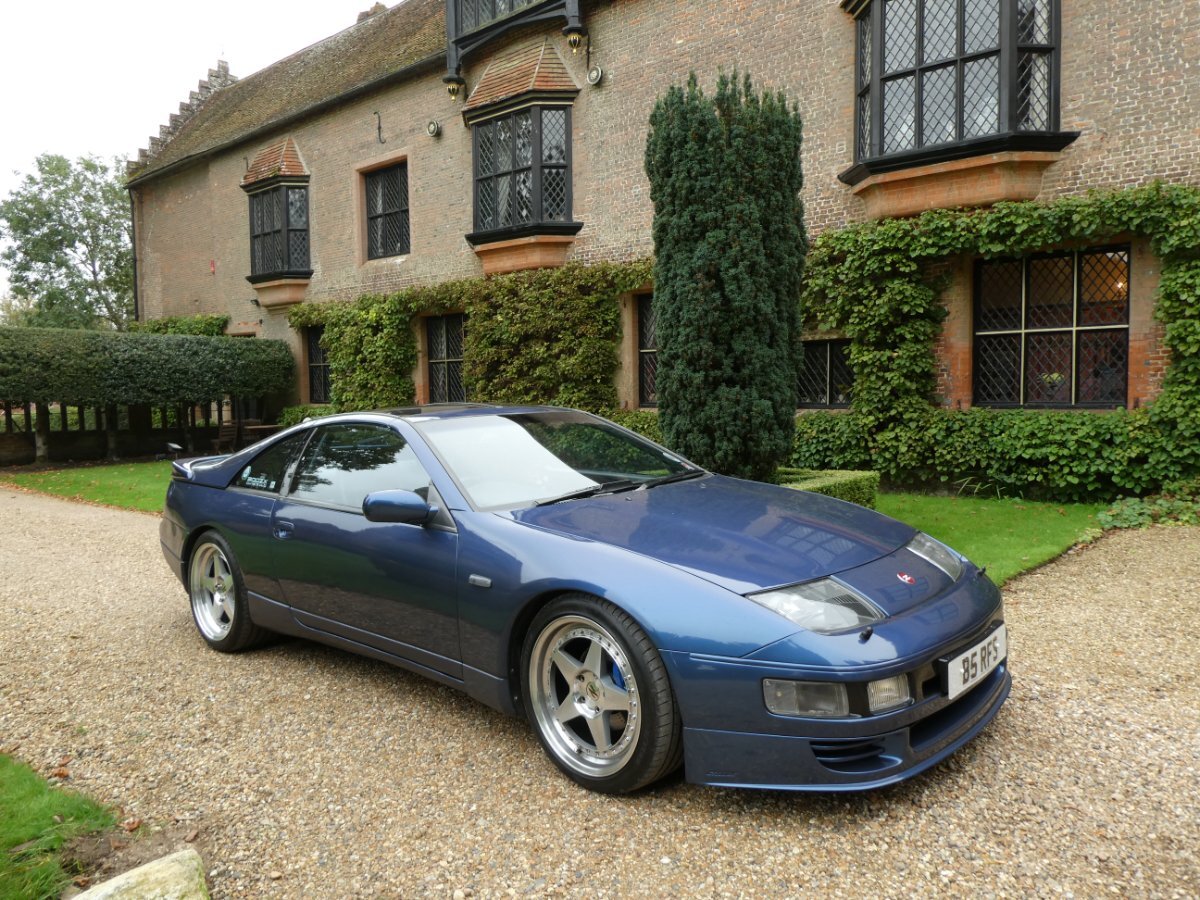
Then called in at Cheinies Manor for a photoshoot........ .........And got home before the rain started.... 😉
7 points
-
I've had my ZX for approaching 14 years and been a member of this Club for a substantial part of that time but never posted. Without any technical expertise to impart I've struggled to think how I can make a positive contribution - until now, when I can publicly express my thanks to Luke at Z Centre and Frank at FG Bodyshop, both in Nottingham, for the wonderful job they've done with replacing the original boot spoiler with one of Luke's replica OEM jobs. And also to Jimmer at PowerZed for his recommendation. I realise a photo is required but it's pouring down here in N.Wales and she doesn't come out in the wet! So, just a genuine THANK YOU!7 points
-
Posting those pictures of rust was a bit depressing! How about a preview of a shiny new motor and predicted HP model? Looks like 300bhp+ is well within reach.
7 points
-
Went for a smashing drive down to Brighton with my car club. An eclectic mix of cars and a lovely sunset to finish it off! . . https://www.instagram.com/reel/CwJIlvYtUpu/?utm_source=ig_web_copy_link&igshid=MzRlODBiNWFlZA==
7 points
-
Went for a spin…
7 points
-
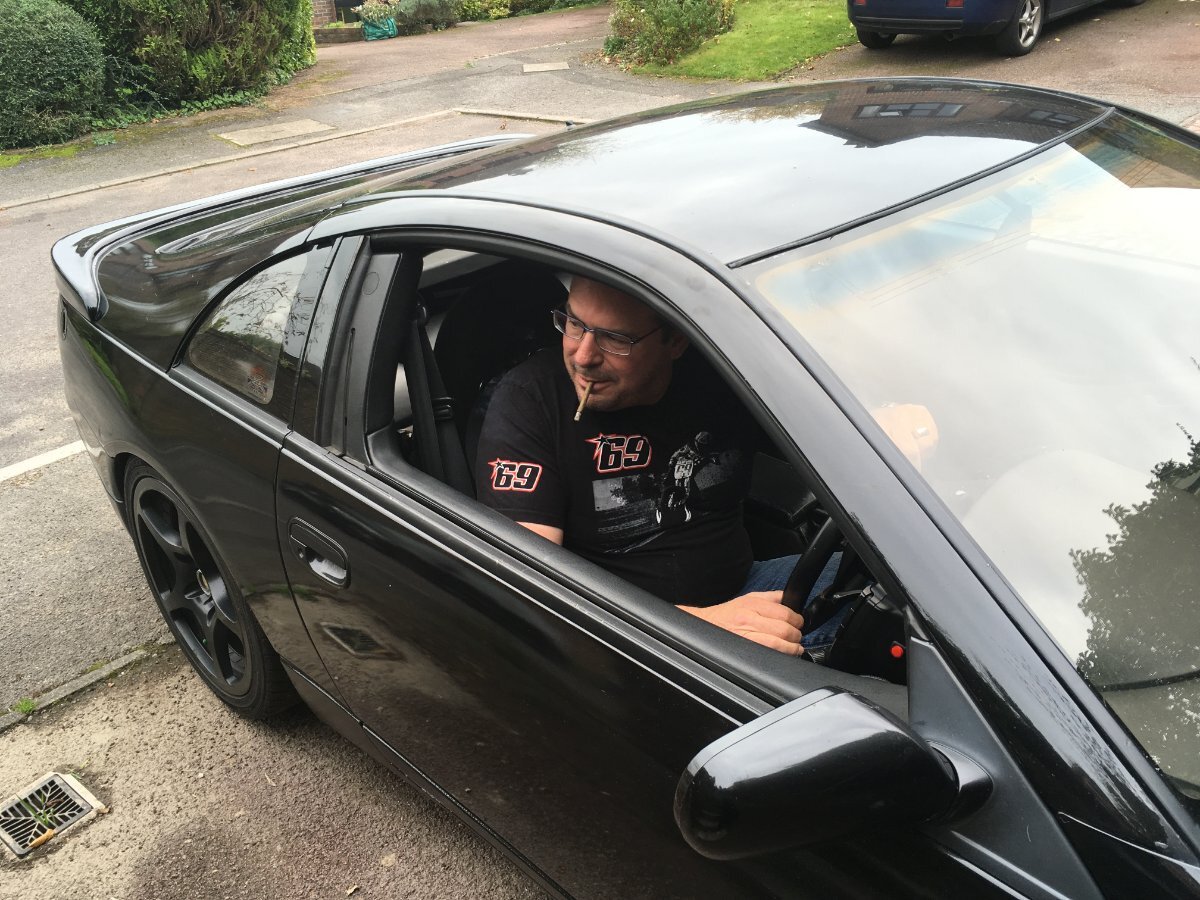
I have had to use the Z as a daily for the past weeks!
7 points
-
Token non zed is shiny and ready too
7 points
-
Zed is shiny and ready for tomorrow.......
7 points
-
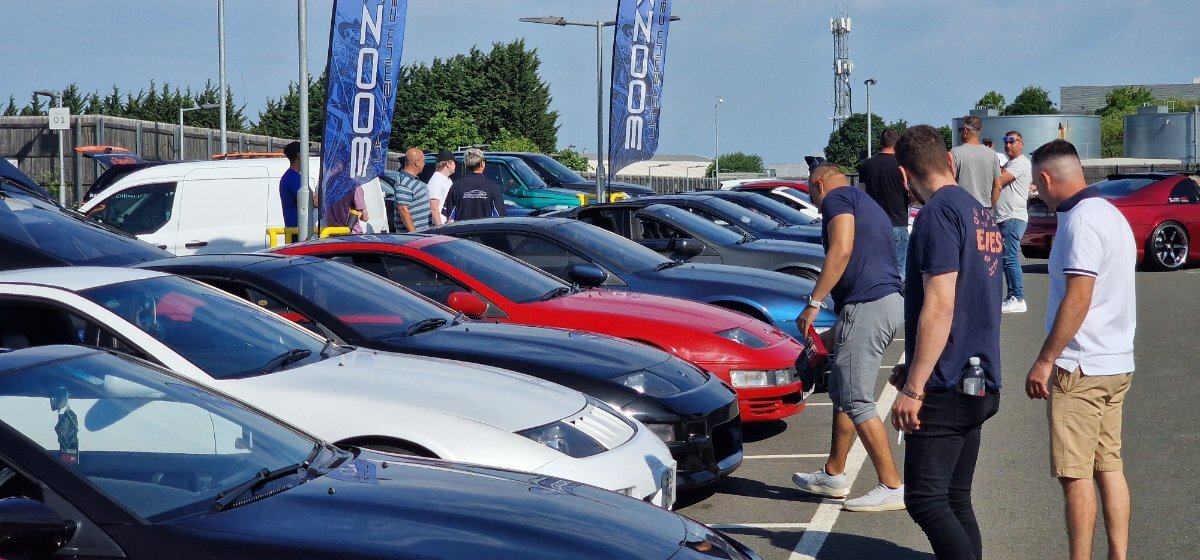
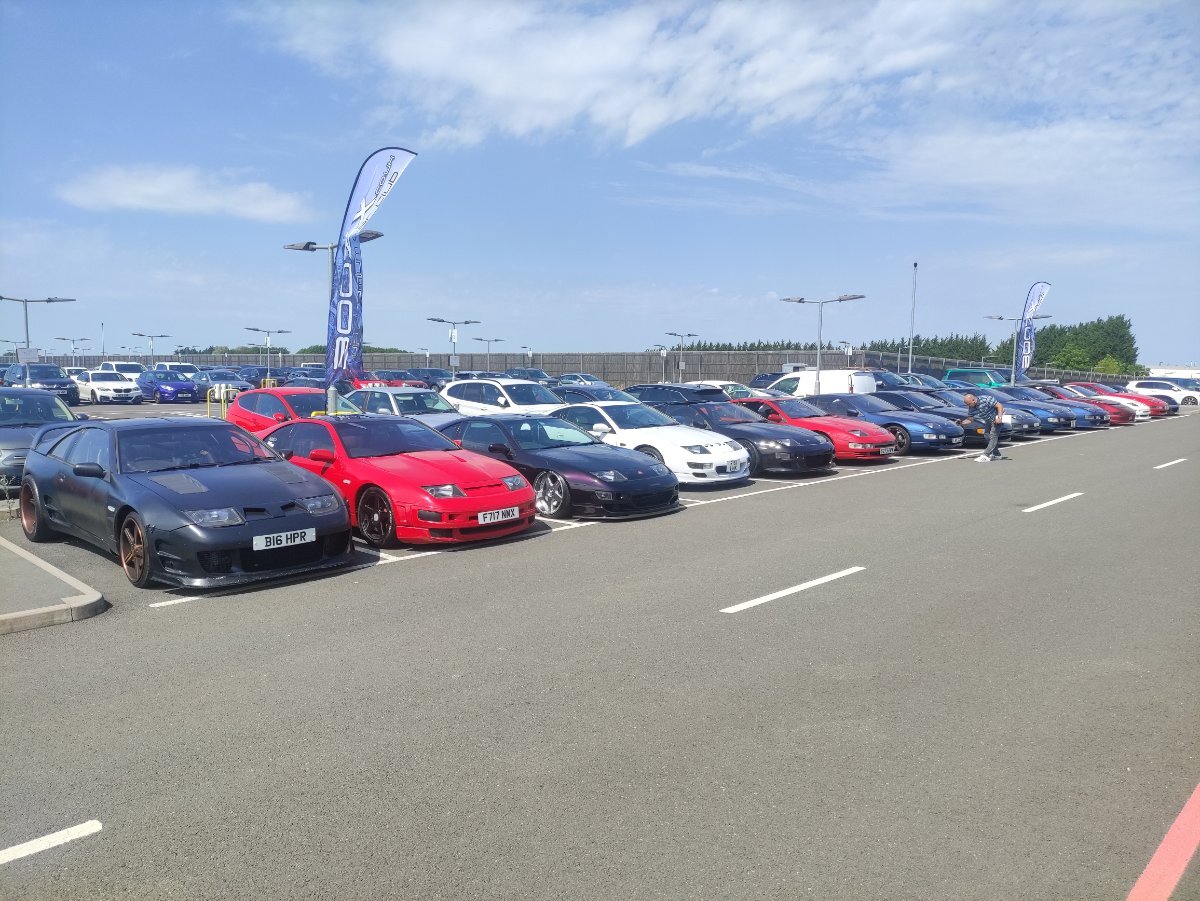
I've been to plenty of shows but not displayed at many. I thought the organisation for this one was very well done. There was absolutely no friction at any point and there was something for everyone but it is still a car show so my kids faded pretty quickly come noon. I do like these sorts of shows where it's not all about measuring dicks (ie. super/hyper cars only). You can really feel the passion in the air as you're walking around checking out everyone else's pride and joy. Thanks Tom for organising! I'd certainly be interested in making this an annual fixture in my diary. It's so close to me that it would be rude not to! ...and allow me to balance out the representation of the non-blue attendees...
7 points
-
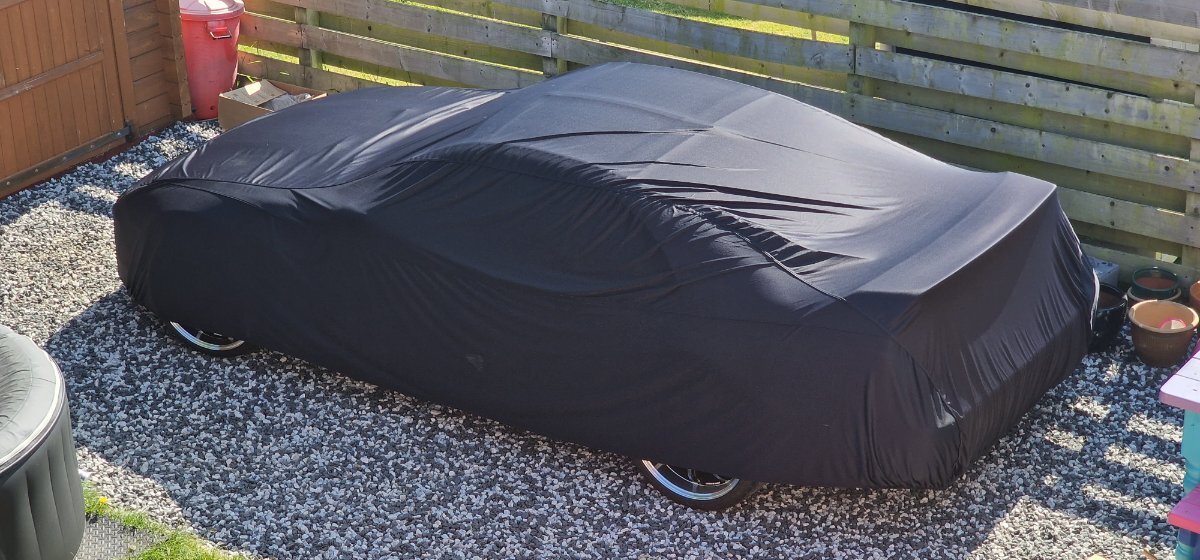
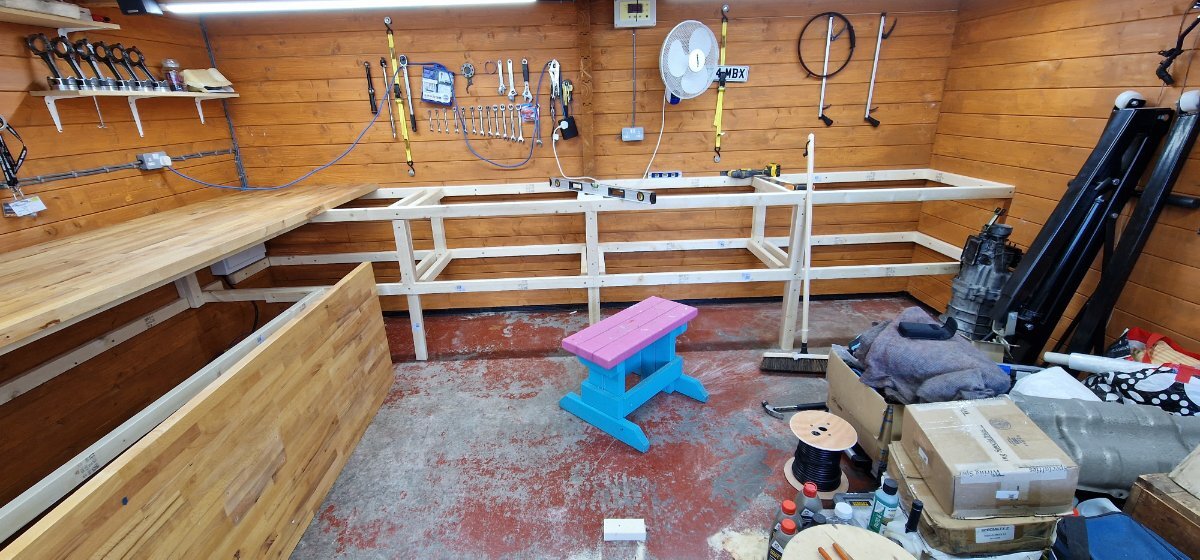
My zed spent its first night outside last night as i'm doing a bit of a refurb on my garage space. Fitting a new workbench made from solid oak, so to make room she was pushed out onto the stones.
7 points
-
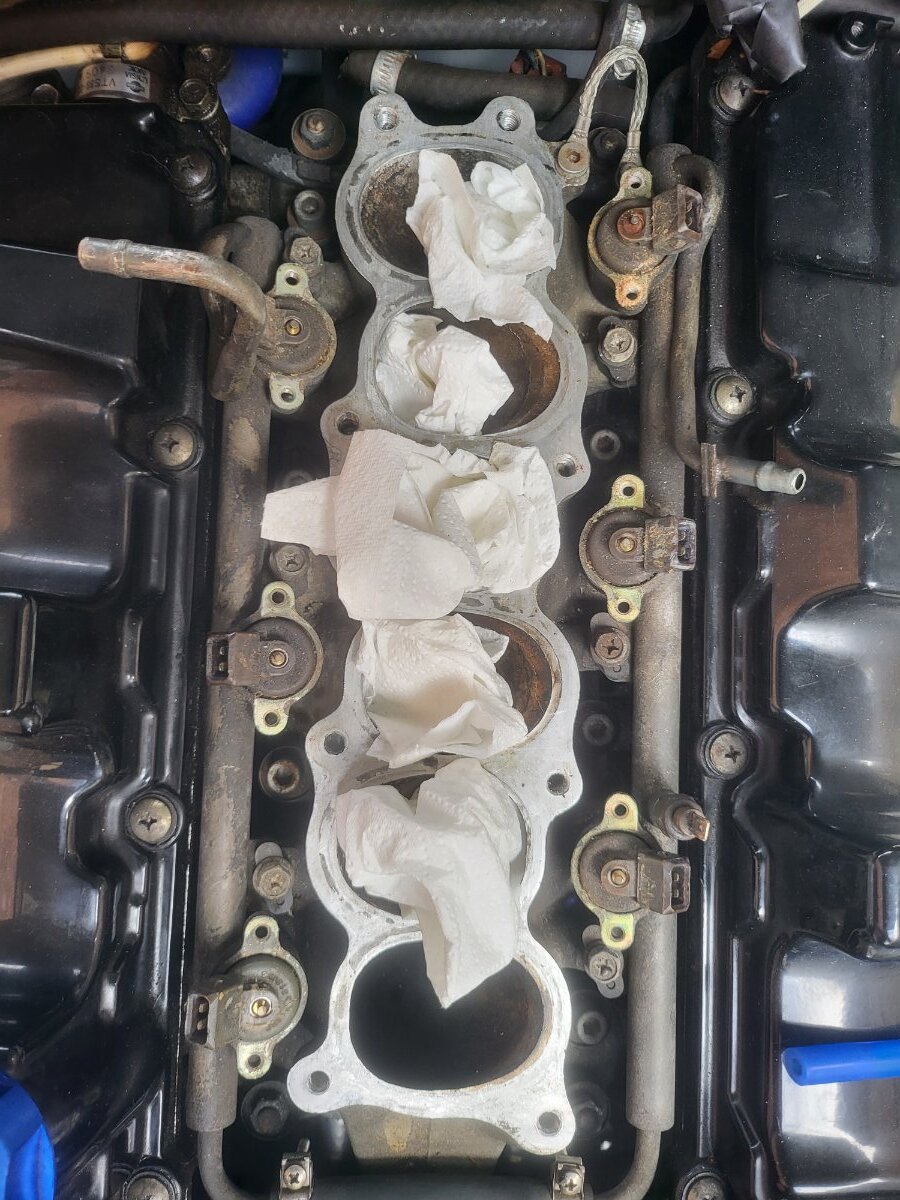
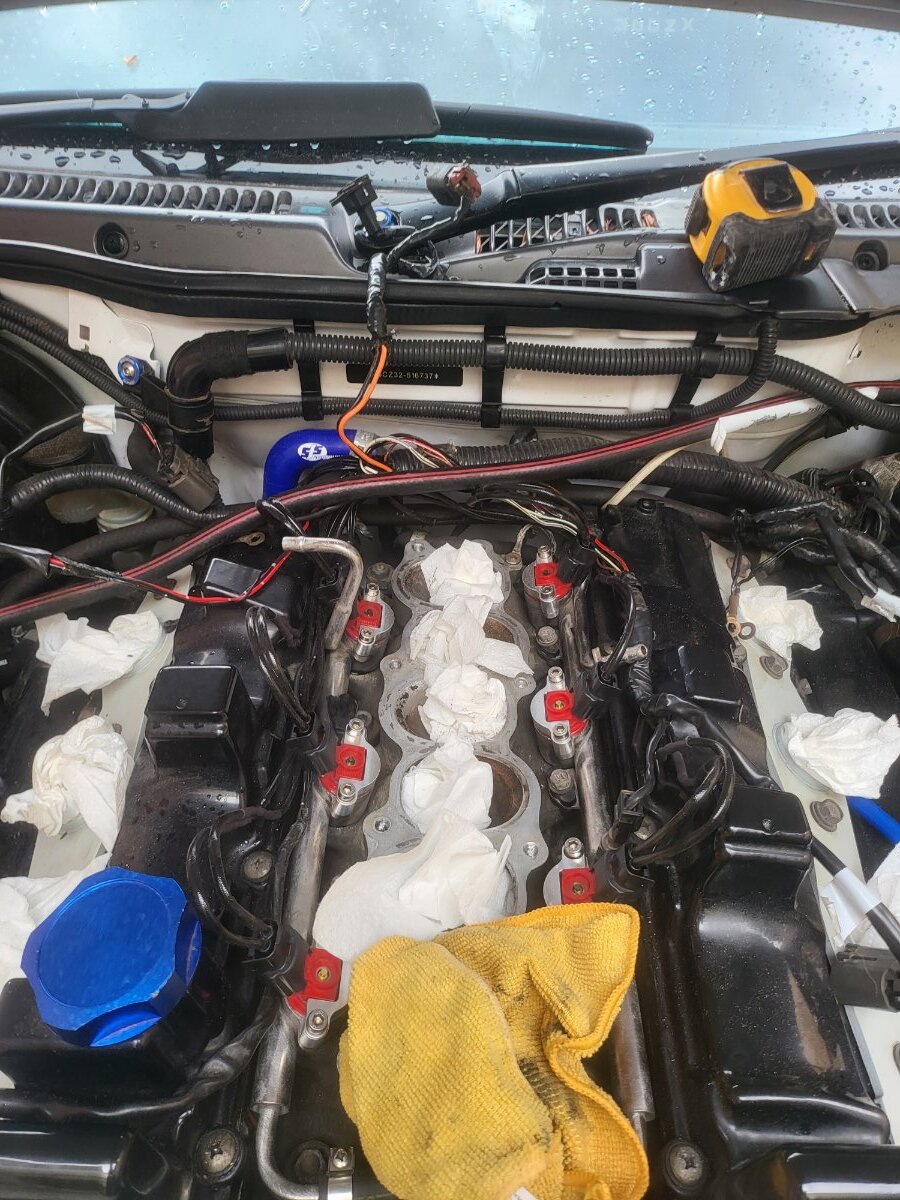
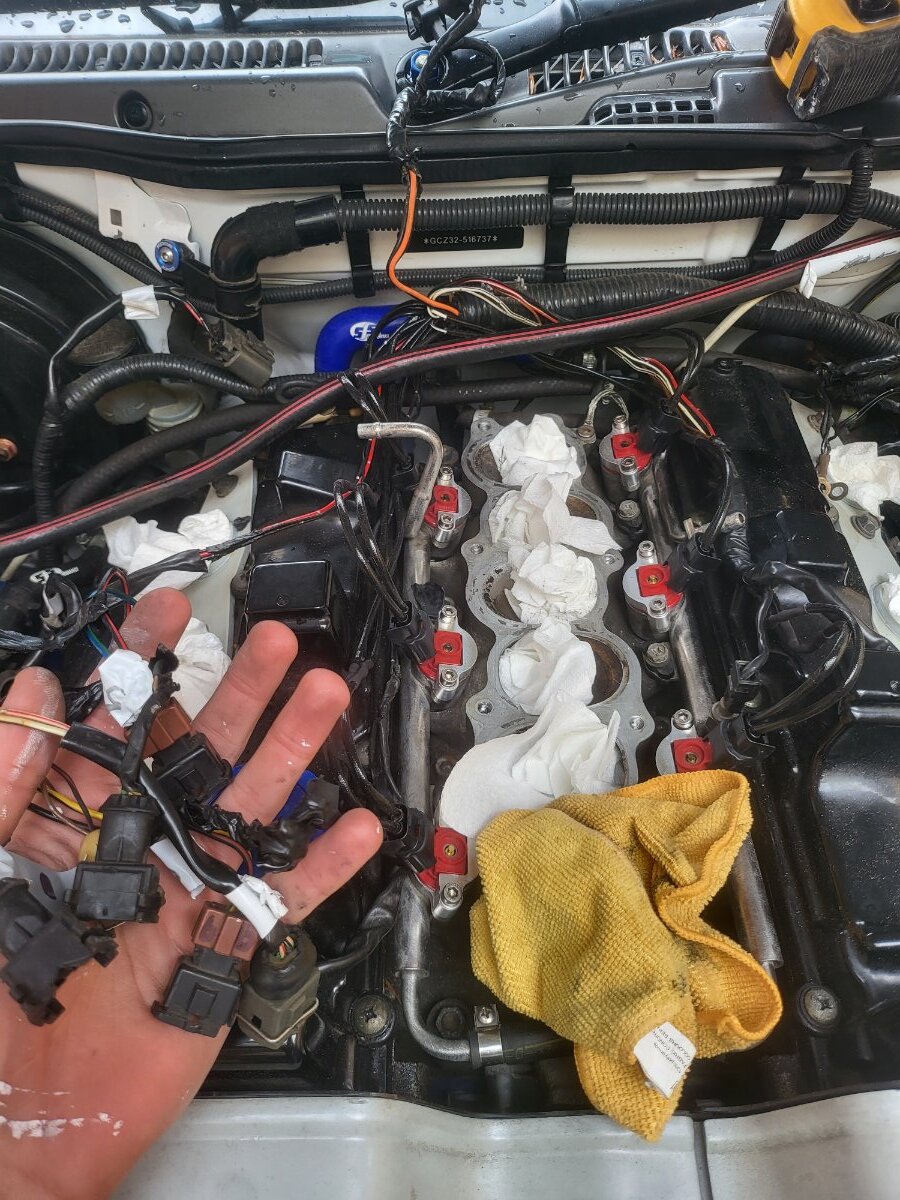
Last couple of weekends when I've had chance I've been upgrading injectors to 555s from the stock series 1 370s, now fitted and in place with the adapter kit and soldered the new plugs on looks so much neater now , next job is to do a neat job of tucking the wires and covering them and then plenum can go back on! Can't wait to have her running again really missing driving her especially now summer is upon us! Also got my hands on a lovely kakimoto exhaust system which needed some cleaning up! But boy that autosol is awesome! Doesn't look brand new but a dahm site cleaner! Can't wait to hear that in full chat!
7 points
-
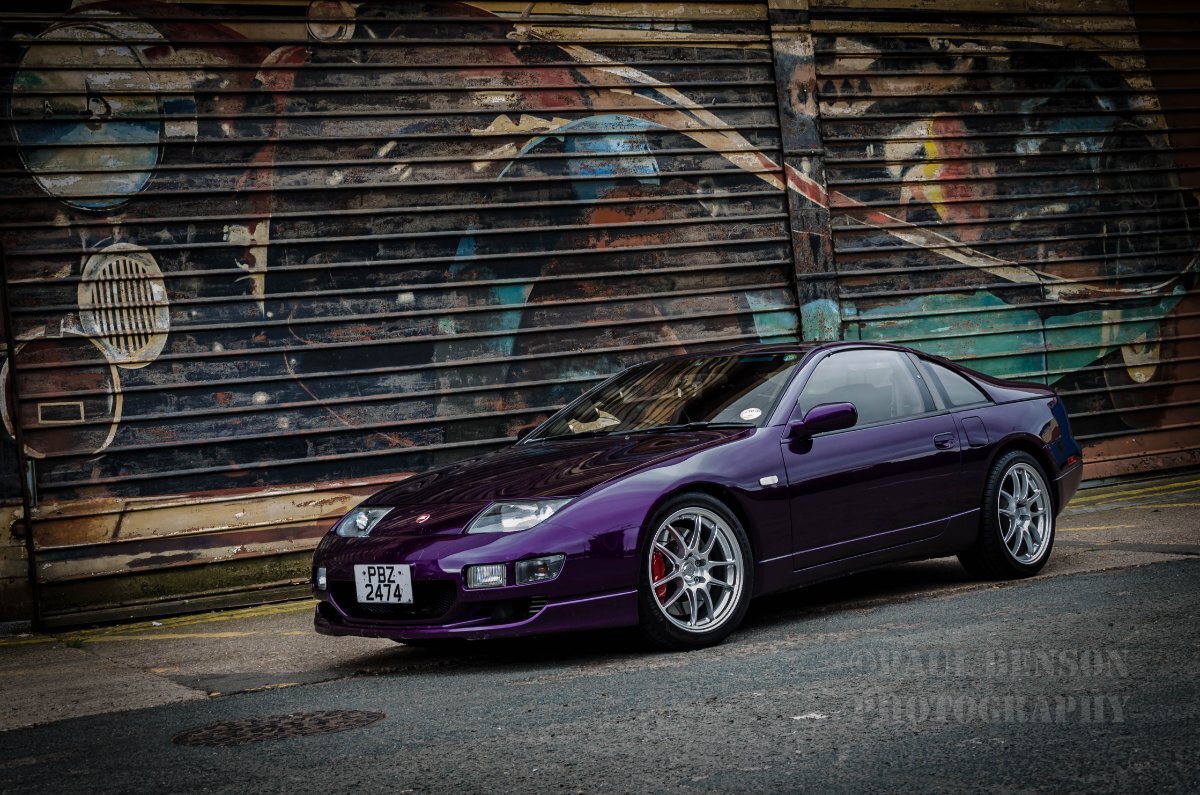
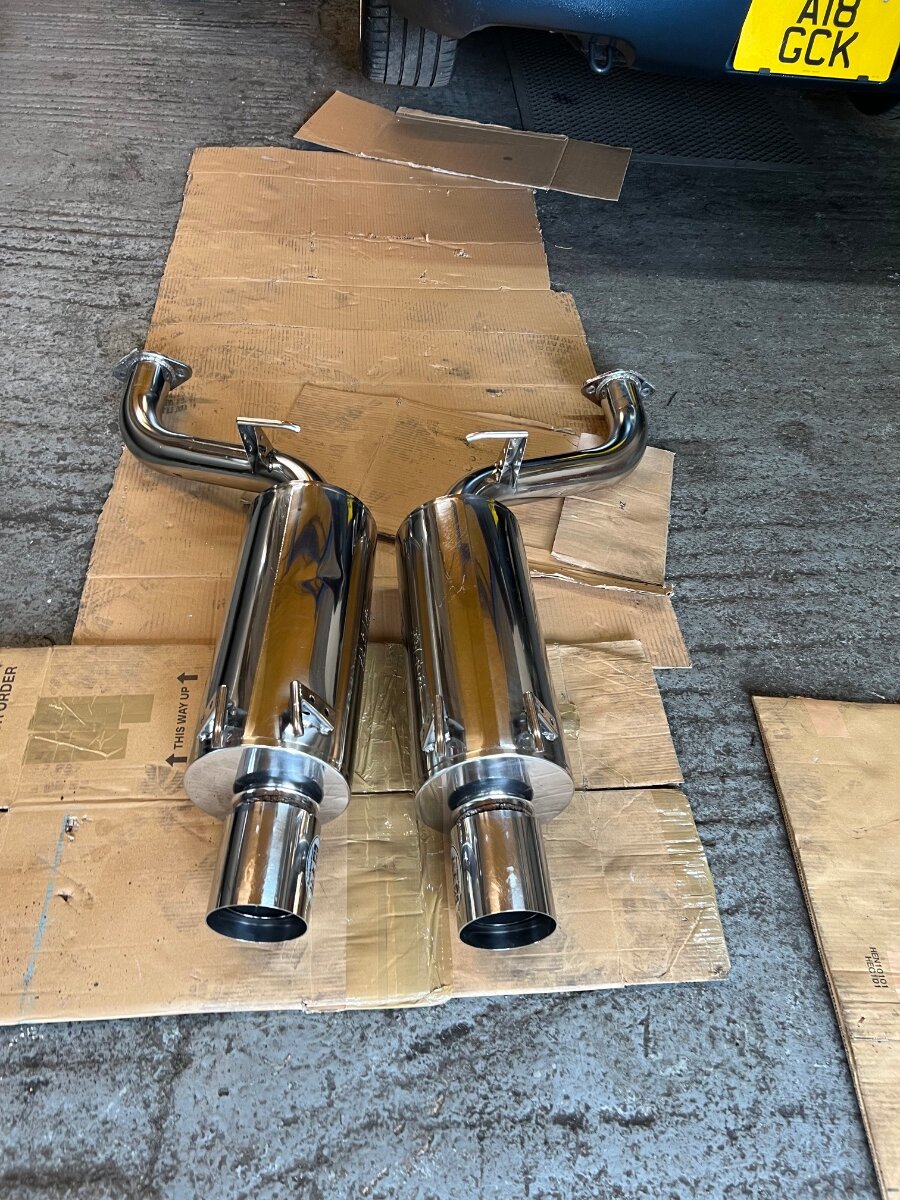
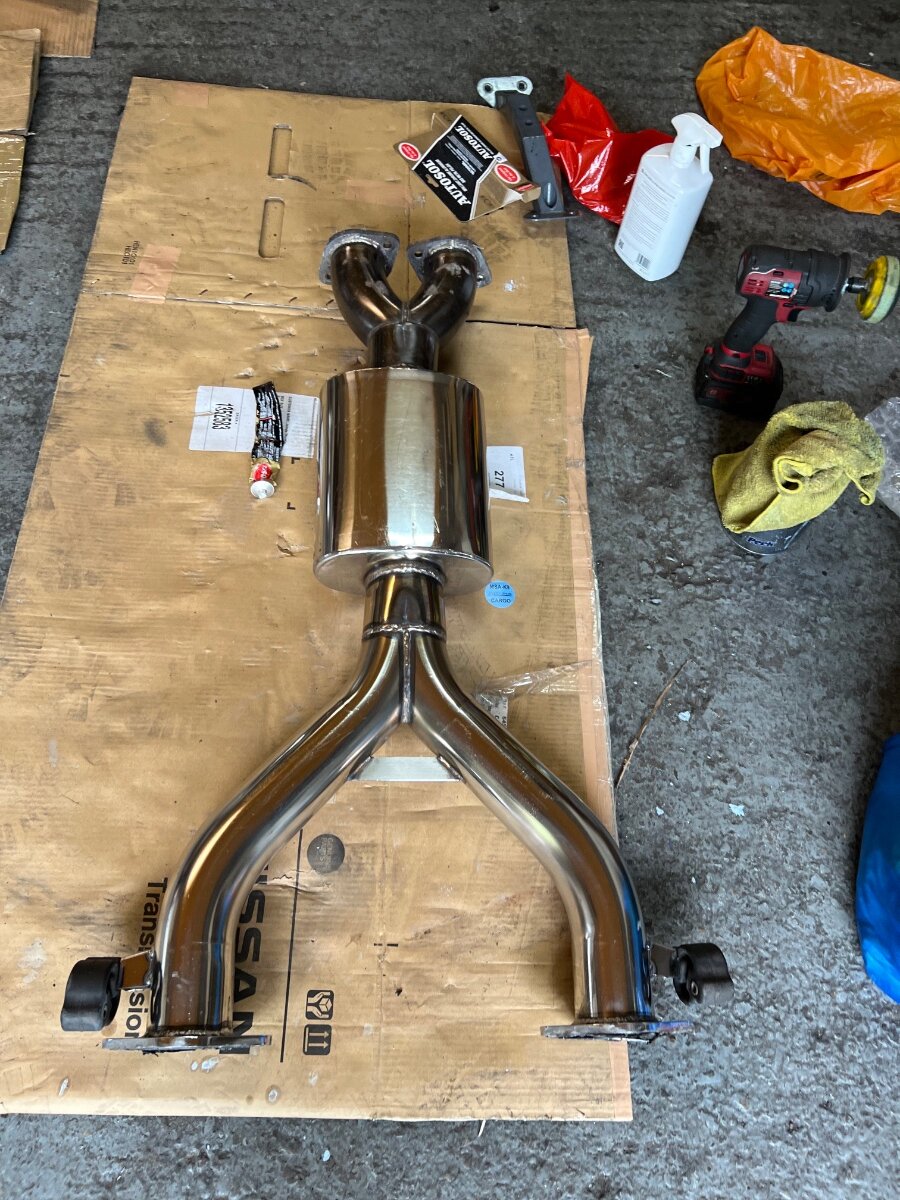
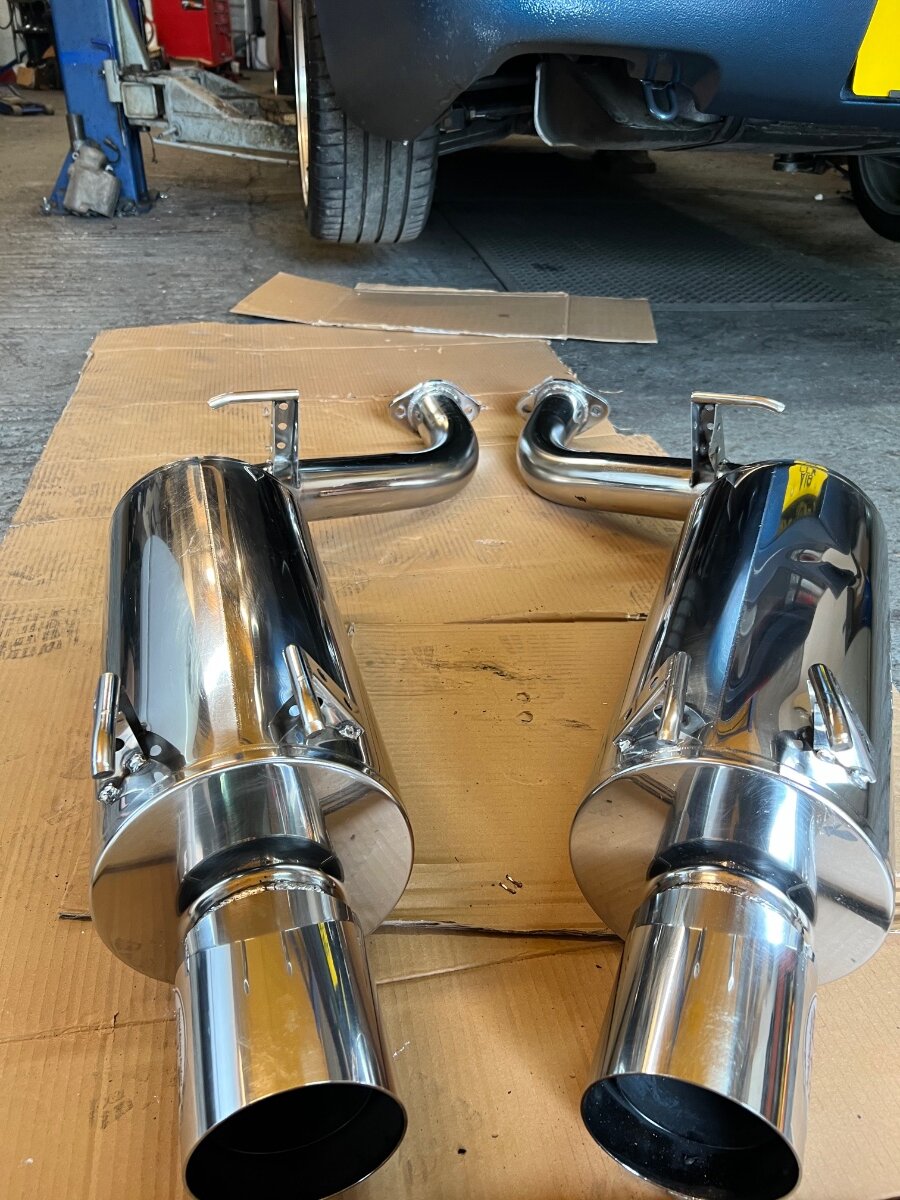
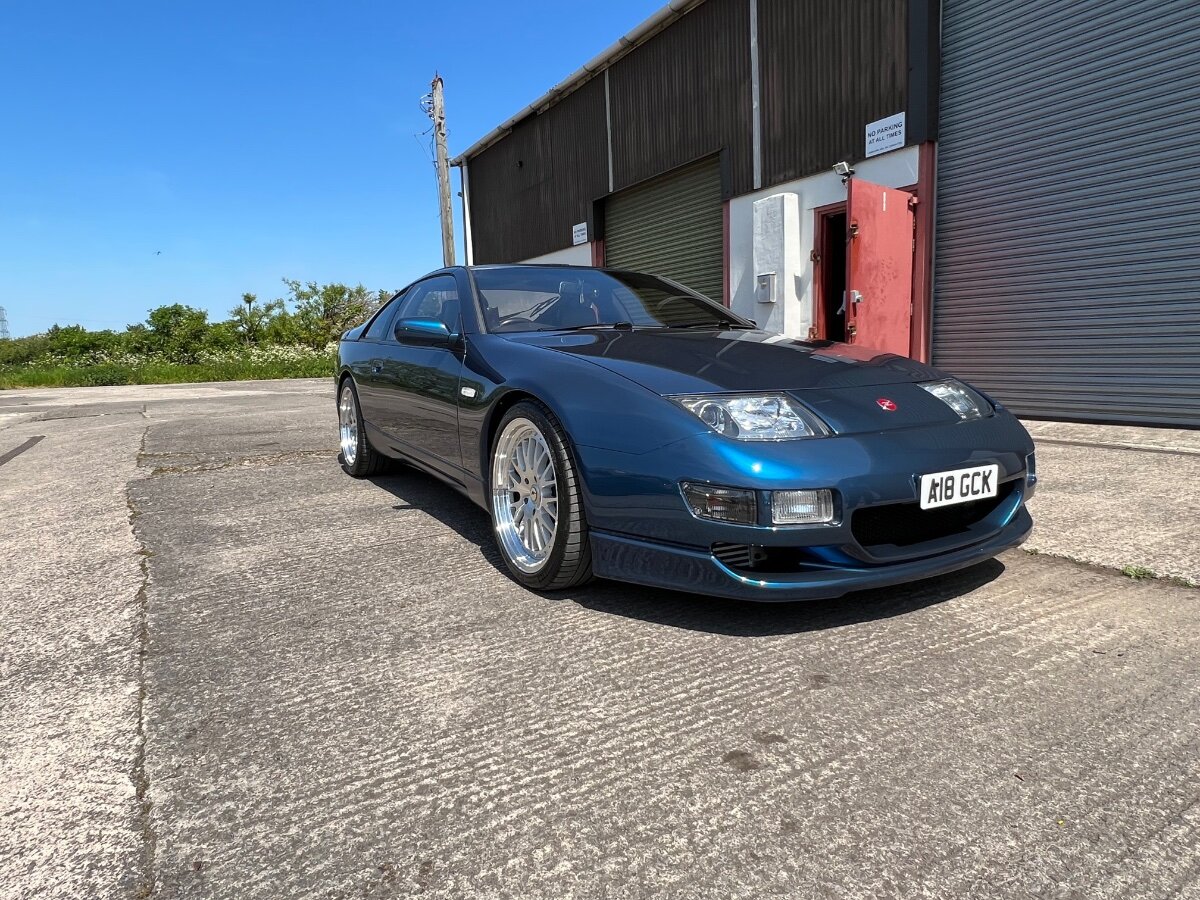
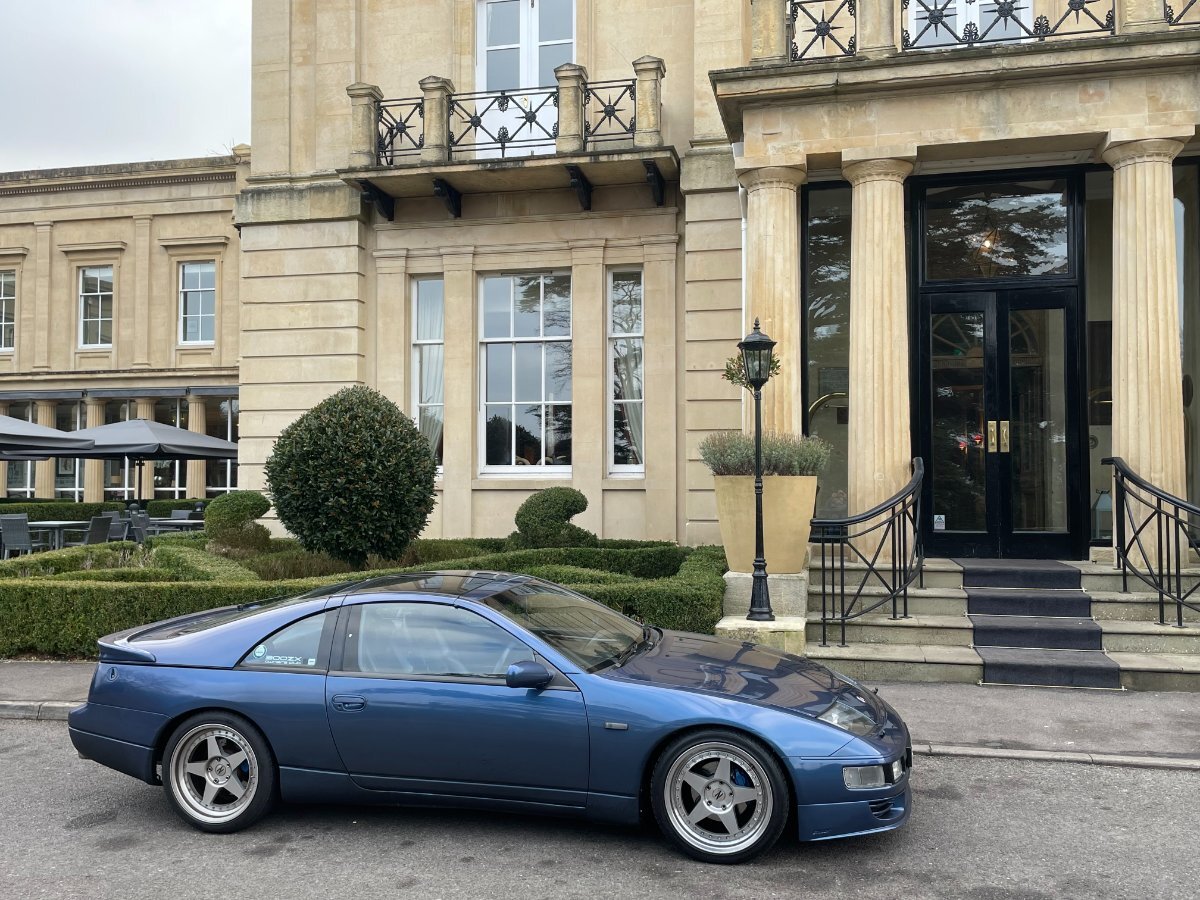
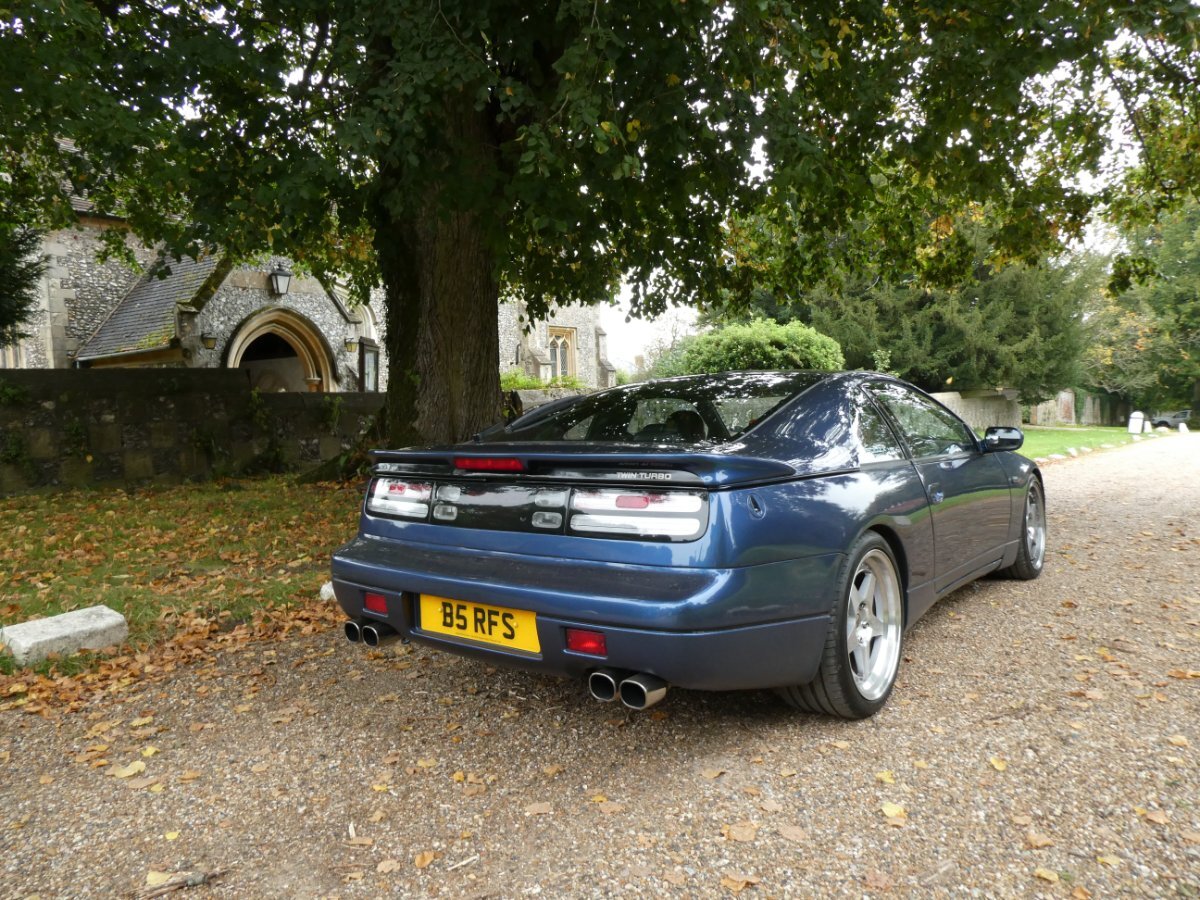
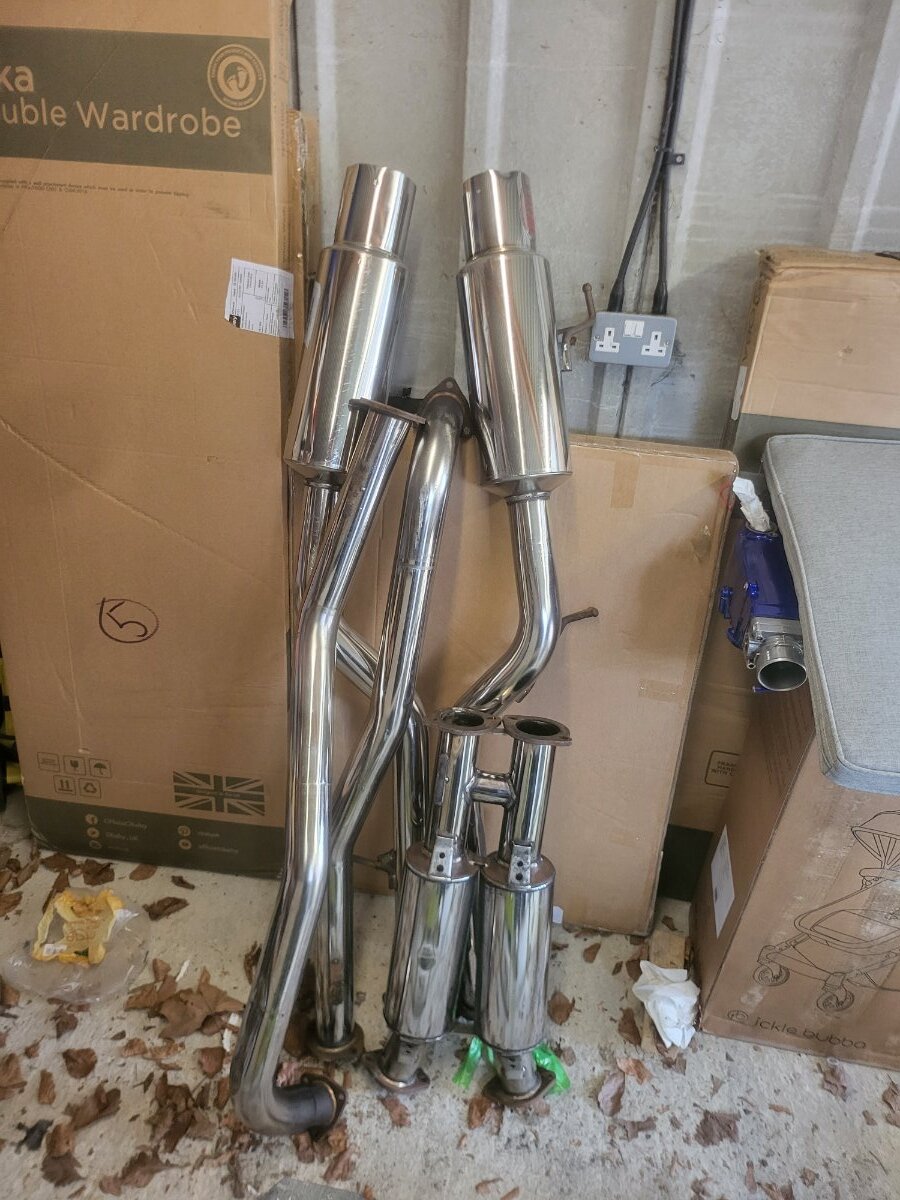
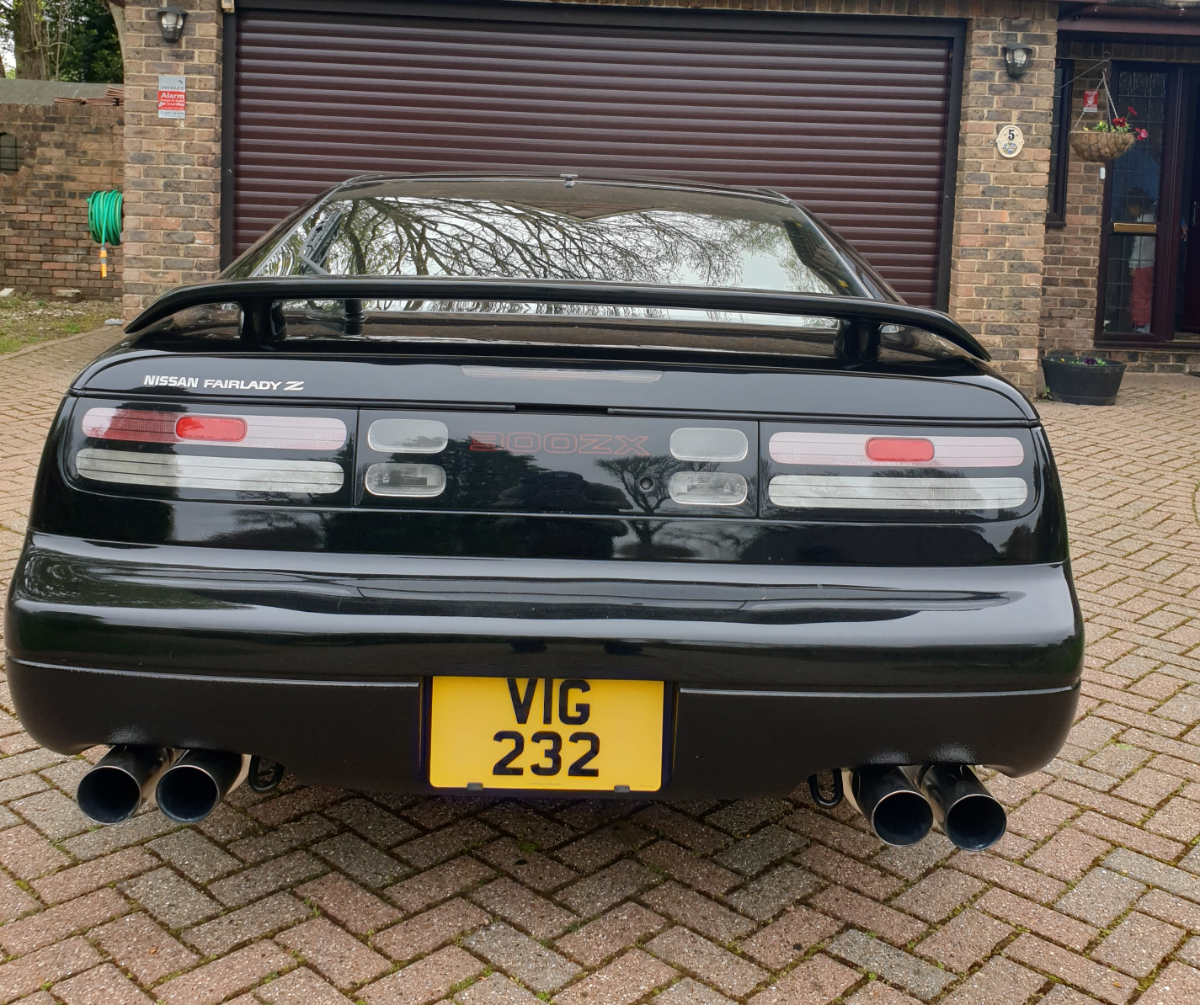
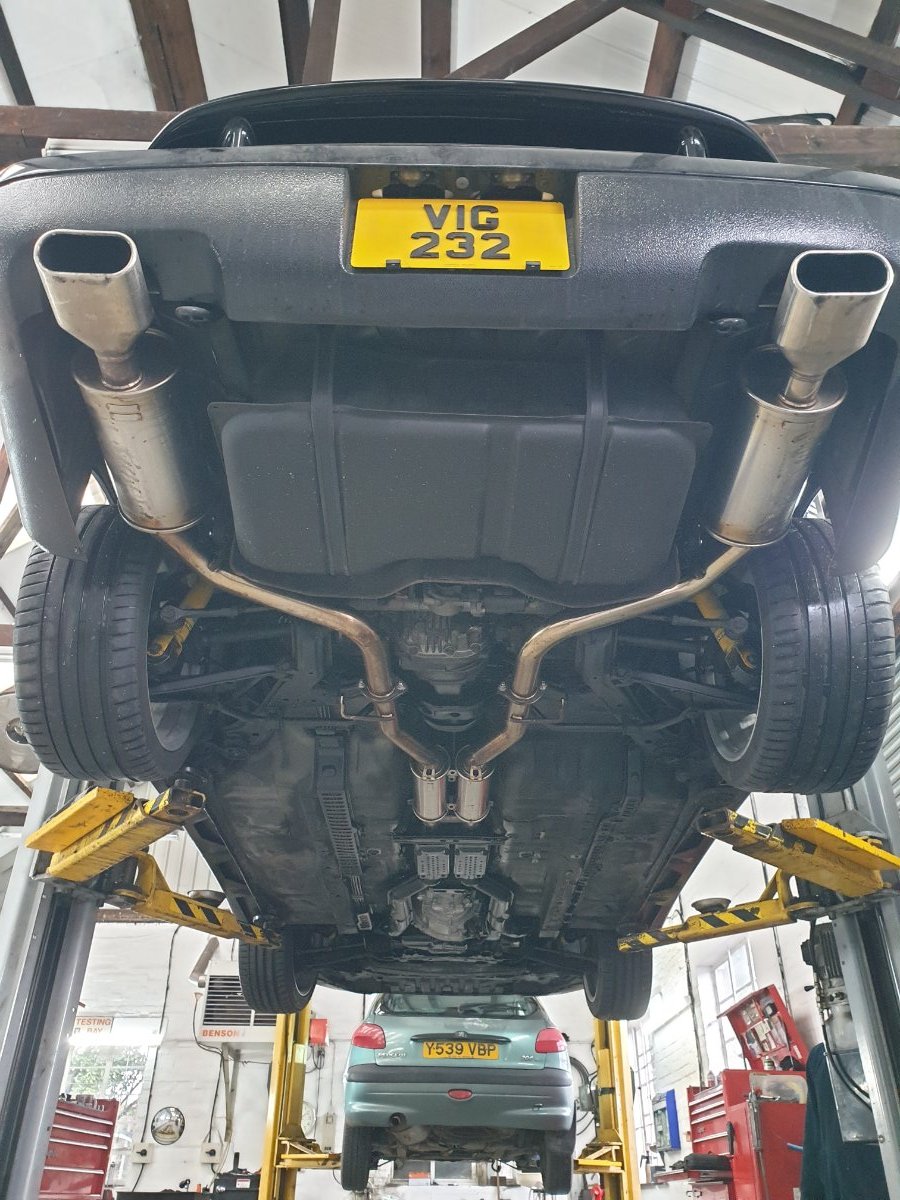
My car came with what I believe to be a very rare Tommy Kaira cat-back exhaust system. I liked the look of the oval tips but the sound was a little too subtle for me. I wasn't after an ASBO exhaust but I did want more of a sense of occasion when driving it. I had heard that the Veilside Evolution was the one to go for if you could have any but those are rare these days so I had consigned myself to having a custom system fabricated. My V8 F-Type R had an inconel system and was by far one of the best sounding exhausts I've experienced so I started looking into an inconel custom system. If you know anything about these things, you would not be surprised to hear that my search ended pretty quickly once I found how how bloody expensive that would be! Stainless steel is would be then! I started corresponding with a few fabricators via social media, where I could see several examples of their work to give me some level of confidence. Costs weren't too bad and I was almost ready to get serious about it but one niggling thought kept popping into my head - "how would I know what it would sound like before it was made (and costs sunk)??". Anyway, fate struck and at the right time, an ABFlug Power Superior system became available in the UK. I hadn't actually heard much about them previously but some quick digging and chatting to those who know (much) better led me to understand that THIS was the system to pick and was actually very similar, if not identical to the Veilside Evolution. More importantly (for me), I was able to find one solitary video on Youtube of this system fitted to a SWB TT in the US....and it sounded glorious! I wasn't too enamoured by the look but it would be worth it. I think. Fast forward through a few months of it sitting in my office in bubble wrap, waiting for better weather (and time to polish it!) and it was finally fitted last week. I had timed the fitting to coincide with a planned drive this morning with my car club to Kingsley Range Rover and I love how much better it sounds. The car really feels like it has so much more presence! Neither system had any whisper of a drone but this one has a lovely deep boom and burble that you can definitely tell that I'm coming now. All this on a stock engine with cats in place! It also doesn't look all that bad, though I'm still not a fan if looking at it from a certain angle but I won't have to do that much! I made a view comparing the two and posted some photos of them fitted below: https://youtu.be/q5dbxJS3QSU
7 points
-
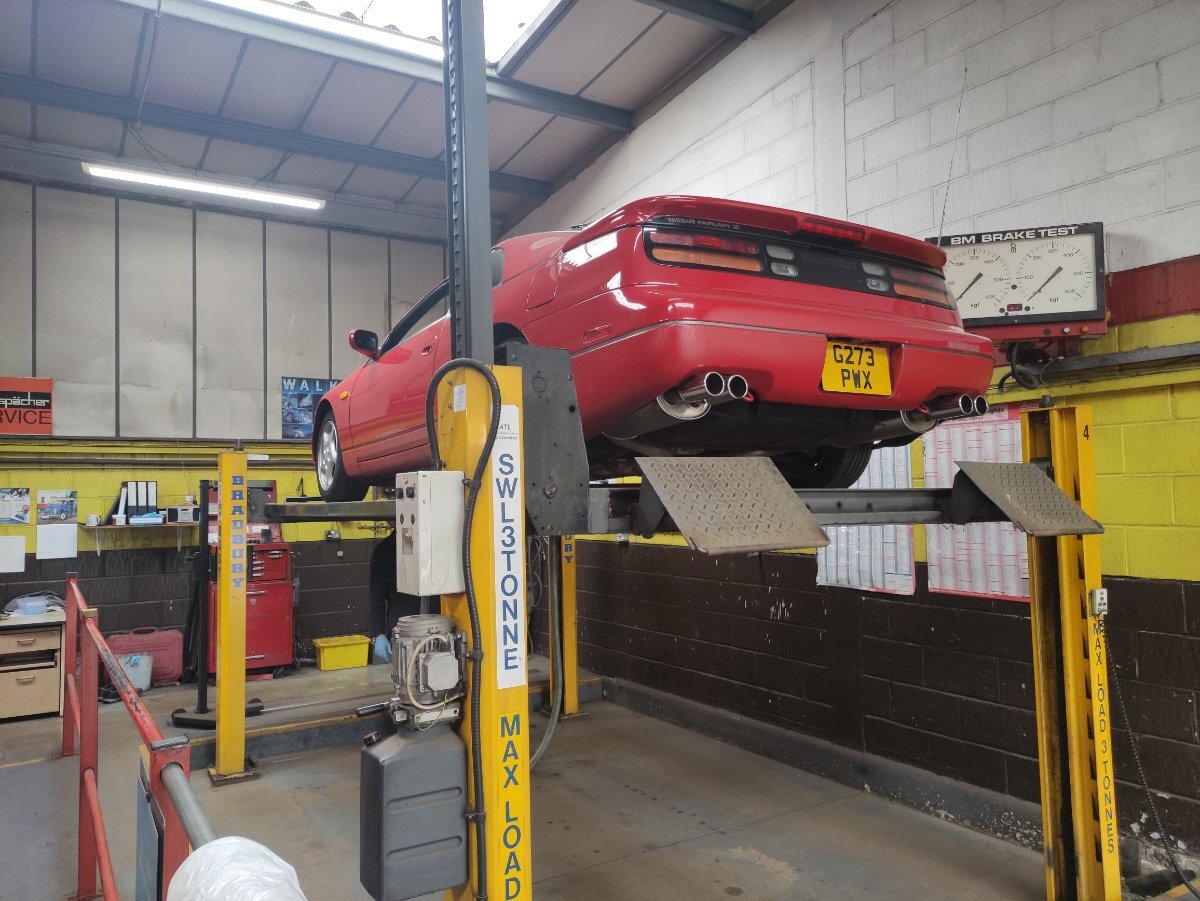
On Thursday, mine was dug out of the garage to find that the Japanese battery had finally given up the ghost. Honestly who would have thought that keeping a car for 5 months in a garage would kill a 15+ year old, original Japanese battery?! Things are not made the same anymore.... Anyway, after car was jumped (auto, cant bump it!) and the oil had stopped the lifters making that cringing noise, I drove it to the garage to have the new wheels and tyres installed and a new battery. The cars parts guy took just over 2 hours to find a correct replacement, but Yuasa do make the correct size battery with the terminals on the correct side. £97 with 5 year warrenty. I then had a good look underneath to see what was what. Car is pristine underneath. Everything black from the factory, no dings/marks/dents on chassis, just a couple on the cats heat shield from an enthuastic sleeping policeman. There is the tinyest of oil weeps, that left a 50p sized puddle on the garage floor over the past 5 months. Its coming out between the back of the engine and the gear box, so I suspect its the main rear seal going. I will get this done on the next service. I then, on Saturday, drive it to and from a friends house with the roof off and remembered exactly why I love it so much 😄 Picture is of car up on ramp having wheels replaced. If you look (very) carefully in front of the "mustang" tool chest you can see the new wheels... Picture of original Japanese battery that let me down after 15-ish years....honestly who would have thought it.... Looking forward to the AGM now!
6 points
-
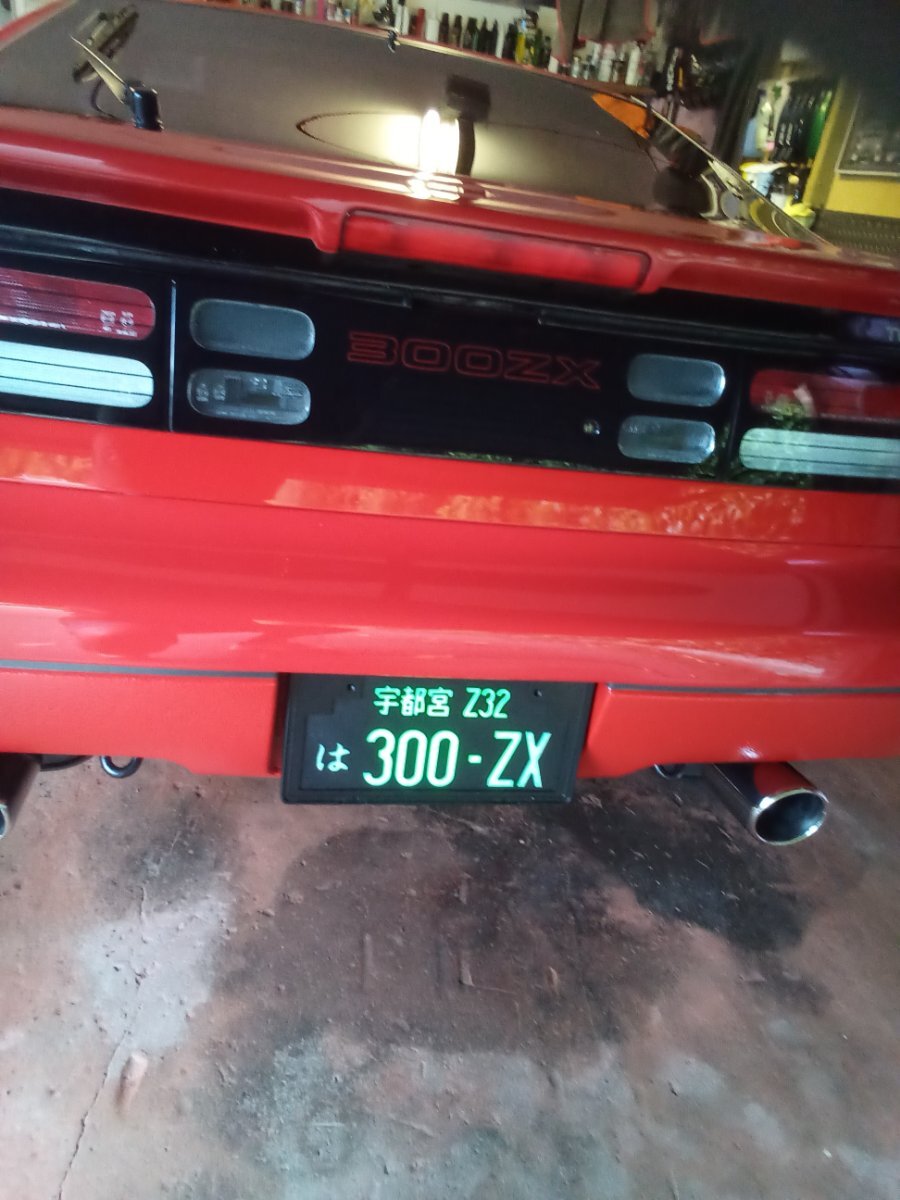
Hi thank you for letting me join I'm Dan living in Kent UK I've recently purchased my first z32 needs work but looking forward to driving it hopefully this summer it's a tt automatic +26 points
-
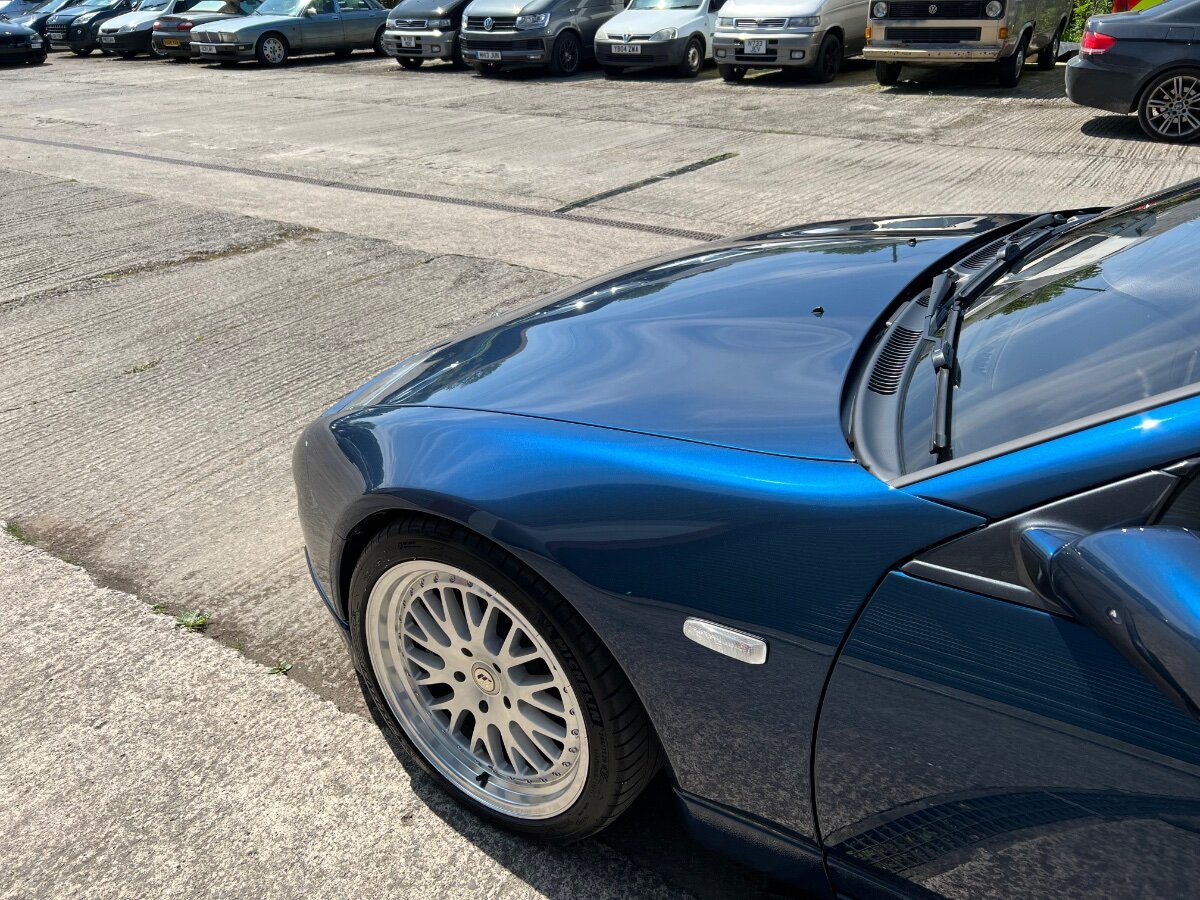
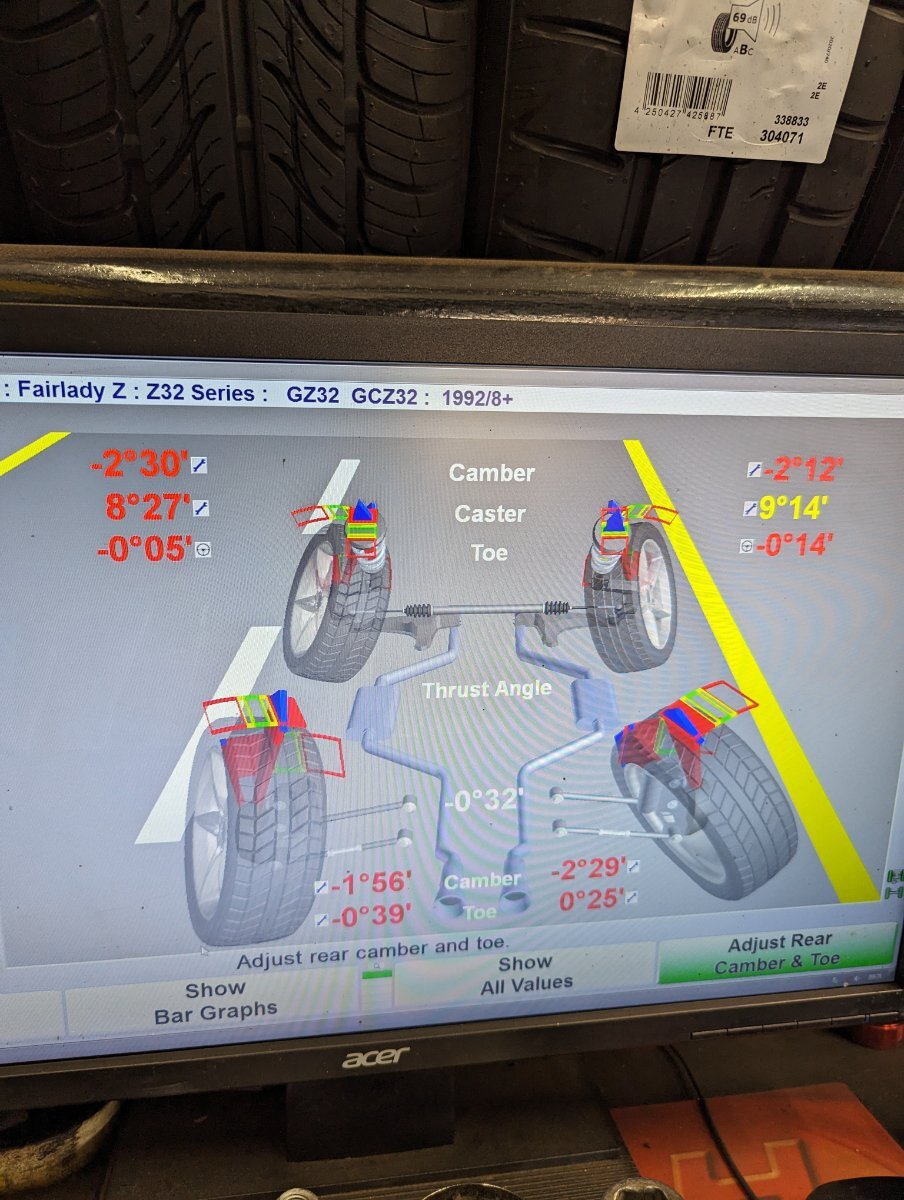
I've done a few little bits over the past month or so, mostly to get the car prepped for my trip to Switzerland next week! (will add pics to this post later on!...) It turns out that the head unit that I fitted doesn't fully power down for 5mins. Add this to the 1min that my turbo timer is set to and I'm left with 6mins before my aerial retracts. Ordinarily not a problem but as the car lives in a carcoon, it means I have to hang about before I can put it away. Also thinking about potential photo ops on my trip, I'd rather capture the car without the aerial sticking out! The place who installed the system took about 30mins to install a manual switch to cut the power to the aerial - neatly tucked away out of sight so I can pop it up or down at will now. I took the car out for a pretty hard blast down to Brighton with my club and though the car felt great, as we progressed the brakes did seem to fade a bit. I don't know when the system was last flushed and as it was on oem hoses (despite the front calipers being upgraded to Pprsche Brembos) I decided to flush and get braided lines fitted. In speaking with Andrew on some technical aspects, he raised the idea of a master brake cylinder brace so that duly went on the order too! I opted for Castrol SRF fluid, braided lines (oem for the rears and banjo for the front Brembos) and an AMS brace. All fitted but not yet tested out. Finally I took the car to get 4-wheel alignment done, having fitted the new spacers. Although it was driving well and straight, the alignment was all over the place! Quite comical. We managed to correct the toe but the camber (neg) and caster misalignment persists as my suspension is still stock and I don't have the ability (or enough of it) to correct it fully. I'll leave it for now as it's not a causing any real problems but I think at some point in the future I may opt to upgrade the suspension. This was the setup BEFORE any adjustment: And this was : .
6 points
-
6 points
-
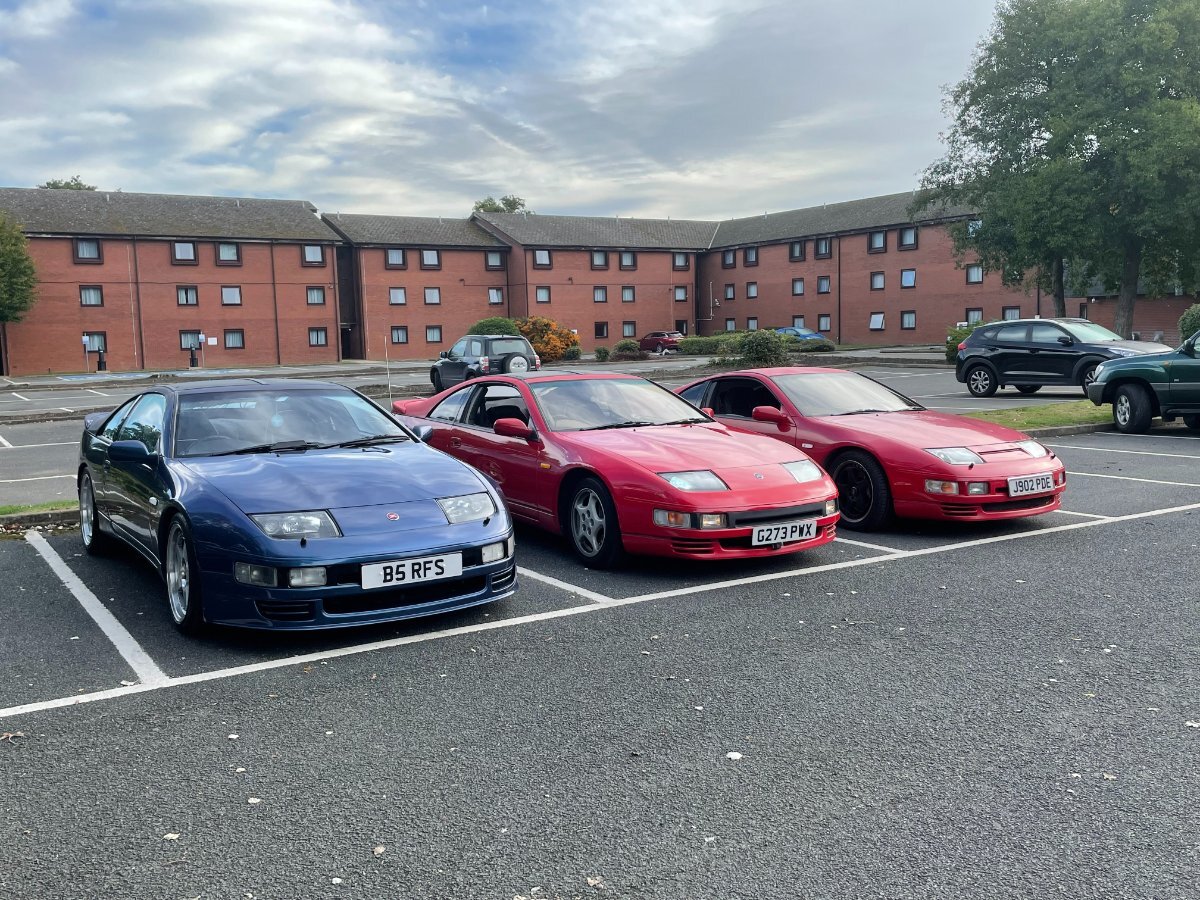
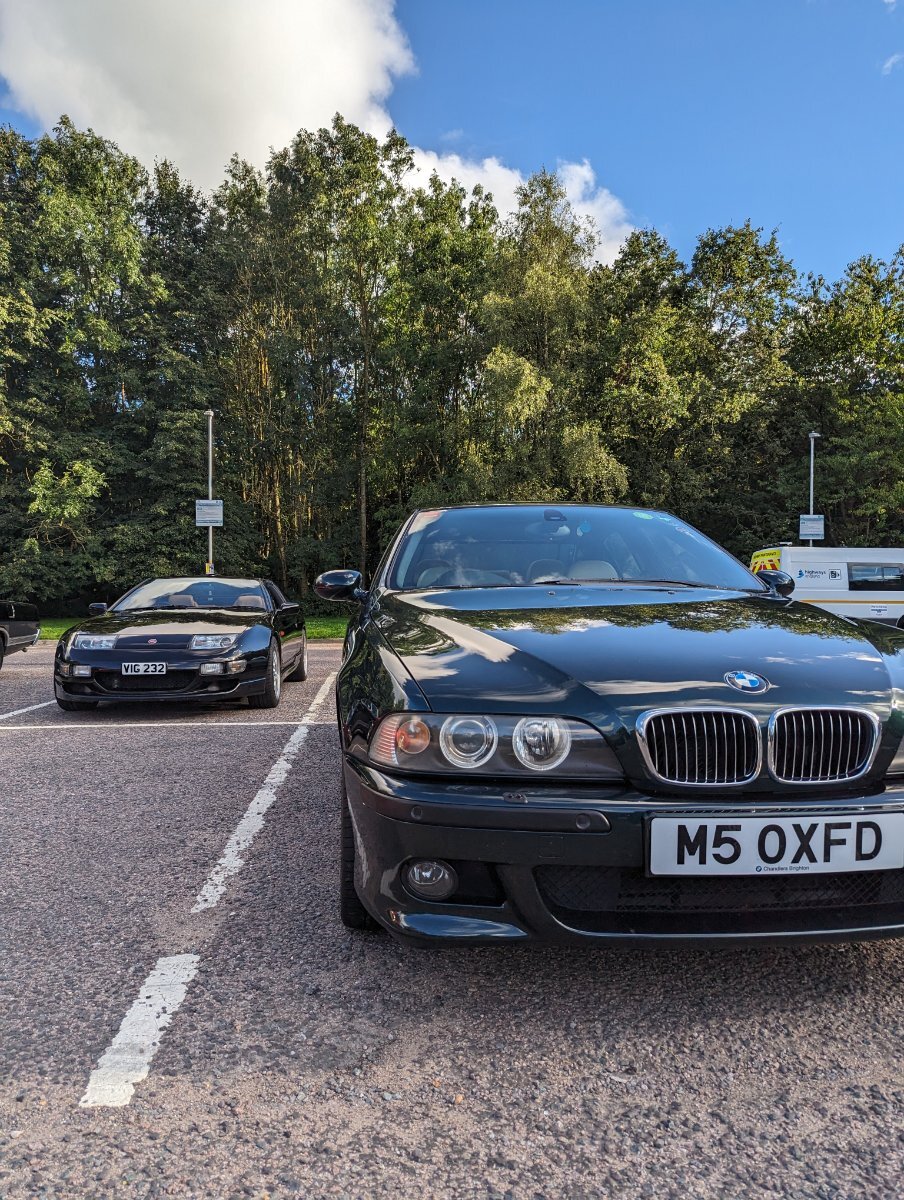
Thanks for organising the day Tom. Lovely to catch up with folkz. God it was hot! Anyway shots of the blues brothers! (click for hi-res)6 points
-
....And a couple more featuring the car in question.... .....any excuse 😉
6 points


This leaderboard is set to London/GMT+01:00