Leaderboard


Popular Content
Showing content with the highest reputation since 02/02/26 in all areas
-
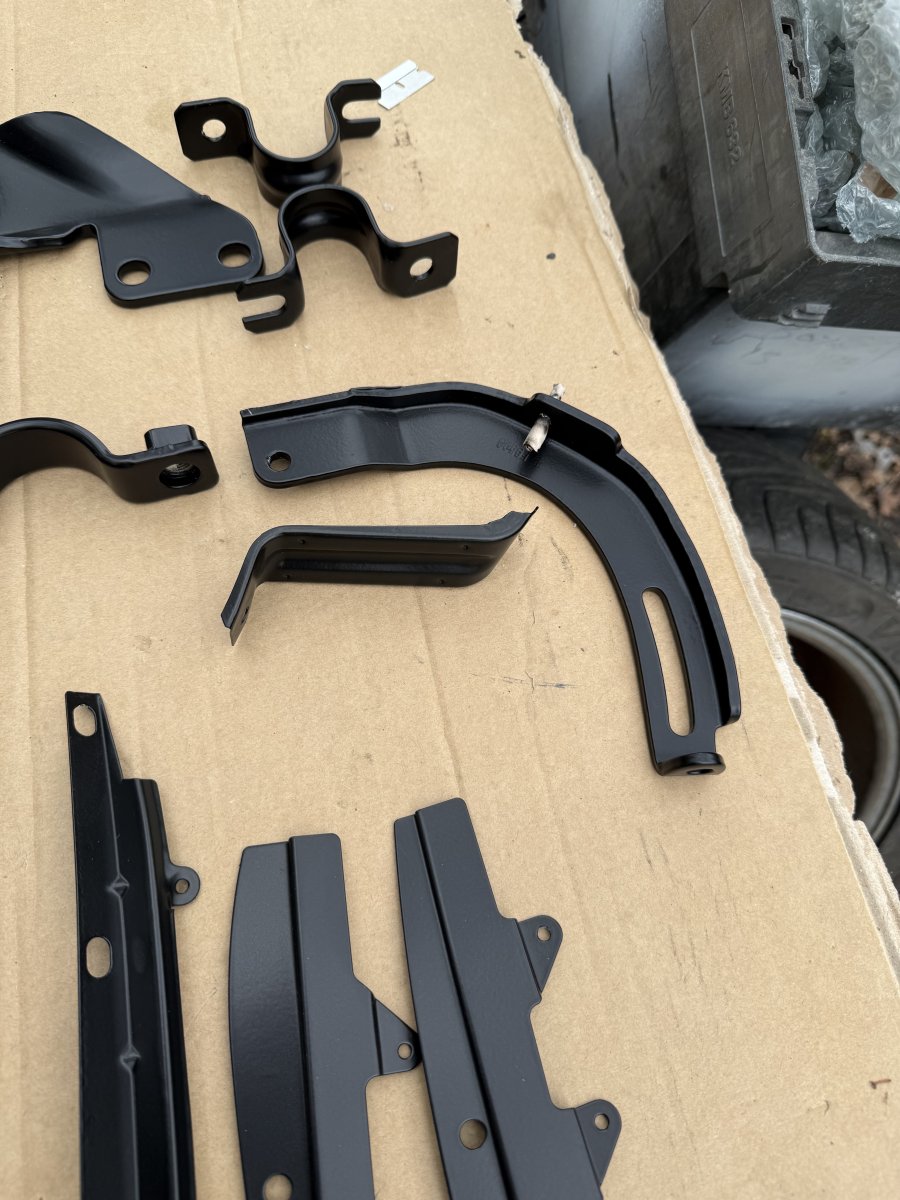
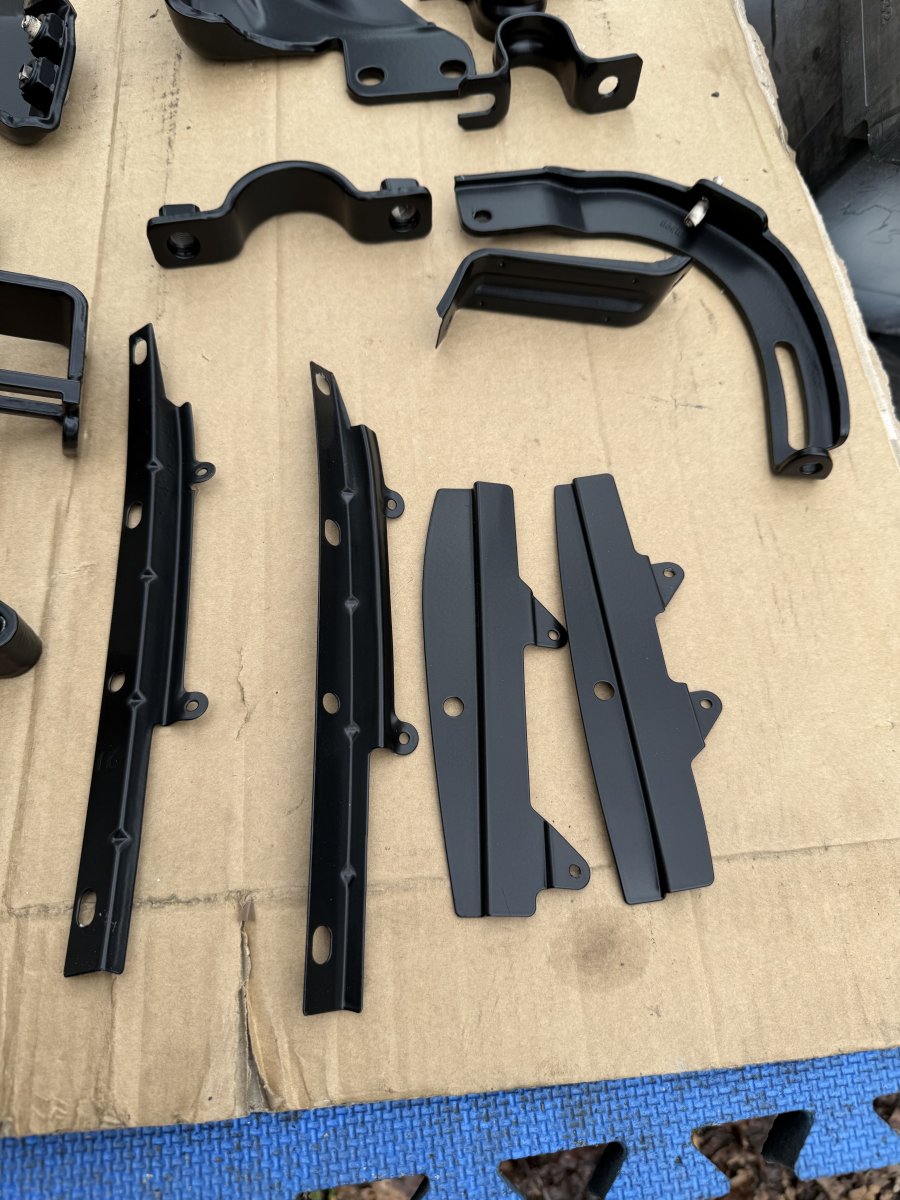
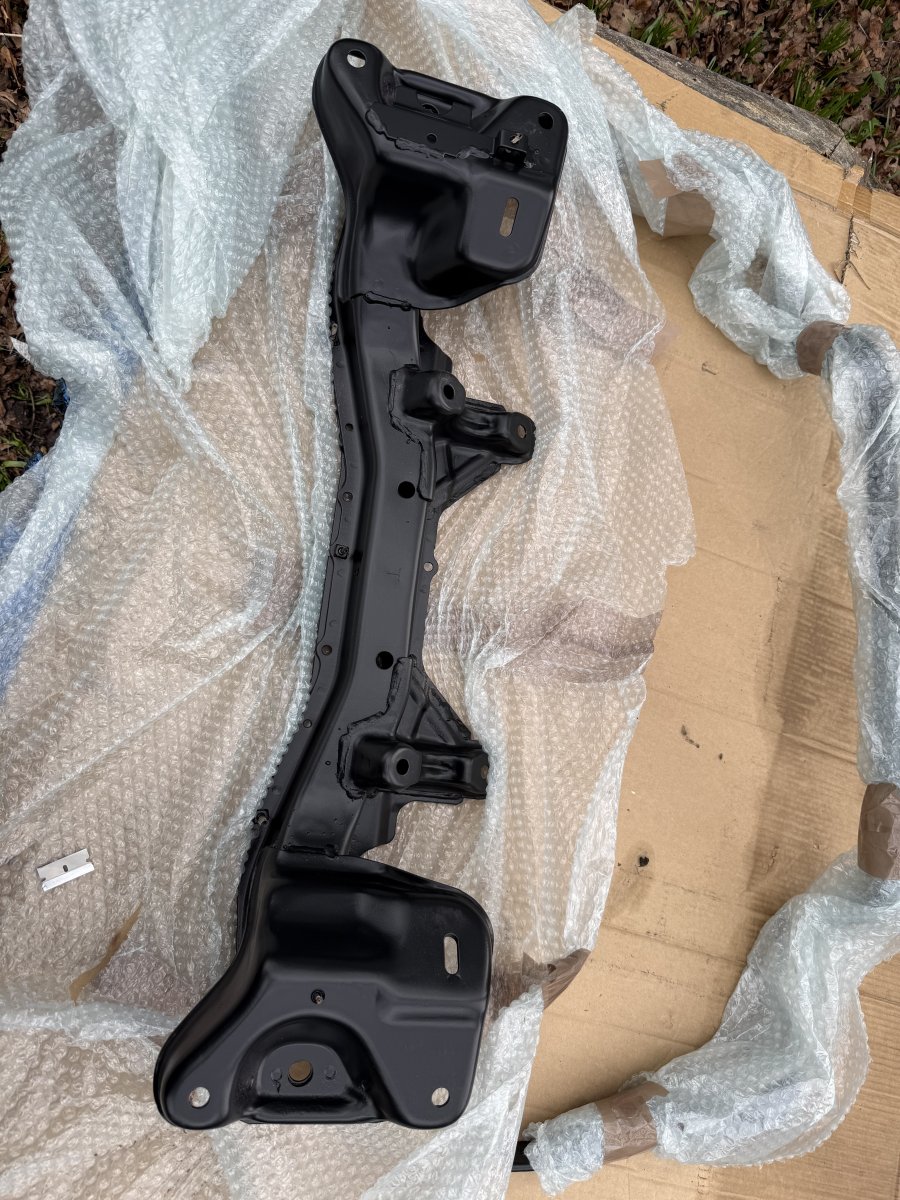
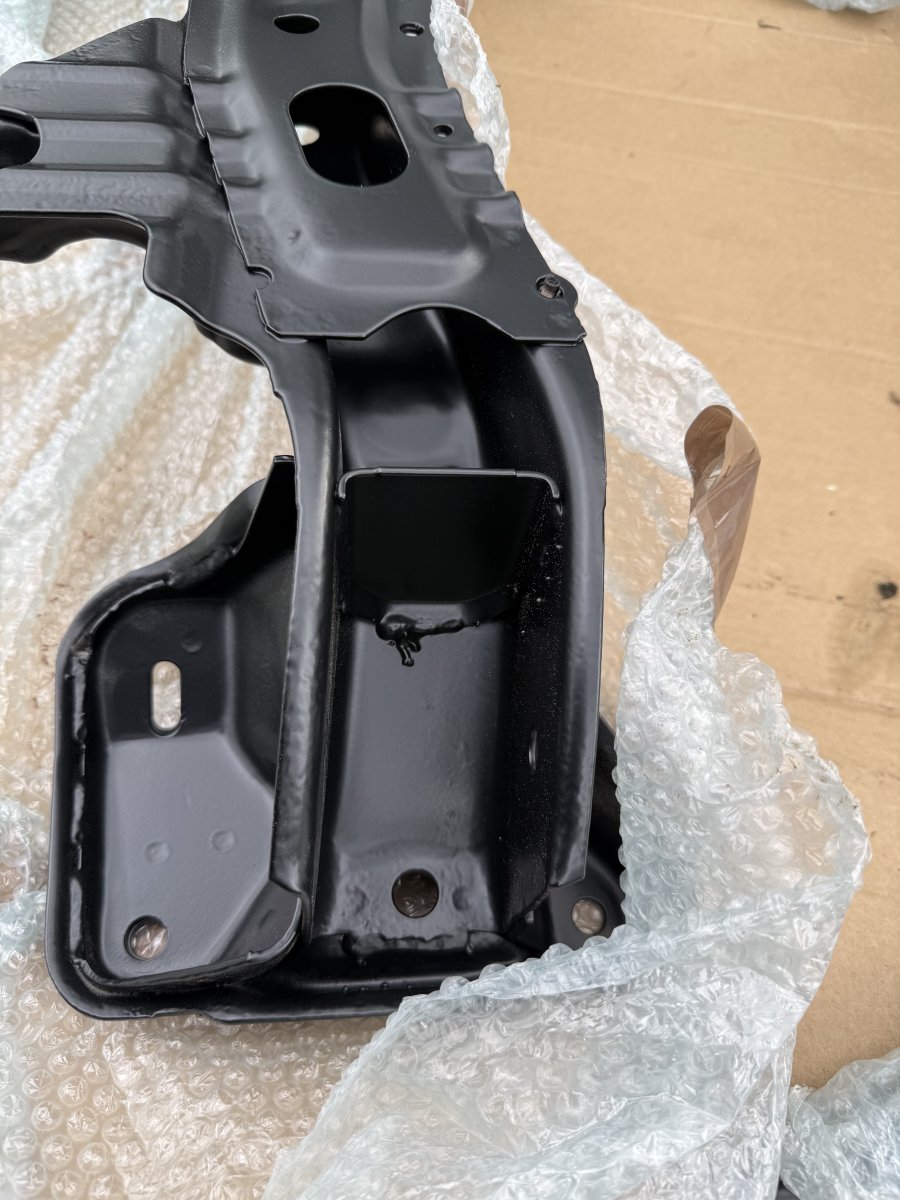
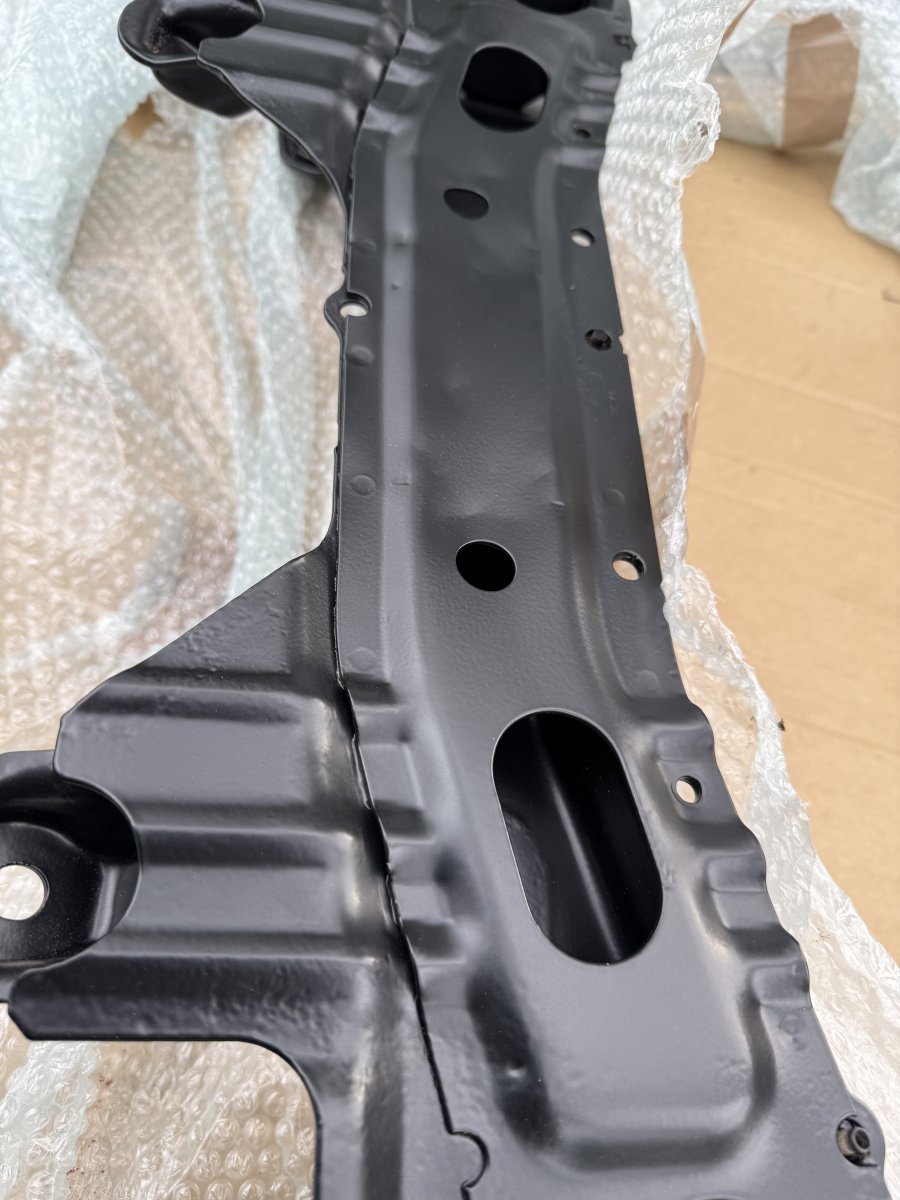
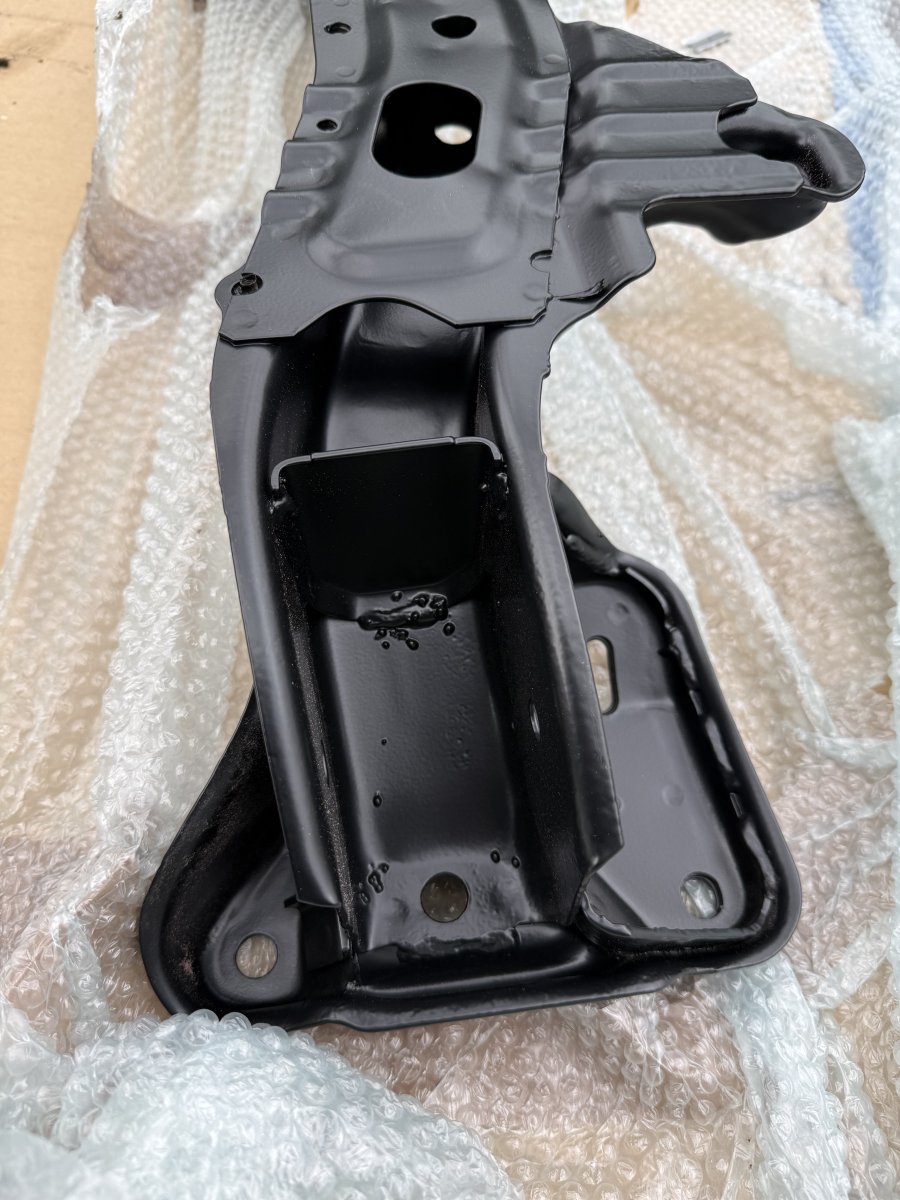
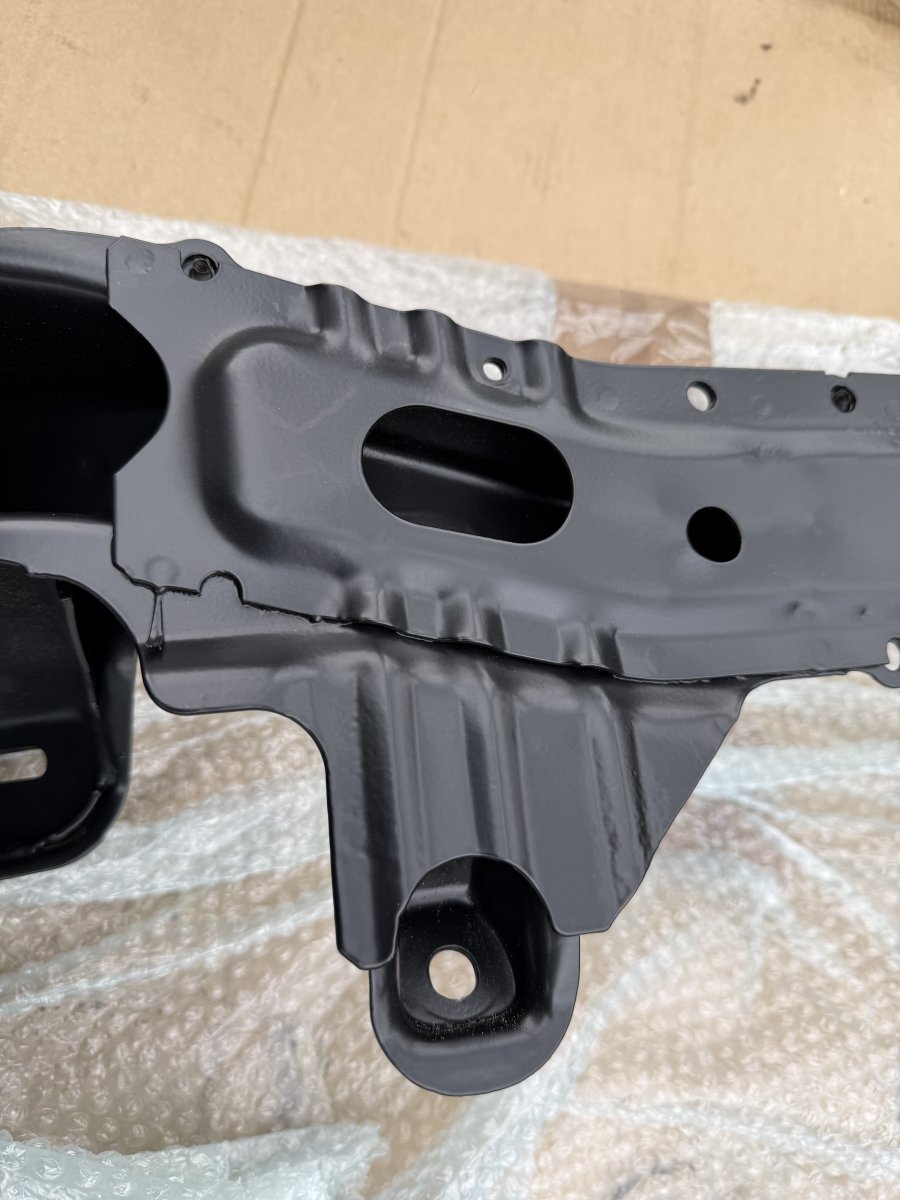
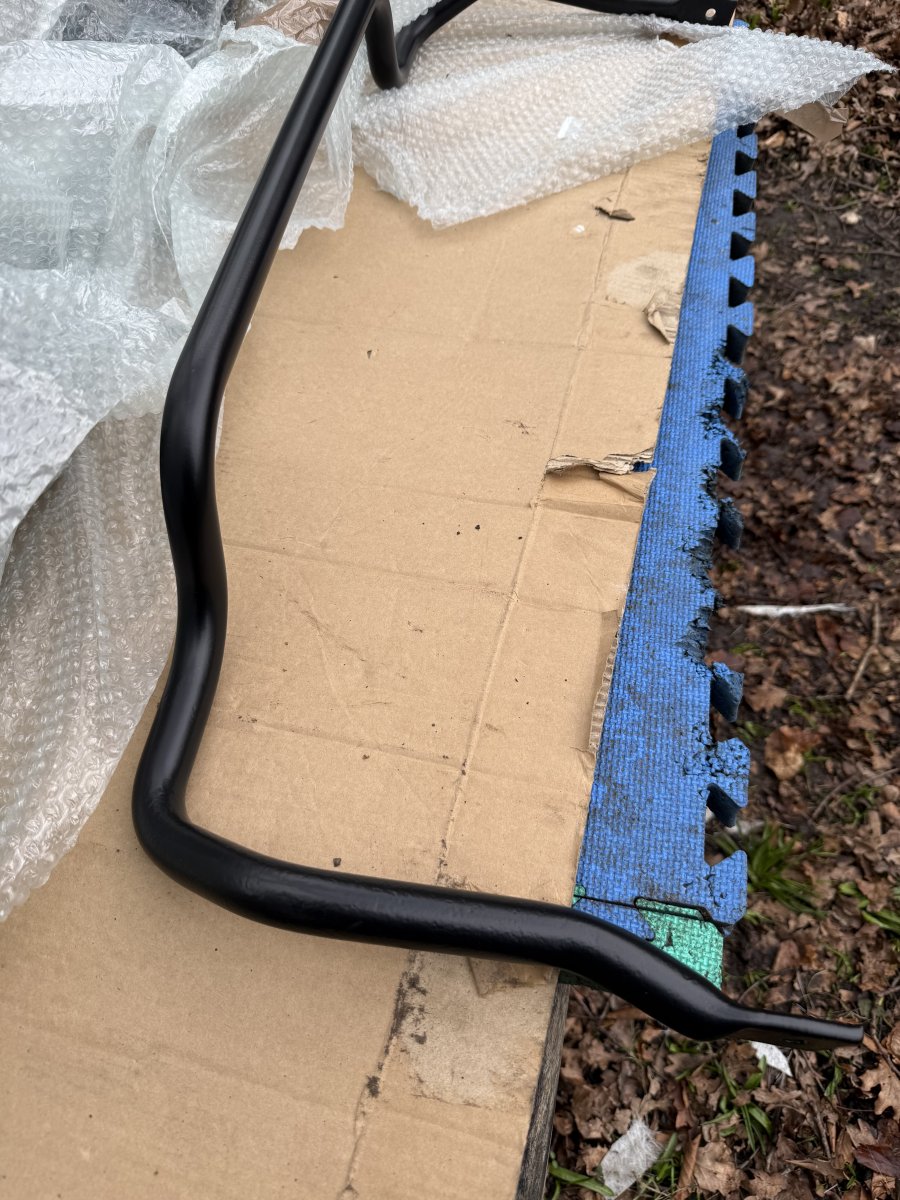
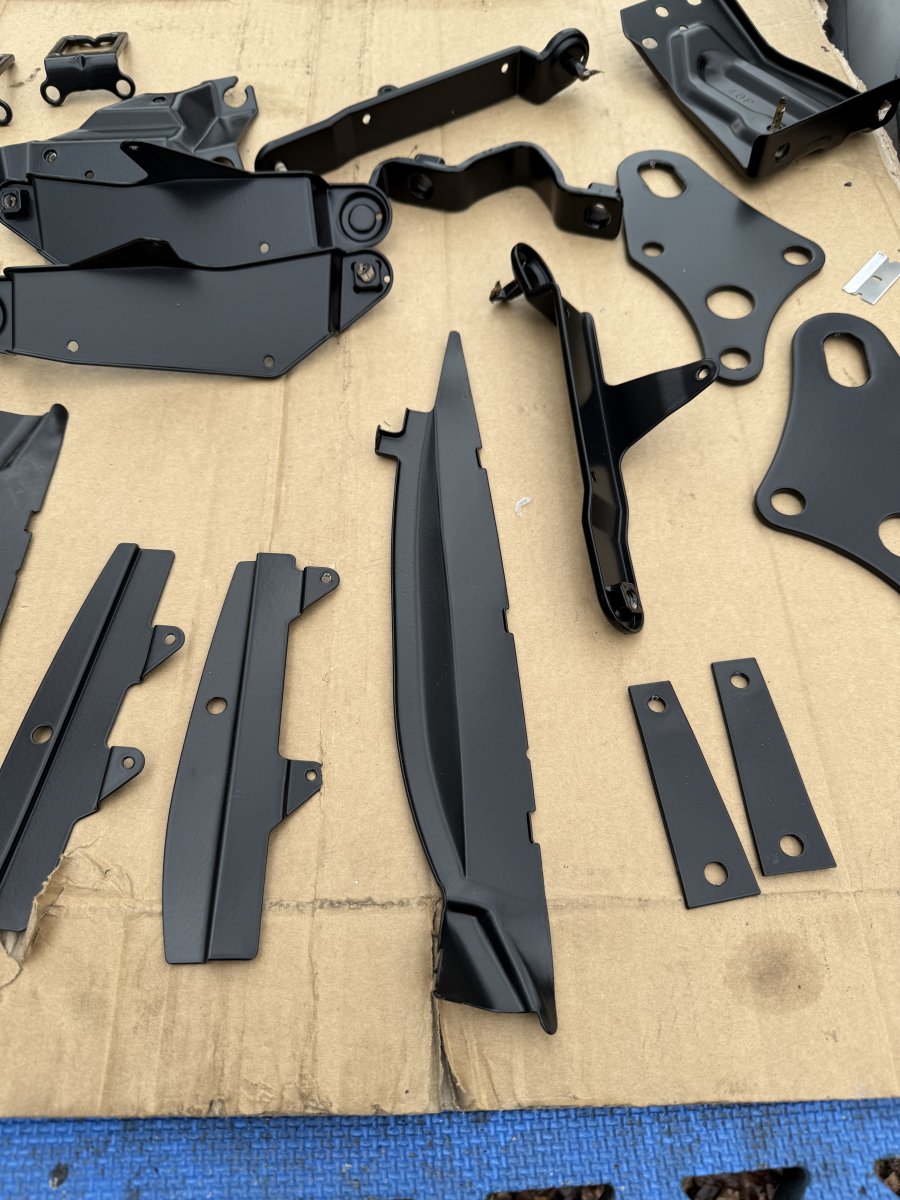
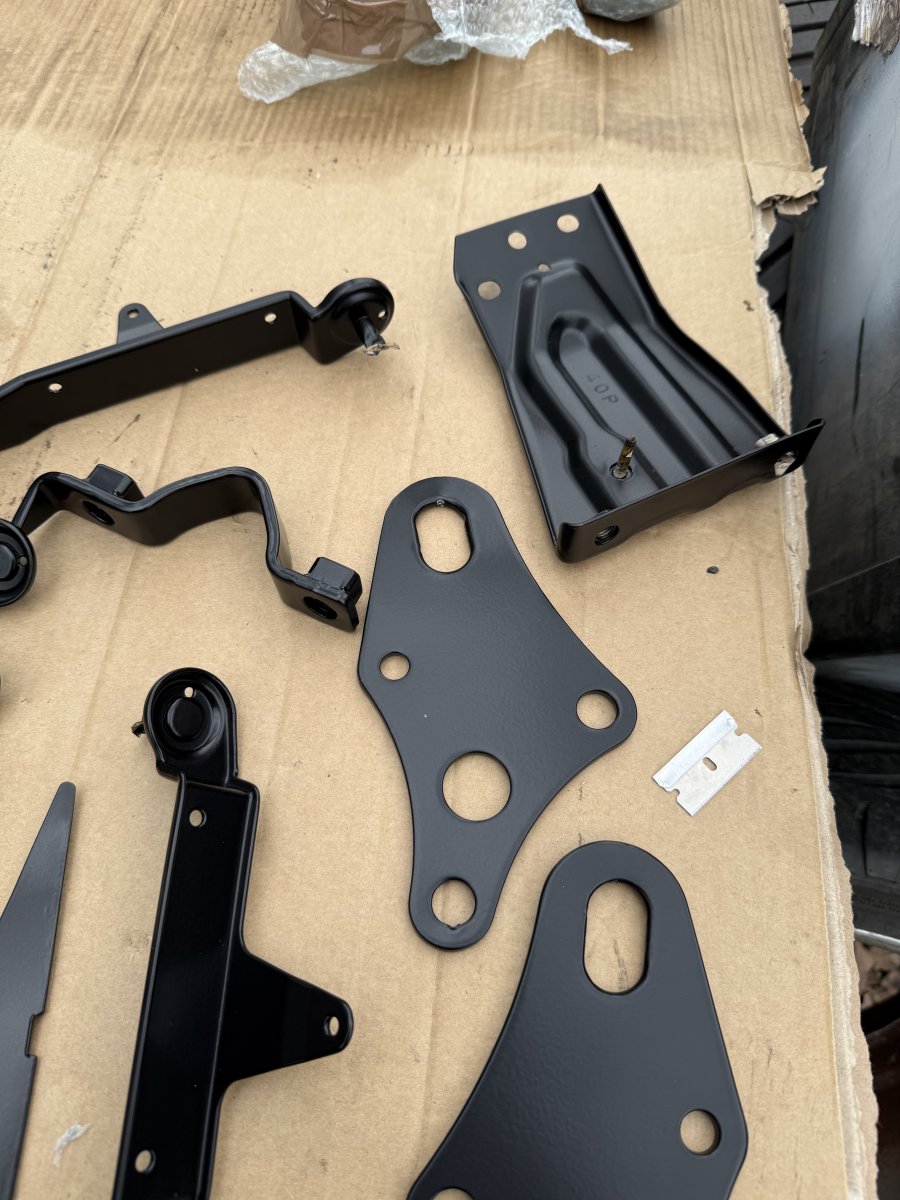
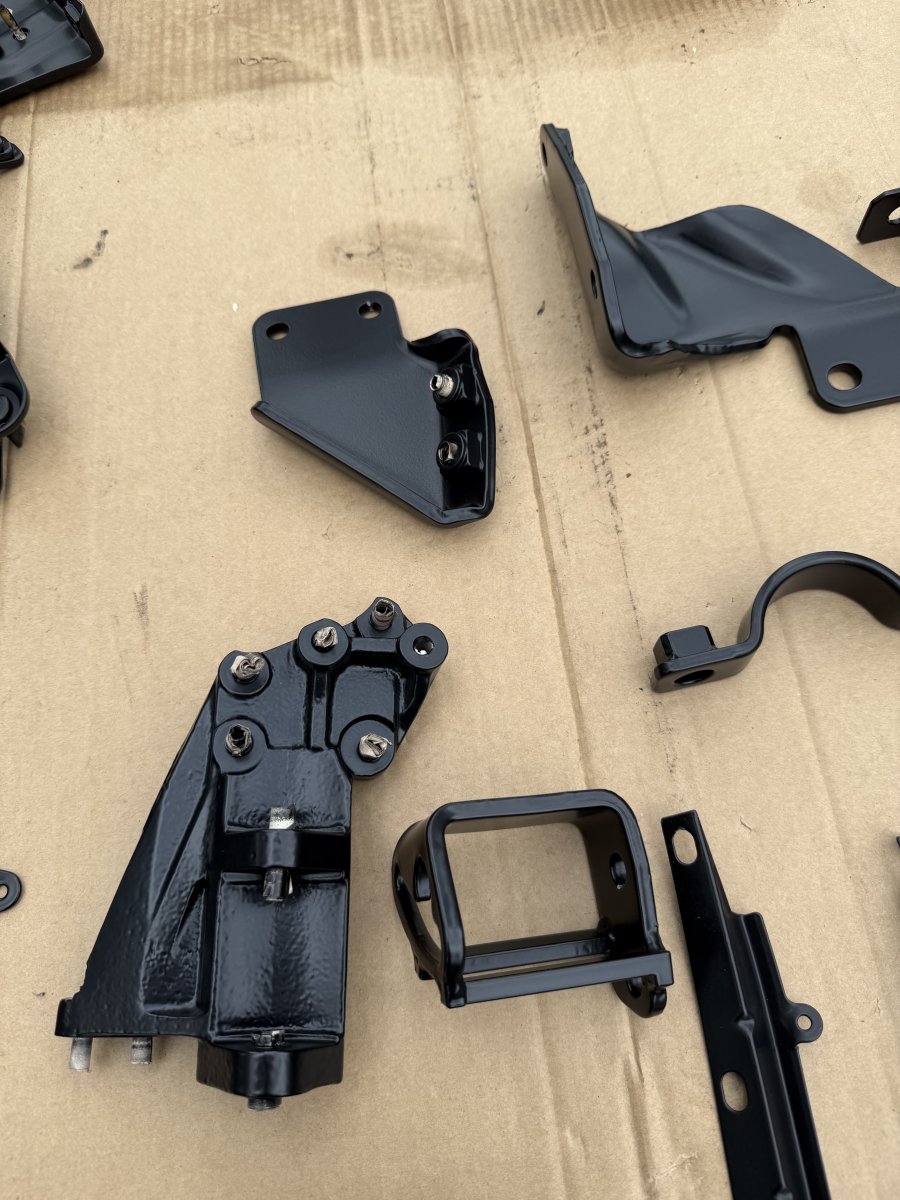
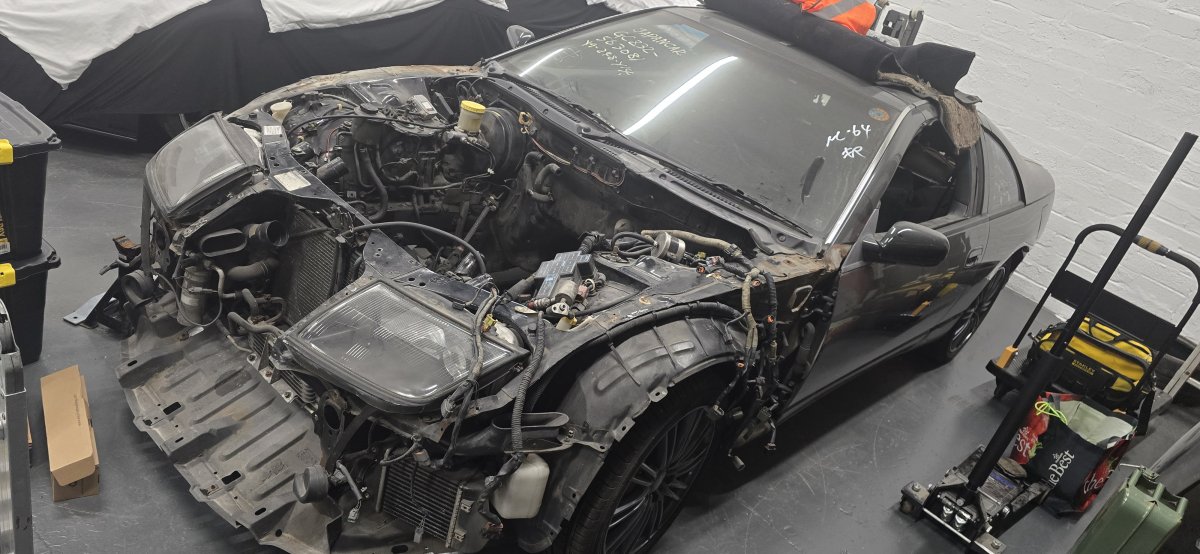
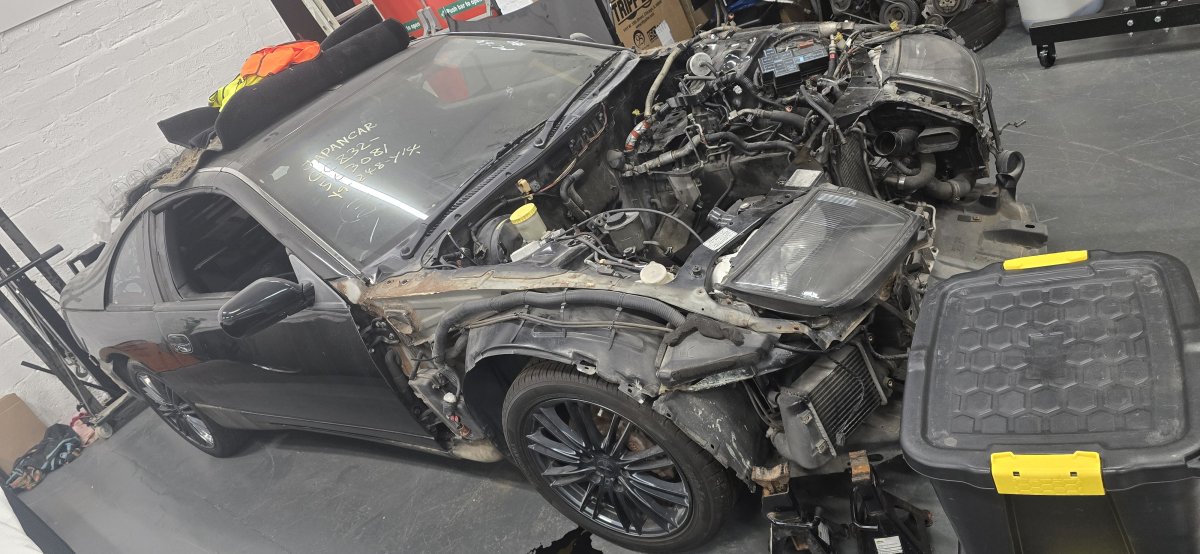
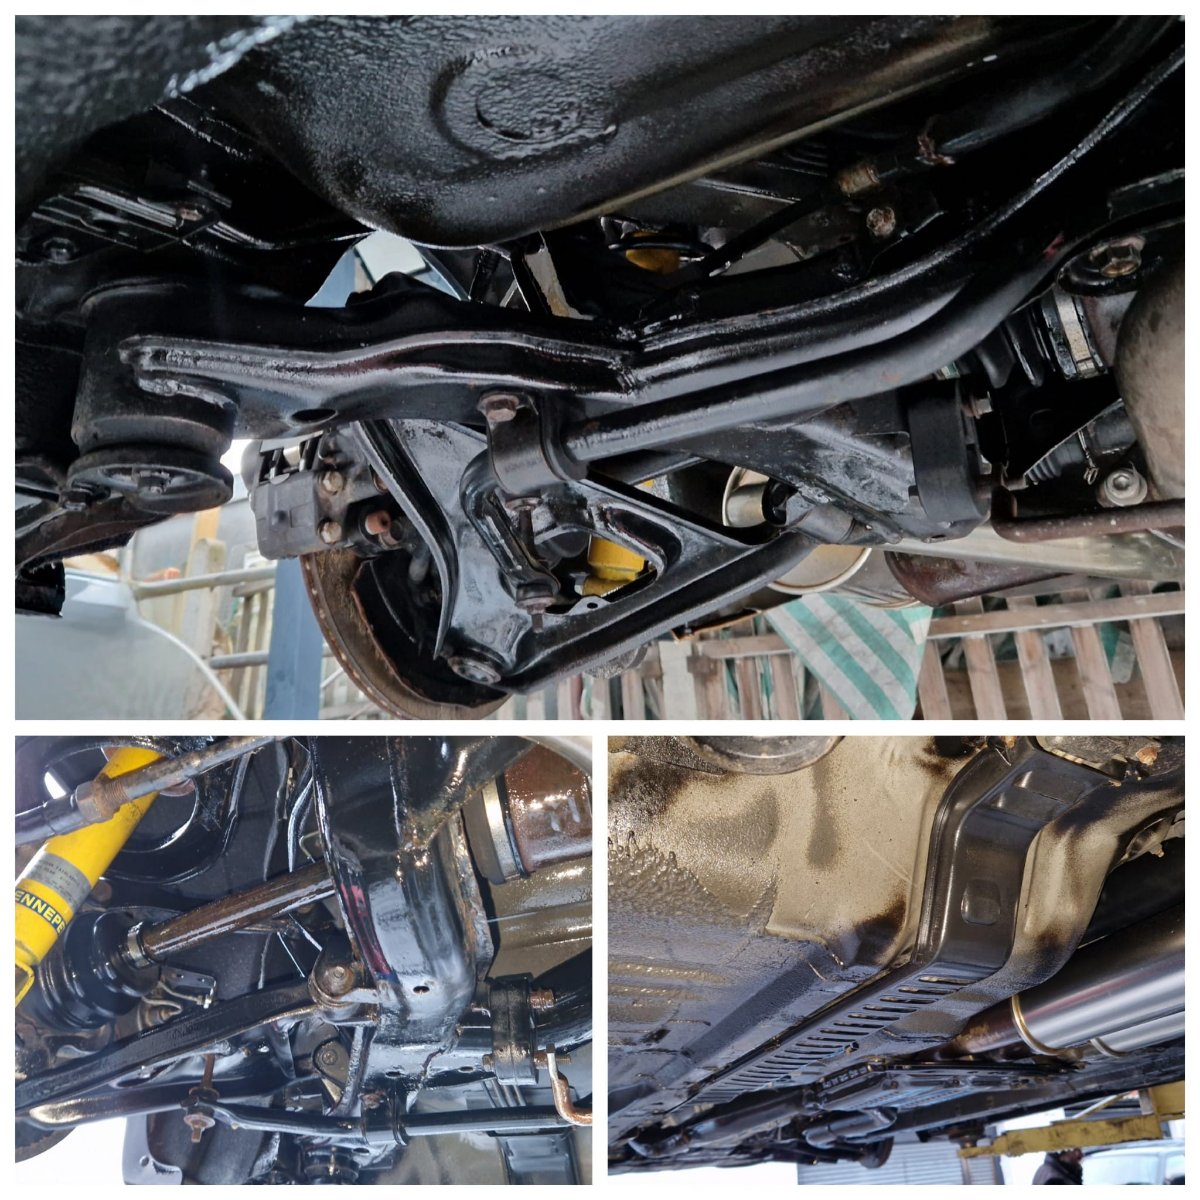
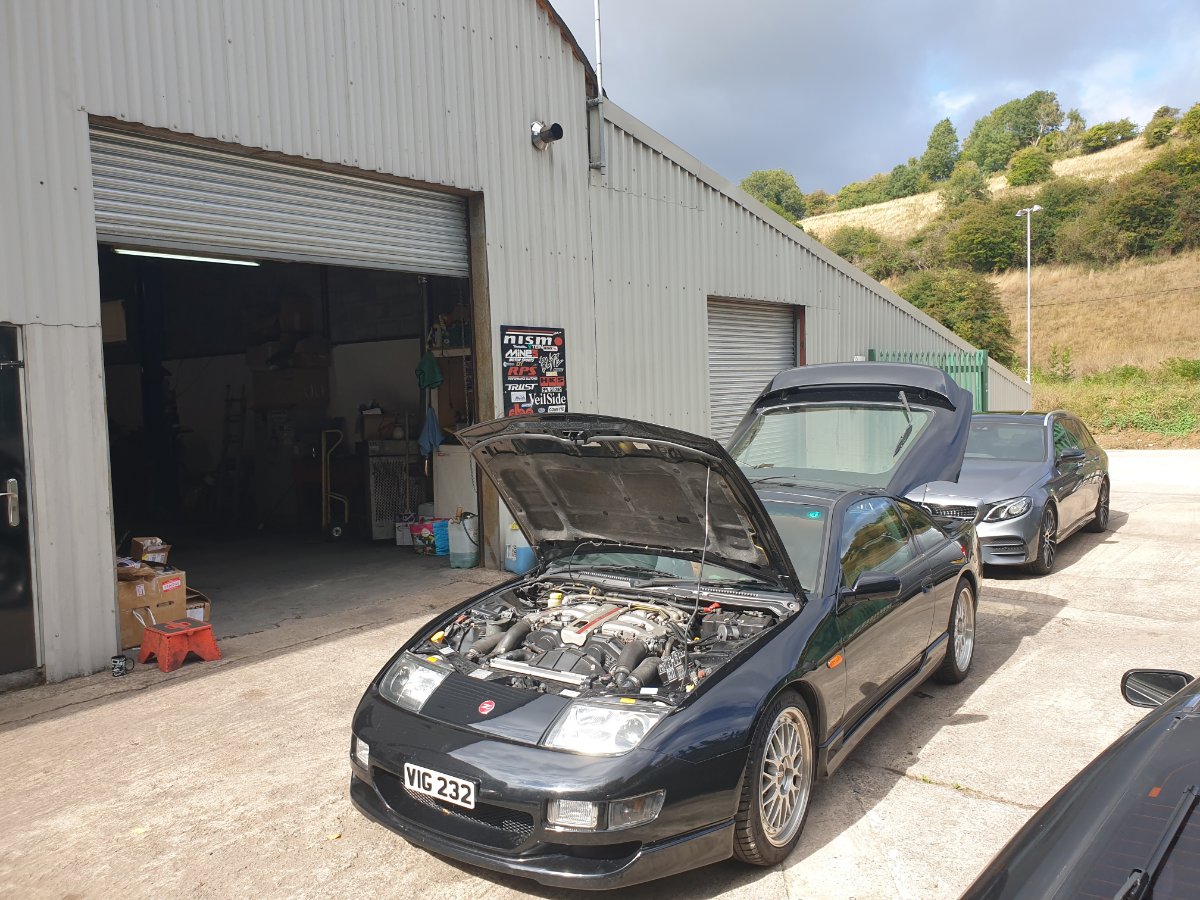
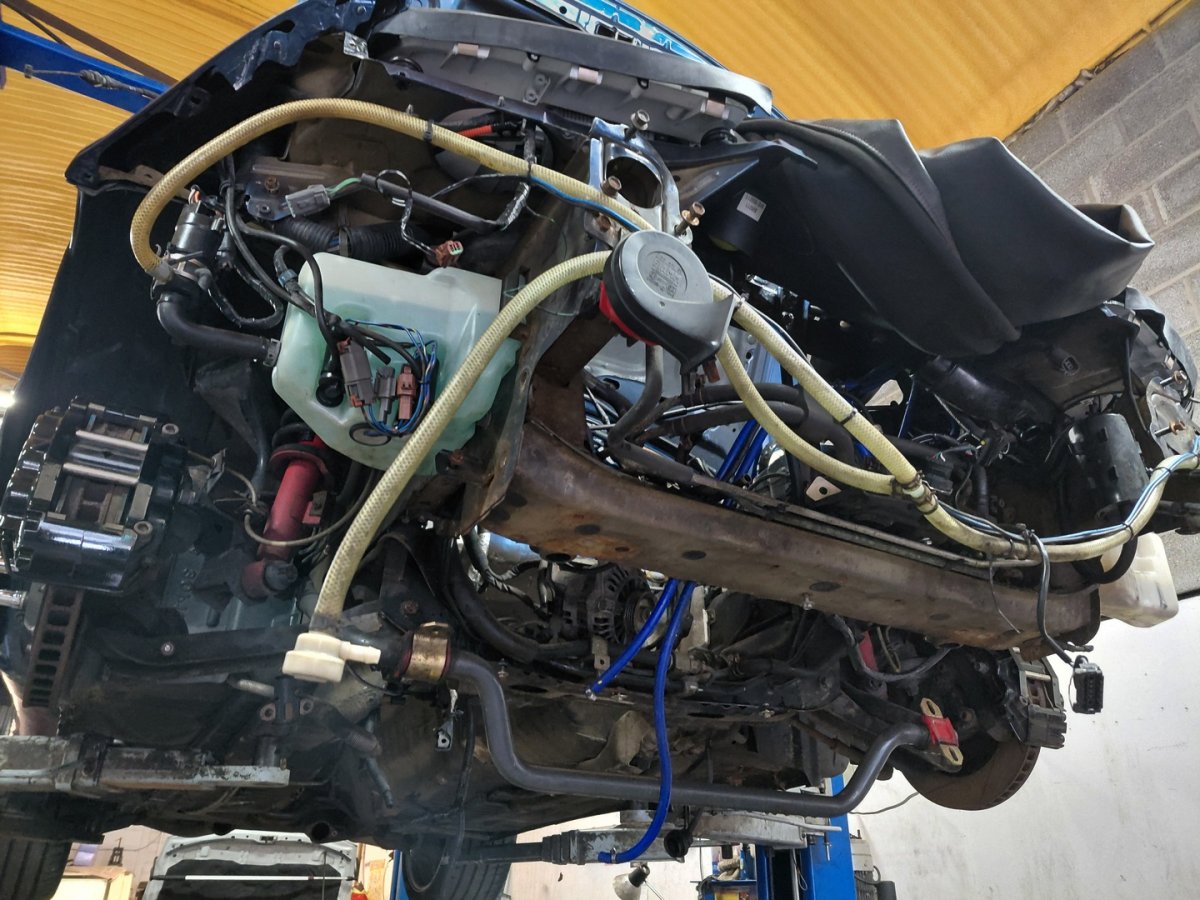
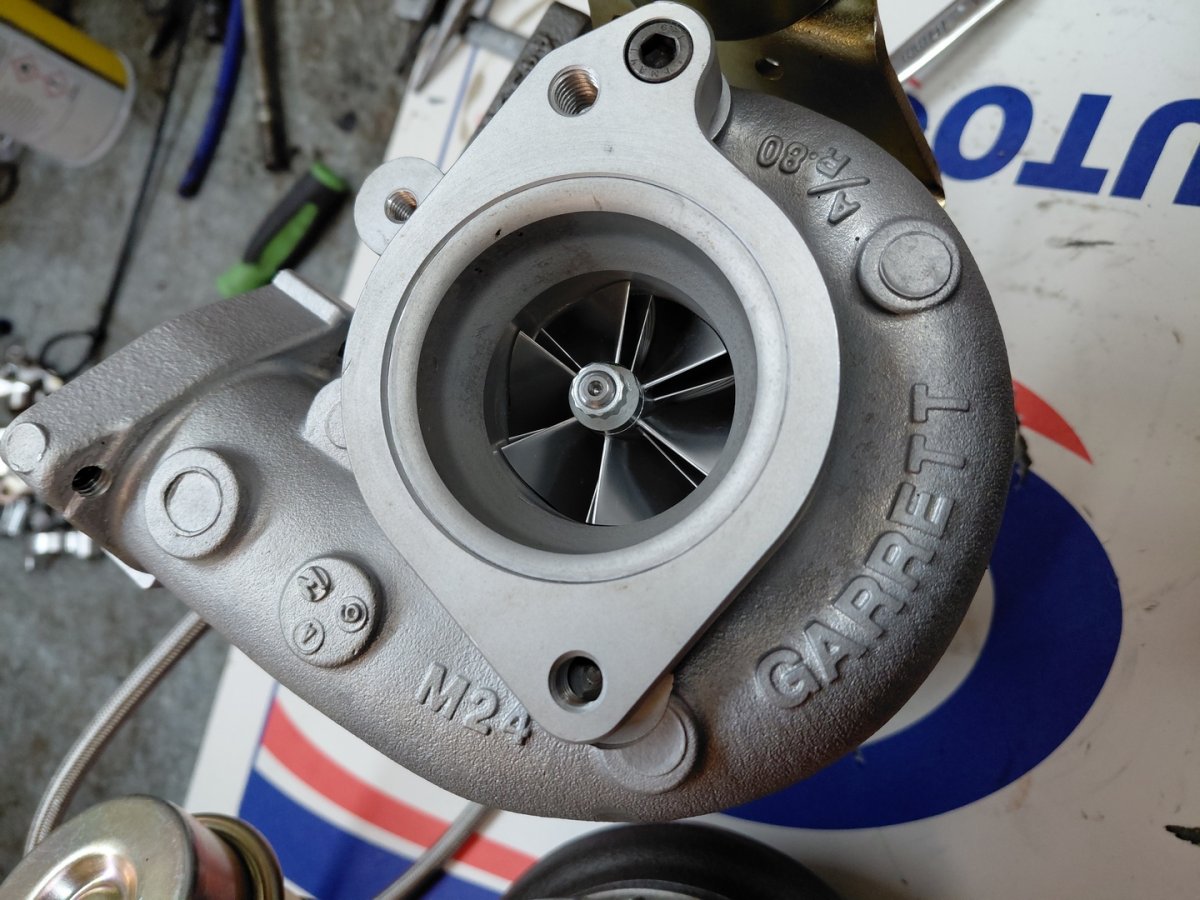
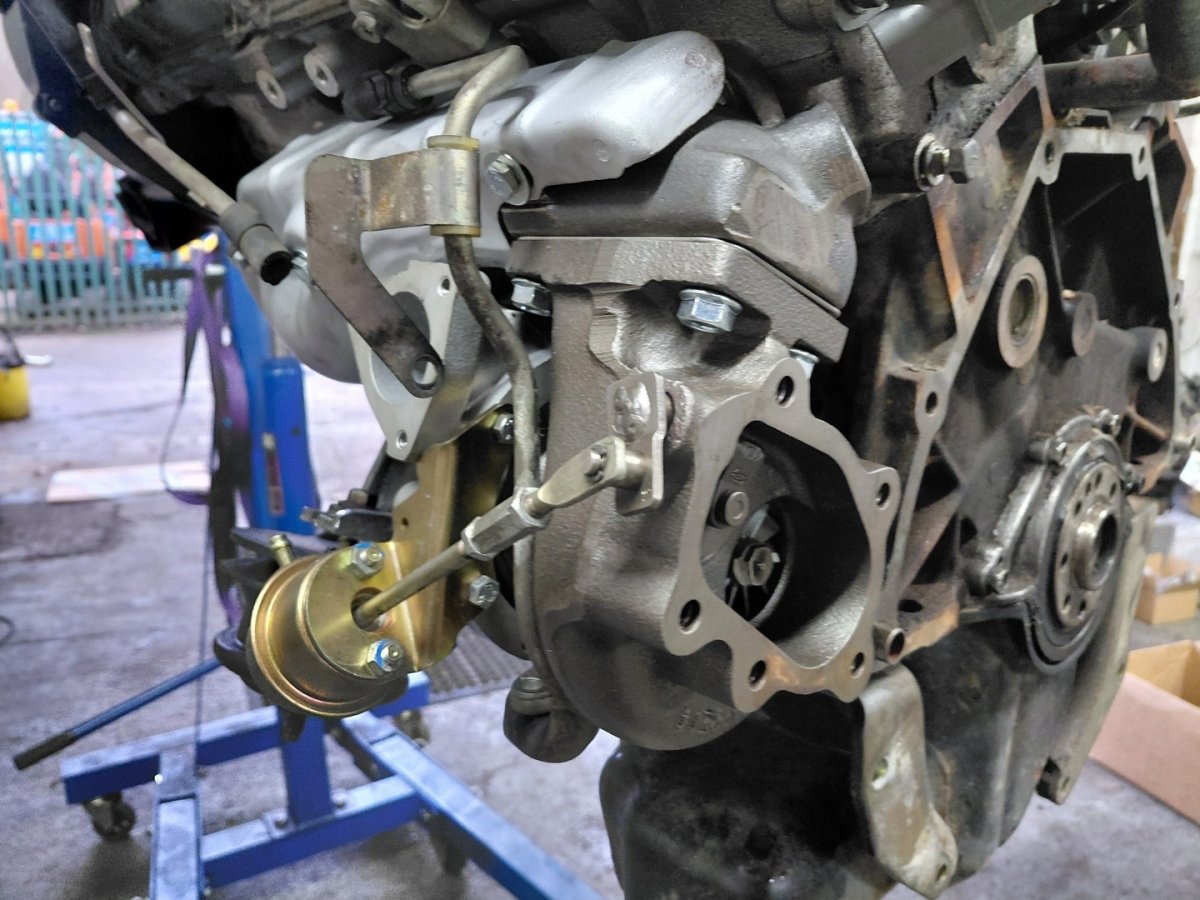
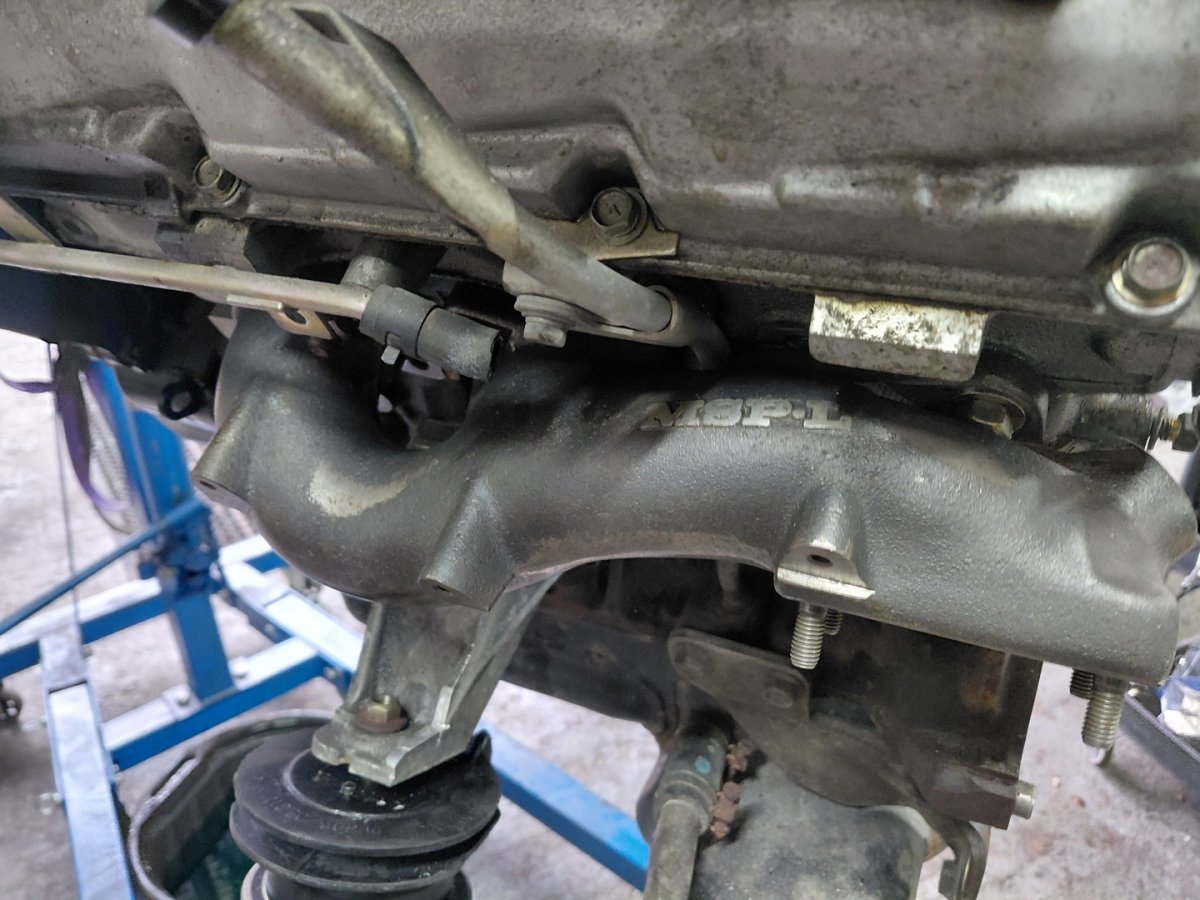
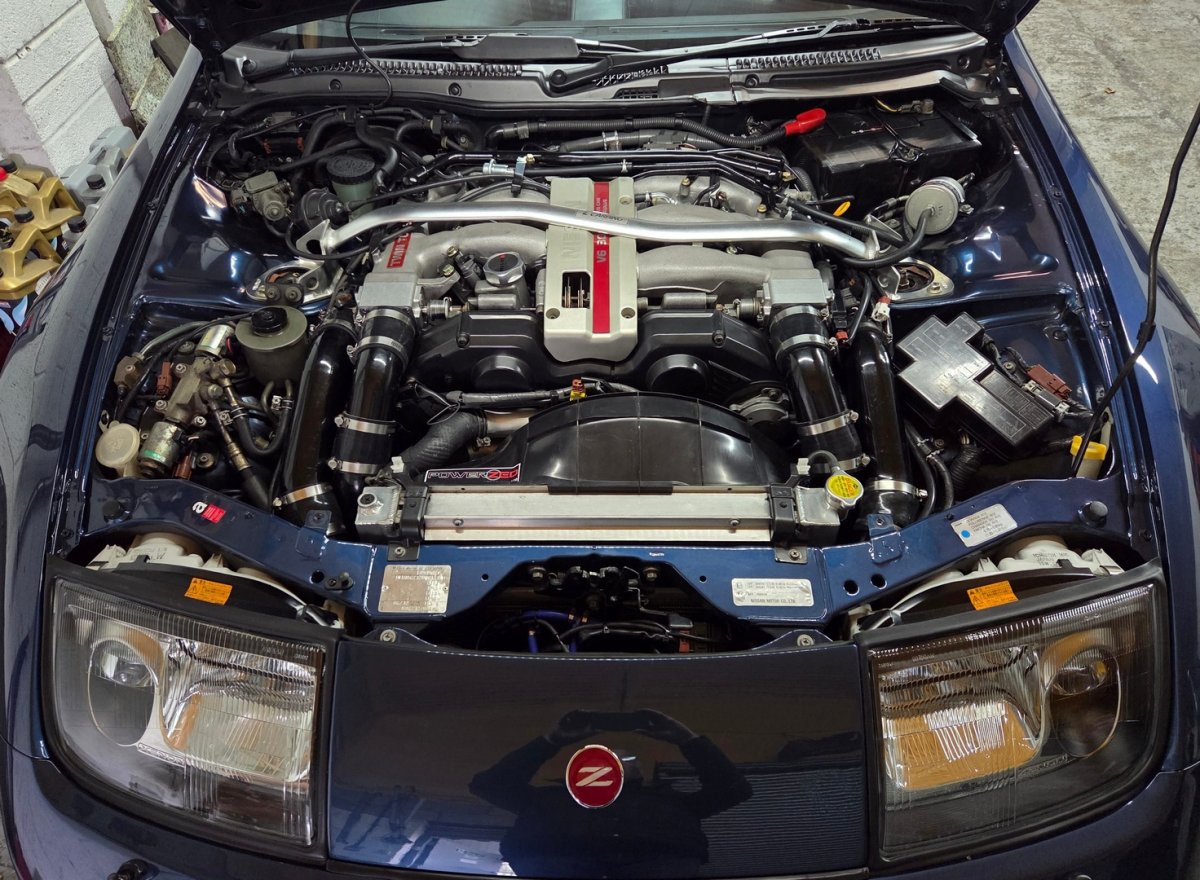
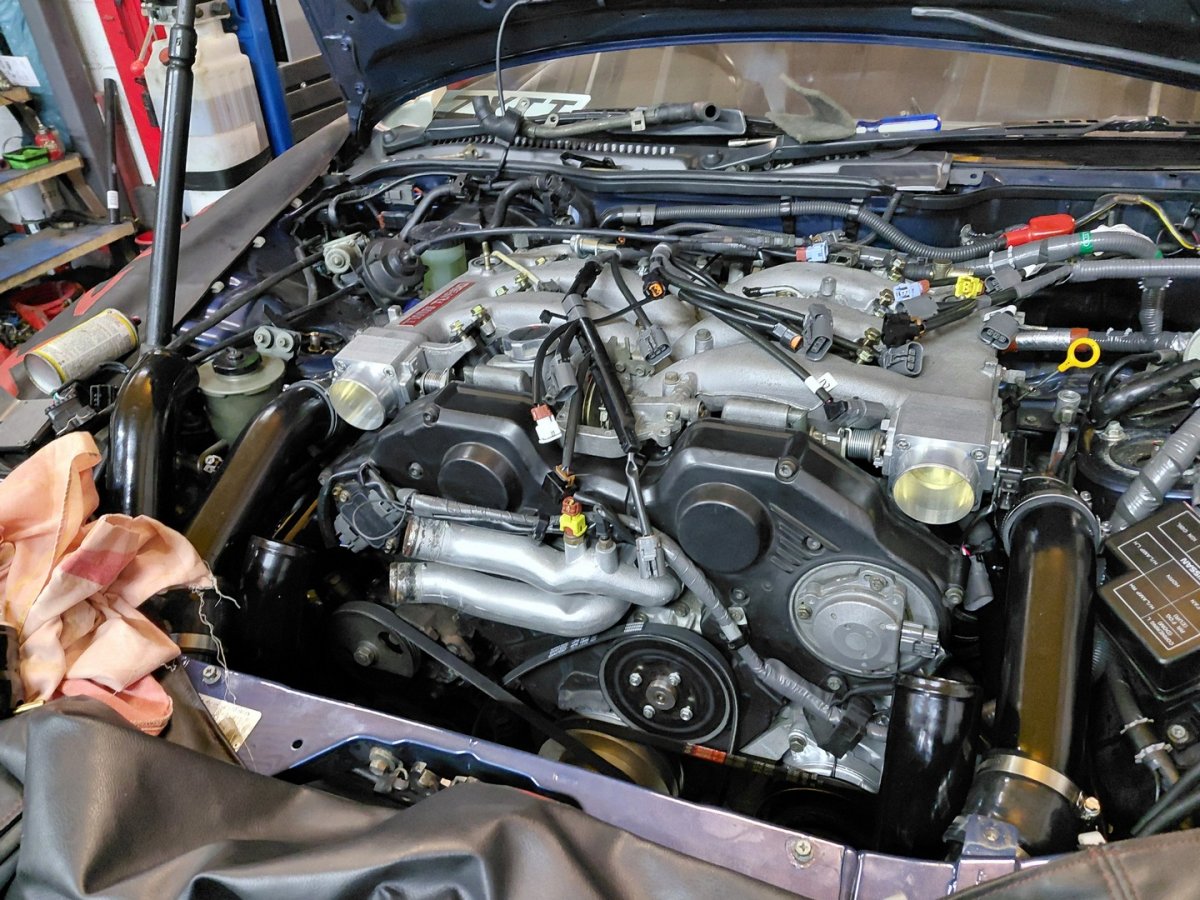
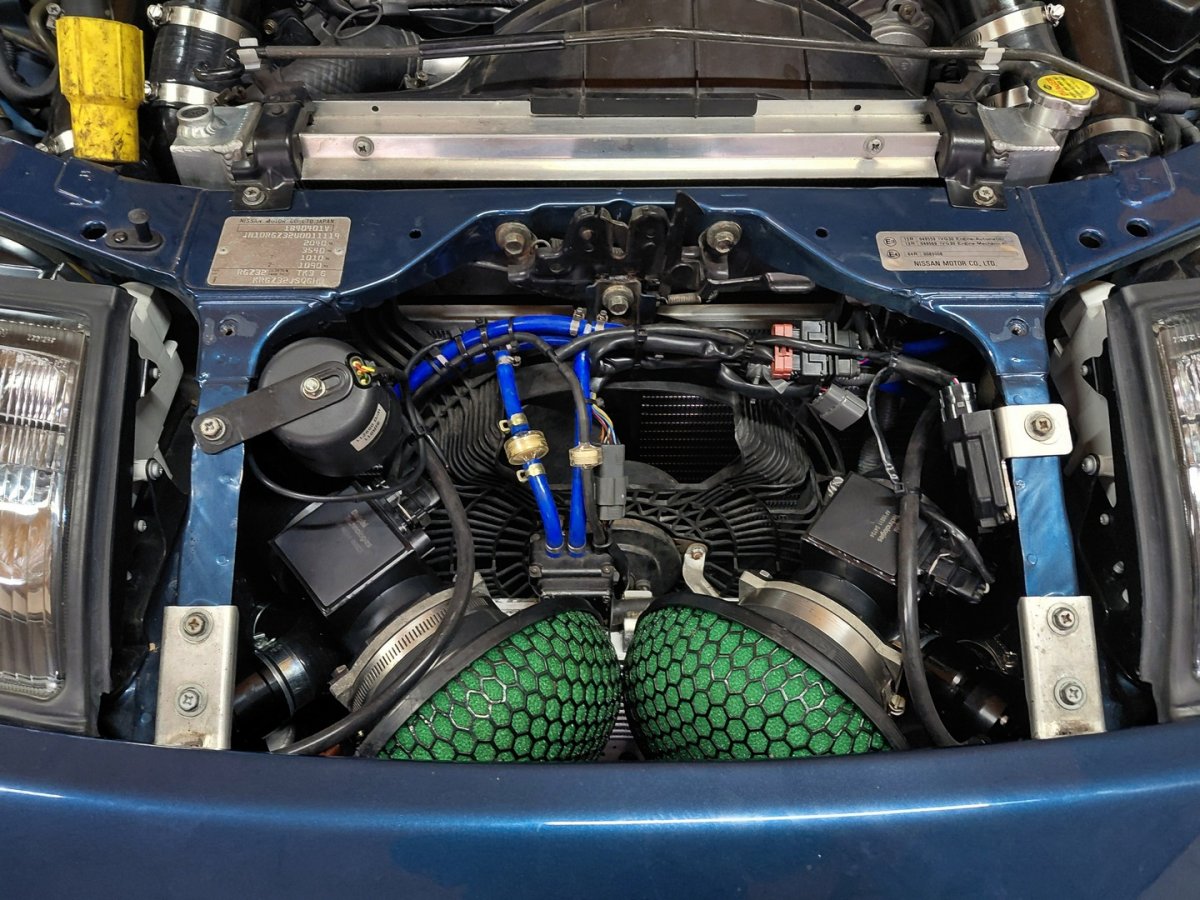
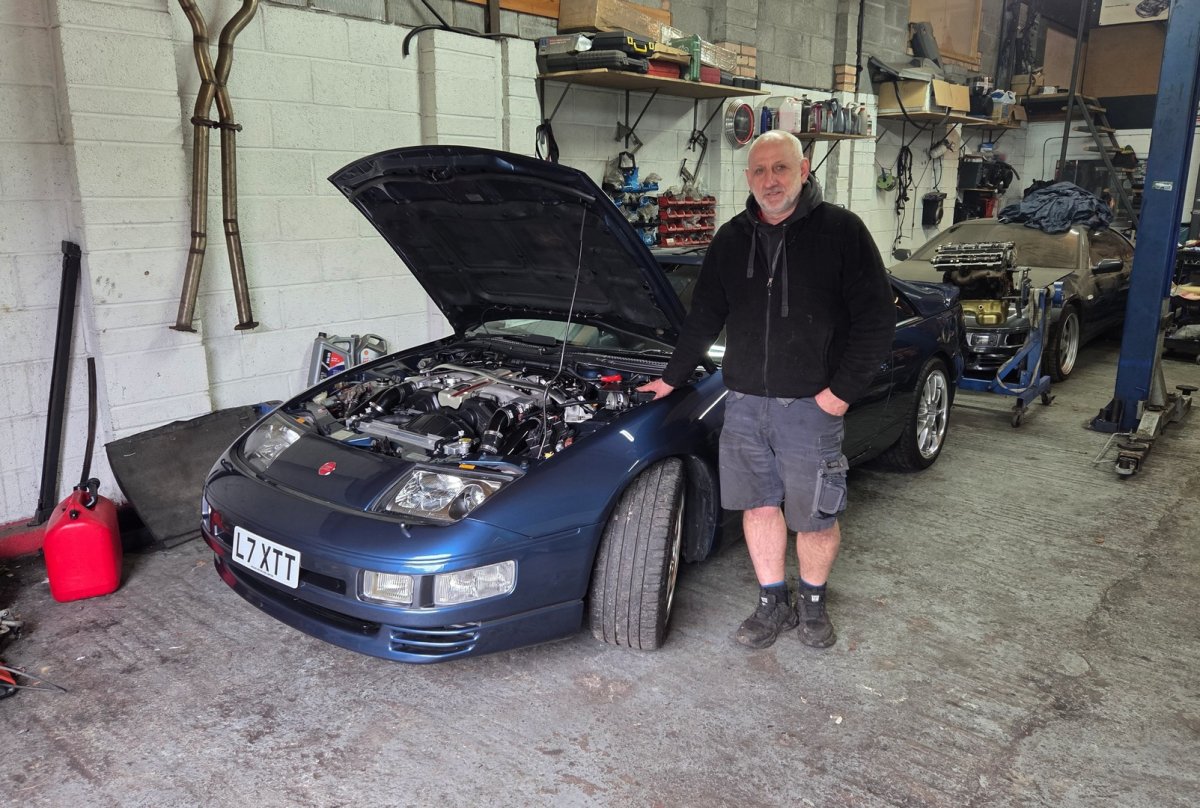
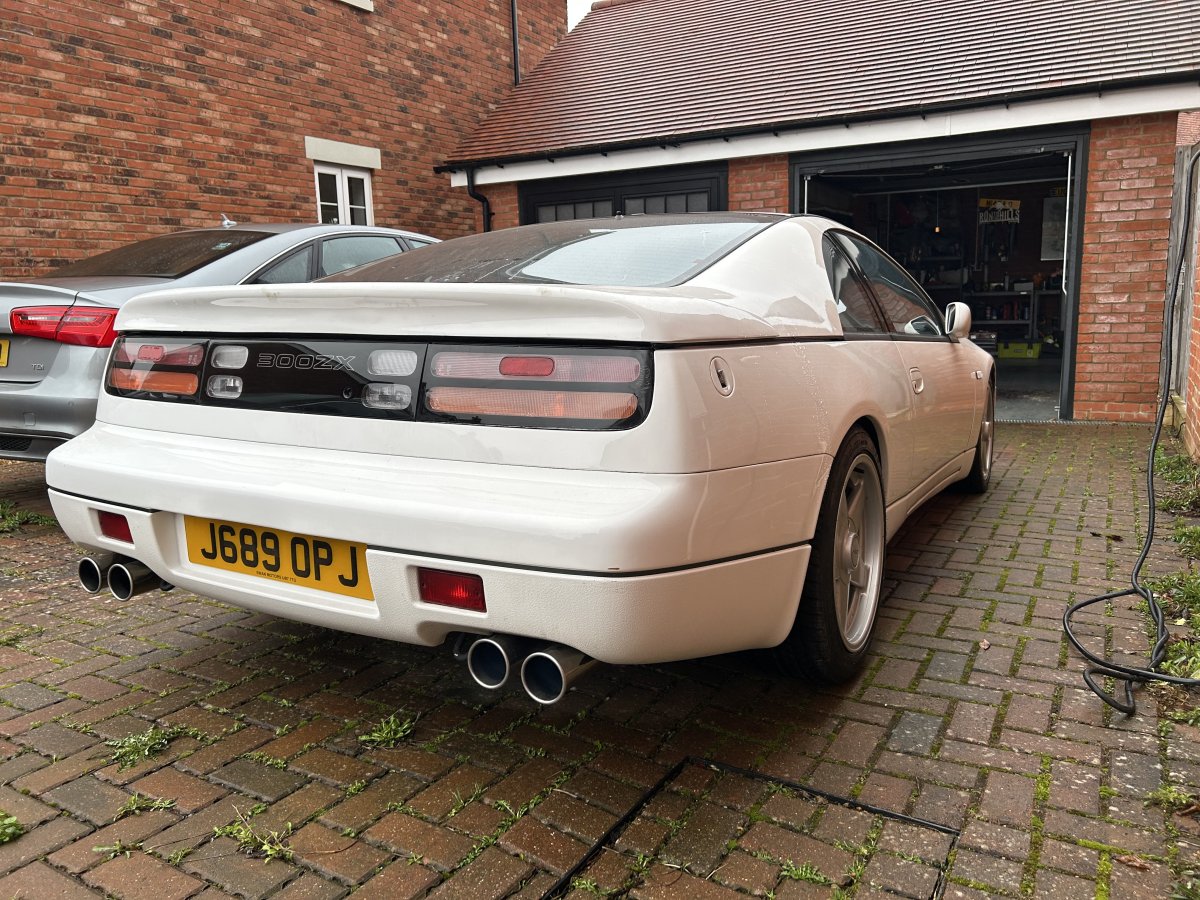
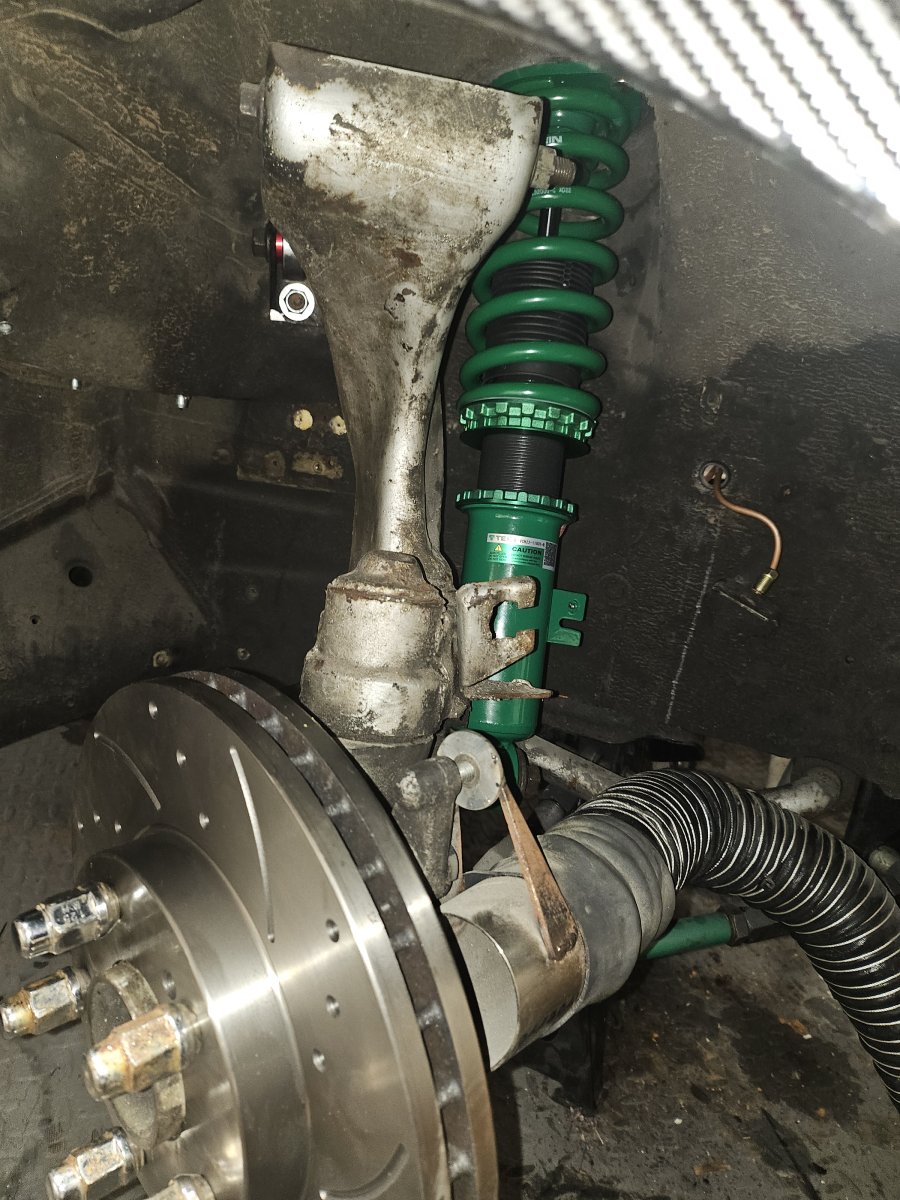
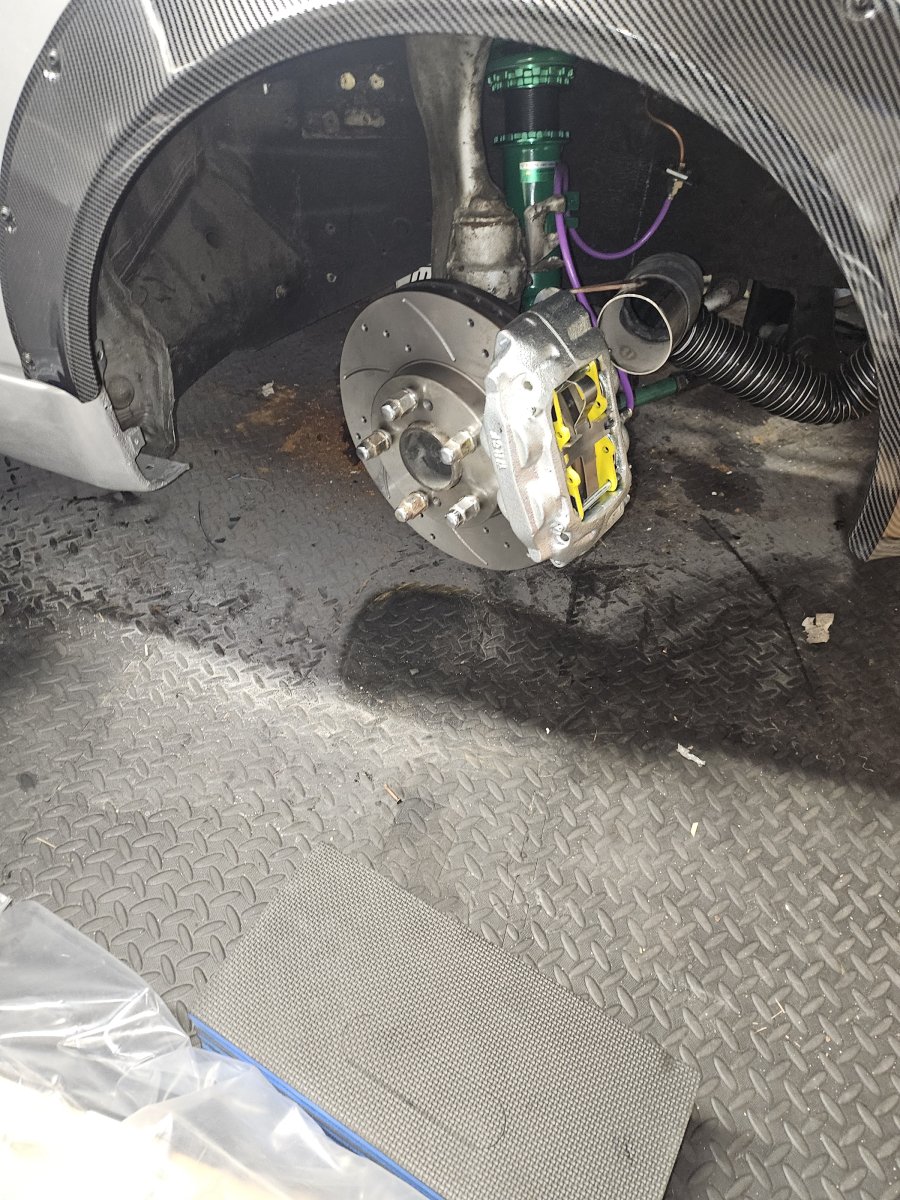
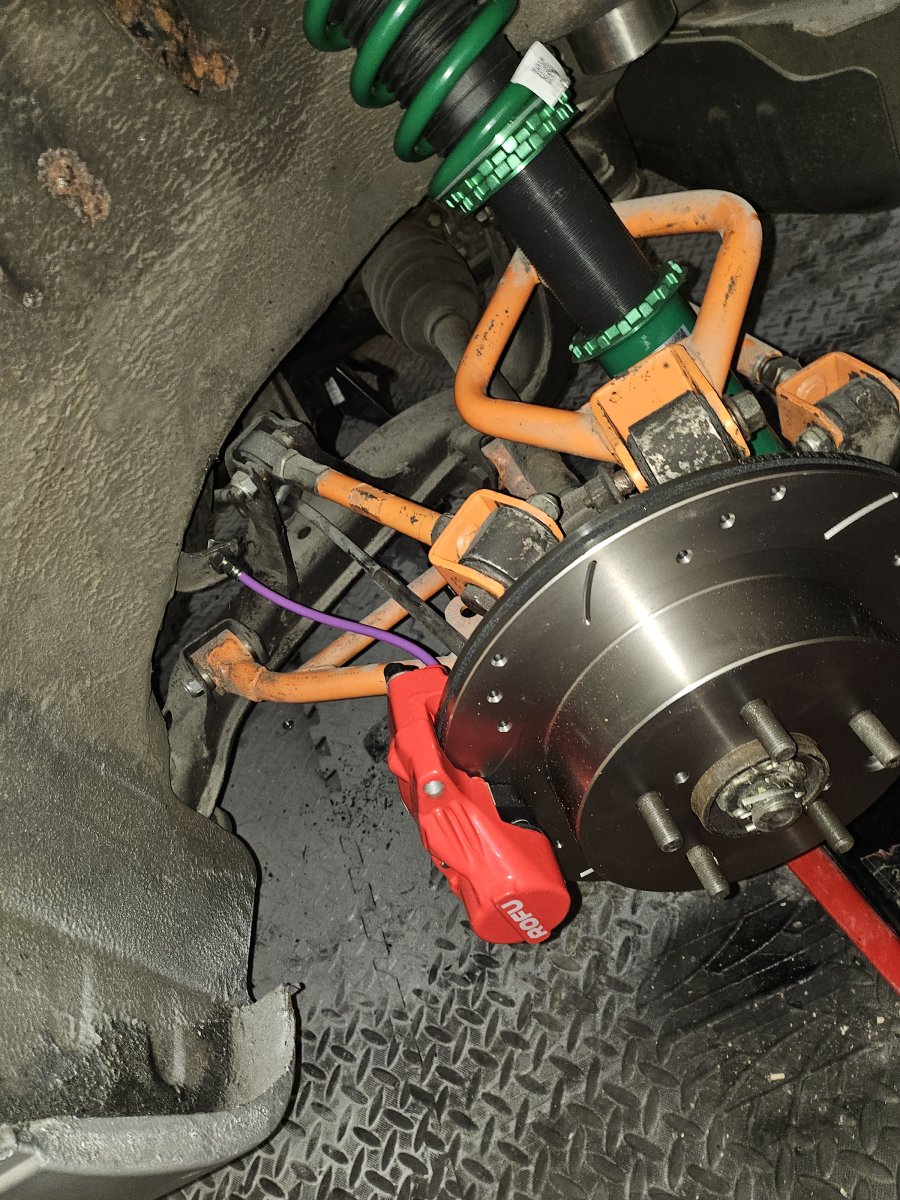
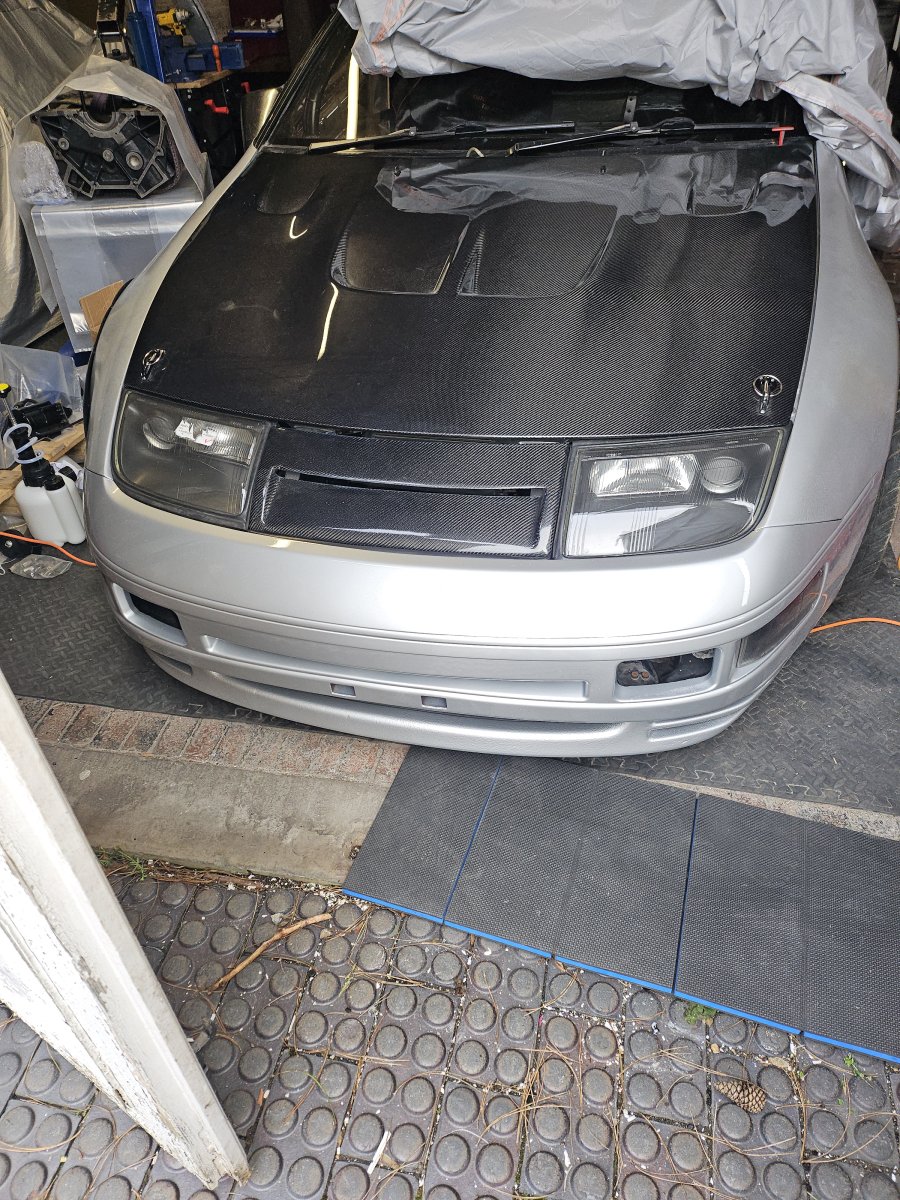
10 pointsCollected the car from PowerZed yesterday. Jim has spent many hours putting all the parts in the first two photos below onto the car and removing as much of the superfluous guff as possible. The car passed its MOT with flying colours and with the emissions well with limits. Jim emailed me after he took her for the MOT and to quote him "it behaved very well during the journey. It is very quick on boost even at wastegate pressure. You will be impressed I am sure" I'm a very happy bunny! The trip back home was very wet so drove with due caution. I will take her out when conditions improve and I have plumbed the Racelogic traction control back into the new engine harness. I'm very grateful to Jim for all he has done in getting the car to this stage of development in my ownership - a very big thank you! Engine out and all the emissions guff, manifolds and old turbos coming off. Compression tests well within specs for a 90K miles engine. Front of the car stripped down, old HKS SMICs, Recircs and pipe work removed. New CHRA's with billet compressors installed into JWT 530BB turbos. MSP exhaust manifolds installed with new engine mounts and modified brackets to clear AshSpec pipework. JWT 530BB turbos mounted. Work in progress - engine back in. RobZ 62mm TB's installed onto modified plenum. AshSpec 2.5" pipework going on and a lot of other new parts. All back in and bolted up with the very clean and discreet OEM+ look I was after with the modifications. Which continues with the new MAFs, GFB Recirculating BOVs and AshSpec 2.5" pipework under the nose panel. Again a very clean look. Finally the man who made it all happen...

 10 points
 -
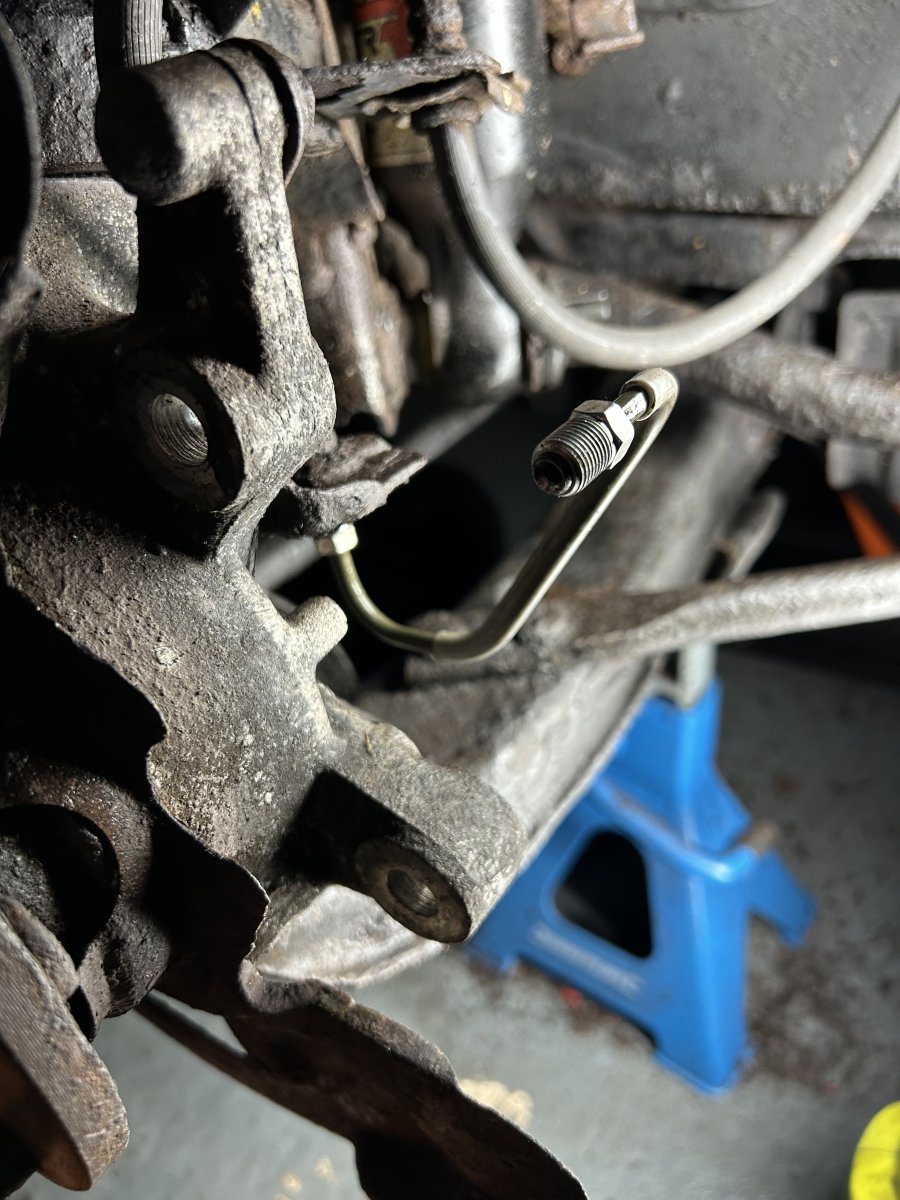
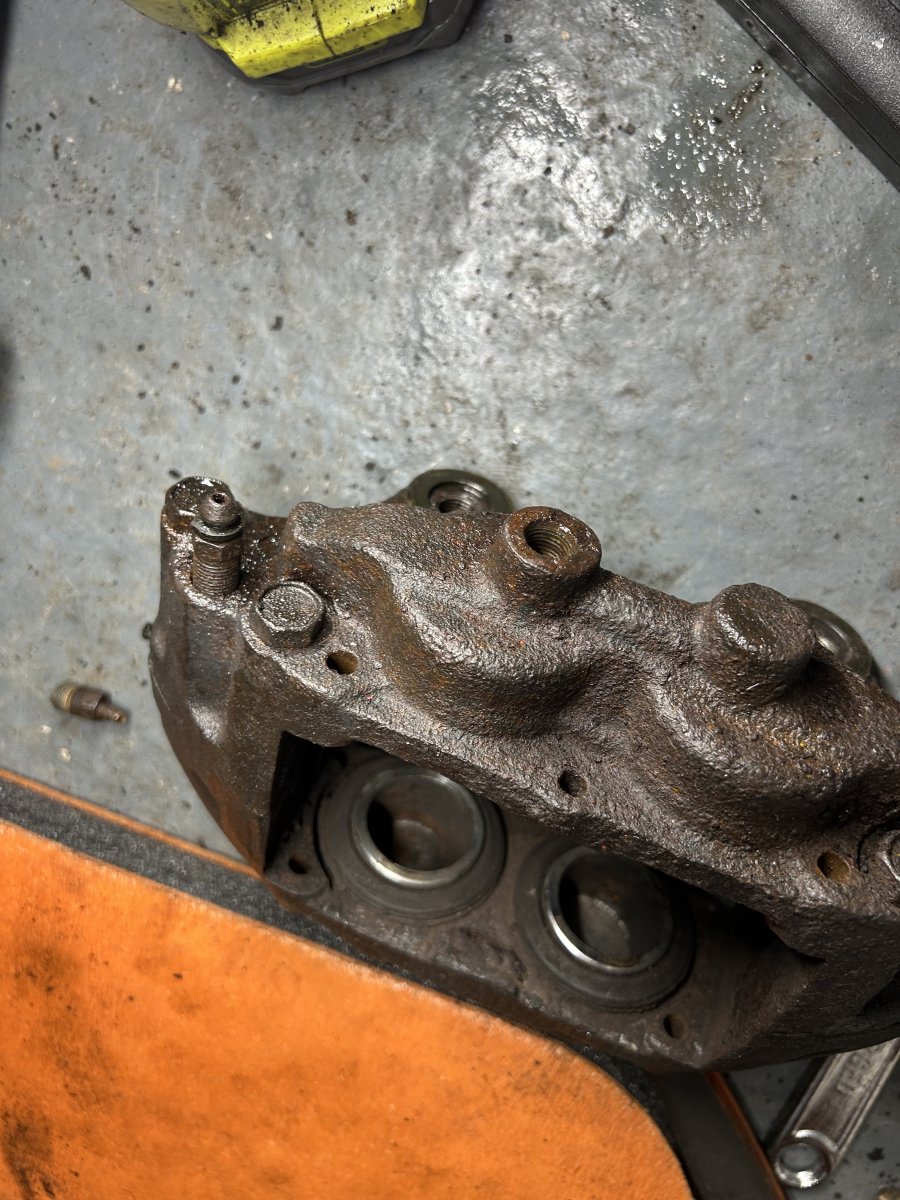
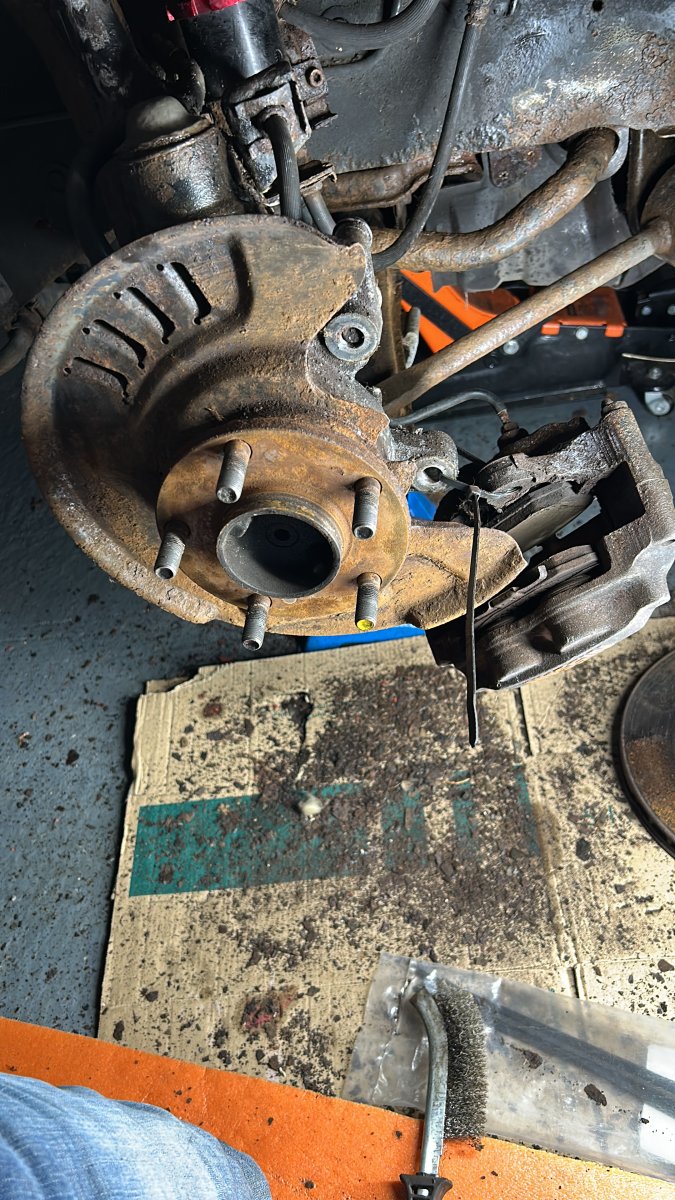
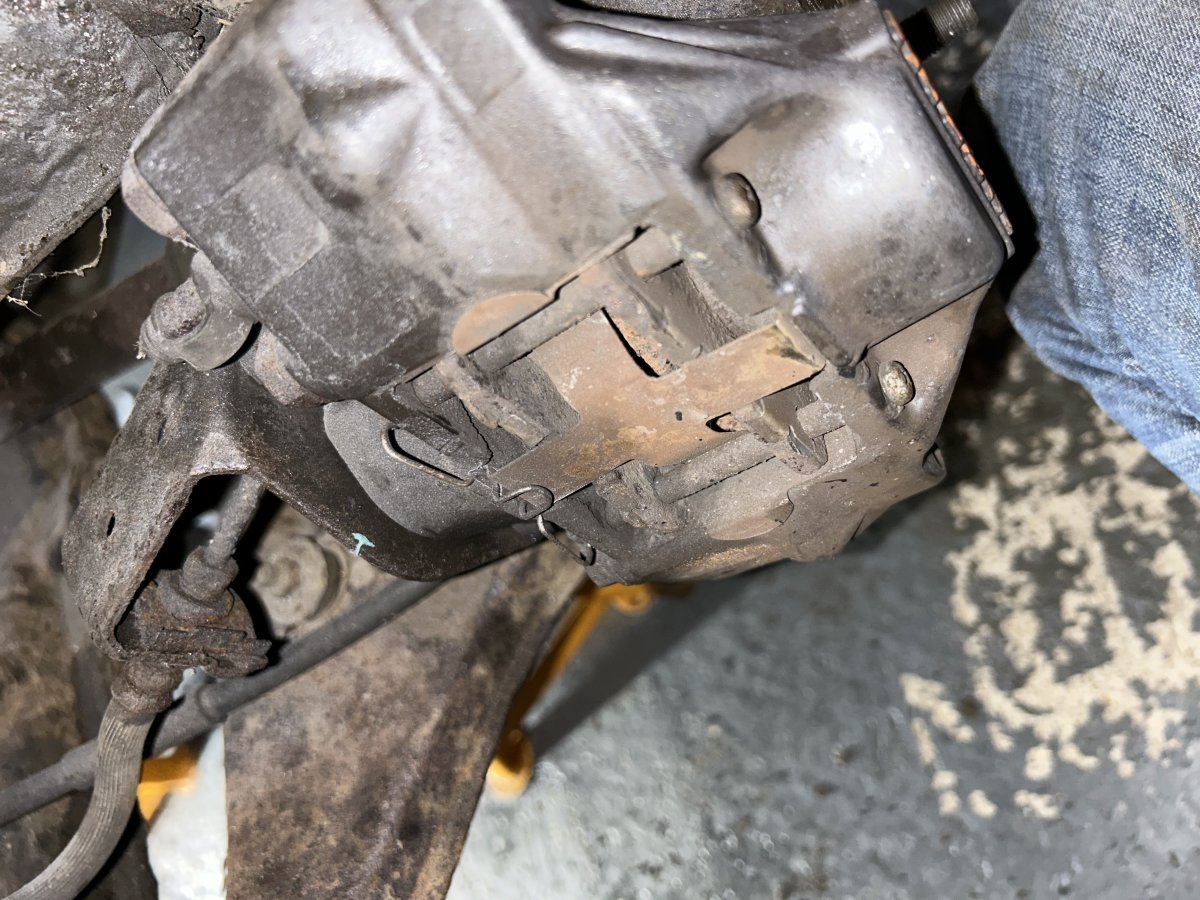
7 pointsI, very fortunately, live about a kilometre from Torqen who are the JK stockist for Z1. Got myself some replacement pipes. Marinaded the caliper for about a week in penetrant and have been able to replace the pipe quite easily. Brakes all sorted now, just need to bleed them. Never done that before so good to learn a new trick! Tyre going on Monday. Then it’s the big one, MOT this Friday!!

 7 points
 -
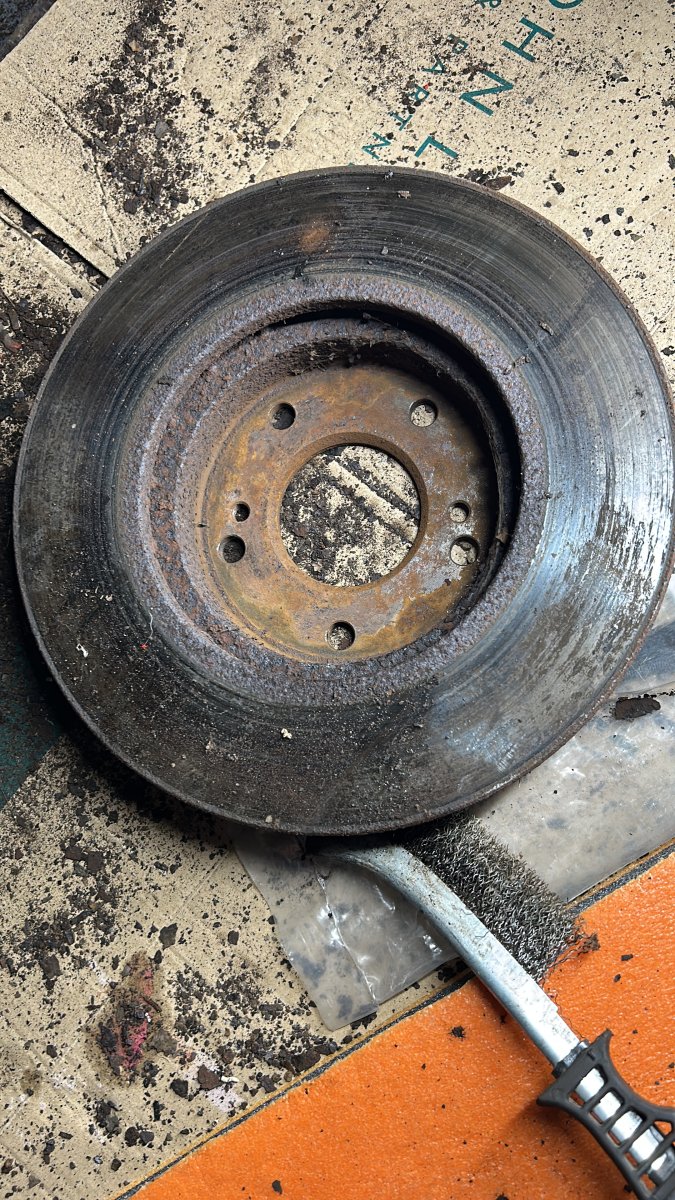
5 points5 pointsHi guys I thought id jump in and say hi 👋 Im currently thinking of re entering the zx world! I had one 20 years ago and still think they have a timeless look to them... ultimately i love 90s/2000s Jap cars and have been in and around the Honda scene for a long time now, starting with Dc2s and then onto S2000z (which im currently still enjoying thuroughly). I am super tempted to get a Manual TT the only thing in my head is that I havent actually sat in one in over 2 decades and whether my past memory of the drive would live up to reality?? 🤷 Anyway glad to get back onto a forum...im super sick of Facebook groups tbh 🙃 Located im Bucks South East.5 points4 pointsWell it passed!! I’m so chuffed! The advisories were just rusty springs, and some brake pipes. That can all wait a bit and the main thing is there is no serious issues!! Now on to sorting out some maintenance. The cambelt hasn’t been done since 2004 😬
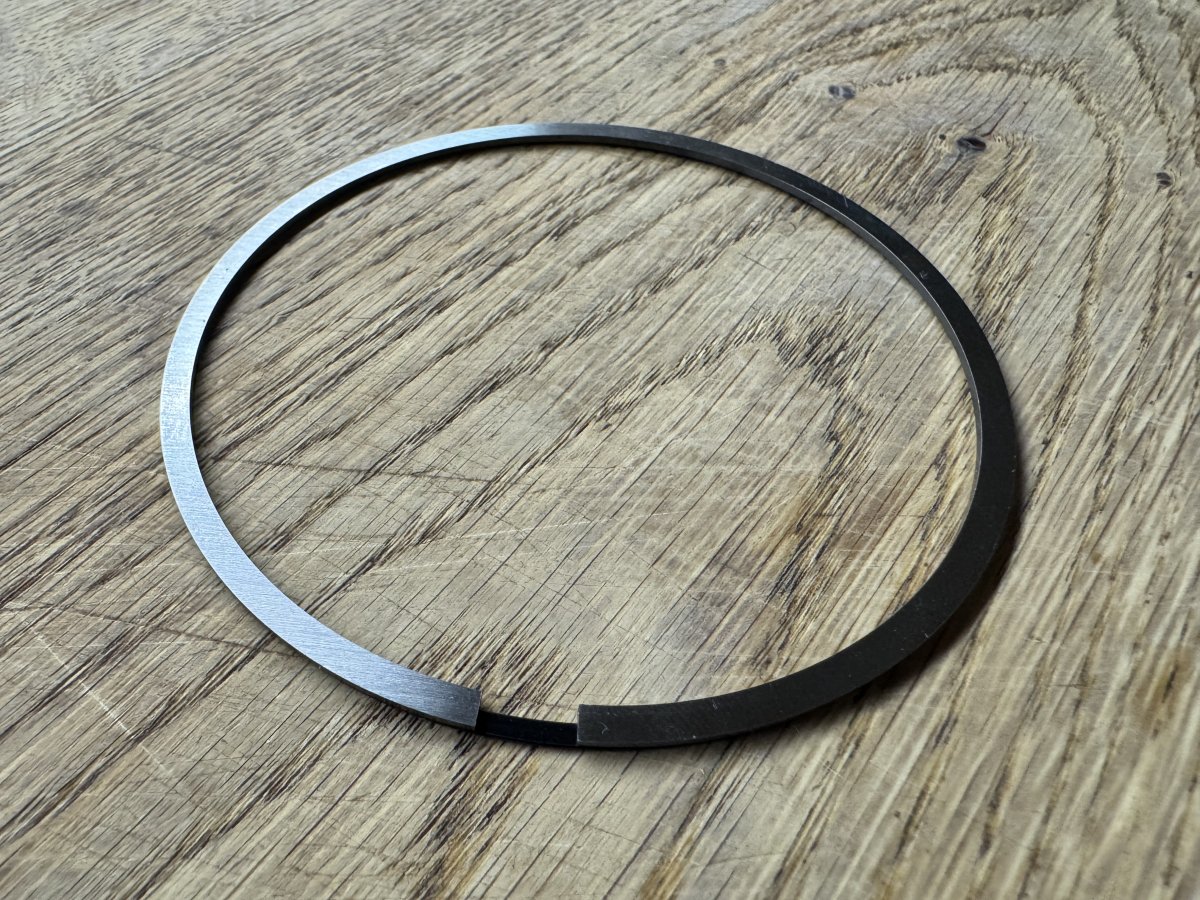
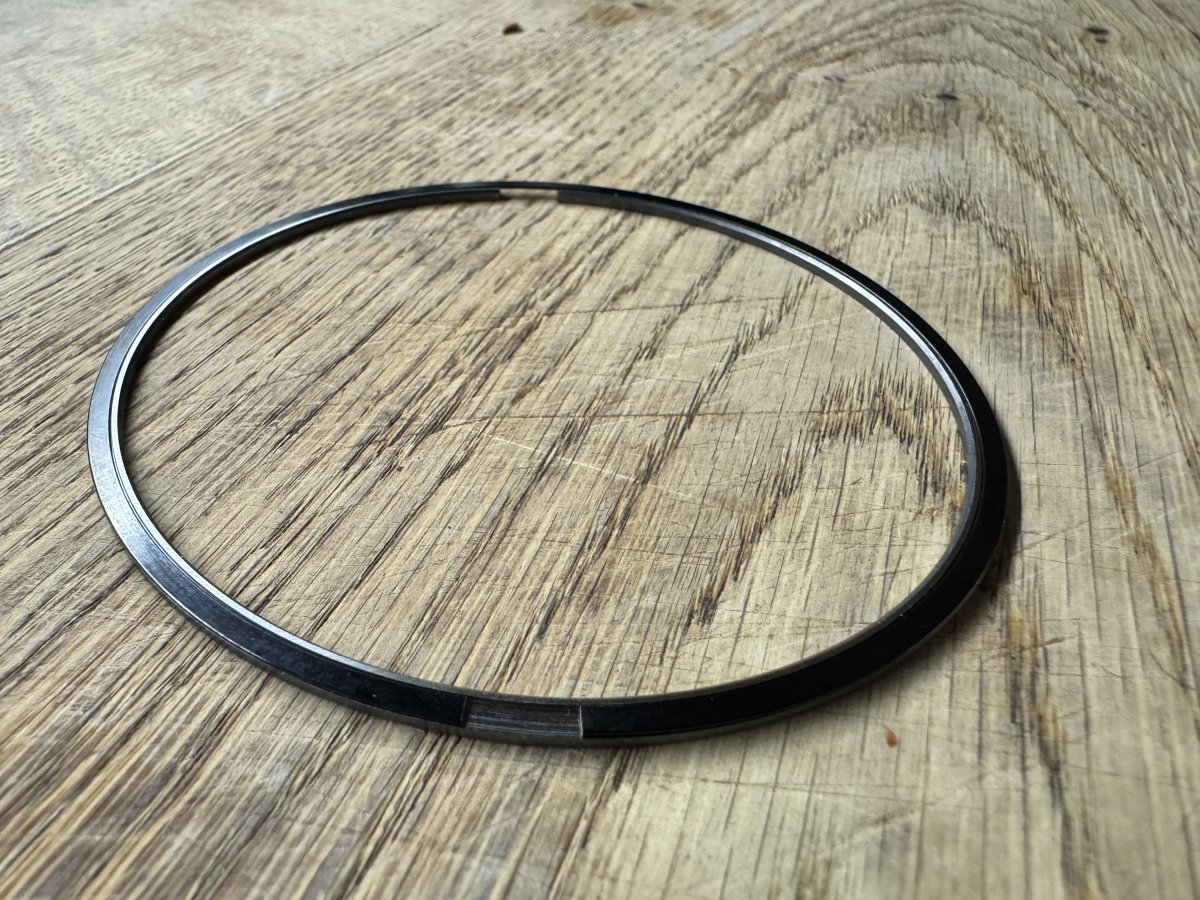
 4 points4 pointsAfter many hours research and consulting OCS, I decided to try something somewhat new with my piston rings. I have decided to run Total Seal Gapless pistons rings. The setup includes a gapless top ring, with conventional second and oil control rings. To my knowledge I’m the only person in the UK to be running gapless rings on a VG30, but I know of at least one other in the states that have shown very positive results. The term gapless is a bit of a misnomer. It’s a 2 piece ring, with their individual ring gaps rotated 180 degrees from each other, effectively making the area around the ring gapless. The positives include virtually 0 blowby (so a 0-1% leakdown vs 5% on a conventional ring), increased vacuum and reduced oil fuel dilution. The other benefit is you can run a larger ring gap on the 2 pieces, allowing the a wider margin for thermal expansion without the downside of increased blow by The only real downside that I can see is the cost, at around 30% more than a CP Piston ring pack. Hopefully this will help with slightly improving my idle vacuum (due to my cam profile) and a generally more efficient engine.
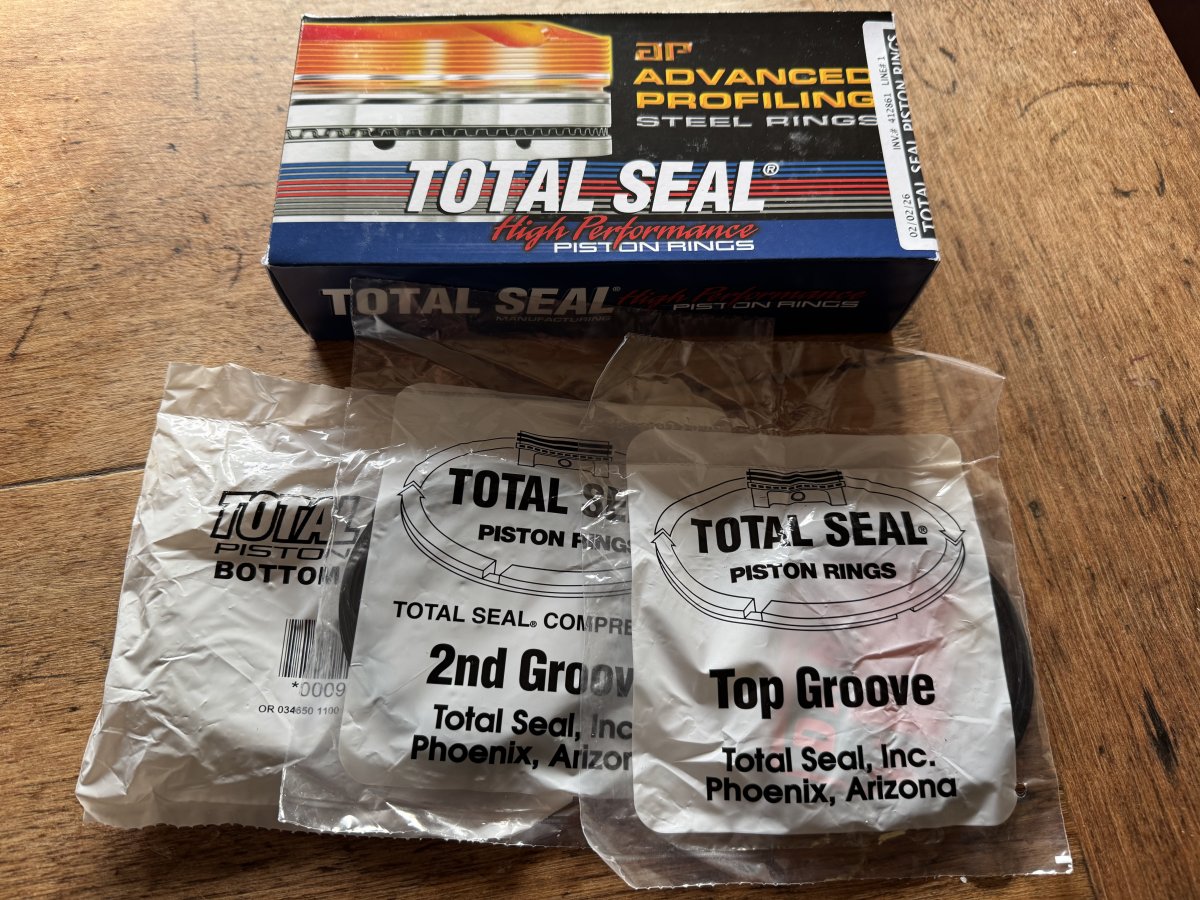
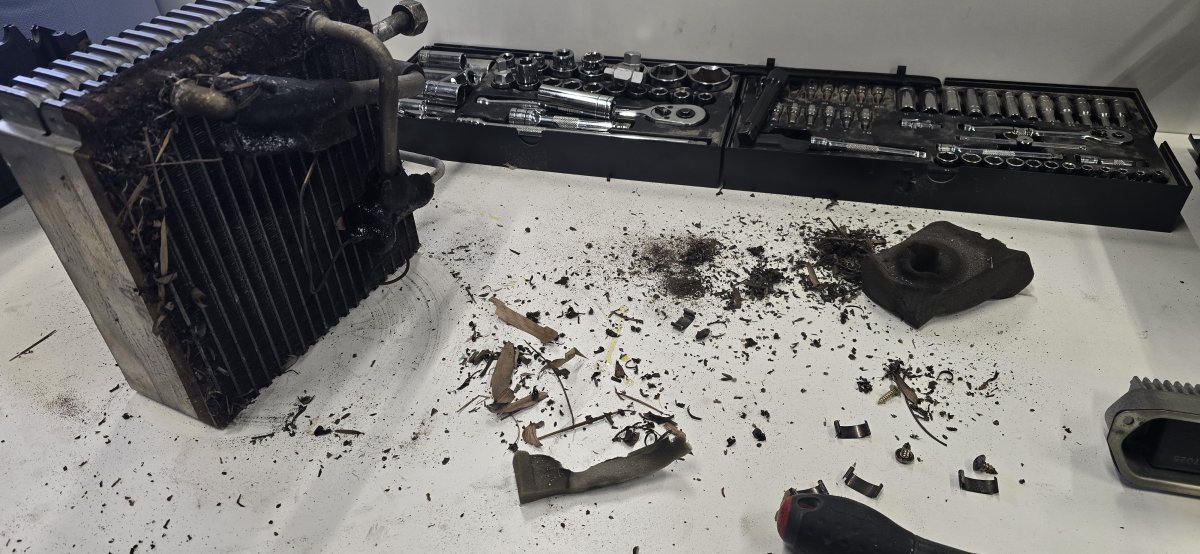
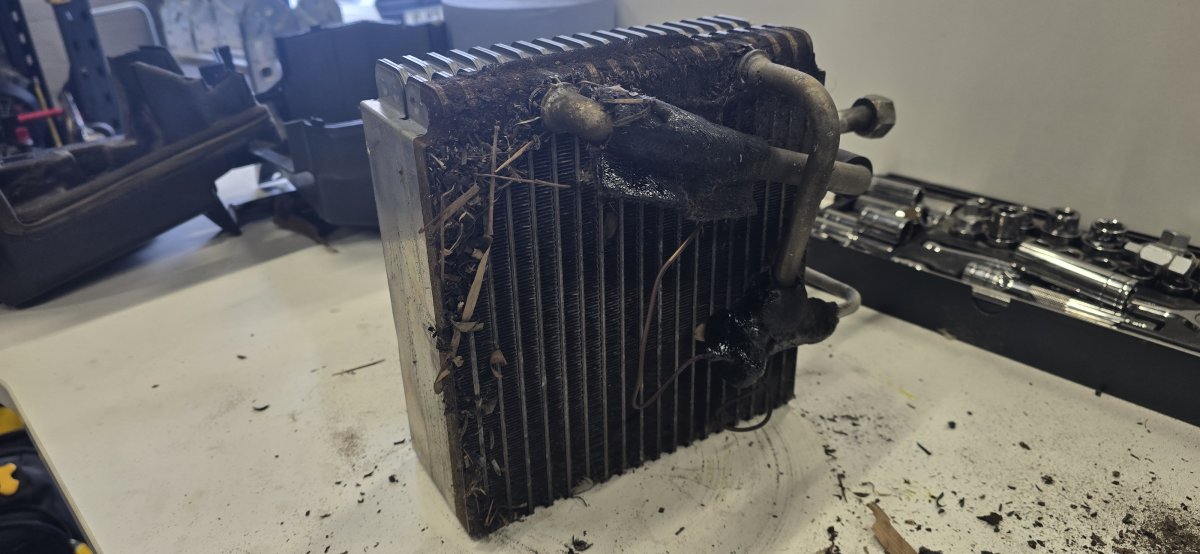
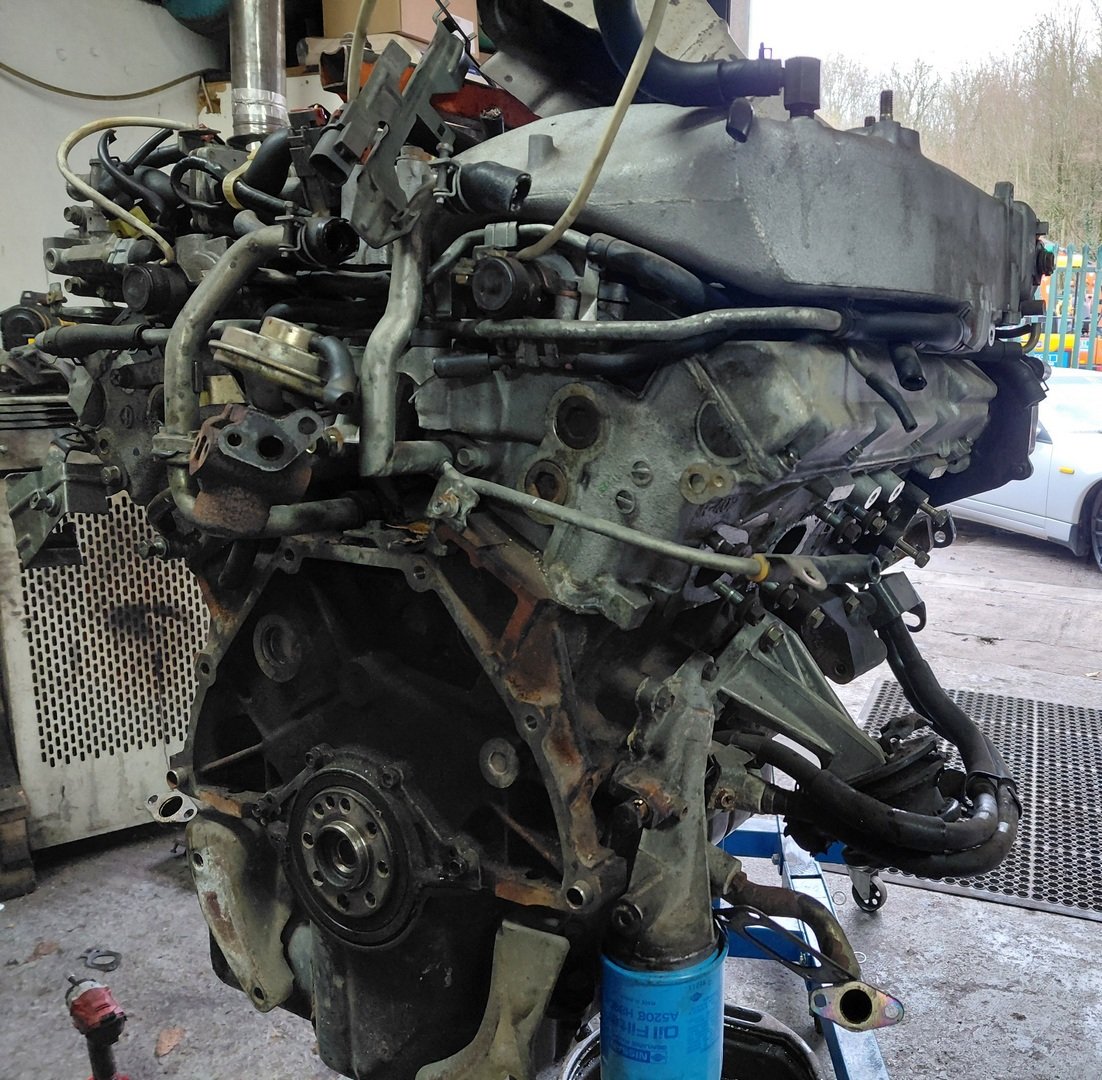
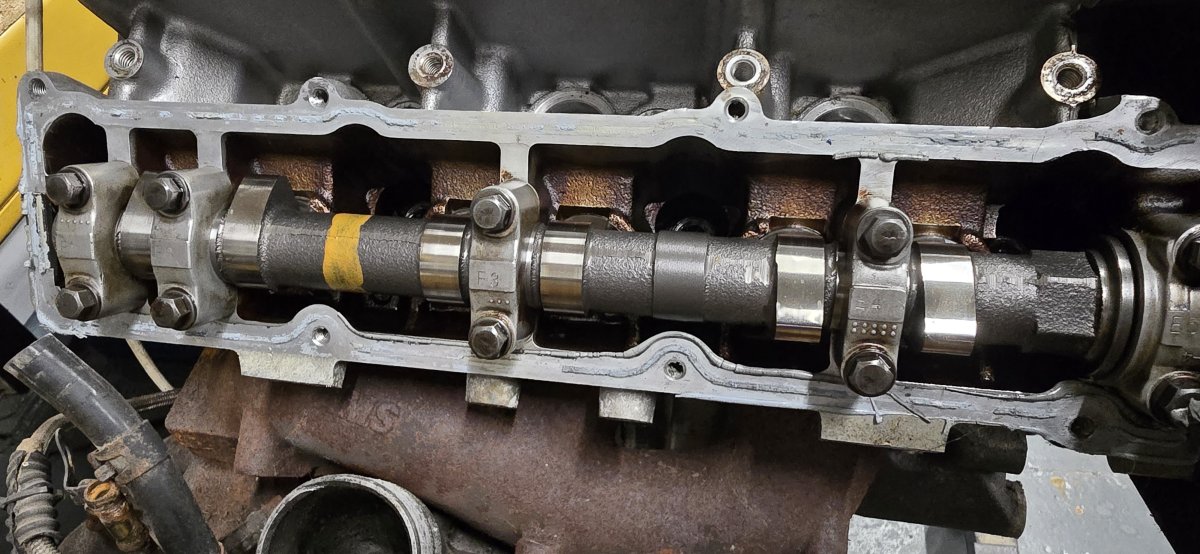
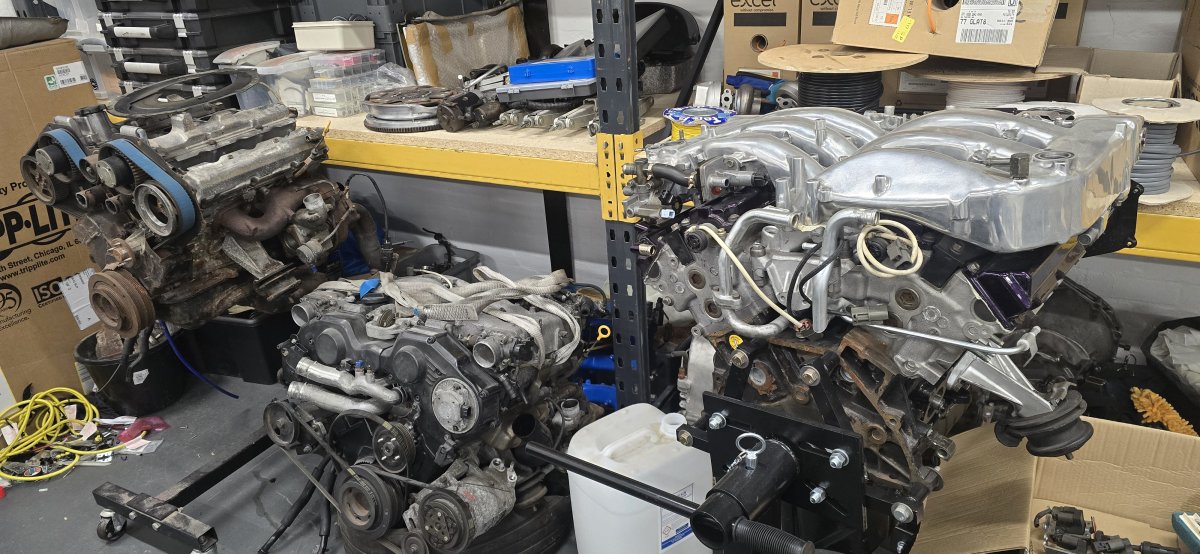
 4 points3 pointsSo as i wait for the turbos to arrive i need to order up a new condenser and dryer. In regards to the engine; its just sitting waiting to be put back in but we are held back because of the turbos. I have 3 engines sitting, 2 forged and 1 stock. I'm also considering replacing the stock cams for a set of JWT's as i have a set in the other engine i own. For the moment it will just have to sit an wait.
 3 pointsTake some time off work this week, so enjoyed the day cleaning and degreasing a variety of parts. Engine block is now ready for painting (hopefully paint will turn up tomorrow). Donor Crankshaft cleaned up really nicely, and pistons and rods are also ready to go. Bloody love Bilt Hamber Surfex HD degreaser, by far best commercial degreaser on the market in my experience!
 3 pointsPARTS ACQUIRED DURING THE MONTH OF APRIL This month I took delivery of two new brake-related parts from Japan. The first was a set of later-model iron Twin Turbo front brake calipers, which I’ve already covered in detail above. The second item, however, is the one I’m most excited about. It has the potential to significantly reduce future servicing time—particularly when bleeding the braking system—provided I can successfully retrofit it to my car. Based on the research I’ve pieced together so far, it should be possible in theory. (Above) The package from Japan containing both brake components. As always, Jesse Streeter and his team did an excellent job ensuring everything arrived safely and undamaged. https://i.postimg.cc/fbNJmRLC/2_Parts_Inside_Box_1.jpg https://i.postimg.cc/YSHhYC9x/2_Parts_Inside_Box_2.jpg (Above) The contents of the package: a set of later-model iron TT brake calipers and a 1994+ ABS pump/actuator assembly. If you haven’t already spotted it in the photos, the “mystery” item is a later-model 1994+ ABS pump/actuator. I purchased it as a complete unit, including all factory brake hardlines connecting the pump to the hydraulic system. Having the original hardlines intact is a huge advantage—it means I should be able to unbolt my original ABS pump and swap this unit in without needing to fabricate or modify any brake lines. https://i.postimg.cc/DzT8LwZP/4_Later_Model_ABS_Pump_1.jpg https://i.postimg.cc/rpkKxwmn/4_Later_Model_ABS_Pump_2.jpg (Above) The later-model ABS pump complete with 2+2 base plate and all original hardlines. These lines feed into the hydraulic distribution box, which connects the pump to the rest of the braking system. The factory part number stamped on the identification plate is 47600-50P00, along with a serial number and the manufacturer’s name, Nippon ABS, LTD. https://i.postimg.cc/wBQ3VYyb/4_Later_Model_ABS_Pump_4.jpg (Above) According to Nissan FAST, part number 47600-50P00 was fitted to both NA and TT Z32 models from September 1993 through to October 1998. As exciting as this purchase is, there’s one obvious issue: surface rust. The unit appears to have been exposed to the elements for some time, and corrosion has formed on several external components. That said, I’ve dealt with similar surface rust before and had good success restoring parts to a respectable condition. The main challenge will be figuring out how best to submerge the assembly in Evapo-Rust (or treat it in stages) to remove the corrosion thoroughly. After that, I’ll need to apply a suitable protective coating to prevent future rust from returning. https://i.postimg.cc/bv9dTfDV/4_Later_Model_ABS_Pump_5.jpg https://i.postimg.cc/HL9j21cQ/4_Later_Model_ABS_Pump_3.jpg (Above) While the rust looks significant at first glance, it appears to be surface-level only. https://i.postimg.cc/vmtDzwxM/4_Later_Model_ABS_Pump_7.jpg https://i.postimg.cc/BvBtgfLy/4_Later_Model_ABS_Pump_6.jpg (Above) A close-up of the five brake hardlines that connect the pump to the car’s main hydraulic distribution box (located beneath the rear center section of the boot). After careful inspection, I found no kinks or damage to any of the lines, which is reassuring. Next, I inspected the electrical side of the unit, including the main wiring harness and the internal relay box mounted on the rear of the pump. Fortunately, there were no signs of corrosion in any of the connectors, and the internal relay box looks to be in near-new condition. https://i.postimg.cc/85kcXXLF/4_Later_Model_ABS_Pump_8.jpg (Above) Research suggests that the three main electrical connectors are identical in location and orientation to those on early-model ABS pumps. https://i.postimg.cc/G23tggvv/4_Later_Model_ABS_Pump_9.jpg https://i.postimg.cc/26jy99nh/4_Later_Model_ABS_Pump_10.jpg (Above) Inspecting the internal relay box located at the rear of the pump. I know some people may question the decision to modify the braking system in this way. Before the ongoing brake-bleeding issues began, I likely wouldn’t have considered it either. However, with no clear resolution to the bleeding problem so far, replacing the ABS pump could potentially eliminate a hidden internal fault. And if I’m going to replace it anyway, it makes sense to consider upgrading to the later-model unit. The biggest unknowns remain: • Can the later-model ABS pump be successfully retrofitted into an early Z32? • If installed, will it function correctly? As far as I can tell, this hasn’t been attempted before—so I may be the first to try this modification on a 300ZX Z32. My approach is simple: if it works, fantastic. If it doesn’t, I can revert to the original pump and share the results with the community so others know whether this path is viable. At this point, based on the information I’ve gathered, the potential benefits outweigh the risks. Worst-case scenario, I return to stock. Best-case scenario, I resolve the brake bleeding saga and gain a worthwhile upgrade in the process.2 points2 pointsUnder the trim circled in blue: In case you don't have the information for the brake bleeding process:
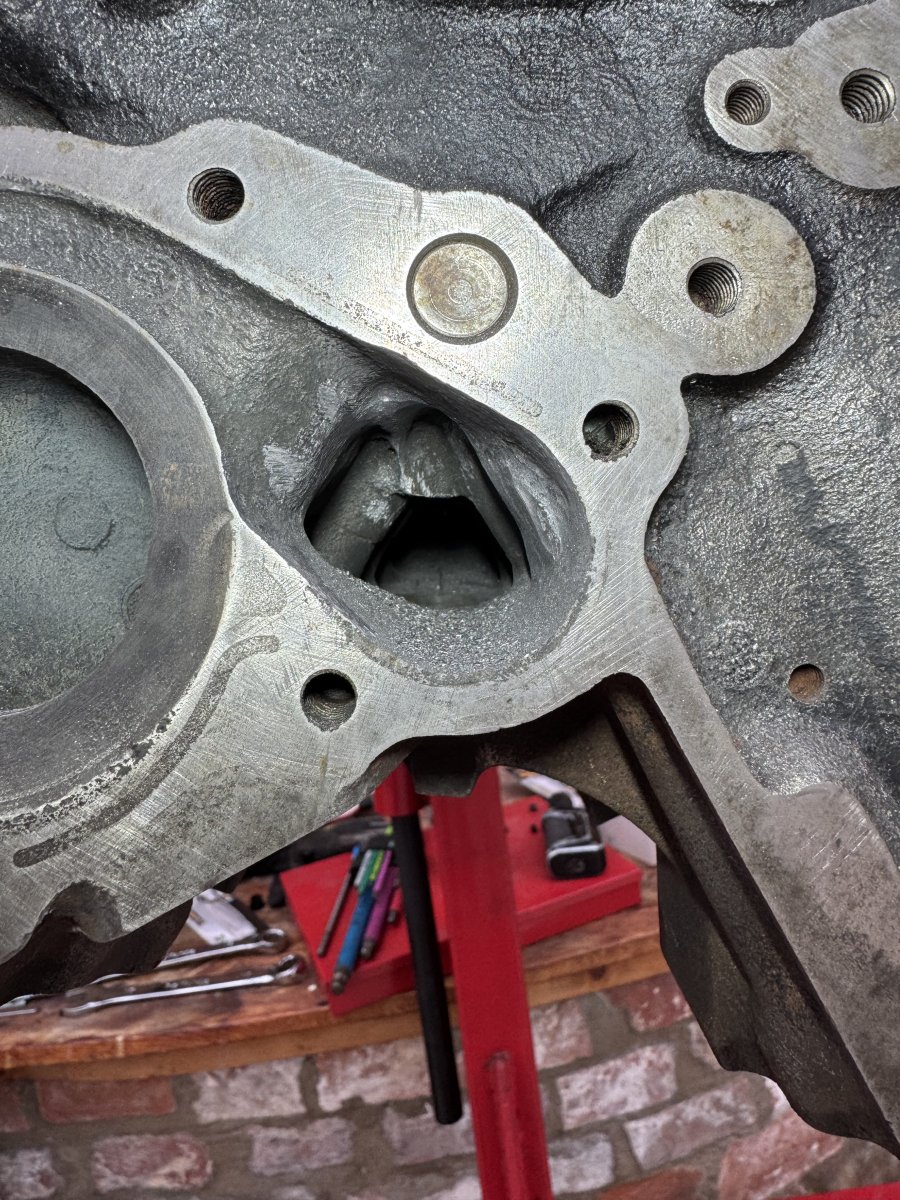
 2 points2 pointsAlso spent a bit of time with the burrs to clear out the casting debris and stress risers from around the bottom of the block around the crank journals. This casting debris is from the imperfect casting mould that leave small sections of iron/sand mix still attached to the main casting. In certain situations, harmonics can release bits of this debris which then has the potential to destroy the bearings, an engine, by being circulated by the oil system. Stress risers are similar. They’re very fine ridges in the casting that can form a weak point. Simple remedy is grind them back flush.
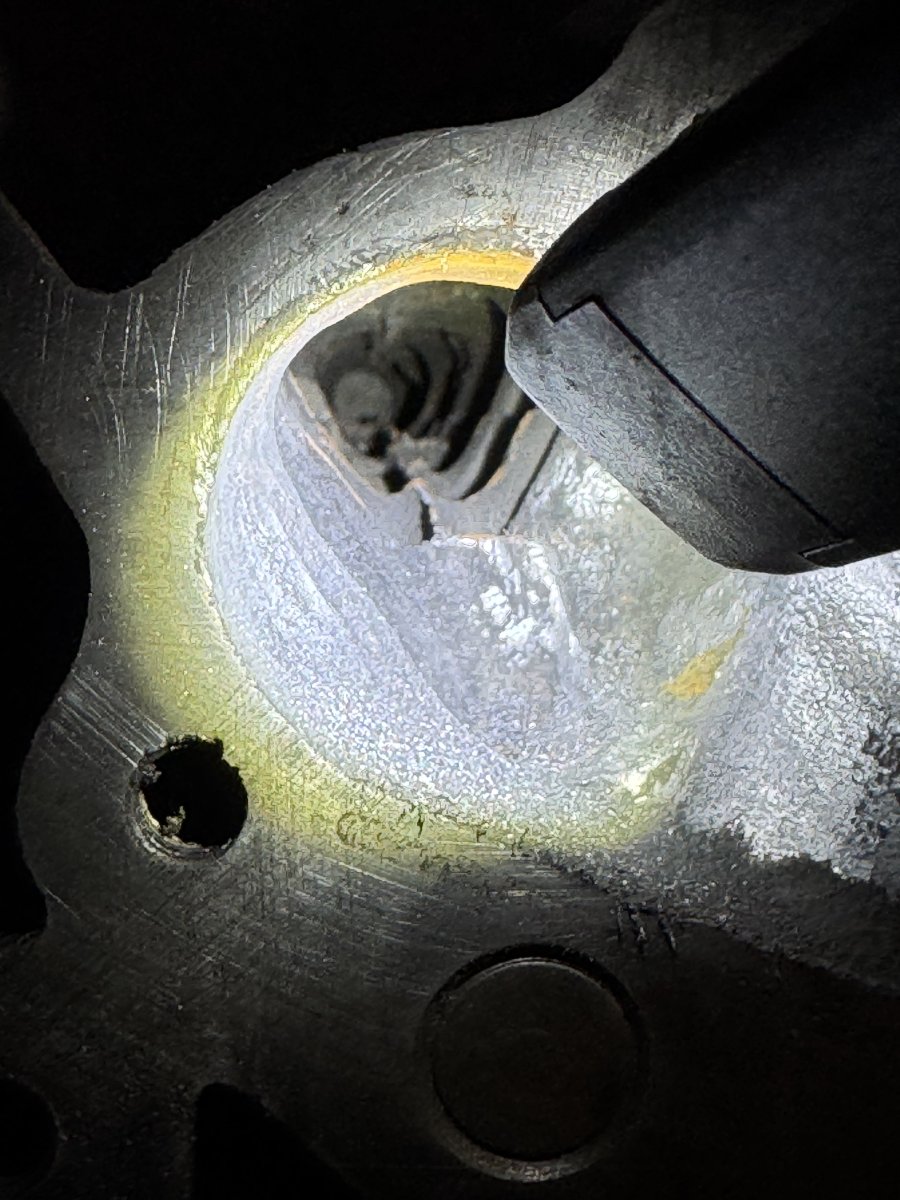
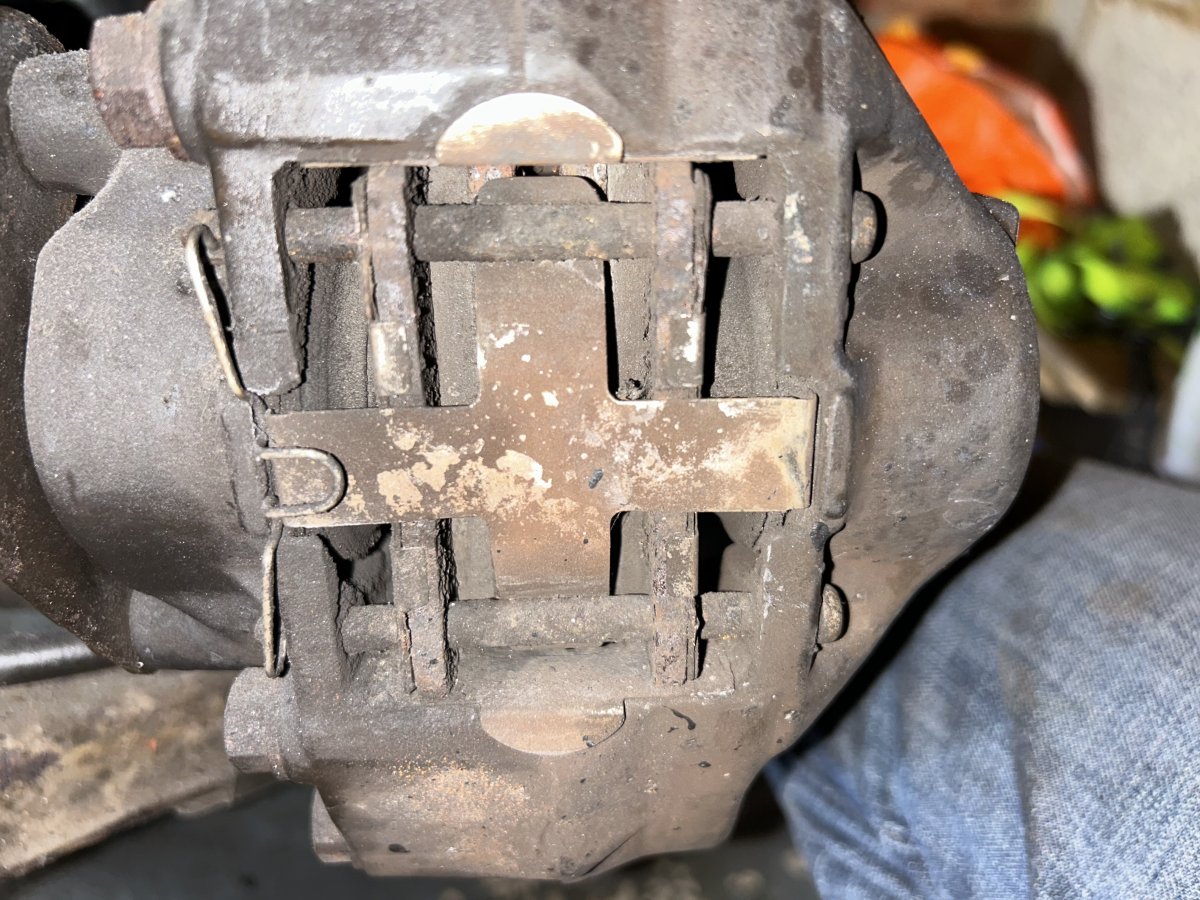
 2 points2 pointsPOLISHING ONE OF MY OEM ALLOY WHEELS Taking a short break from all of the recent brake system work, I decided to turn my attention to something a little more cosmetic — my set of bare aluminum OEM wheels. After sitting for the past four years, they were starting to look tired and dull, and it was clear they were long overdue for a proper polish to bring them back to life. Upon closer inspection, I noticed a layer of oxidation had formed on the bare aluminum since the last time I polished this particular wheel. I was hopeful that a thorough polishing would remove it, but there was only one way to find out. [i](Above) Back in 2007, I purchased a full set of OEM JDM factory wheels from another Z owner who had already stripped and polished the bare aluminum before selling them to me. Around that time, I learned that the USDM models were offered with factory chrome OEM wheels — a look I instantly fell in love with. Unfortunately, here in Australia, none of the OEM wheels available came in that factory chrome finish. So when a polished set came up for sale, I didn’t hesitate — it was the closest I could get to that chrome look, and I jumped on the opportunity.[/i] (Below) A close-up of the oxidation that had formed on the surface of the bare aluminum over time. https://i.postimg.cc/mkxrB7PN/1_Before_Polishing_2.jpg After about an hour of polishing using an electric drill, a buffing cone, and some purple metal polish, the results were immediately noticeable. The dull, hazy finish was gone, replaced by a reflective, mirror-like shine that closely resembles chrome. I couldn’t have been happier with how the wheel turned out. Ultimately, I’d love to have all of my OEM alloy wheels finished in a true mirror-like chrome one day. For now, though, the polished aluminum gives me a close enough look to achieve the style I’m going for — and I’m more than happy with it. It was also a refreshing change of pace from the brake system work I’ve been focused on for the past few months — sometimes it’s nice to see quick, visual progress. https://i.postimg.cc/wMKBgD15/2_After_Polishing.jpg (Above) Although the bare aluminum now has a nice reflective, mirror-like shine, the oxidation hasn’t been completely removed. Even after several passes with the polish, I wasn’t able to eliminate any more of the remaining surface oxidation. Unfortunately, I didn’t have enough time to polish the remaining three OEM wheels, but I’m planning to tackle those soon — ideally before reinstalling the refurbished brake calipers on the car. There’s something incredibly satisfying about bringing old aluminum back to life, and this first wheel is a great reminder of why I’ve always loved the look of polished OEM wheels on this Z.1 point1 point1 point1 point1 point1 pointWell done for giving it a go, things happen but you learn from it and next time will be easier.1 pointBought them from Performance Unlimited. They’re the UK approved retailer. 88mm CP pistons. I had to give dimensions of rings as well as my anticipated power/boost pressure, that TS then matched to their products to spec the rings1 point1 pointBrakes bled! A remarkably easy job! Much thanks to AndrewG for the guide on that one. Something I’ve always wanted to do so I’m pleased. Very nearly messed up big time though! I wanted to test the brakes were working properly, so had engine running and got wheels spinning BUT I don’t have any wheels on the rear and I hadn’t put the nuts on the threads so the discs started to move! Made a horrible noise, so I stopped quite quickly but have done some minor damage to the discs. School boy error that but you live and learn! Should be fine for the MOT, but I will buy some new ones and swap them out to be safe1 point1 point1 pointPaul Bailey was a local here in Bristol. His " chop shop" got raided & he vanished into obscurity after.His lock up was full of stolen 300s & it was well known locally he was a rogue.He had some good publicity in his time with one wide arch yellow NA being featured in Max Power magazine. I have encountered several people who knew of him back in the day.Nick @ Tomorrows Classics in Charfield knew of him quite well & may have painted some of the cars if i recall.As for any value i would say very little being honest as most people seek to return cars now to a more oem look.Get some pics up though as we all love a bit of nostalgia.1 point1 pointWell I got my block back from OCS last week and have started on the block prep for deep clean and assembly first job was to clear the excessive casting flash in the centre coolant channel and smooth the entry point out. Out came the long shank tungsten carbide burrs. A small but positive improvement
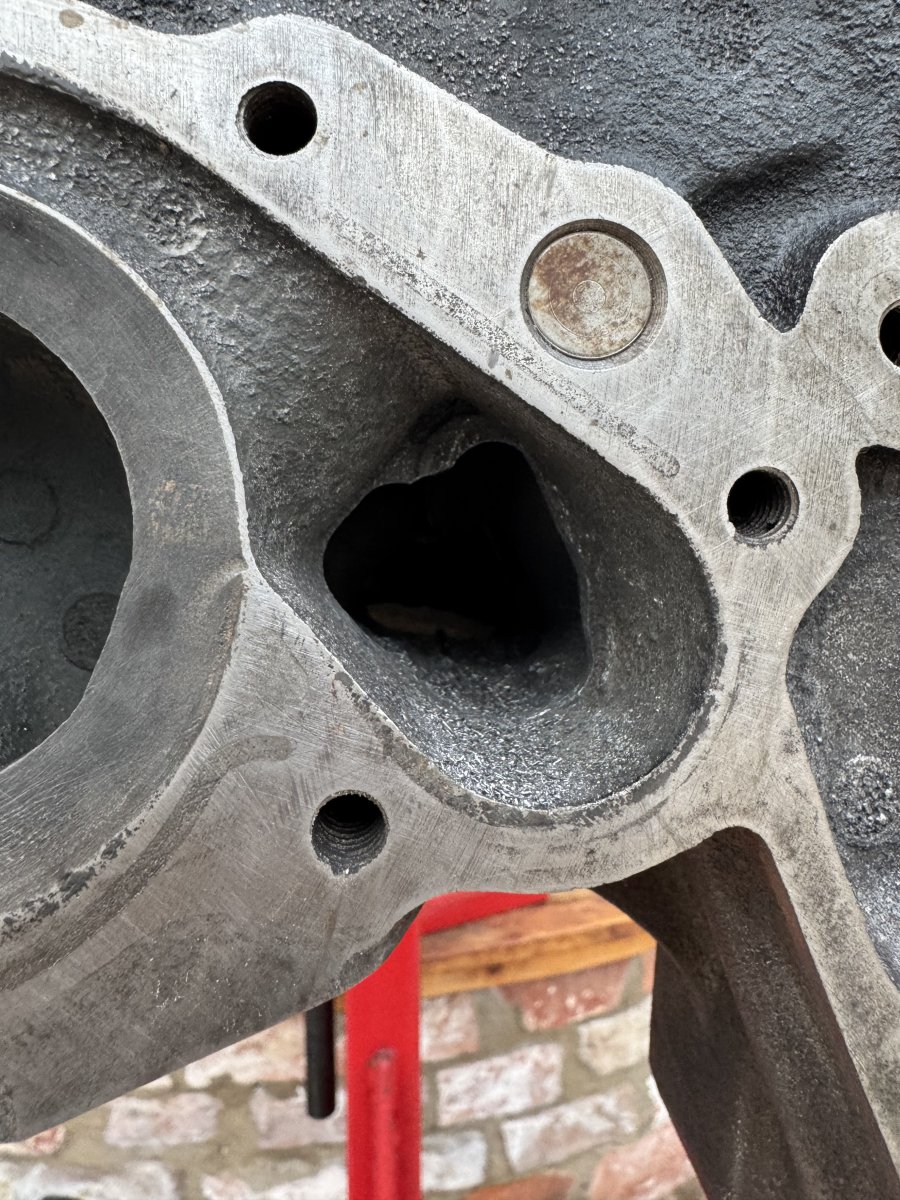
 1 point1 pointNice to see all those upgrades make it onto the car, congrats!1 point1 point1 pointHappy belated Birthday Richard,I hope Julia treated you like a lord for the day 😉1 point1 pointThanks folks....! Just got home from the pub - we're enjoying the day with a drink or two....🍺🍷🥂1 point1 pointAwesome - my favourite Zed in the club just got better......🤩1 point1 pointShe looks a picture Andrew & i am so glad you approved of my subtle dress up bolts & satin black enhancements.1 point1 pointHi Joel - and welcome back! This is the main relay - they are NLA from Nissan so it might be worth buying another to swap, just to confirm whether it's the problem. NISSAN 300ZX Z32 TWIN TURBO VG30DETT WINDSCREEN WIPER RELAY MODULE | eBay UK Failing that, it could be the switch itself; you may need to replace the LH control pod. Richard1 pointHi and welcome back..... ....And glad you prefer the forum format to the FB-group, it's nice to hear that!! I am sure you'll find the driving experience will live up to the reality. I never tire of driving mine; despite having owned new sports cars alongside my Zed over the years, the Zed still feels great in comparison and always puts a smile on my face. Good luck in your search for one - I'd say follow Jimmer's recommendation, if you want a nice one.1 pointWelcome to the owners club and hope you find a nice 300zx.1 point1 point1 pointNow i have to strip out the old oil cooler and hoses from the purple zed.
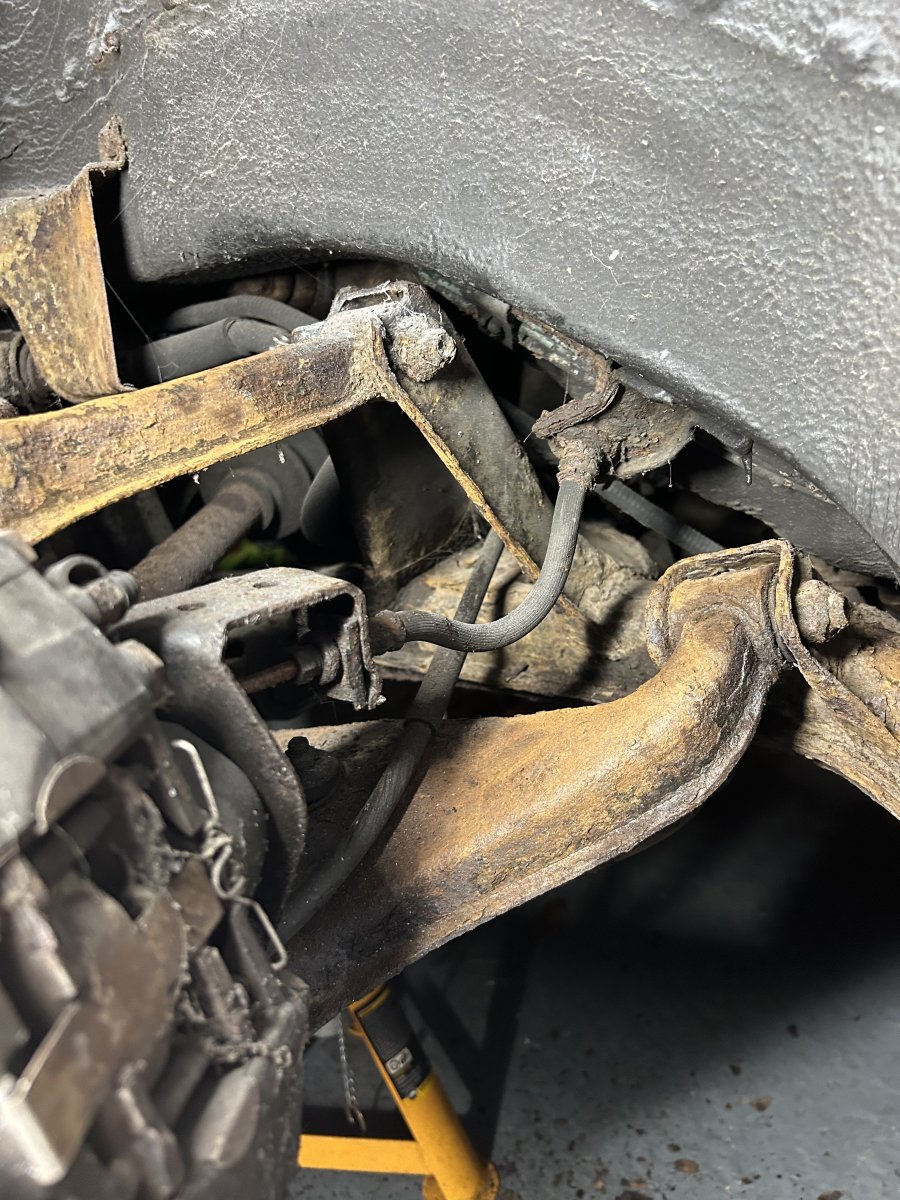
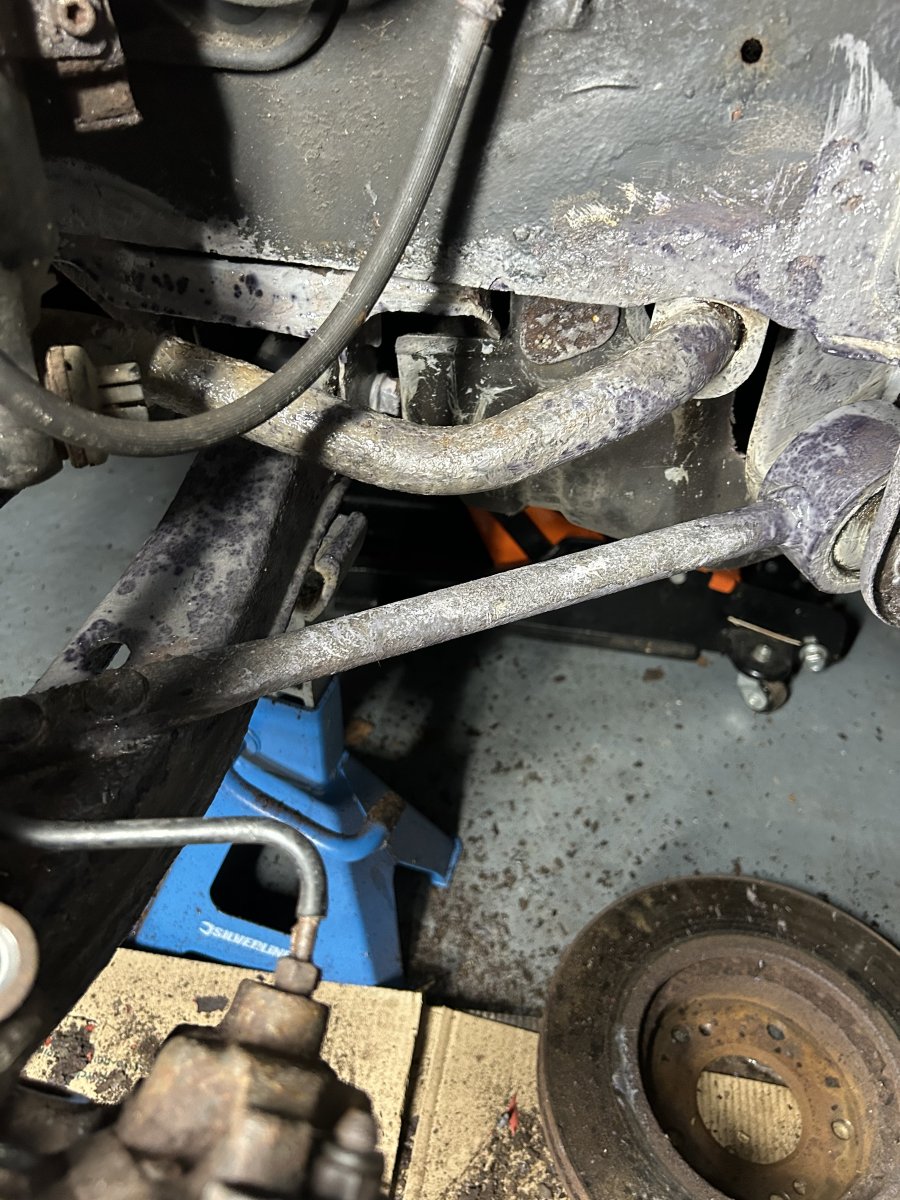
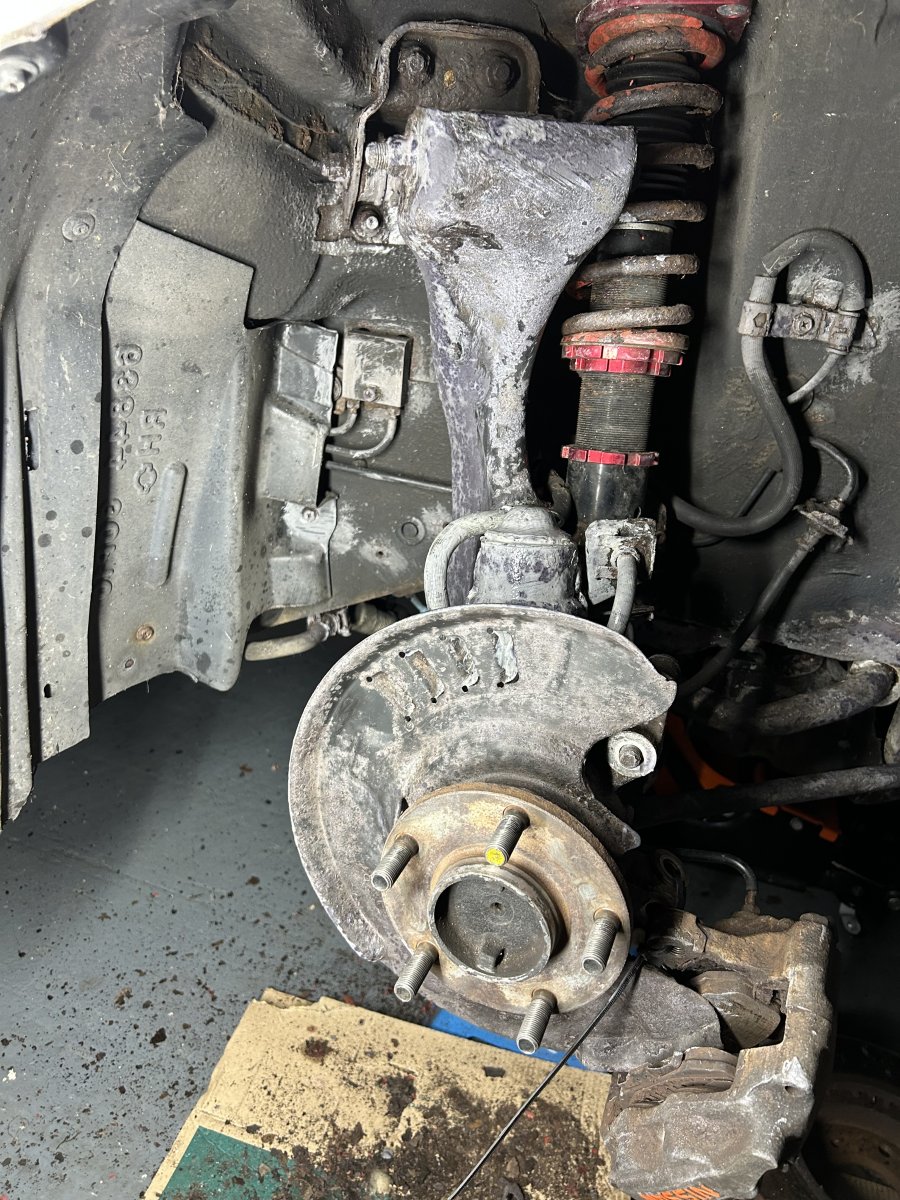
 1 point1 pointMade some progress today. Cars up in the air, wheels off and I’ve been cleaning up the suspension and steering components. Wire brushed, used jenolite rust remover, then some rust neutraliser and then I’ll hammerite it. I think at some point in the future I’ll get it all done properly but this’ll really clean it up and prevent any more rust (mostly)!
 1 point1 point1 pointTrying to bring a once, race / track 300zx back to life. Not doing as much work now as the garage is bloody cold. But I have recently fitted new Tein EDFC active dampers , slotted brakes discs and yellow stuff pads. Now repairing brake lines that run inside the car. Next just is to repair and spray a bumper, also fit intercoolers. I have a ZF 8HP gearbox I am planning to use as a sequential box (not for the purists I know, but i would never buy a car i can't modifiy, it's in my DNA) Rebuild ing a small block chevy, although I do have a single turbo heavily modified 300zx engine that could go in. I also need to get a prop made. All this will keep me busy. Unique features of the car: One piece carbon fibre detachable roof, carbon fibre tailgate for 2+2, carbon fibre bonnetand light panel, polycarbonate windows, FIA roll cage, internal fuse and breaker box to run all car electrics from just need to make a loom. Race battery, brake bias controls. Slightly wider wheel track due to suspension upgrades. Bumper sprayed and provisionally fitted, chin spoiler and fog light ducs to be added. Most electrics have done.


.jpg.d3c6e630f0522795f278d82dafe7eaa2.jpg)
.jpg.f71bed016e6db18f877db56169ba342c.jpg)
 1 pointGrafting underneath at the back end making everything look pretty!
 1 point1 pointA few weeks ago I took a short trip with my club over to Europe for a double header -an evening session at The Ring followed by a full open pitlane trackday at Spa. It was quite an eventful few days but an absolute blast from start to finish! We caught the shuttle early doors on a Weds and drove straight to the Ring with a brief lunch stop somewhere in Belgium. The tourist session at The Ring was only from 5.30pm-6.15pm as the track was closed for testing all day. Fortunately the weather was dry and because of the late / short nature of the session, it was very quiet. This played to my advantage as I’ll describe later on! Driving as the sun was setting was immense as you get to experience a totally different side to the Ring. The views are spectacular and it feels very special. Fortunately the Ring-side photographers were still there so I managed to get some awesome photos of the car going around. With a lap taking somewhere between 11-12mins followed by a brief stop in the DEvil's Diner carpark to let both myself and the car cool down, it was s squeeze but I managed a total of 3 laps within the 45min session. As the saying goes, "quit while you're ahead" and I really should have. The first two laps were very comfortable but I pushed to get in a 3rd with one of the other guys in his Ferrari 360. Usually the two to push each other the most, we went out together and I even carried a passenger with me. Ironically joking about the need for a helmet (it's not mandatory on the Ring...we chose not to) and pushing the car and myself harder than I ever have on any of my 25+ previous laps of the Ring, the inevitable happened.... WhatsApp Video 2025-04-19 at 10.12.58.mp4 Going into the corner which I've never had a problem with before, I realised I was carrying too much speed and lifted off slightly. A BIG mistake which caused liftoff oversteer at around 90-95mph. It didn't feel like there was a lot I could do once it started going as the rear end was light as a feather but I did automatically start trying to counter with the steering and intermittent braking. Not sure if any of that was the right thing to do but as you can see, I managed to complete a full 720 spin with the car back on the tarmac, facing the right way and able to simply keep driving. Someone was definitely looking down/over me that day!! Having gone over 2 kerbs and 2 sets of grass, the only damage to the car was my brand new front splitter getting ripped clean off - if you look closely you see it waving goodbye to me as it flies off into the distance 😭 The car had a vibration as I finished the lap but this cleared once I hosed the car down later that evening so most likely just debris caught up in the wheels and brakes. One of the guys shared the below video with me a few days ago which is of an AMG GTR doing the exact same thing in the exact same spot but with quite a different result. It's not lost on me just how lucky I was and certainly a lesson in humility learned. https://www.instagram.com/reel/DIXoagYphMo/?utm_source=ig_web_copy_link&igsh=MzRlODBiNWFlZA== The following day the group spent the day touring the back roads around the Ring and the Black Forest. Unsurprisingly I stayed at the back of the group and often got left behind! There was no way I was going to be pushing the car so soon after what happened! We headed to Spa that evening and stayed at Hotel Le Source, with direct bedroom views of the track..all very exciting! The following day we headed to the pits where we had 2 garages reserved for our group and a dedicated instructor. I was feeling very nervous but the sun was out, the track was wide and I promised myself I would take it slow and build up through the day. It ended up being one of the most perfect days of driving I've ever experienced! This was the first F1 track I've driven and the difference in quality is insane! The tarmac was like silk, the marshalling was perfect, track time was maximised, the pit lanes where the F1 cars hangout felt like being on a movie set... Although a bucket list day, I would 100% go back again for a trackday at Spa. It's easily driveable for a day (+1 overnight) away. For anyone considering it, my advice would be to just do it. You won't regret it! I've been back home for a few weeks now and after washing and cleaning the car, I've not taken it out. There are a few jobs I need to get going on with it: source and fit a new front lip ☹️ remove and refit my new PowerTrix side skirts as they were fitted as a bit of a rush job before the trip and not done quite correctly get the engine checked out as there was a little blue smoke at times under load from the left bank..possibly turbo seal on the way out? using a dial test indicator on my hubs to check for runout. The discs are true as are the wheels but I still have the vibration. I want to check the hubs and change the tyres (was waiting til after this trip to get new rubber) and failing that, I think it might be time to start renewing the suspension components Before the trip, I fitted a front lip sourced from Luke at ZCentre and I replaced my factory 99spec side skirts with some new PowerTrix side skirts. I never really liked the 99specs as they looked a little dated and 'fruity'. Hard to explain but I much prefer this new look. As always, I've posted a few recap reels on my IG which you can checkout if interested: https://www.instagram.com/p/DHpBCFbC-XE/ https://www.instagram.com/p/DHrirh_iG9j/ https://www.instagram.com/p/DHzHs3LN1QY/


.jpeg.c9455063a1fc68169755bc47a79b2906.jpeg)


 1 point1 pointChalked up another trackday this past week with an open pit lane at Thruxton, the UK's fastest circuit. I have driven Thruxton before but not in my own car. After the success at the Nurburgring, I was excited for the day. Even more so as I had new tyres fitted and was eager to see how they would perform - Continental Sport Contact 7s. I was also a tad apprehensive as it would mark the first test of the gold LMs which I had personally rebuilt....it was hard work putting images of self-destructing wheels out of my mind!! Thankfully the day remained dry throughout and was quite warm from mid morning. The Zed wasn't the fastest on track but I received an awful lot of comments from spectators about how good it looked out on the tarmac! The trackday photographer also seemed to be taken with it as the online photo album of the day showed (some of his photos below). I'm happy to report that I'm still not hungry for more power or speed - the stock engine with boost jets feels wonderful. The car is ever nimble. Still has more body roll than I'd like on track but I'm not planning to do anything about that just yet. Thruxton is very easy on the brakes with only 2 braking zones so no concerns there with the judder I experienced at the Ring - which is good as I totally forgot about my plan to slip in some track pads for the next track day! I definitely do need to decat the car though. It was far too refined! . . . .


 1 point1 pointLast weekend, I finally went on my long awaited trip back to the Nurburgring. I’ve been a few times before but always opted to take a rental on track versus taking my own car, driven mainly by insurance cover limitations. This time I was planning to get my own car on track, albeit I planned to drive quite calmly and with my right indicator on the whole time! We drove down very early on Friday morning, straight to our hotel a few miles down from the Ring with a brief lunch break in Belgium. It’s always such great fun driving in a pack, especially through Europe where drivers are generally so much better at understanding lane discipline! After checking into the hotel, we tried to get to the track but unbeknownst to us, that weekend was a long weekend in Germany as a commemoration / remembrance of the Second World War so traffic was crazy as every German with a BMW decided to visit The Ring! We didn’t get anywhere close so quickly bailed and went for dinner instead! On Saturday, we had planned a morning of spirited driving through the winding hills and forests around the Ring. We set off very early and enjoyed lovely empty roads. All the cars performed beautifully and it really got us all in the mood for the weekend ahead. After a stop for lunch in Adenau by the Ring, we headed off to do some karting at the Ring centre. Great fun on any occasion, even greater fun with a group of good drivers where a second split 1st to 11st driver! After karting, we were free to do what we wanted so I took the opportunity to get some laps in on the Ring as a sort of sighting lap ahead of the main track day on Sunday. It will probably come as no surprise that after a warm-up lap, the red mist descended in the green hell and I was pushing the car to its limits (vs taking it easy as I'd initially planned!). Thankfully the weather was clear, hot and dry and the car performed brilliantly over the 2 laps that day. We ended the day with dinner at Pistenklaus, a firm Ring favourite. Sunday was the big day - no plans except laps, laps and laps of The Ring! Another very early start to get ahead of the traffic and in total, I managed to get in 5 laps throughout the day. I played around with the adjustable shocks to firm up the suspension (something I had forgotten to do on my previous visit to Snetterton) and the results were remarkable. The car handled very well and the back only stepped out a handful of times when I got a little too eager on the exit. One component which did disappoint but probably shouldn’t have been a surprise were the brake pads (or my assumption it’s them). A lap of The Ring is almost 13miles and 154 corners but after the first lap, I started getting judder on hard braking. Initially it would present towards the end of the lap but with each subsequent lap, the judder would present earlier and earlier. This despite letting the brakes cool for 20-30mins after each lap. All the brake components were brand new prior to the trip and there was no fade so my thoughts are it’s the pads - Brembo HP2s which aren’t a track pad and perhaps couldn’t take the repeated abuse. It was disappointing as this was the only limiting factor in being able to push the car further than I had been…and it certainly felt capable of more! For my next track outing I think I’ll source some track pads to pop in and see how I get on. As for other improvements / new parts following the trip, I hadn’t replaced the tyres before the trip and probably should have but I definitely will be now. I’m keen to get a slightly bigger sidewall and believe I can go wider than I have today with my LMs. Otherwise the shopping list just has the thicker ARBs and a decat as the car definitely needs to be a little louder, especially if I continue rolling with the same group of mates! Monday saw another spirited drive in the morning up to Cologne and the Motorworld museum which houses the Michael Schumacher personal collection. A fairly interesting site, not too dissimilar to Bicester in its feel and habitation by car specialists. This is also where you can stay at a hotel where your car sleeps by your bed. It looks a LOT better on social media than in real life. After lunch there, it was a sprint back up to Calais and the train home. Overall, the trip and the car were fantastic. I never had any occasion to doubt its health or ability to perform and really can’t wait to get out in it again on another long trip or track day. The recent improvements of the brake setup, the digital boost gauge and the stereo setup were all absolutely perfect (except for aforementioned pad judder). I was planning to visit Anglesey in June but unfortunately that event has been postponed til August and I’m no longer able to make it. The hunt for events is underway…. Obligatory photos for your enjoyment... . . . . . . .


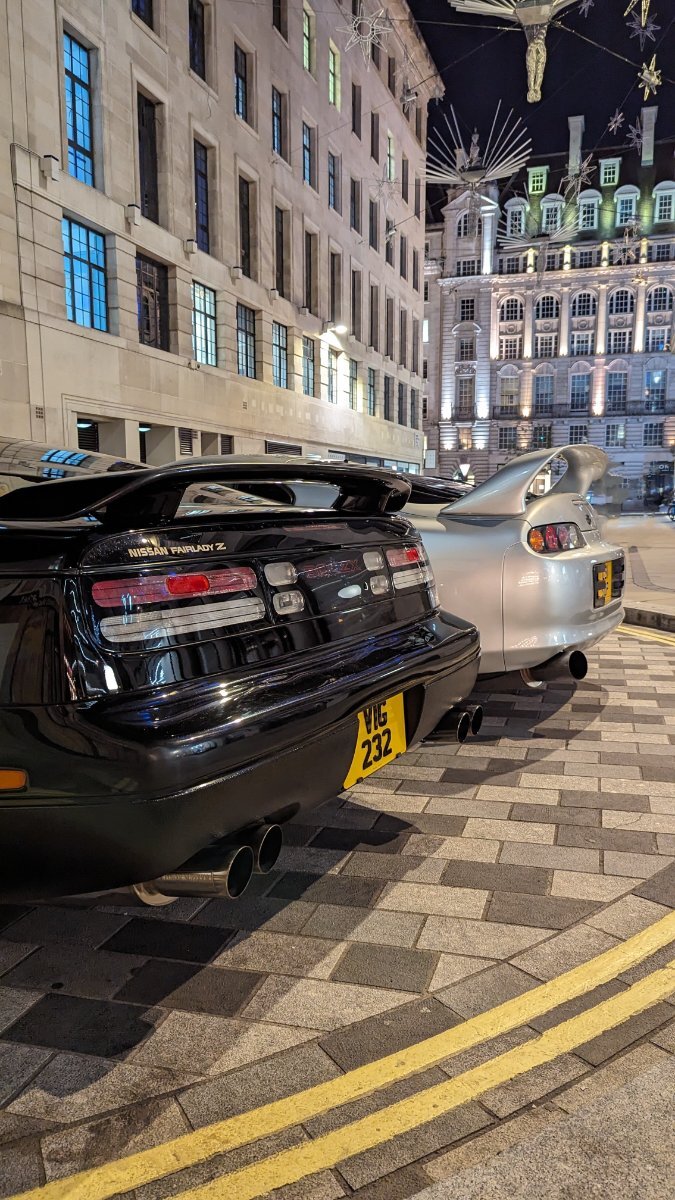
 1 point1 pointNo new work to the car but I had the idea of organising a 90's JDM photoshoot recently so with a little bit of networking, I managed to locate a '91 NSX, a Mk4 Supra and a RX7 FD3 along with a very well known automotive photographer and this past weekend we headed into Central London for out shoot. The final edits should be released in a week or so but here are some BTS shots I took. The cars travelled in convoy from one location to the next and drew a considerable amount of attention from the tourists and public that were out and about. It was great to see and experience! . . . .


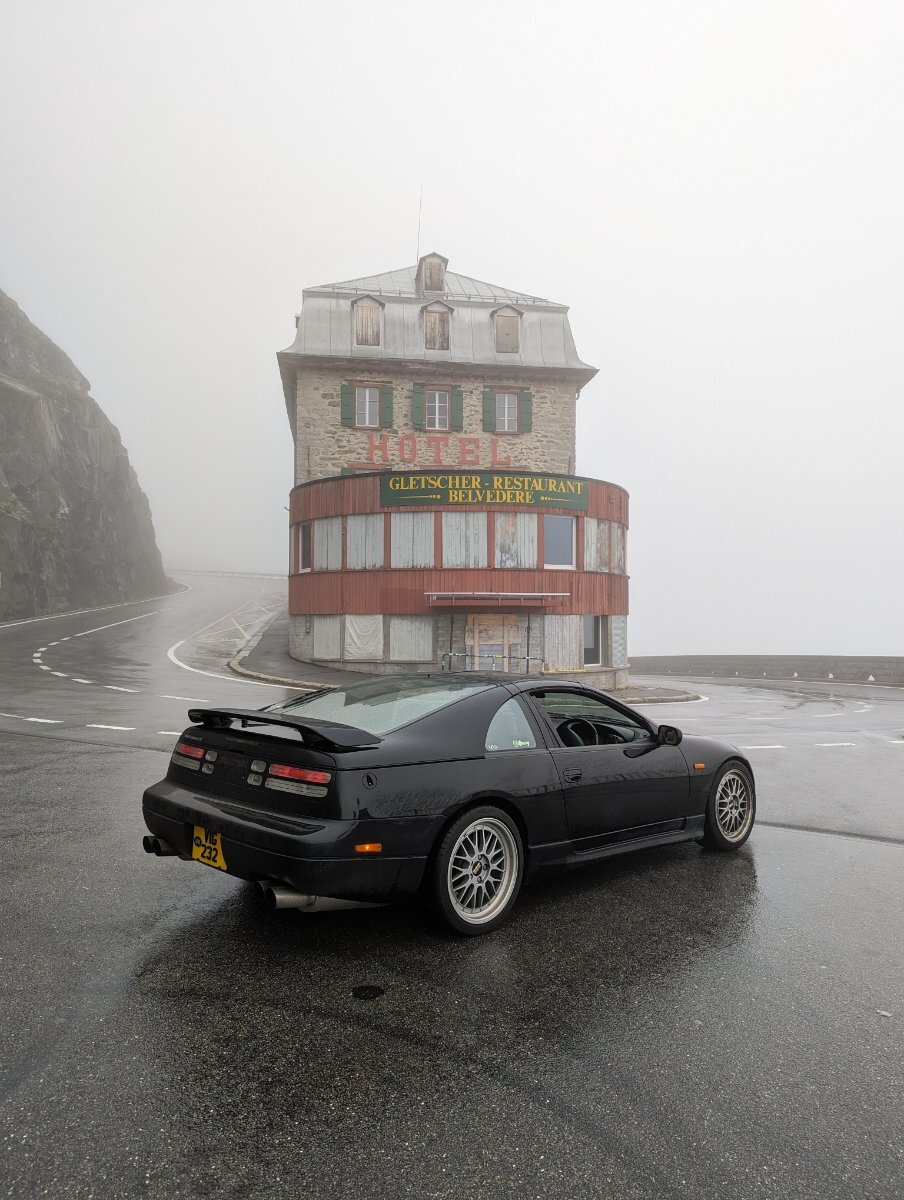
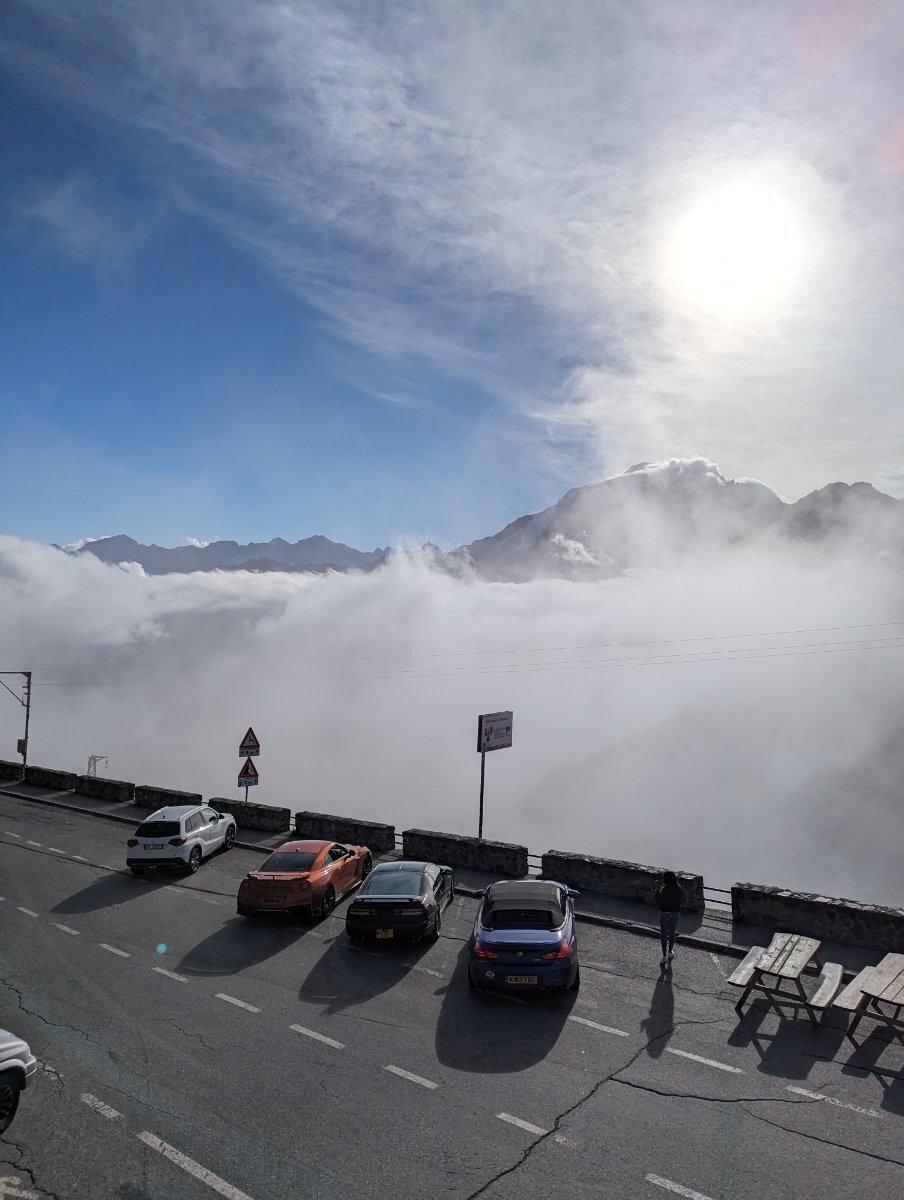
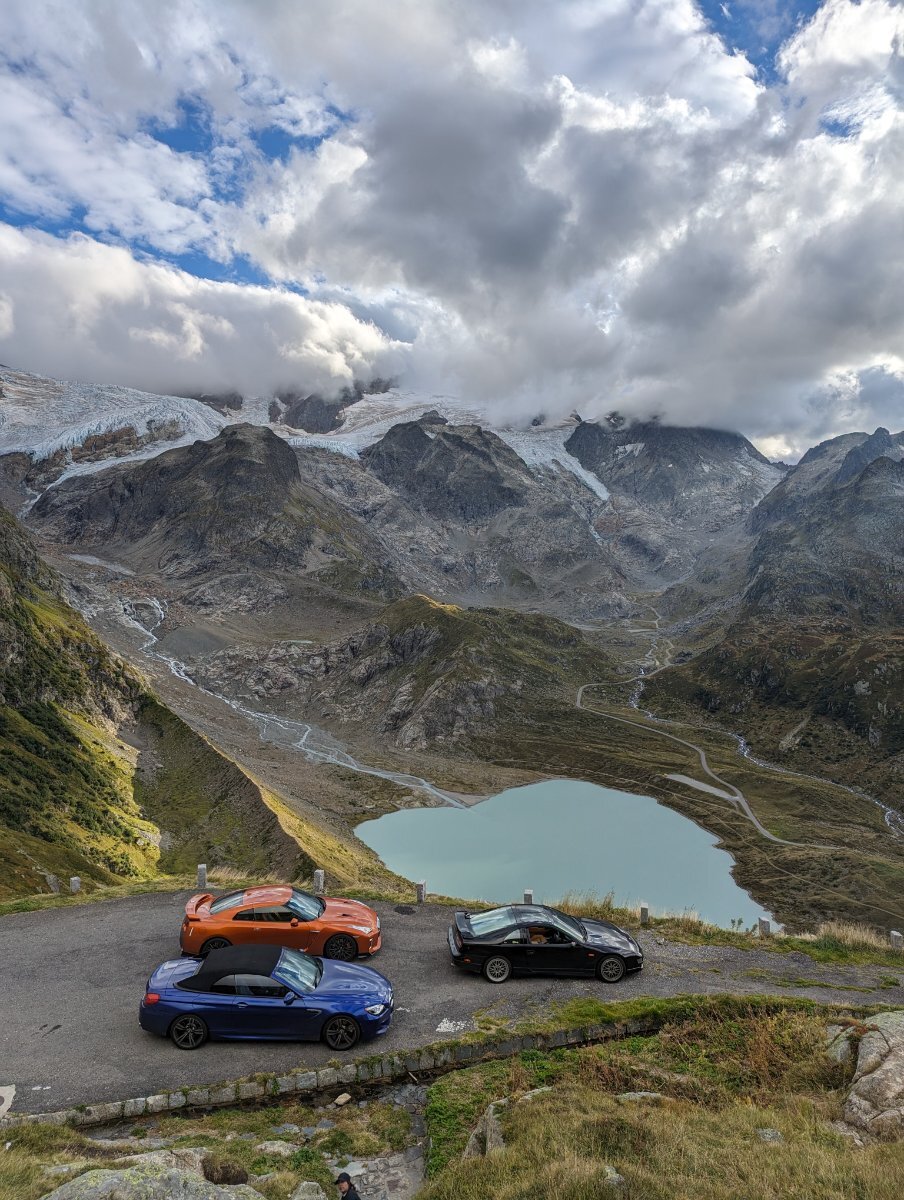
 1 point1 pointFresh from my 5day and almost 1700mile trip to Switzerland, my overwhelming takeaway is that the 300zx, even in near stock form is an absolute delight to drive (and drive v v hard!). I went down with a modified R35 GTR and a stock V8 M6 which meant on the straights and motorways, I was nowhere near being able to keep up on pulls but once we were on the Alpine passes, it was a totally different story! The lower power and lighter car, the 300zx was incredibly nimble and at reasonably high speeds. The car never once stepped out on me, even in the wet (except when intended for some cheeky sideways action)! The only problem was a tyre blowout on the first full day due to hitting a rogue rock which had rolled across the road. A huge annoyance which almost ruined the trip and the day but we managed to salvage and get a replacement fitted the same day. It did however damage the rim slightly and I have a very small leak as a result but this didn't cause any issues for the remainder of the trip so I'm not rushing into an urgent fix but am considering binging the refurbishment f the rims forward in my plans instead. I think I may upgrade the brakes at the same time. The only thing stopping me from getting a BBK previously was that the ones I was thinking of wouldn't fit under my 18" LMs but if I'm changing those anyway, then I may as well hange the brakes now too. I'm quite happy with the power but may also sort out an EBC and get it installed and mapped (and the 115mph limit removed!!). There is so much I could recount but most of it is documented on my IG - I'll include some links below with some of the best photos which sum up the trip. https://www.instagram.com/itsmrvig https://www.instagram.com/reel/CxWLqYdtQj9/?hl=en https://www.instagram.com/reel/CxY1xlstQvA/?hl=en https://www.instagram.com/reel/CxbfKsjt4Wq/?hl=en https://www.instagram.com/reel/CxgsQgkNl3r/?hl=en https://www.instagram.com/reel/CxjUAf2NS4O/?hl=en Grimsel Pass Furka Pass San Bernadino Pass Zernez (next to our hotel or the night) . Stelvio Pass Top of Stelvio . Gotthardstrasse (just outside Andermatt) Susten Pass . Susten Pass around Golden Hour Arch Dam - Lukmanier Pass - it was blowing an absolute gale so the drone was really struggling. The videos have come out better than the photos .
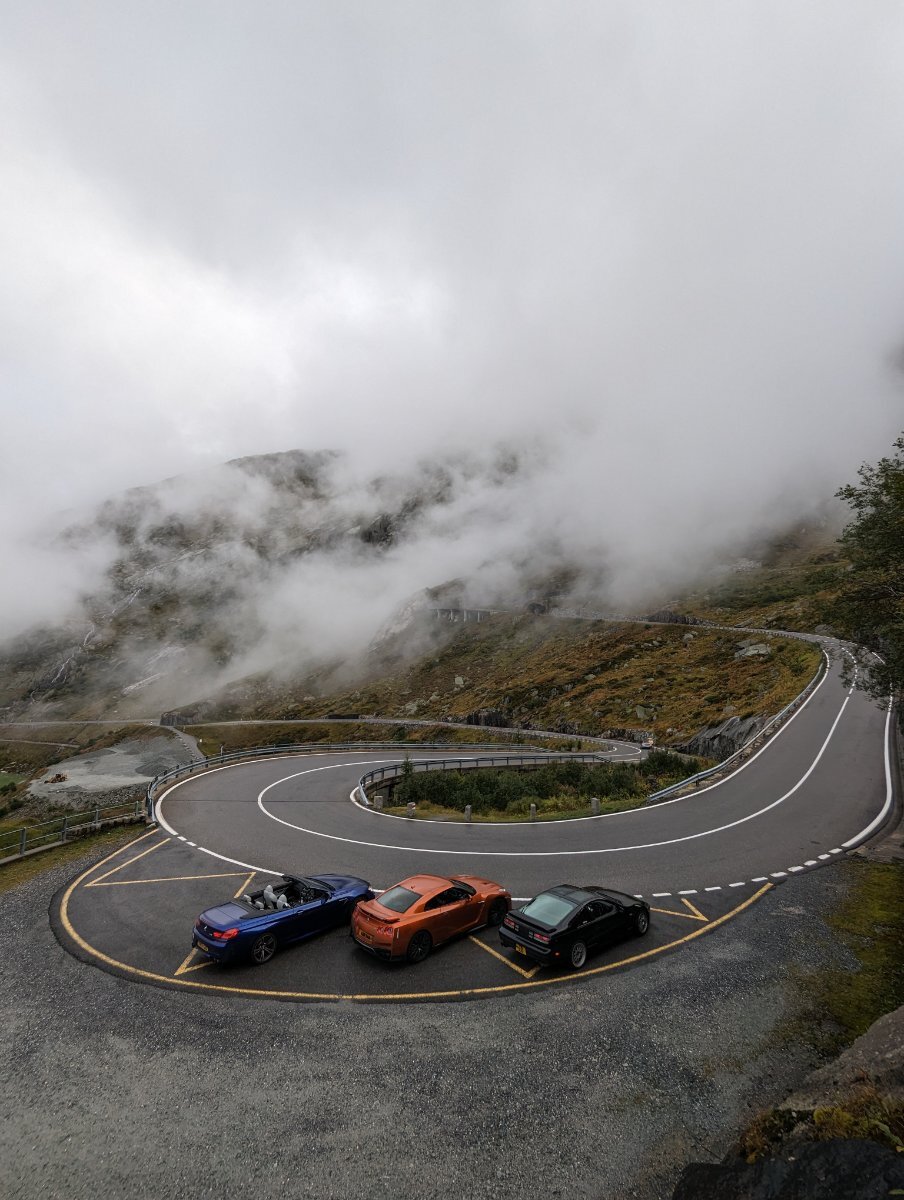


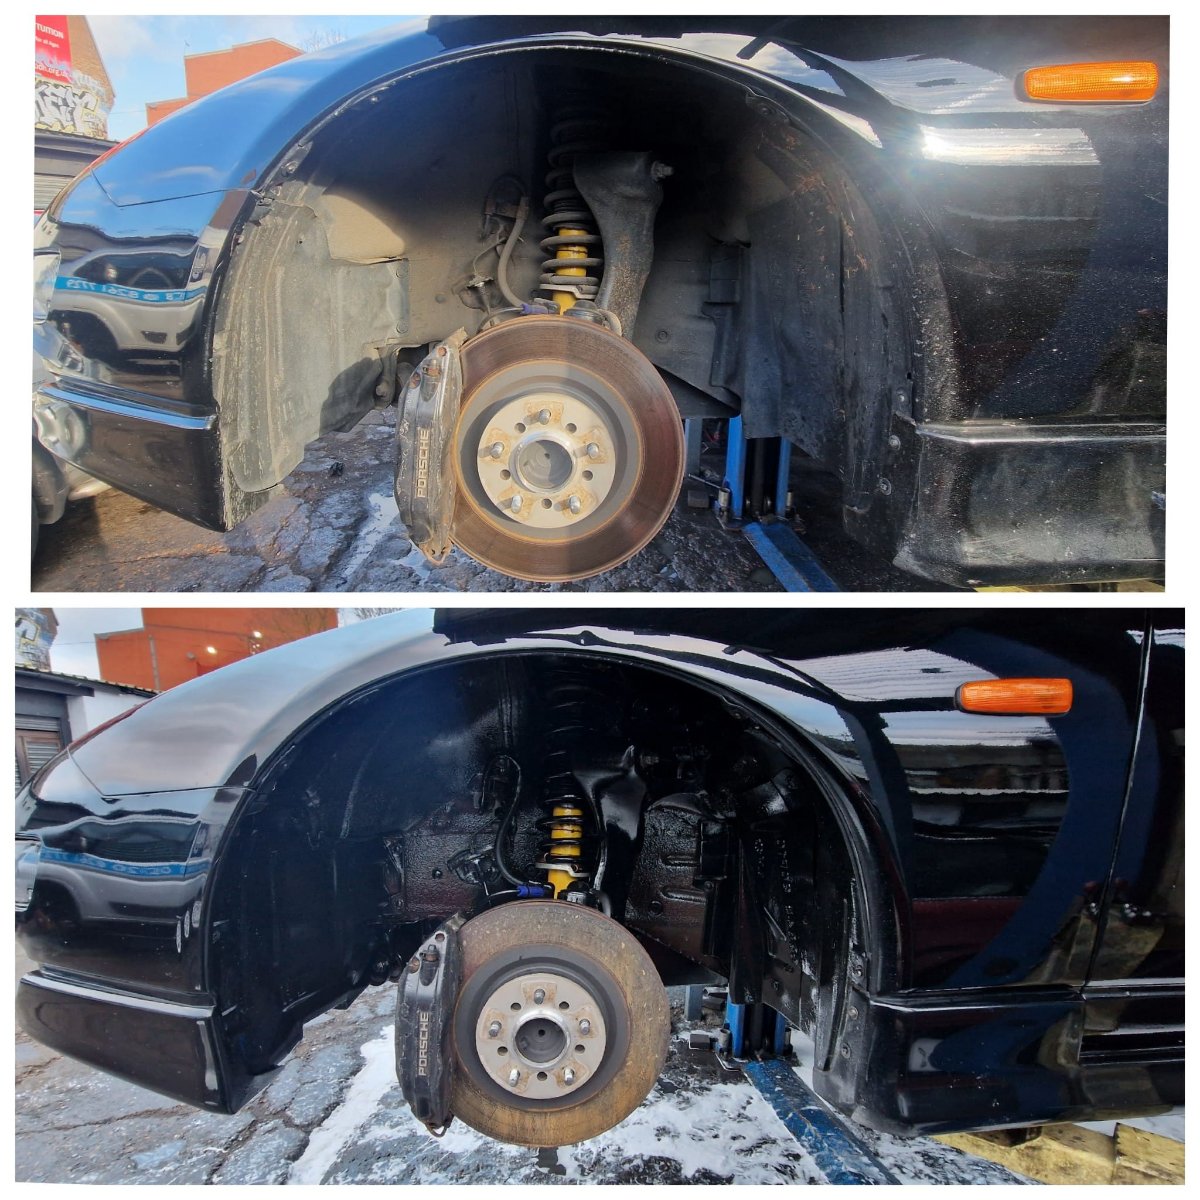
 1 point1 pointI cant tell you how many times I have taken an interior in and out of a zed. I swear I could do it blind/asleep/telepathically1 point1 pointI'm not sure if the docs detail who owned my car...they might but it's all in Japanese! I had previously posted on the forum to seek people's thoughts on Lanoguard and the feedback was mixed but less in favour compared to the usual alternatives. Not to intentionally go against the feedback, I recently had the car cleaned and underbody treated with Lanoguard by a local chap I've recently met via another car club I'm a member of. The level of service was fantastic including a home drop-off/pick-up, a free exterior detail and even resolving some issues with the paintwork which we suspect were due to previous detailing faux pas', again free of charge! Here are some before/after photos. He confirmed that there was no visible rust anywhere underneath but he did spot a small amount of surface rust where the tailgate shuts - hopefully something I can touch up without it looking too obvious. He also was able to confirm that I do indeed have Bilstein shocks...B6 Performance to be precise!


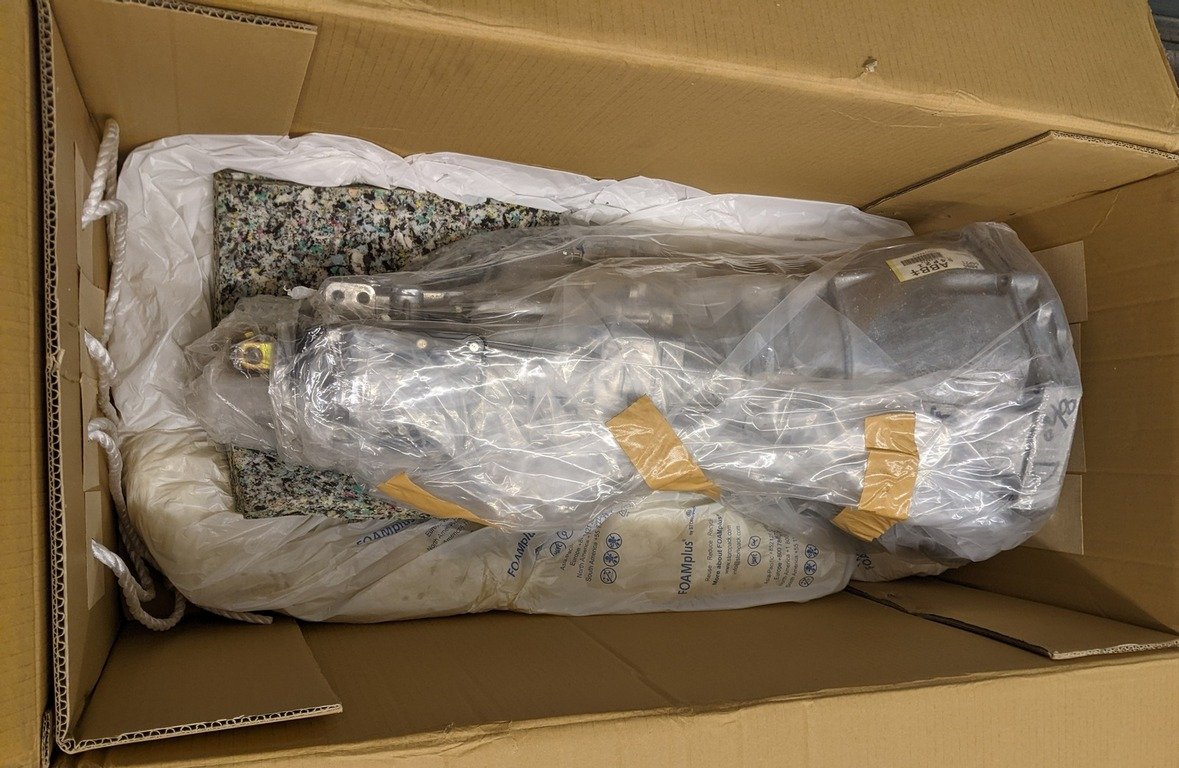
 1 point1 pointA bit of a delayed update unfortunately as I’ve been a bit busy with life but…I now have a MANUAL 99spec 300zx! What a difference an extra pedal makes to the satisfaction of driving! The last time I owned a manual in any car was with my previous ’90 UK and the only times I’ve driven a manual since then has been on small rental on holidays. Whilst the car was with Jim, it underwent a full 60k service, new fuel line clips (in light of that first leak on Day1) as well as the manual conversion and a general all-over inspection (remembering that I still was not fully aware of the condition of the car since buying it ‘blind’ at auction). There was fortunately no issues with the service or the manual conversion but Jim did detect a faulty O2 sensor during a post-work test drive. Jim believes that the car would have been down on power with the auto box as a result so the combination of replacing this and the manual conversion giving instant response meant that the car felt totally different on the drive back down from PowerZed! Condition-wise, I was very happy for Jim to report that there were no issues at all to be concerned about. The car hasn't been fettled with, is rust free and a very clean example. This above all makes me so happy I went for the import option but I appreciate that it could have very easily gone the other way too! As far as parts go, I wanted to go new but unfortunately some were NLA so no choice but to source used for a couple of them. I did however fit a brand new ’98 spec manual transmission with a JWT clutch which I understand should be able to manage any power increases I go for in future. And now for some photos! Dropping the car and parts off with PowerZed (big thanks to @AndrewG for driving up the gear box and driving me back down!) Out with the old.... ...and in with the New! Some shots of inbetween Service in progress and a few bonus photos from a photoshoot I did back in August ?


 1 pointSo far so good, at least you are now getting an idea of what lays ahead. I would suggest not doing anything too hasty as yet until you know the full extent of the corrosion. Nissan went to a lot of trouble so as to design multiple sill sections and floor pan to maximise rigidity, the last thing you want to do is compromise the structural strength. If I was you, I would also use paint stripper so as to clearly see the transition from corrosion to good steel, that way you can be sure of cutting back to none corroded steel. As you say, take some time to remove the trim etc', that way you will be sure of the extent of the corrosion. That way you will be able to plan the sequence of repairs. It is too easy to tack a piece in, only to realise it has to come back out so as to allow access to another area. Watching with interest.1 point