
Everything posted by iain knight
-
Yes engineering is my background and my hobby to, I have made a fully working 4 axis cnc milling machine with a dermal 30K rpm for engraving. I'm now working on a automatic tool changer for it. I try and make as much as possible for my Zed.
-
I had redraw it as iPhone couldn't pick up pencil lines, the spacers are about 4.5/5mm I think, a o-ring on the injector pushes down on the top so the spacer depends how good the oem injector seal in the injector rail.
-
I'll dig them out for you tomorrow
-
He is a pic of a spare injector with adaptor After cleaning these flowed at 545L/min@3 Bar, I think these have a better spray paten over the single type(early ink)
-
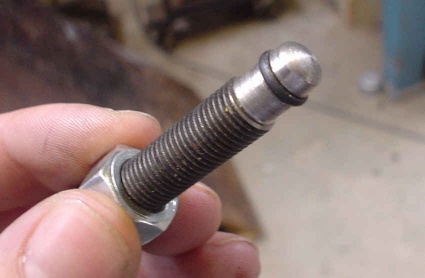
I use the early inj rail caps with the D-rubber and a spacer, to put the later injectors into a early fuel rail you will need adaptor for the later injectors which you can buy, but I made mine from aluminium bar turn down with rubber O-ring's
-
I have Subaru yellow injectors which I had flow and cleaned £90 for six injectors, there are adaptors around but I made me own , they been fitted for 2 year now with out any probs, just need to upgrade the rest of the engine ££££££ " and yes I know it's in wrong way round, it just looked good for a nice picture - facing the right way now"
-
under the head lights is a nice little hole which you can feed a pipe through and connected up to the intake pipe of the turbo, I used 90 Deg pipe with about 4" of striate, fitted in real nice. The hardest part was taking the head light out :)
-
some pic's for reference that I've picked up from the internet.
-
Thanks guys:clap::punk::thumbup1:
-
Now there a name (squint at MJS) from the past, he had a grey mk4 RS turbo then he built a twin turbo engine mk4 escort in lime green.
-
Welcome to the club :) Sent from my iPhone using Tapatalk
-
This one is a bit of a long shot, could you scan the front hub of a TT with out disk or brake calliper. I'm using 2014 Solidworks. I would be interested in any scan file of your Zed as I have a small cnc hobby machine. :punk:
-
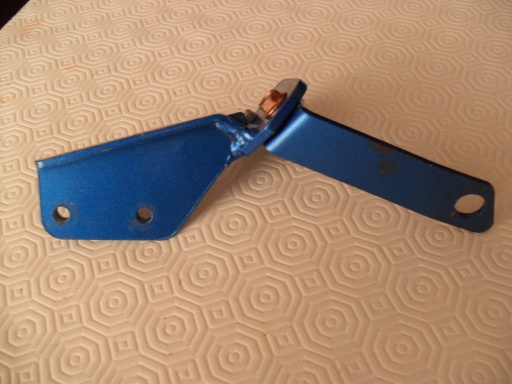
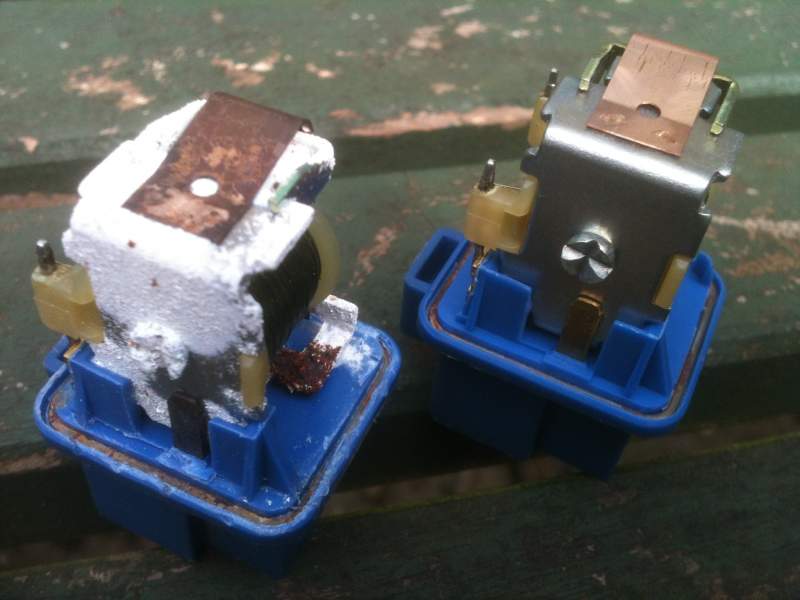
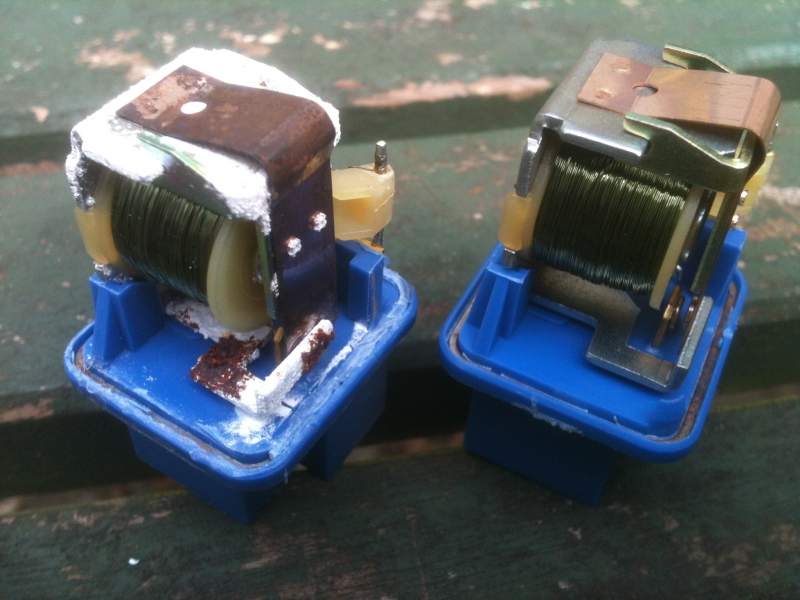
I can also show you a green relay in the same condition as the corroded as the blue one. I might be looking into this mosfet based power relay ....!
-
Also to back up Jeff, here are two relays from a 1990 tt one stuck now and then the other fine. As you can see from the picture both was sealed until I cut them open and know wonder it was sticking.
-
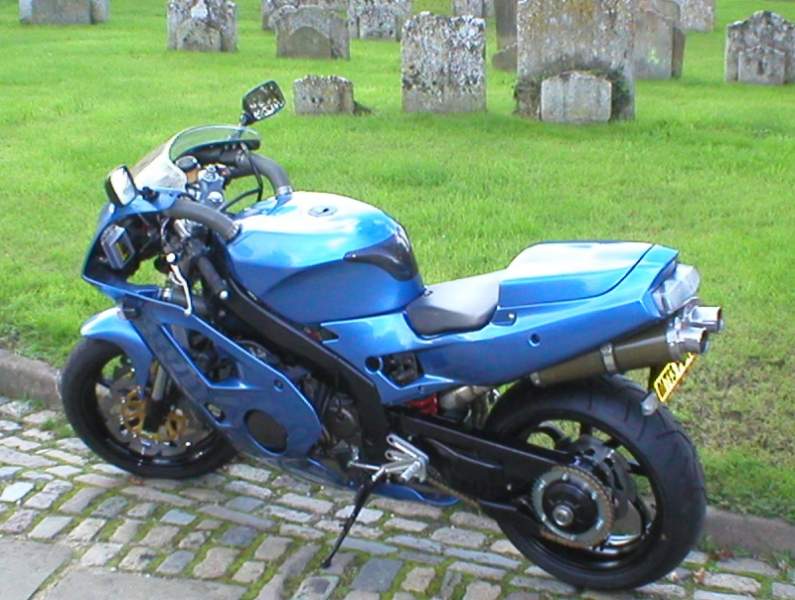
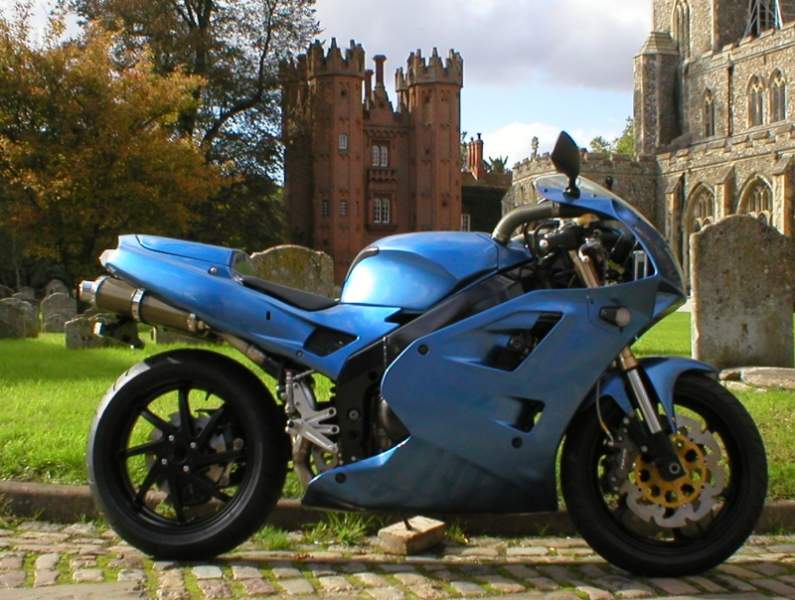
I gave my old girl a bit of a new twist, apart from another 200cc increase (from ZXR400 to ZX6r) plus a few extras.....!
-
With the some Race Logic TC comes with LC, but as I said before you cannot engage LC hold down your accelerate and then dump the clutch because Race Logic units was designed to use on tracks at first then became available to road cars. Taken from User manual Page 23 1.10 Launch Control 1.10.1 General Launch Control is a method of controlling the revs at the start. It is activated by the launch control button. This allows full throttle to be used, and the revs are controlled by the traction control. This means you only have to balance one foot instead of two. The system uses a secondary rev limit that removes itself automatically when the rear wheels are within a set percentage slip of the front wheels. The Launch Control rev-limits can be programmed using two methods depending upon whether you have access to a laptop computer. The Launch Control has two different rev-limits that can be set, WET and DRY. The wet rev-limit only works when the switch is positioned in the WET position. All other settings on the switch use the DRY launch. 1.10.4 Launch Procedure Button Initiation – Stop the vehicle and press the launch button once leaving the adjuster selecting the desired percentage slip. The car will then rev-limit between the programmed soft and hard cut limits. The revlimit and launch control strategy depends upon whether wet or dry settings have been selected with the adjuster. After 2-3 seconds the car should be settled on the Launch Control Rev Limit. If it is a turbo car the boost pressure should be gradually building up. A common mistake is to bang the clutch in and instantly spin the wheels. The first 10 metres is the most critical phase, even a small amount of wheel spin at these low speeds is very high in percentage terms. The clutch should be slipped whilst not breaking traction, but not too much as to impede forward progress. If you can't slip the clutch, then change it for one you can, you are losing out, here is why :- The clutch can be used as torque converter. The torque curve on a race engine is going to be biased towards higher rpm, at low rpm there will not be a surplus of torque over wheel spin. Therefore the engine needs to rev before it can accelerate the vehicle at a decent rate. The clutch translates this high rpm into high torque. On a low powered engine that cannot spin the wheels in first gear, the slipping clutch translates the stored momentum of the engine into torque to artificially boost the acceleration in the first few metres. On a high-powered vehicle, the slipping clutch prevents the wheels from initially breaking traction, the most important factor in a good start. If the car “bogs down” or has too much wheel spin adjust the rev-limits to program the perfect start.
-
I think it's 310 D shape
-
I have Race Logic fitted it to mine, with on interior it still took 2 hours. I up graded to the control digital box which you can change any setting on the fly, my tt has not got big power (about 350-370bhp) but in the wet it cut's in and you don't feel anything if on full wet setting. By turning down TC(launch control) you get more slip angle with out losing control. Regarding launch control it's not a system were you rev the engine and dump the clutch it is designed the help the drive get away better, you still need the control the clutch and feed the power in. The flywheel stores rotating mass which is turned into forward movement from the tires but to much and you start to spin and tires start to have less grip as loss of friction, what the launch control does is limit the friction loss when you accelerate but the wheels still spin. which is all about physics of grip and accelerating ect which to much to go into.
-
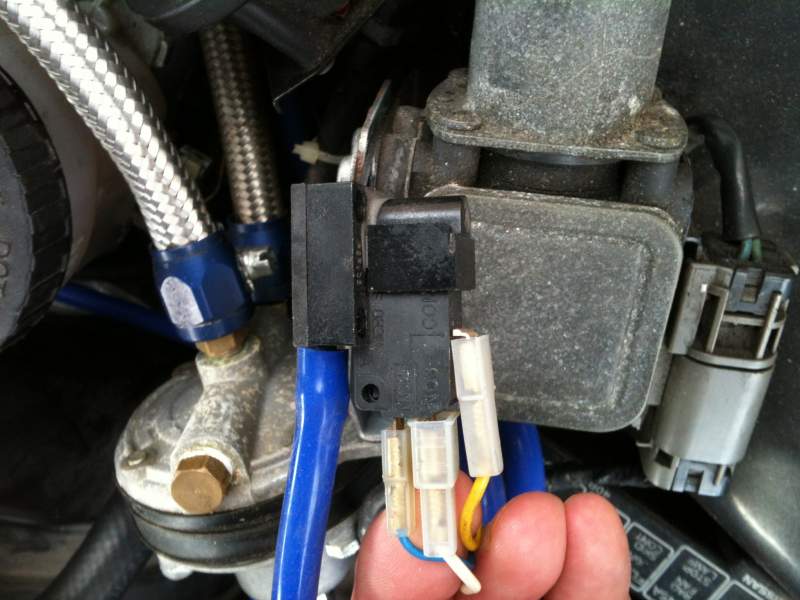
Here you go http://www.ebay.co.uk/itm/New-DC-12V-3W-2-Position-2-Way-Solenoid-Valve-F-Electric-Pneumatic-Power-Control-/300966699114?pt=LH_DefaultDomain_3&hash=item461303606a Also my pressure switch
-
you can buy a adjustable pressure switch and with a small solenoid job done.
-
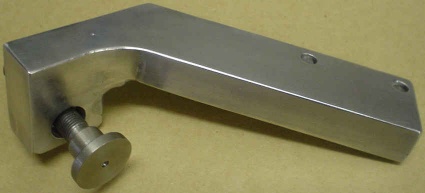
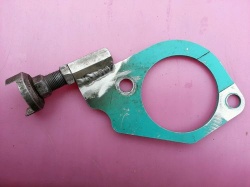
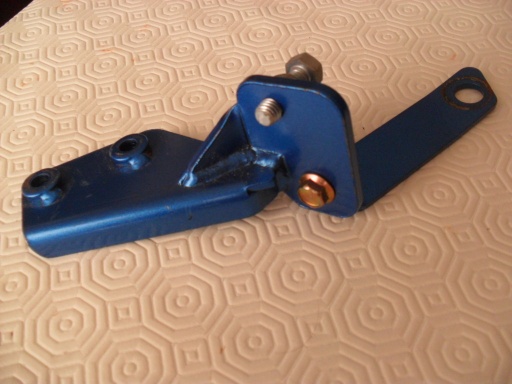
Does some one have a Ksport 8pot calliper of at the moment or know of the dimension from mounting face of the calliper to the bolt holes on wheel hub and hub face to the calliper bolt holes. I have a set of Ksport 8pot callipers, 330mm discs and a ally bar of 2 1/4"x20" to make the calliper brackets with my milling machine, so I just need a ball park figer to make a dummy bracket from plastic. Any help on the dimension would be most great full. Iain
-
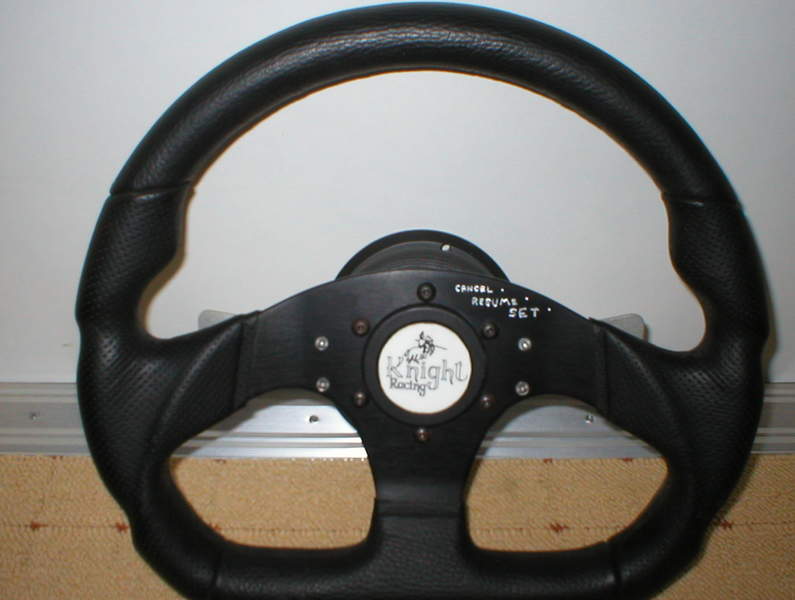
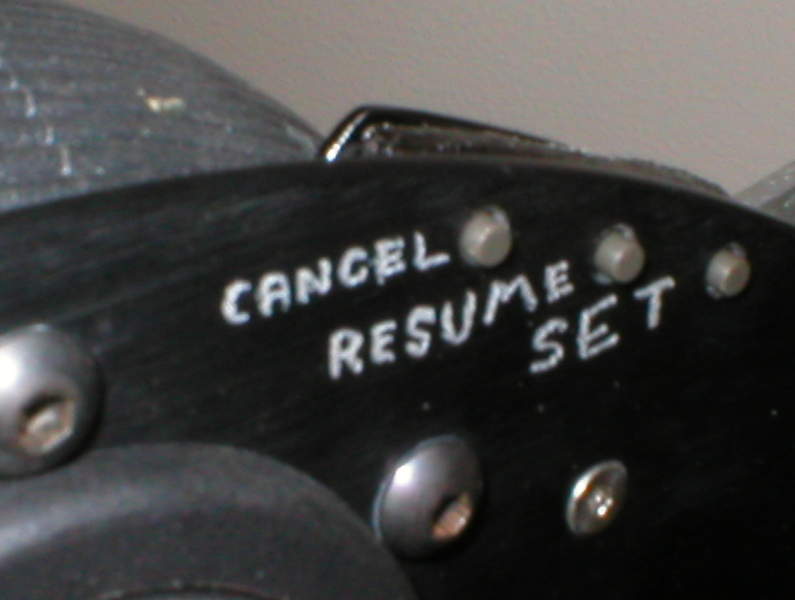
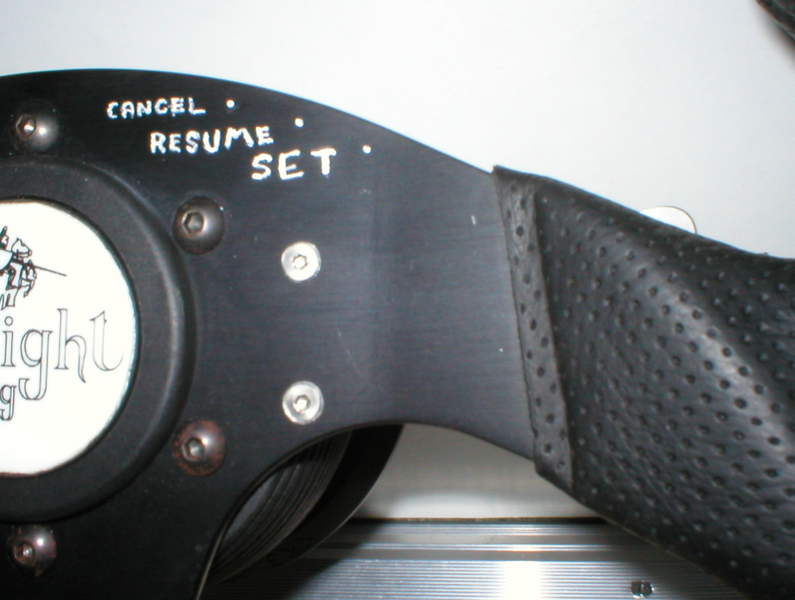
When you have a striped out car who needs it look factory ! at least it all works, and I can have cruise control from 30 to 80+mph. It was hand written with a Dremel engraving tool as my CNC milling machine was not at the stage I could not cnc engrave.
-
You can do this with a Ford slip ring and have extra buttons as well.....! Flappy paddle at the back

-
Happy birthday bud
-
The birds can't keep there hands of me in my onesie....! oops thats my boiler suit.......! to much cidre....!