
Everything posted by mister_fcx
-
I've been to their summer meet and got talking to the staff members to see how versed they were in 300ZXs - as they are well known for 350Zs & 370Zs, I can't remember exactly how the relation was, but one of the senior guys is related to the senior guy at CZP. So they usually order from CZP and then ship within the UK, covering the import aspects, However, in the future, it would most likely be easier to order from Z1 Motorsports, CZP or Amayama yourself - as others have said too. That way you can get the updates directly,
-
If you undo the centre boot trim, the one directly behind the rear panel for the reverse lights, can you pull on the cable to see if it's stretched or caught? It should run though a plastic 'runner/spacer' to support the cable and might have just popped out,
-
I replaced the flasher unit with the following one from Parts in Motion and it worked in my case - Intermotor Flasher Unit 58972 But I'm not an electrical person, so I can't say if that is the issue or not,
-
I have some notes below from when I took mine off: Hopefully they make sense 1 - Remove Side Lights 2 - Remove Interior Panels 3 - Unscrew along the rear centre = 11 nuts Along the left & right hand sides = 2 screws each in rubber washer-type things, 3 - Above rear licence plate along the top = 3 screws 4 - Underside behind License plate = 4 plastic screws in the middle + 1 in each corner 5 - Corners next to exhaust - 1 screw each side - Found these really tricky as they are exposed and may be covered in grit and dirt or even rusted out, 6 - Corners above exhaust holding the bumper to rear quarter panel = 1 screw each side

-
Okay, if madmarco decides not to take them, are you able to PM me to discuss further please? 🙂
-
Your version looks quite cool! I like the additional USB port to act as an individual feed for CarPlay/Auto too. Would be interested in one of these similar to the one posted, although without the Z logo 🙂 Plus one for the window moulding caps too
-
Sorry to jump on this, but if madmarco doesn't take the BDE Gears, I may be interested in them if you're willing to sell them?
-
Indeed! I was quite sceptical of doing anything near it in case it tripped something, It seems there is power at the fuse, but tracing it back it more tricky than I thought it would be - perhaps a bit more time is needed ? Ooooo okay, I may need a bit more info on how to complete this - electrics confuse me ? So I may take it to a friend and see if they understand it, I'll keep an eye out for a module though to see if swapping it would resolve it,
-
I was kind of hoping this would be the issue, but I tried both the original location of the horn bolt mounting to the chassis and a few other locations - still no luck, - Ascotec - So does that mean that the 'module' is the air bag module? It looks completely different to what I can find when searching online, - The horns and relay were tested individually on a bench test and were working - even the old horns worked when tested individually! I feel this may be the way to go. Sorry for the simple question, but would this mean running a wire from the left-brown connector on the module to the relay? Hopefully, this doesn't cause any issues to make the module think something is wrong, I'm trying to source a just a second module too as it's a bit annoying having the additional wire running around for the horn. But as TheRealNips has said, they can only be found on the Japanese auction sites, Thanks for the inputs all ?
-
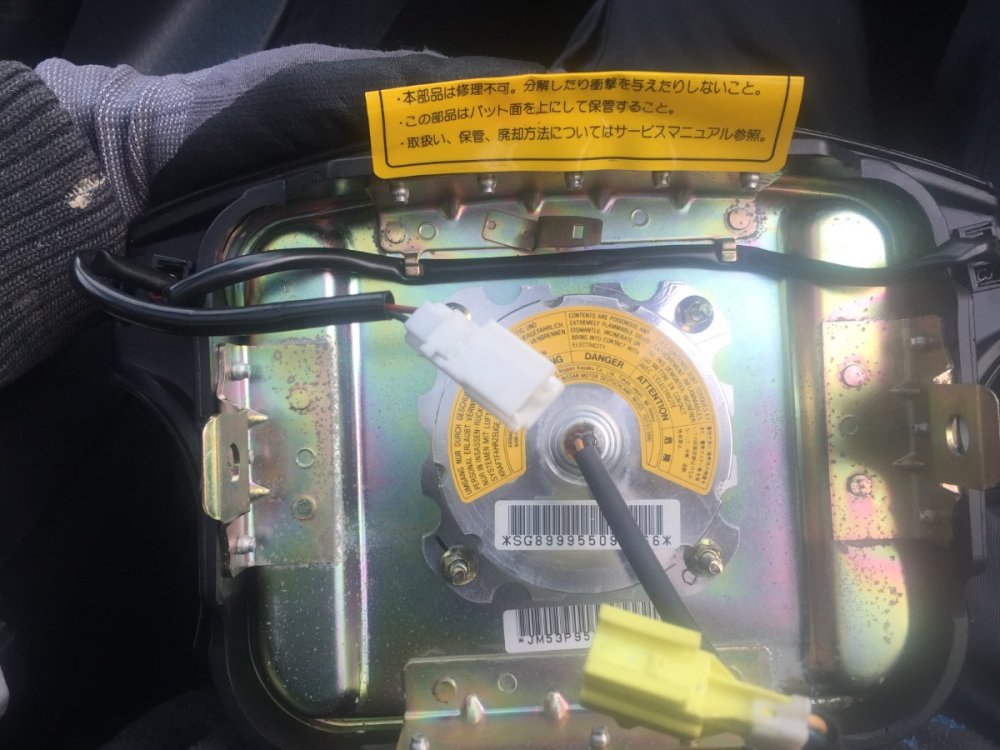
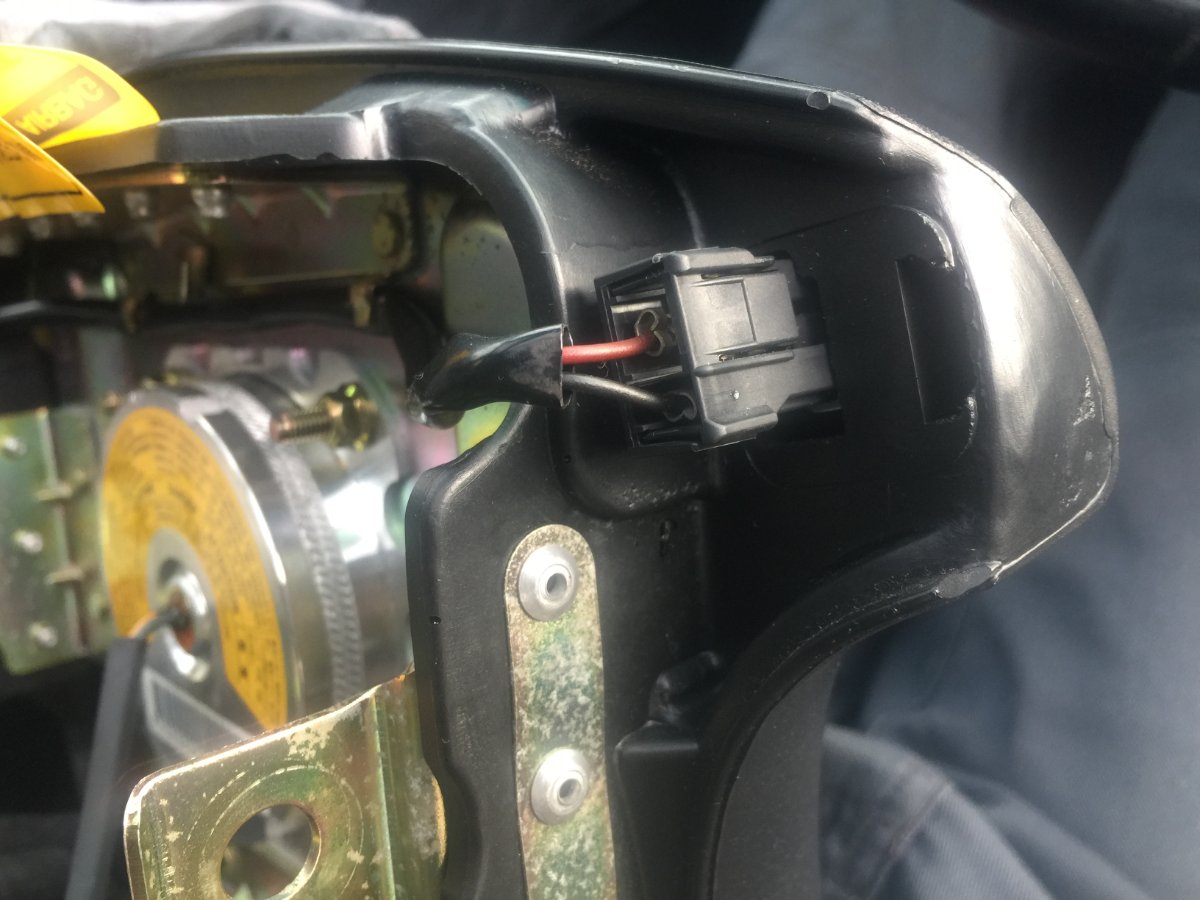
Hi Everyone! I’ve got a bit of an issue that I was hoping someone may be able to offer some advice on. The horn on the Z no longer works and I can’t really work out why ? I’ve changed the fuse in the engine, the relay in the engine and even got new horns – Hella Supertone, but still no joy. I also removed the air bag from the steering wheel to check if something had happened there, but everything looked good! One thing I’m not sure on is how the wiring for the horns works. The buttons from the steering wheel connect to the earth and then go into some kind of ‘module’? Is this for the air bag or the HICAS or something else? As everything else is working independently, I’m leaning towards this ‘module’ thing being at fault – but I have no idea what it is or does! The ‘Air Bag’ light goes on on ignition and turns off as normal too. Nothing has changed in terms of the wiring and the problem randomly occurred. I’m not that great at electrics, but I have a friend who is and they also suggested it may be the ‘module’ at fault, as everything else looks okay. Is there anything else to consider? Thanks in advance all! ? Information on the ‘module’ sticker: Nissan Motor DC12V Custom ER’S No = 98584 53P00 Parts No = 407933-0591 ASCOTEC A picture of the module under the air bag – Horn Button - Steering Wheel Rear View - Module Closer -


.thumb.jpeg.a12f4a8ec2420ea70853f1d5e7c499b9.jpeg)
-
I recently got a set from CPZ - 80820-VP100 and they look pretty good. The finish is a very close match to OEM, but not 100% exact - although it's hard to confirm for definite without having a brand new OEM one to compare to! They haven't been fitted, but if you ever want to check them out in person, let me know ?
-
Nice to see a car that's stayed within the owners club and the history is known! Great work in getting the car back up to driving after it's been standing for some time and had some mechanical issues. Kinda like overcoming the final hurdles. I remember seeing it at PowerZed in December 2020 and also when it was on sale - the place wasn't too far from me, but when I enquired, it was sold!
-
Thanks for the info and pictures Lexx! I've been going through the previous threads on Headlights, HIDs and Bulbs and have seen the Earthing-mod for the flashing too. Although, some of the pictures have disappeared from the older threads and some threads have an error, but you can still work out what to do (I think) I suck at anything electrical, so am always scared to do anything before looking around and asking to make sure! I came across redwine300's full headlight disassembly and rebuild and am astonished on how well they came out! Serious dedication and well documented too!
-
Sorry to bring this thread back up, but how did you get on with the HIDs - were you able to install them? After driving in the dark for the first time in quite a while, I've decided that the bulbs need to be updated! After reading through the various headlight/ bulb / HID threads, it seems that everyone goes for this option,
-
It's nice to see the history of car ? Yes, the Veilside wheels got sorted in the end - it took 6 weeks though and there were a few issues. But they're sorted now, so all good, Other than that, not much happened really. Looking back now, I never really drove her and now winter is approaching ? But that means more motivation next year!
-
I agree! I never thought I would ask someone 'how thick is your paperwork?' ? That's so cool. I've got a similar format with mine too (and previous cars). Every now and again I just read through it and remember what' been done. I guess normal people play games or something? ?
-
Love seeing people take care of all of the paperwork! It goes to show that the car has been looked after and cared for. Just out of curiosity, how thick it that?
-
I couldn't find any in the UK and have previously purchased boot struts for other cars from them. But I think they only have the SWB sizes, as they were far too short! I got mine re-gassed to 600N and it's almost automatic. I have to keep my hand on the boot otherwise it opens too quick for my liking! ?
-
If you can't find some that hold pressure, but still have your old ones, you could get them re-gassed? I got mine re-gassed from SGS for £30.96 and am no longer scared of putting my head inside the boot!
-
That's what I'm thinking, as lockdown is now opening up, everyone's getting their cars sorted! The reviews are excellent. I'm hoping everything should be okay. It's reassuring to hear from someone that has used them a few times in the past,
-
Sometimes I just stare at it and think 'it's barely been used. I've gotta keep it in the condition it's in!' Spinning is okay as long as you intend for it! I'll post up some pictures once they're back, but not having much of a 'positive' (if that's the right term) experience with them at the minute. I'm hoping it's just because they're busy and I've got really high expectations based on reviews. But hopefully, it should all turn out good,
-
That's always the way - if you've got some space, it'll soon get filled with car parts! Good to hear the handling is on point after the series of upgrades. It's always the case that some of the comfort is traded-off for a more positive feel/ response of the steering and handling. I was thinking of getting the Michellin PS4s, but opted for the Goodyear Eagle F1s as I had pretty good results from them previously. They both seem to always be at the top, although the PS4s just take it! Once it's back from PowerZed, it should be all goooood! It's like taking the car to a spa and returning rejuvenated. Ahh, so it's the same place - First Aid Wheels. Mine are currently there now getting a refurb due to air leaks between the split bits and the paint flaking off. I've gone for keeping them with silver faces and polished lips though. Thanks! Other than getting the wheels done, I can't foresee anything else to do other than the maintenance. Hopefully, it'll get driven a bit over the summer,
-
Just been through your thread and it's been quite a nice read! Loving the blue colour, it looks amazing in person and you're doing a good job of keeping it shiny and treating the plastics and rubber bits too! I like the fact that you've been wanting to do the respray for a while, but sidetrack to sort the mechanicals and rust. You often hear stories about how people sort the exterior and leave the underneath issues lurking. Very much the best way to go to ensure a solid base for the future. How have you found the ride and steering since all of the suspension bushes were changed? I've read about the ride getting stiffer and being "not as smooth"? Heading back to the beginning, it's a shame you couldn't save the VeilSide alloys. (I think I've contacted the same place in NW London about mine). But the JR10s you've got really suit the car!
-
There is some serious dedication in this thread! From the early stages of bling in the engine bay to the retrimming of the interior. Even managing to source the (rare) second hand parts and making them look brand new - making them look better than the actual new parts! A definite example of a labour of love. Looking forward to reading about the new path ahead. On a side note, you seem to come across as an electrical wizard!
-
I12 - Bedfordshire


.jpeg.52b08356118296206cd3f112ddf4943f.jpeg)