Who's Online (See full list)
- There are no registered users currently online
All Activity
- Today
-
PARTS ACQUIRED DURING THE MONTH OF APRIL This month I took delivery of two new brake-related parts from Japan. The first was a set of later-model iron Twin Turbo front brake calipers, which I’ve already covered in detail above. The second item, however, is the one I’m most excited about. It has the potential to significantly reduce future servicing time—particularly when bleeding the braking system—provided I can successfully retrofit it to my car. Based on the research I’ve pieced together so far, it should be possible in theory. (Above) The package from Japan containing both brake components. As always, Jesse Streeter and his team did an excellent job ensuring everything arrived safely and undamaged. https://i.postimg.cc/fbNJmRLC/2_Parts_Inside_Box_1.jpg https://i.postimg.cc/YSHhYC9x/2_Parts_Inside_Box_2.jpg (Above) The contents of the package: a set of later-model iron TT brake calipers and a 1994+ ABS pump/actuator assembly. If you haven’t already spotted it in the photos, the “mystery” item is a later-model 1994+ ABS pump/actuator. I purchased it as a complete unit, including all factory brake hardlines connecting the pump to the hydraulic system. Having the original hardlines intact is a huge advantage—it means I should be able to unbolt my original ABS pump and swap this unit in without needing to fabricate or modify any brake lines. https://i.postimg.cc/DzT8LwZP/4_Later_Model_ABS_Pump_1.jpg https://i.postimg.cc/rpkKxwmn/4_Later_Model_ABS_Pump_2.jpg (Above) The later-model ABS pump complete with 2+2 base plate and all original hardlines. These lines feed into the hydraulic distribution box, which connects the pump to the rest of the braking system. The factory part number stamped on the identification plate is 47600-50P00, along with a serial number and the manufacturer’s name, Nippon ABS, LTD. https://i.postimg.cc/wBQ3VYyb/4_Later_Model_ABS_Pump_4.jpg (Above) According to Nissan FAST, part number 47600-50P00 was fitted to both NA and TT Z32 models from September 1993 through to October 1998. As exciting as this purchase is, there’s one obvious issue: surface rust. The unit appears to have been exposed to the elements for some time, and corrosion has formed on several external components. That said, I’ve dealt with similar surface rust before and had good success restoring parts to a respectable condition. The main challenge will be figuring out how best to submerge the assembly in Evapo-Rust (or treat it in stages) to remove the corrosion thoroughly. After that, I’ll need to apply a suitable protective coating to prevent future rust from returning. https://i.postimg.cc/bv9dTfDV/4_Later_Model_ABS_Pump_5.jpg https://i.postimg.cc/HL9j21cQ/4_Later_Model_ABS_Pump_3.jpg (Above) While the rust looks significant at first glance, it appears to be surface-level only. https://i.postimg.cc/vmtDzwxM/4_Later_Model_ABS_Pump_7.jpg https://i.postimg.cc/BvBtgfLy/4_Later_Model_ABS_Pump_6.jpg (Above) A close-up of the five brake hardlines that connect the pump to the car’s main hydraulic distribution box (located beneath the rear center section of the boot). After careful inspection, I found no kinks or damage to any of the lines, which is reassuring. Next, I inspected the electrical side of the unit, including the main wiring harness and the internal relay box mounted on the rear of the pump. Fortunately, there were no signs of corrosion in any of the connectors, and the internal relay box looks to be in near-new condition. https://i.postimg.cc/85kcXXLF/4_Later_Model_ABS_Pump_8.jpg (Above) Research suggests that the three main electrical connectors are identical in location and orientation to those on early-model ABS pumps. https://i.postimg.cc/G23tggvv/4_Later_Model_ABS_Pump_9.jpg https://i.postimg.cc/26jy99nh/4_Later_Model_ABS_Pump_10.jpg (Above) Inspecting the internal relay box located at the rear of the pump. I know some people may question the decision to modify the braking system in this way. Before the ongoing brake-bleeding issues began, I likely wouldn’t have considered it either. However, with no clear resolution to the bleeding problem so far, replacing the ABS pump could potentially eliminate a hidden internal fault. And if I’m going to replace it anyway, it makes sense to consider upgrading to the later-model unit. The biggest unknowns remain: • Can the later-model ABS pump be successfully retrofitted into an early Z32? • If installed, will it function correctly? As far as I can tell, this hasn’t been attempted before—so I may be the first to try this modification on a 300ZX Z32. My approach is simple: if it works, fantastic. If it doesn’t, I can revert to the original pump and share the results with the community so others know whether this path is viable. At this point, based on the information I’ve gathered, the potential benefits outweigh the risks. Worst-case scenario, I return to stock. Best-case scenario, I resolve the brake bleeding saga and gain a worthwhile upgrade in the process.
-
POLISHING ONE OF MY OEM ALLOY WHEELS Taking a short break from all of the recent brake system work, I decided to turn my attention to something a little more cosmetic — my set of bare aluminum OEM wheels. After sitting for the past four years, they were starting to look tired and dull, and it was clear they were long overdue for a proper polish to bring them back to life. Upon closer inspection, I noticed a layer of oxidation had formed on the bare aluminum since the last time I polished this particular wheel. I was hopeful that a thorough polishing would remove it, but there was only one way to find out. [i](Above) Back in 2007, I purchased a full set of OEM JDM factory wheels from another Z owner who had already stripped and polished the bare aluminum before selling them to me. Around that time, I learned that the USDM models were offered with factory chrome OEM wheels — a look I instantly fell in love with. Unfortunately, here in Australia, none of the OEM wheels available came in that factory chrome finish. So when a polished set came up for sale, I didn’t hesitate — it was the closest I could get to that chrome look, and I jumped on the opportunity.[/i] (Below) A close-up of the oxidation that had formed on the surface of the bare aluminum over time. https://i.postimg.cc/mkxrB7PN/1_Before_Polishing_2.jpg After about an hour of polishing using an electric drill, a buffing cone, and some purple metal polish, the results were immediately noticeable. The dull, hazy finish was gone, replaced by a reflective, mirror-like shine that closely resembles chrome. I couldn’t have been happier with how the wheel turned out. Ultimately, I’d love to have all of my OEM alloy wheels finished in a true mirror-like chrome one day. For now, though, the polished aluminum gives me a close enough look to achieve the style I’m going for — and I’m more than happy with it. It was also a refreshing change of pace from the brake system work I’ve been focused on for the past few months — sometimes it’s nice to see quick, visual progress. https://i.postimg.cc/wMKBgD15/2_After_Polishing.jpg (Above) Although the bare aluminum now has a nice reflective, mirror-like shine, the oxidation hasn’t been completely removed. Even after several passes with the polish, I wasn’t able to eliminate any more of the remaining surface oxidation. Unfortunately, I didn’t have enough time to polish the remaining three OEM wheels, but I’m planning to tackle those soon — ideally before reinstalling the refurbished brake calipers on the car. There’s something incredibly satisfying about bringing old aluminum back to life, and this first wheel is a great reminder of why I’ve always loved the look of polished OEM wheels on this Z.
-
DISASSEMBLY PROCESS OF MY NEW SPARE SET OF LATER MODEL TWIN TURBO OEM IRON BRAKE CALIPERS With the teardown of my used rear OEM brake calipers now complete, I’m starting this month’s update with the newly acquired set of later-model twin turbo iron front brake calipers that arrived earlier this month for the rebuild project. The goal for this set is simple: once restored, they will replace the later-model TT front calipers currently on the car — the same ones I installed back in 2011. These “new” used calipers will go through the exact same teardown and restoration process as the rears featured in last month’s update. Finding the Twin Turbo Front Brake Calipers on Yahoo Auctions I came across these calipers listed on Yahoo Auctions, advertised as having been used on a Skyline R32. The seller wasn’t completely certain of their origin, but from the photos I immediately recognized them as the later-model 300ZX Twin Turbo front calipers (Series 4–6, 1995–2000). https://i.postimg.cc/L8VH8MJC/1_TT_brake_calipers_yahoo_auctions_2.jpg Cosmetically, they were in average-to-poor condition, with significant surface rust and grime. However, the important thing was that they were complete. The key difference between these later-model calipers and the earlier versions is the material. The later units are made from iron rather than aluminum. While heavier, the iron construction offers improved resistance to heat-induced warping under hard braking — particularly beneficial during track use. This is why Nissan upgraded to iron calipers in the later production models. https://i.postimg.cc/YCxpCwvQ/1_final_model_brochure_photos_of_brakes_(1999_2000).jpg Once they arrived here in Australia, I was eager to begin the restoration process. Despite their condition, I was confident they could be rebuilt to a standard better than new. https://i.postimg.cc/Dzjn1ddv/1_Front_TT_Iron_Brake_Calipers_Before_1.jpg https://i.postimg.cc/W4WT066z/1_Front_TT_Iron_Brake_Calipers_Before_2.jpg Step 1: Hydraulic Piston Removal As soon as the calipers arrived, I began by removing all hydraulic pistons using compressed air and old brake pads as spacers to prevent damage during extraction. https://i.postimg.cc/gjRpF99h/2_Piston_Removal_Process_3.jpg https://i.postimg.cc/gc6m6hwY/2_Piston_Removed_1.jpg The process went smoothly, and I was able to remove all eight pistons without major issues. Step 2: Separating the Caliper Halves Next, I applied penetrating lubricant to the four main fasteners on each caliper to help loosen the rusted bolts. After allowing it to soak briefly, I carefully removed all eight fasteners. Fortunately, none of them snapped — always a small victory when working with older hardware. https://i.postimg.cc/CLG0cVHX/3_Caliper_Bolts_Removal_Process_1.jpg https://i.postimg.cc/1R61zZTn/3_Caliper_Bolts_Removal_Process_6.jpg With the bolts removed, I separated the caliper halves and extracted the internal O-ring seals from each piston bore. https://i.postimg.cc/t4BLcR1z/4_O_ring_Removal.jpg At this stage, the calipers were fully dismantled. Years of grime, corrosion, and brake dust buildup were clearly visible. There’s no denying — they need serious attention — but this is exactly why I wanted to rebuild them properly. https://i.postimg.cc/SxSBVYKG/5_Front_TT_Iron_Brake_Calipers_After_1.jpg https://i.postimg.cc/q7YWkmx2/5_Front_TT_Iron_Brake_Calipers_After_2.jpg https://i.postimg.cc/xCzhqK6v/5_Front_TT_Iron_Brake_Calipers_After_3.jpg Step 3: Cleaning Process Before moving any further, every component went into the ultrasonic cleaner. Each part was placed in containers and run through a full cleaning cycle. The results were impressive. Years of accumulated dirt and grease were removed, revealing clean metal surfaces underneath. It’s always satisfying seeing neglected parts come back to life. https://i.postimg.cc/L6Rw6gLT/6_Cleaning_Process_1.jpg During inspection, I discovered a small hole in one of the original piston dust boots. This would have allowed moisture and debris into the bore — potentially leading to corrosion or piston seizure. Finding that damage alone justified the decision to completely dismantle these calipers. https://i.postimg.cc/JzzFjwT5/6_Cleaning_Process_2.jpg https://i.postimg.cc/5yWGz6Gz/6_Before_Derusting_Process.jpg https://i.postimg.cc/DwpMgCHK/6_hole_in_piston_dust_boot.jpg Step 4: De-Rusting Process With the grime removed, it was time to address the rust. All affected metal components were submerged in my go-to rust removal solution and run through a heated 20-minute ultrasonic cycle. https://i.postimg.cc/NjCz4NSf/7_After_Derusting_Process_1.jpg https://i.postimg.cc/R03bb7xN/7_After_Derusting_Process_2.jpg The results were outstanding. The surface rust was effectively eliminated, and the transformation was dramatic. It’s incredible how much renewal proper rust treatment can provide. https://i.postimg.cc/yNwrqD7c/7_After_Derusting_Process_3.jpg Most of the corrosion on the hydraulic pistons was also removed. I’m still undecided whether to coat the internal surfaces of the pistons in a flat black finish or leave them natural — I’ll make that call during reassembly. Conclusion That concludes the teardown of this later-model twin turbo iron front caliper set. I’m extremely pleased with how smoothly the process went, and I’ve gained an even deeper understanding of the internal workings of these calipers. Next up will be surface preparation of the caliper bodies. The old factory coating will need to be completely stripped back to bare metal before applying a fresh finish. That means it’s time to bring out the bench grinder and start prepping for paint. Stay tuned for the next stage of the restoration.
-
Another productive month in the garage, with another successful brake caliper teardown completed—this time tackling a set of later-model iron Twin Turbo front calipers. Alongside that, I began polishing one of my bare aluminum OEM wheels, aiming for a full mirror finish. To top it all off, I also received a package from Japan containing the latest parts for the rebuild project, adding even more momentum to the build. YouTube Channel: https://www.youtube.com/@ADAMZX Instagram: instagram.com/adamzx_z32
- Yesterday
-
I called it, well done Rob 👏
-
Excellent looking very nice.
-
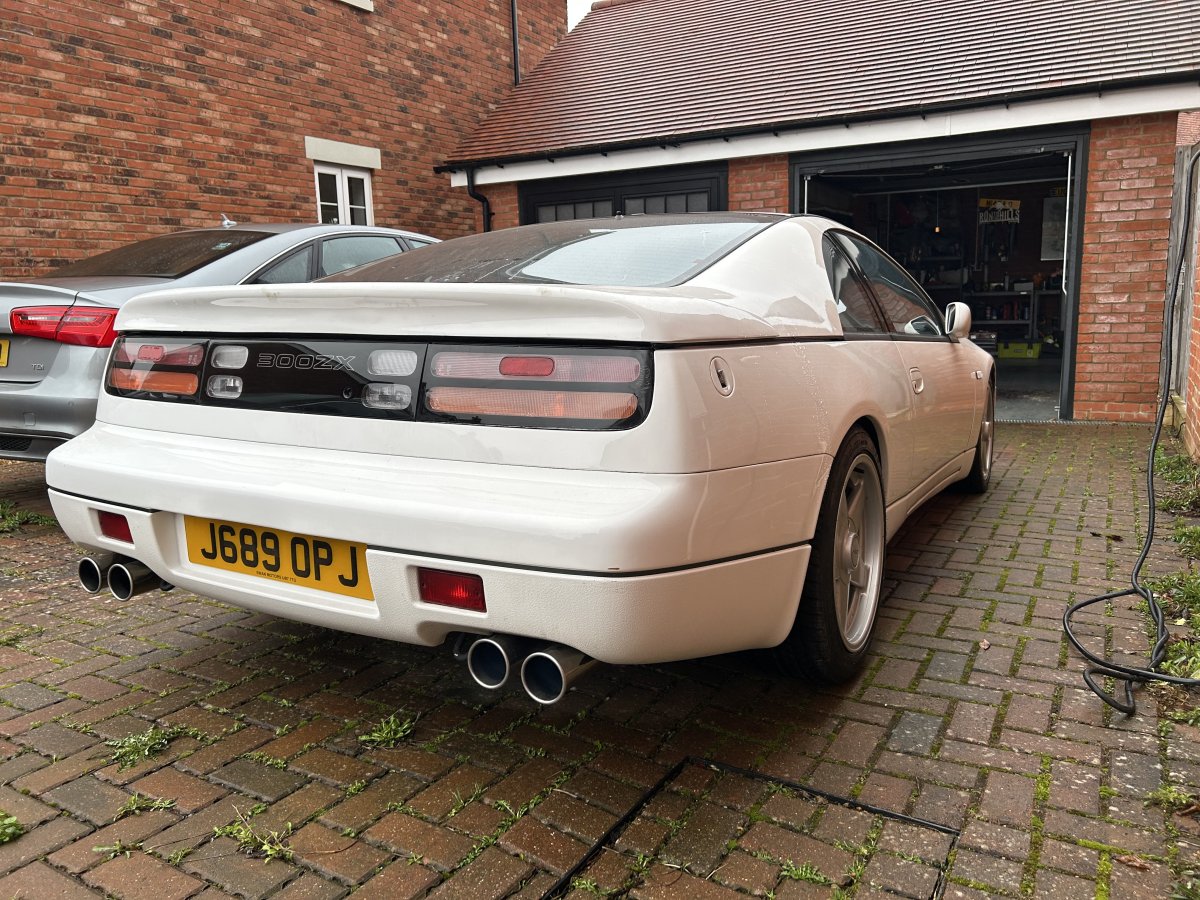
Well it passed!! I’m so chuffed! The advisories were just rusty springs, and some brake pipes. That can all wait a bit and the main thing is there is no serious issues!! Now on to sorting out some maintenance. The cambelt hasn’t been done since 2004 😬
- Last week
-
Looking good Tony!
-
Hello, good evening and welcome......👍
-
Welcome!
-
Toska changed their profile photo
-
Welcome we have an excellent knowledge bank.
-
Welcome to the owners club MeiM.
-
Hello all! Finally made the plunge… pleased to be here…🤝
-
Well done for giving it a go, things happen but you learn from it and next time will be easier.
-
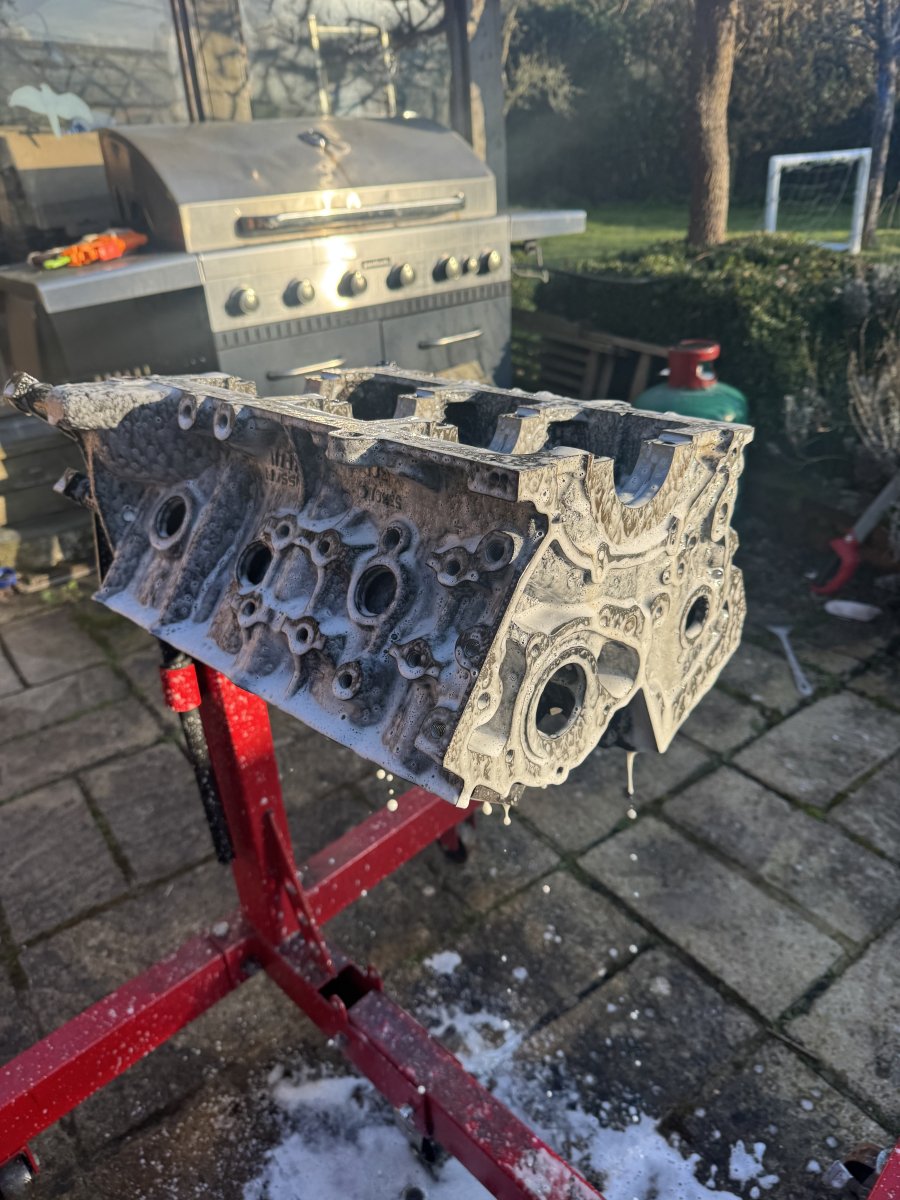
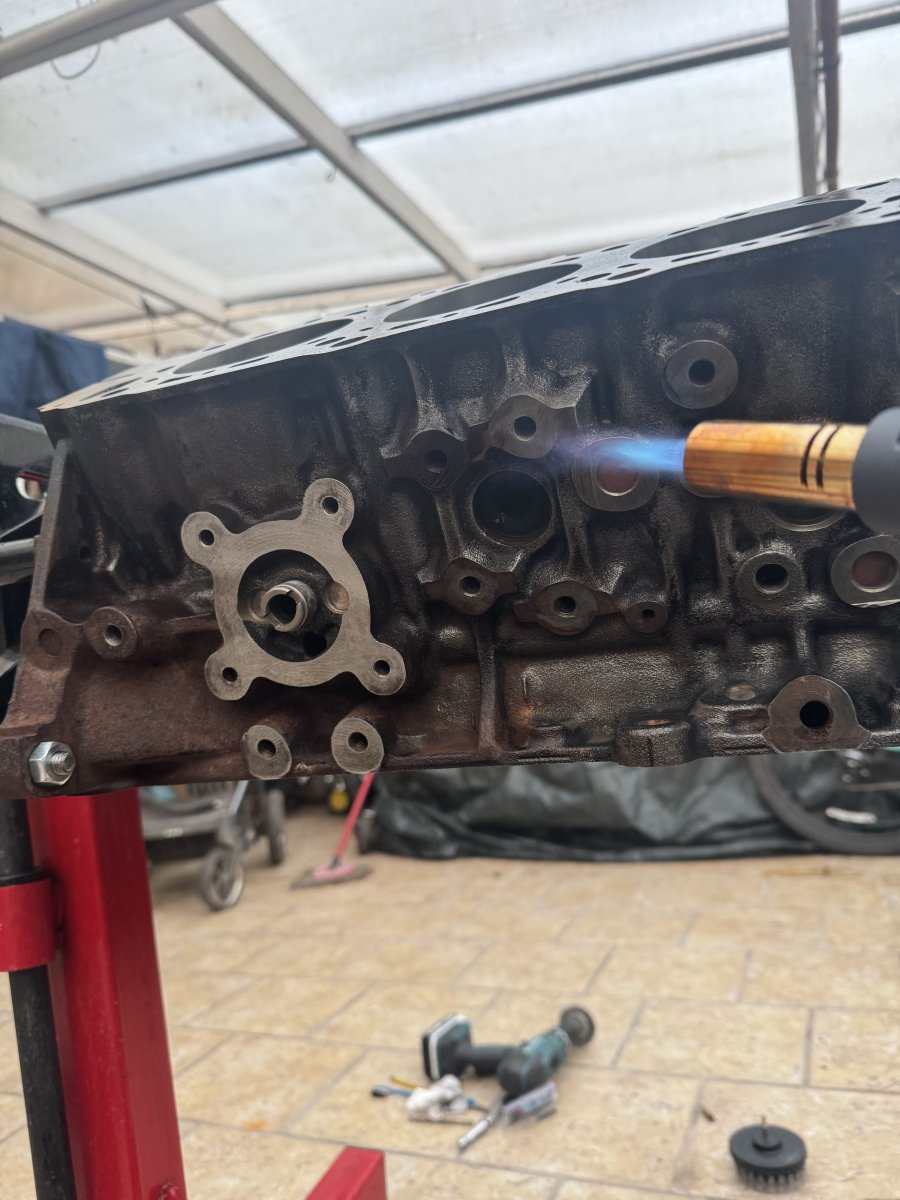
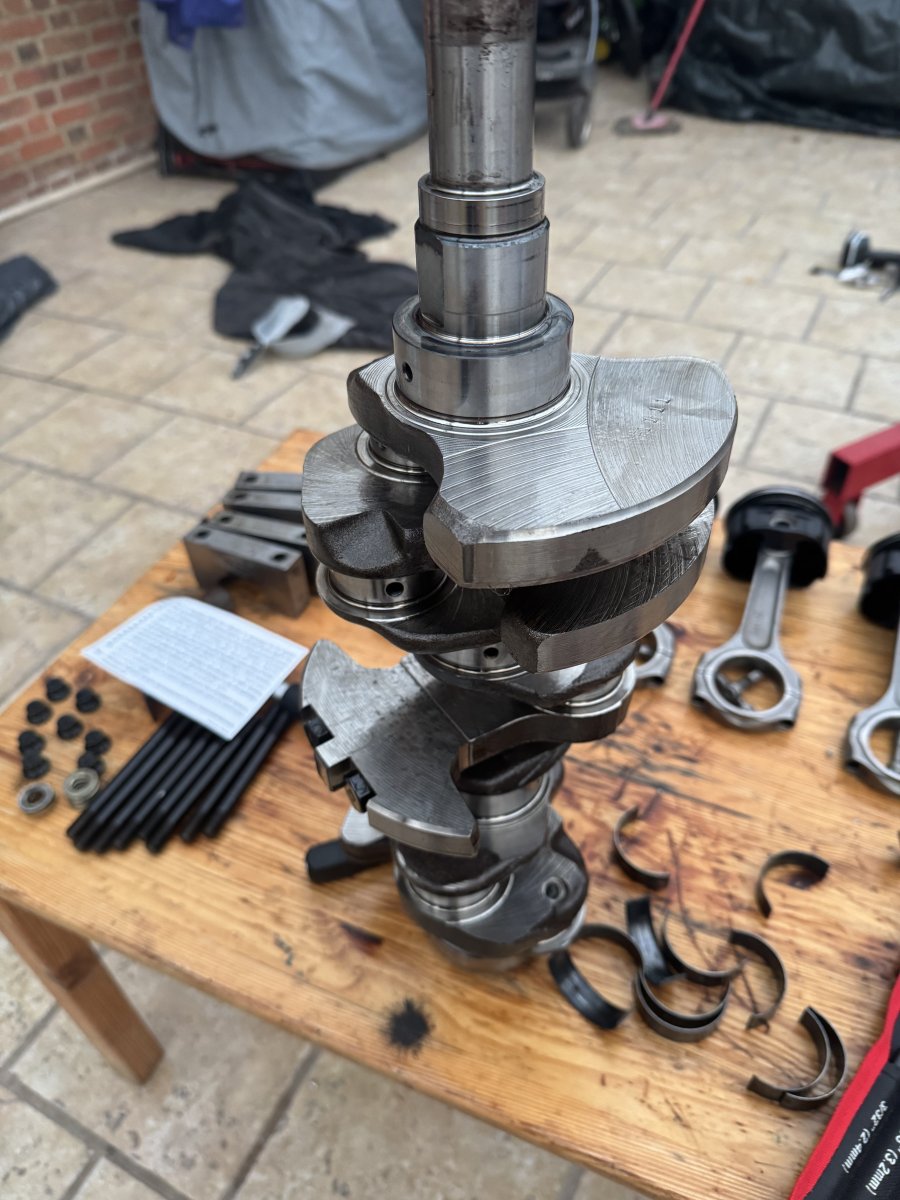
Take some time off work this week, so enjoyed the day cleaning and degreasing a variety of parts. Engine block is now ready for painting (hopefully paint will turn up tomorrow). Donor Crankshaft cleaned up really nicely, and pistons and rods are also ready to go. Bloody love Bilt Hamber Surfex HD degreaser, by far best commercial degreaser on the market in my experience!
-
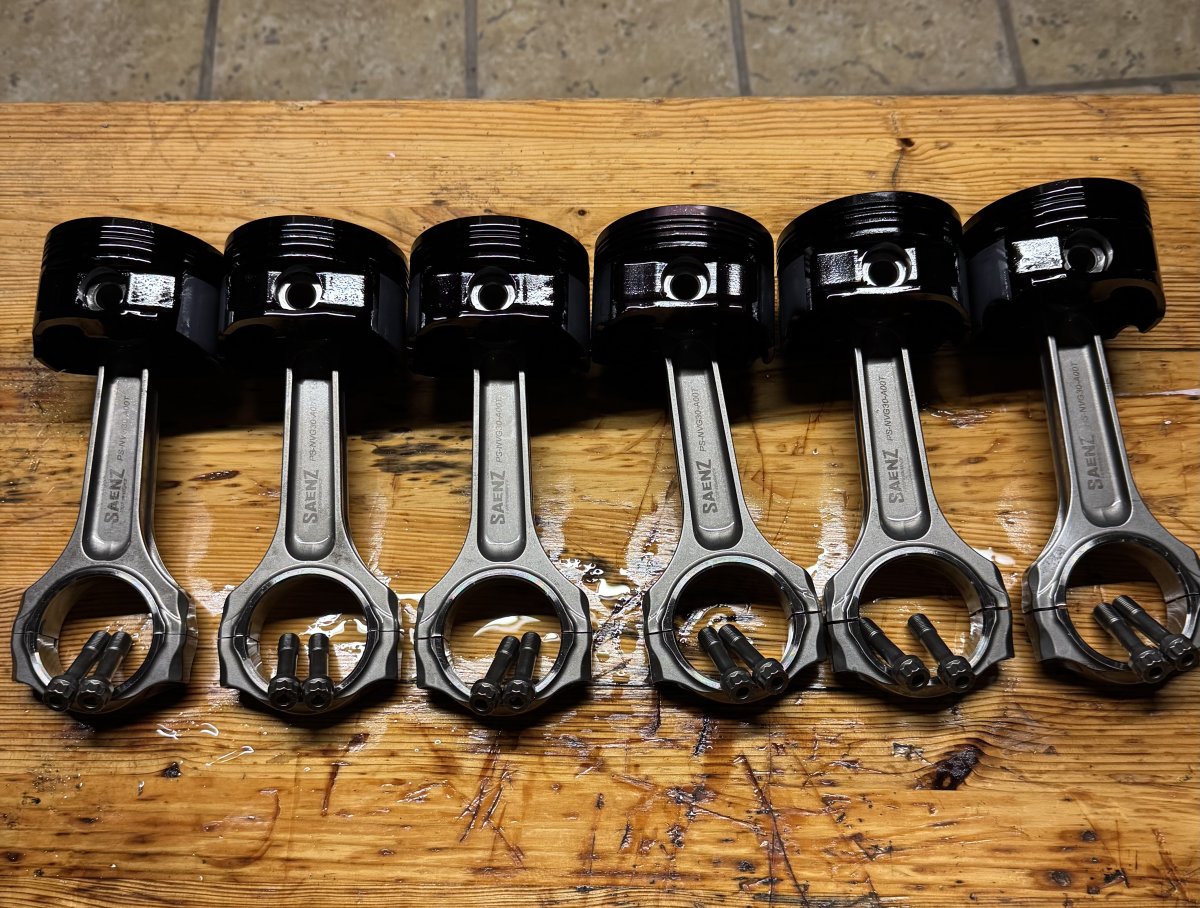
Bought them from Performance Unlimited. They’re the UK approved retailer. 88mm CP pistons. I had to give dimensions of rings as well as my anticipated power/boost pressure, that TS then matched to their products to spec the rings
-
Brakes bled! A remarkably easy job! Much thanks to AndrewG for the guide on that one. Something I’ve always wanted to do so I’m pleased. Very nearly messed up big time though! I wanted to test the brakes were working properly, so had engine running and got wheels spinning BUT I don’t have any wheels on the rear and I hadn’t put the nuts on the threads so the discs started to move! Made a horrible noise, so I stopped quite quickly but have done some minor damage to the discs. School boy error that but you live and learn! Should be fine for the MOT, but I will buy some new ones and swap them out to be safe
-
I am very interested in these rings also, can you tell me where you purchased them from was it direct from the company? and what size diameter bore are they for, is your engine a standard 87mm? I have 88mm cylinder diameter bore Regards Greg
-
Happy birthday for yesterday Adam - hope you had a good day!!
-
Wide.r32__2gs joined the community
-
84 zx turbo auto transmission wont engage. Changed TPS. Transmission will engage at start- up then stops.
-
Fantastic! Thank you
-
Happy Birthday 🎂
-
Have a good one Adam. 🎂
-
Coming on nicely Rob.....!
-
Coolrobzx joined the community
- Earlier
-
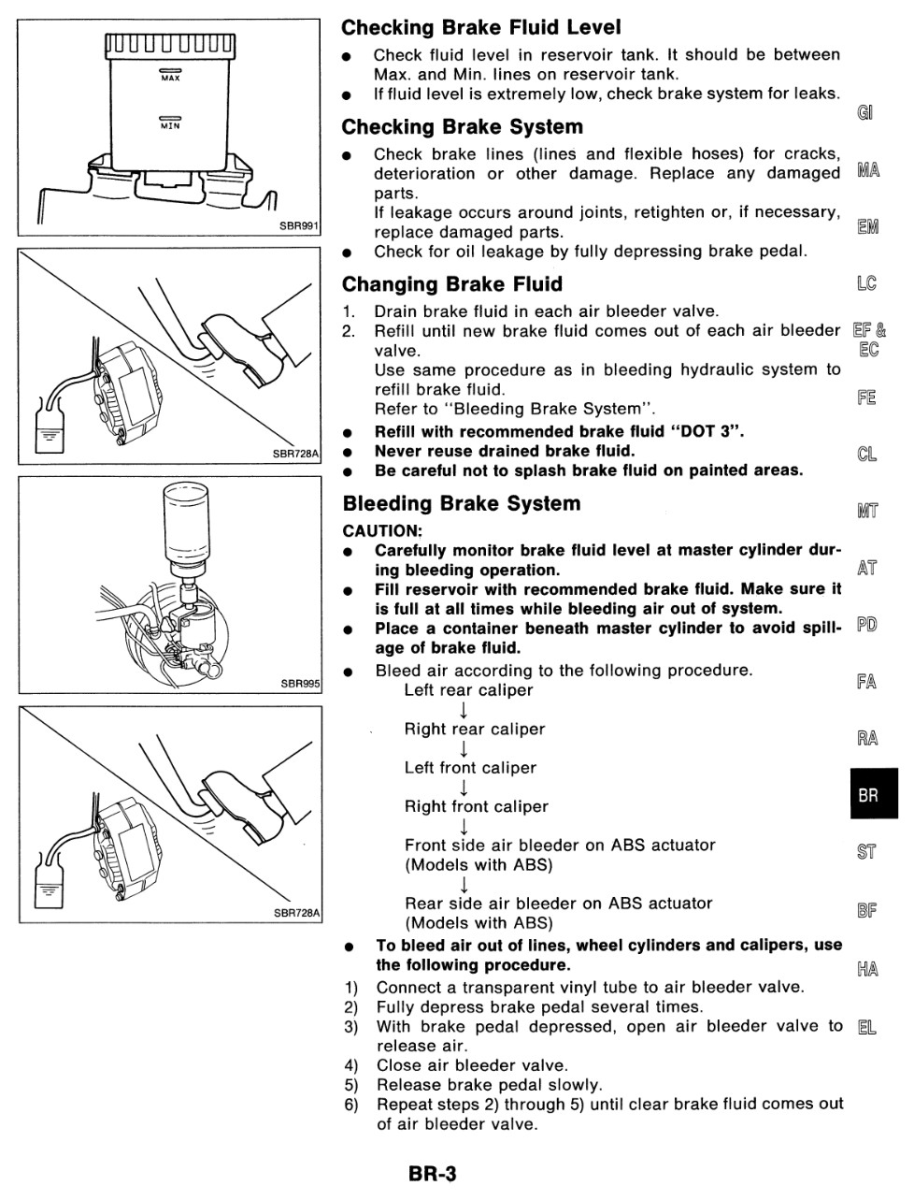
Under the trim circled in blue: In case you don't have the information for the brake bleeding process: