FASTREDZ
Standard Member
-
Joined
-
Last visited
Everything posted by FASTREDZ
-
I cant remember to be honest im thinking Blitz or something similar, there is also a wire going to the handbrake
-
I did mine on the car and made my own tool to press the valve spring down https://www.300zx.co.uk/forums/showthread.php?46303-oh!-dear-no-turning-back-now!!-valve-seals!!&highlight=valve+stem+oil+seals no pics on the thread they have all gone im afraid :( the tool I made if I remember clamps on top and then screws down hard to give you access to the collets, I had no probs doing mine with the heads on the car be easier still on the bench.
-
I set mine to about 10 seconds but yes I know the annoyance when it runs with a cat 1 alarm :) usually plugs in to the ignition inside the steering column plastic iirc
-
Wwww 993 even nicer still :) ive got the 997 but I would love a 993 very nice indeed, Yep my next step is to do all the cavitys but first I need to address all the rust I have and need to cut out
-
Nice 911 you have in the garage too Same as me matey, red z & a black Porsche :) :) Zed looks awesome, please be sure to treat all the inner sills and box sections as mine rotted from the inside out even though I had treated the underside this will then give you years of care free rust problems. I wish I had done it first Doh !!!
-
Damn sorry matey my fault for not reading the whole thread hope you got everything sorted :)
-
Hey Matey, Gutted to hear you snapped your nipple, easily done mind you, especially when the anger kicks in :) so basically when we use stud extractors at work you will need to drill a hole to suit the stud extractor, be very careful when drilling yours as the bottom of the hole is machined as a seat for your brake pipe, you kneed to know exactly how far your safe drilling down to and clear the bottom of the hole, as said above be sure to use quality tools as a broken stud extractor is no fun at all believe me, patience is the key here, if your not having fun at it you may need to remove the whole abs pump onto the bench a lot of work I know but at least you get more room to work best of luck hope you get it out
-
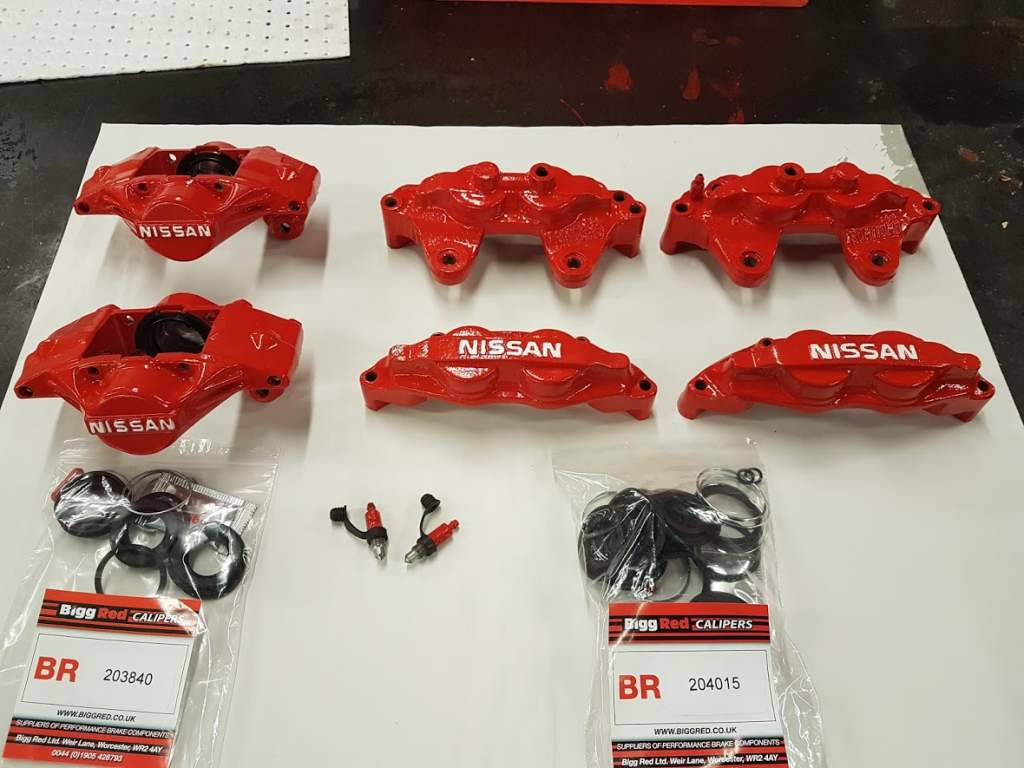
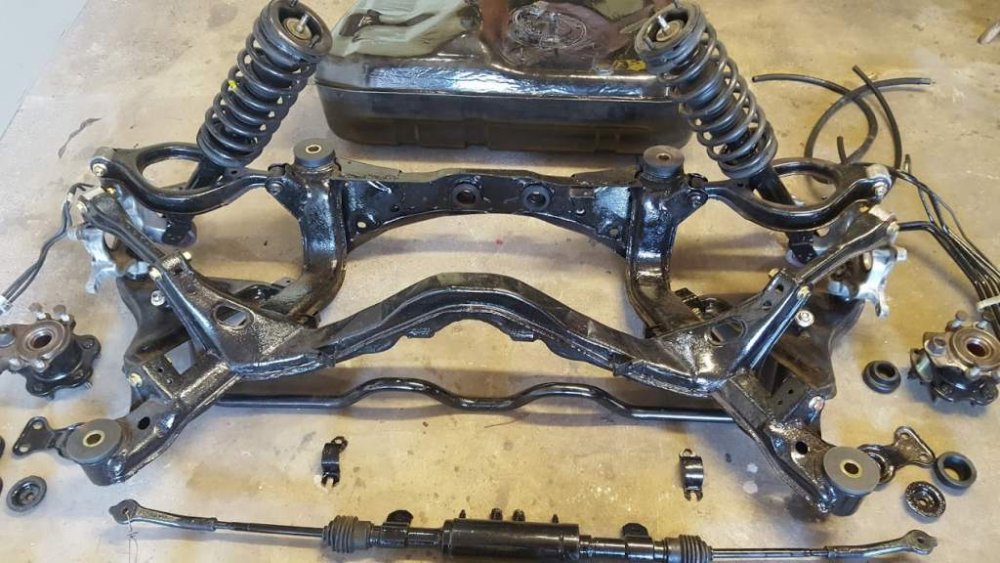
Onto the calipers now, Fully stripped down and shot blasted, I split the front calipers and in my moment of madness I have forgotten which calipers half match as they got mixed up im sure they wont make a difference, but its good practise to keep them matched so after shot blasting I cleaned the cylinders of all marks and polished them, painted them using http://www.brakecaliperspecialists.uk/brake-caliper-painting-kit/ in post box red, They even added white paint for me to do the lettering very kind of them then I used http://www.biggred.co.uk/brakecaliperrepairkit_brk204015 for the front And http://www.biggred.co.uk/brakecaliperrepairkit_brk203840 for the rear Now when I fitted the rear seals there was a big lip on the rear caliper casting to stop the rubber boots sliding off when on the other hand I fitted the front there was no lip at all on the casting and this allowed the rubber boot to slide of easily, I used the old caliper boot rings, as the new clips from bigg red tended to slide off the boot quite easy anybody else noticed this?


-
Wow stunning lets see more :)
-
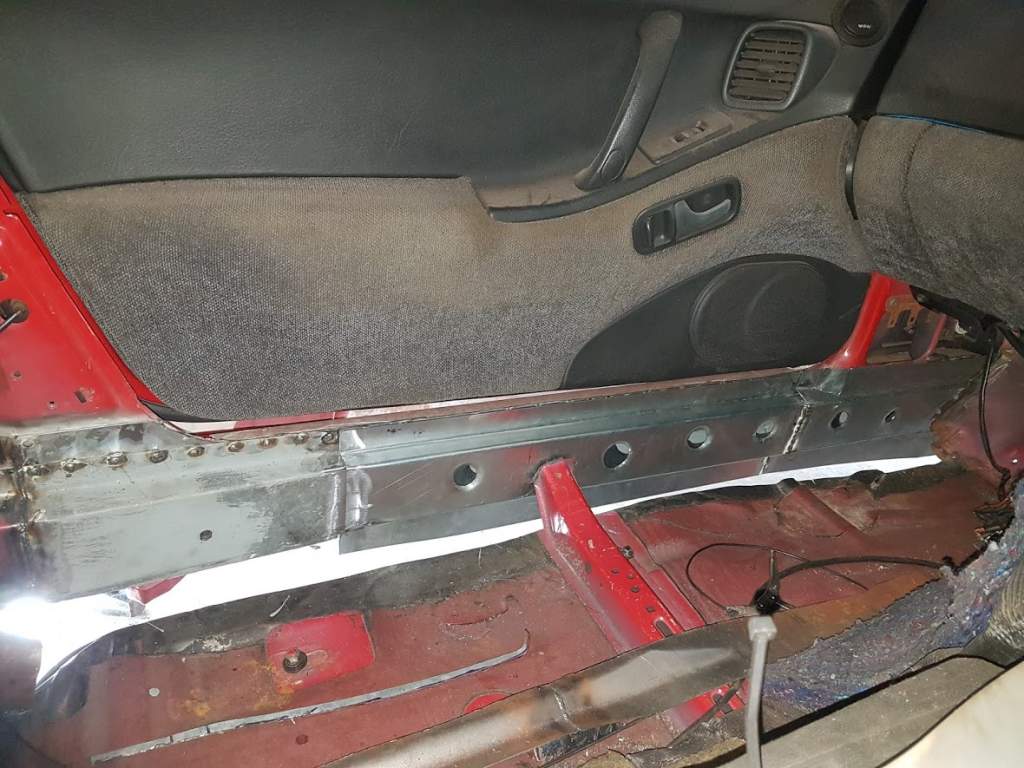
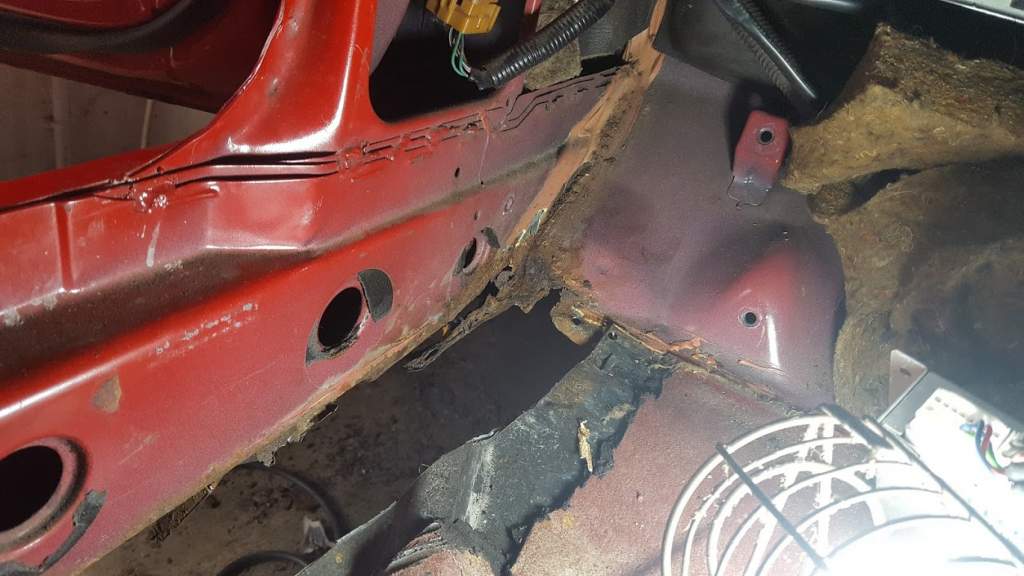
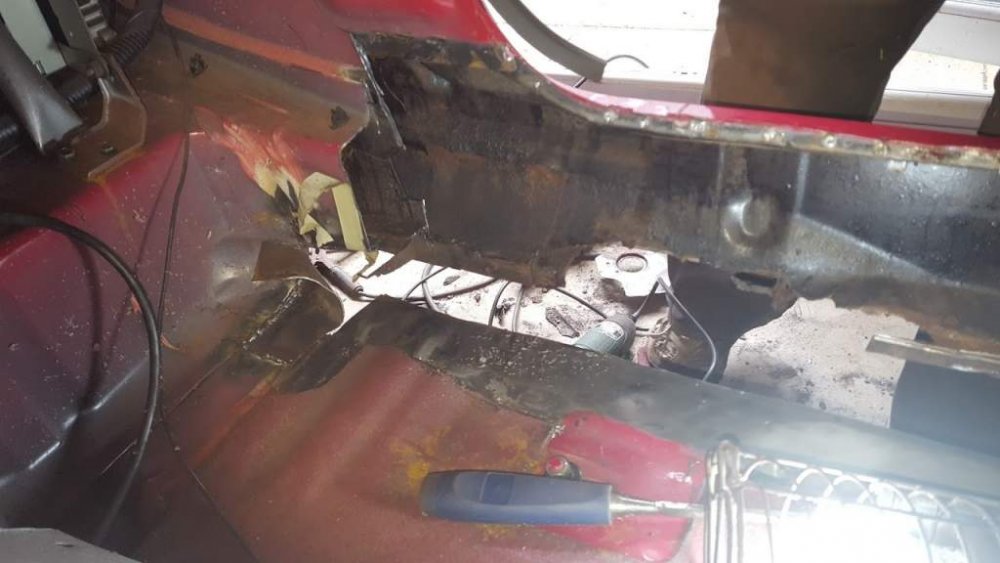
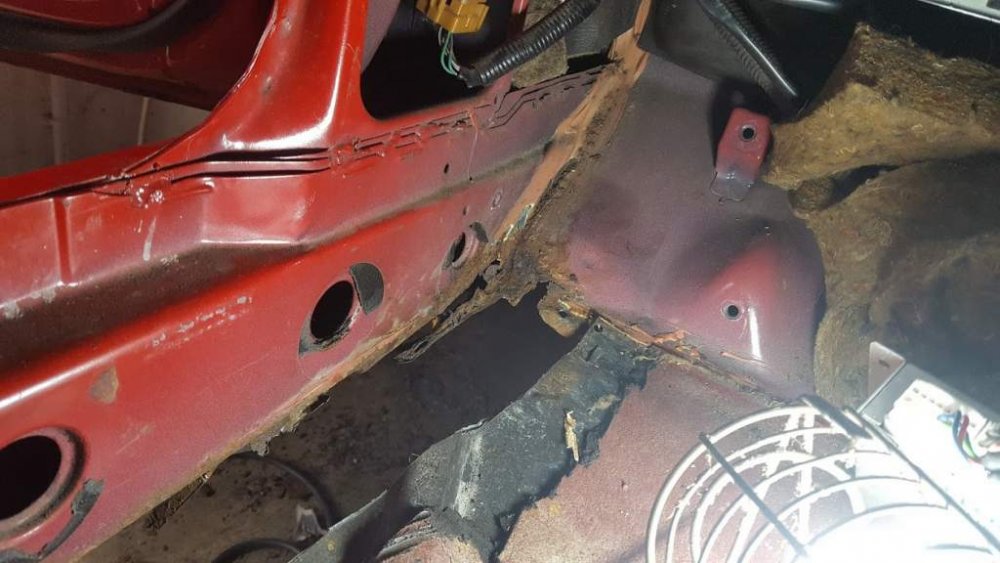
for me it was the only way as the outer sills have a fiberglass side skirt that has been blended into it as for doing the job from the inside its great the only problem is when you get to the bulkhead its quite tight in there and I had to cut a section out of the floor to access the sills, but the floor was rotten anyway so had to be cut out
-
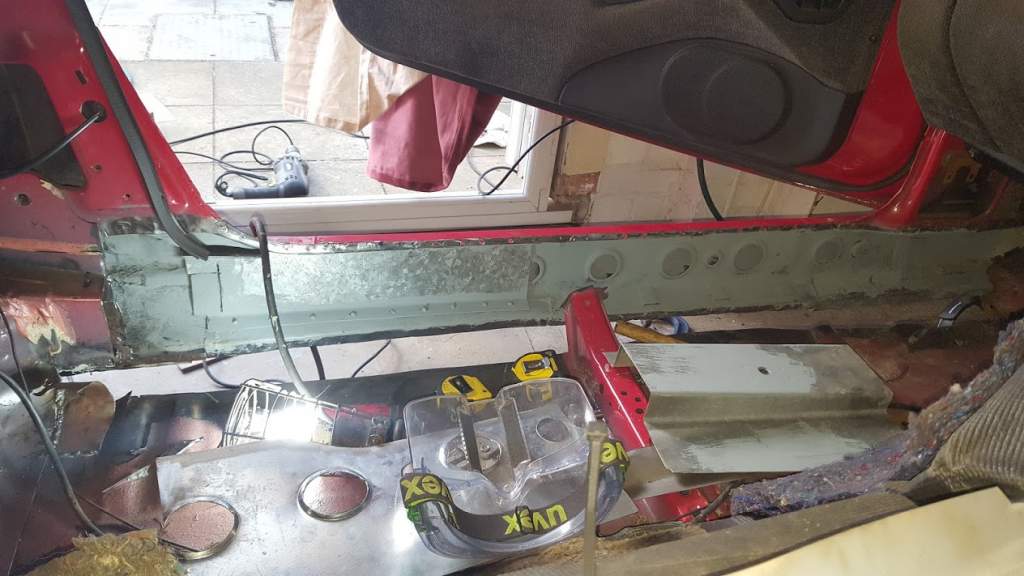
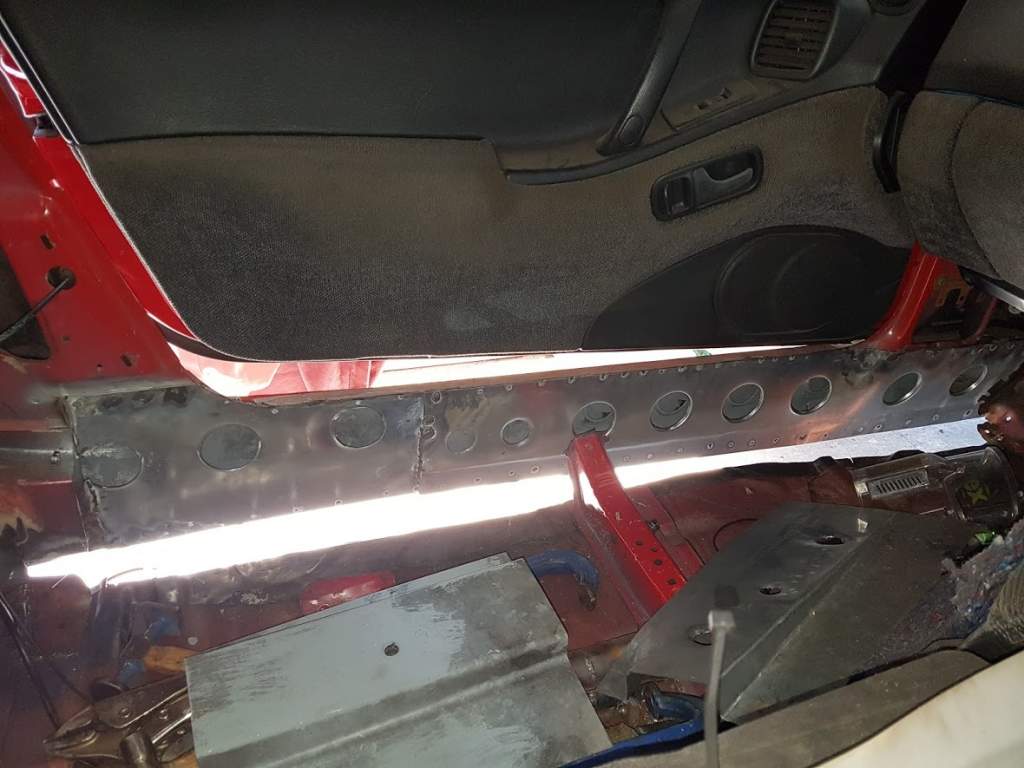
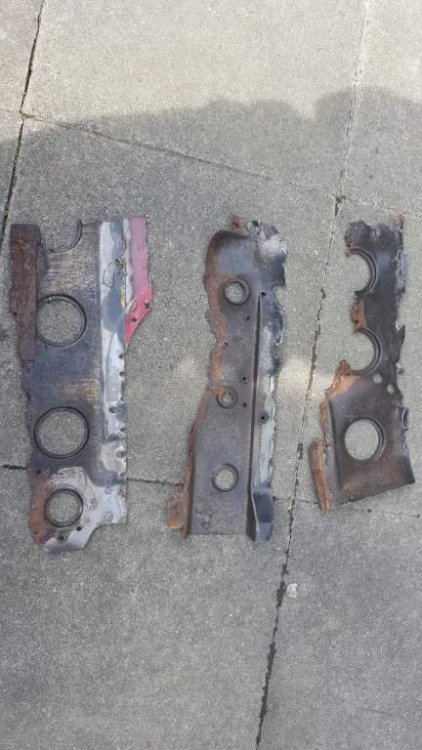
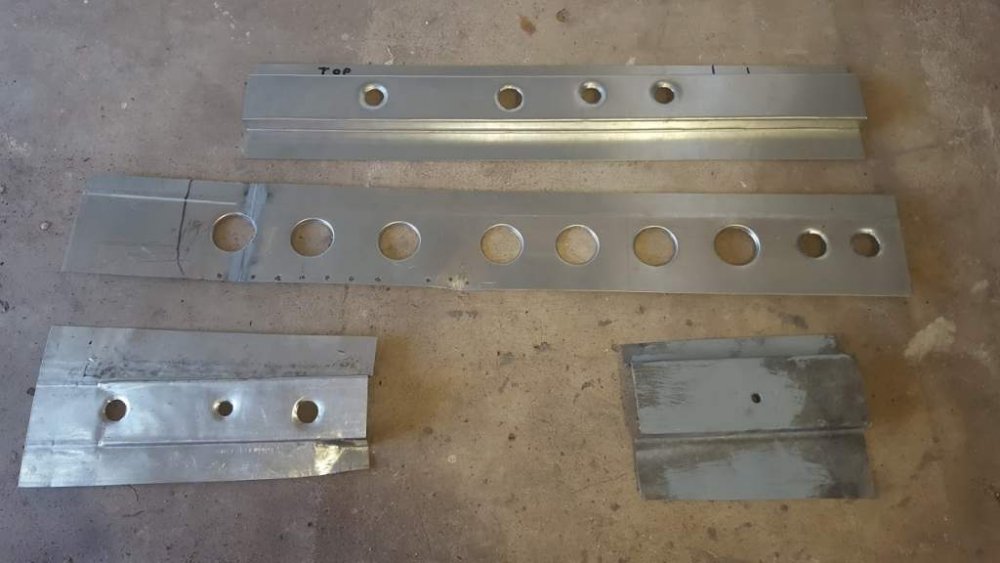
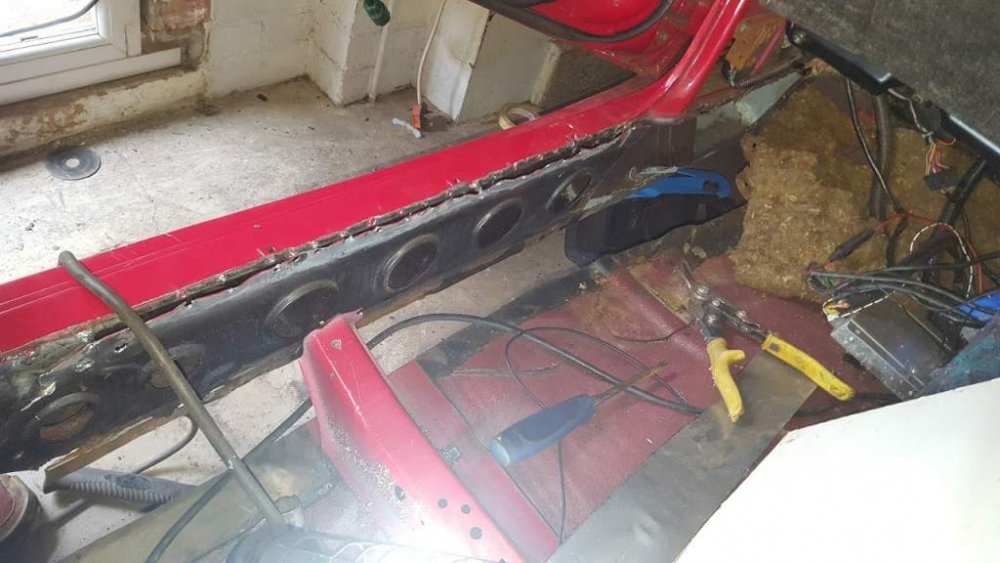
Onto the sills now, I bought some 1.2 mm galvanised sheet steel, Now lets be clear about this... Galvanised is very nasty stuff to be welding the fumes it gives off is highly toxic so all the welding has been done using an appropriate respirator mask under my welding mask so now health and safety is out of the way lets see what we have done so far, Cut and formed the steel to match the old parts that have been removed the sill has been stripped from the inside to the outer sill that has been patched up and treated with bilt hamber zinc primer and dynax seam sealer on all welds Next the middle sill next the inner sill has been test fitted before welding, I will update as I go along


-
Thanks for the inspiration guys :) im happy on how the work is coming on albeit very slow .... all this work would have been avoided if I had waxoiled all the cavities when I first had the zed ah well hindsight is a wonderful thing, I have found that wherever was welded before that was where the rust has hit the worst. Im still stuck for an inner wing for the drivers side rear if anybody knows of one going, im doing the sills at the moment and im doing them in galvanised, plenty of pics to come as I work my way through :)
-
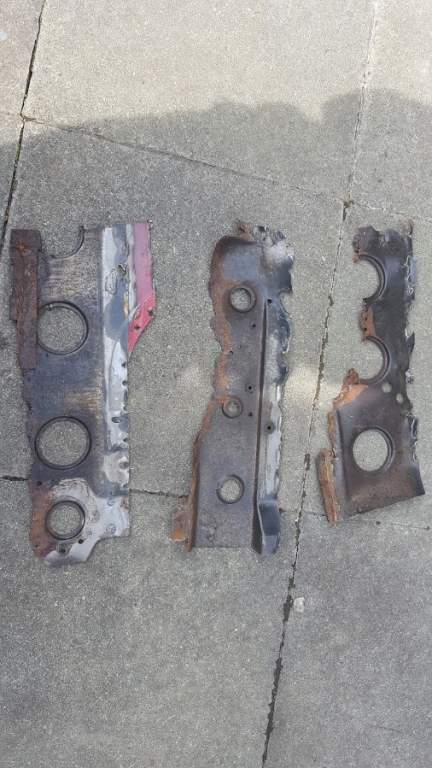
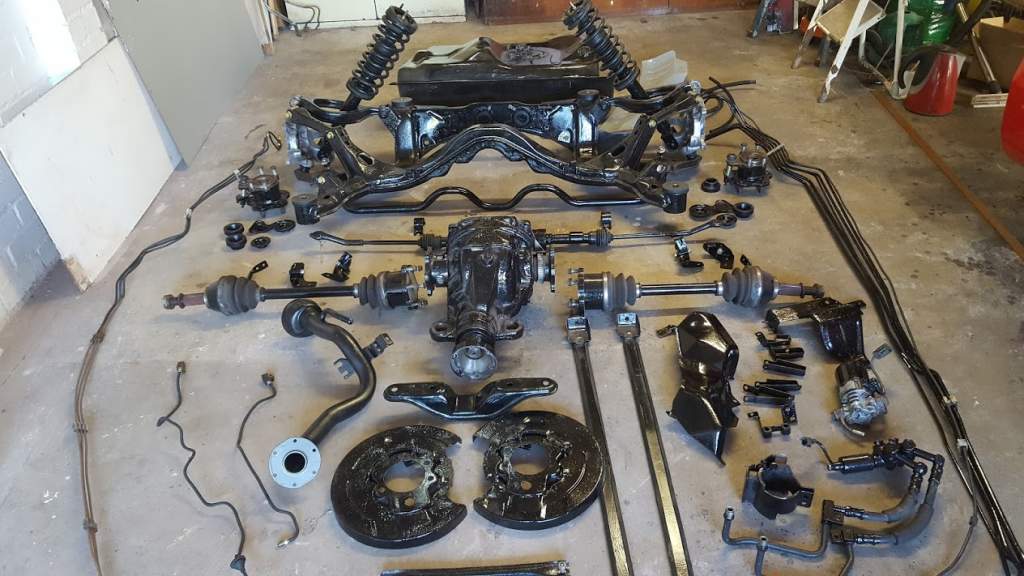
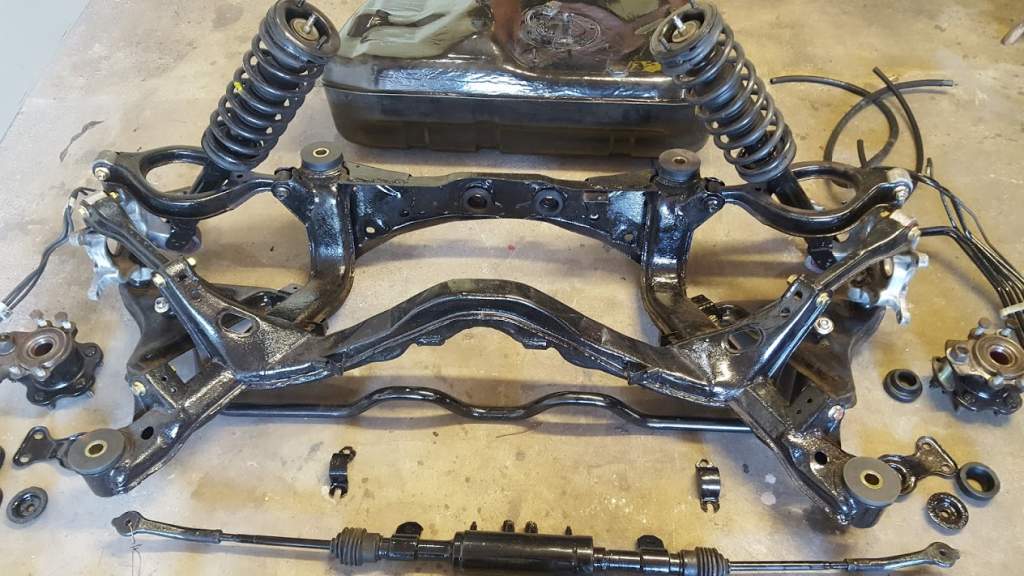
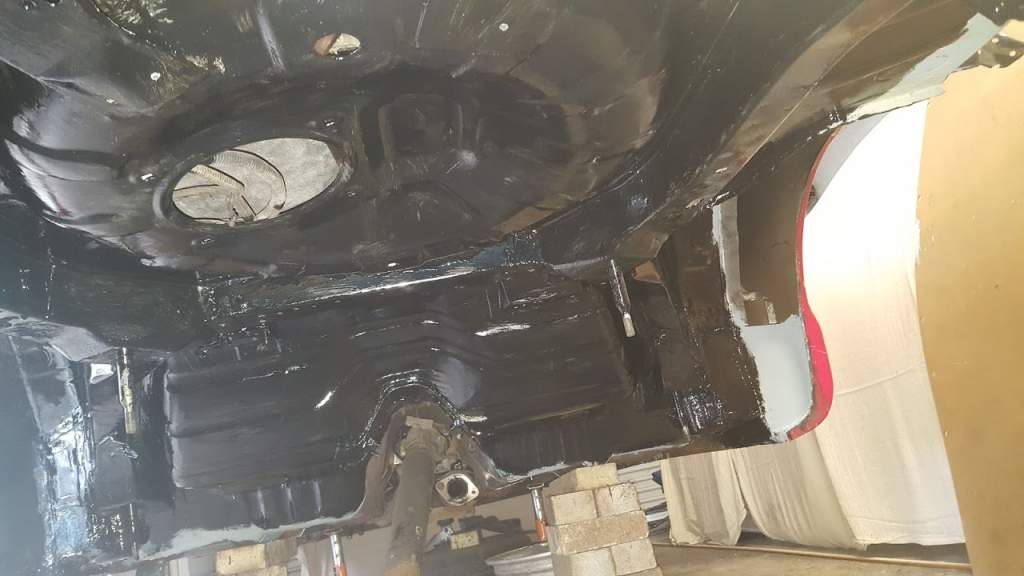
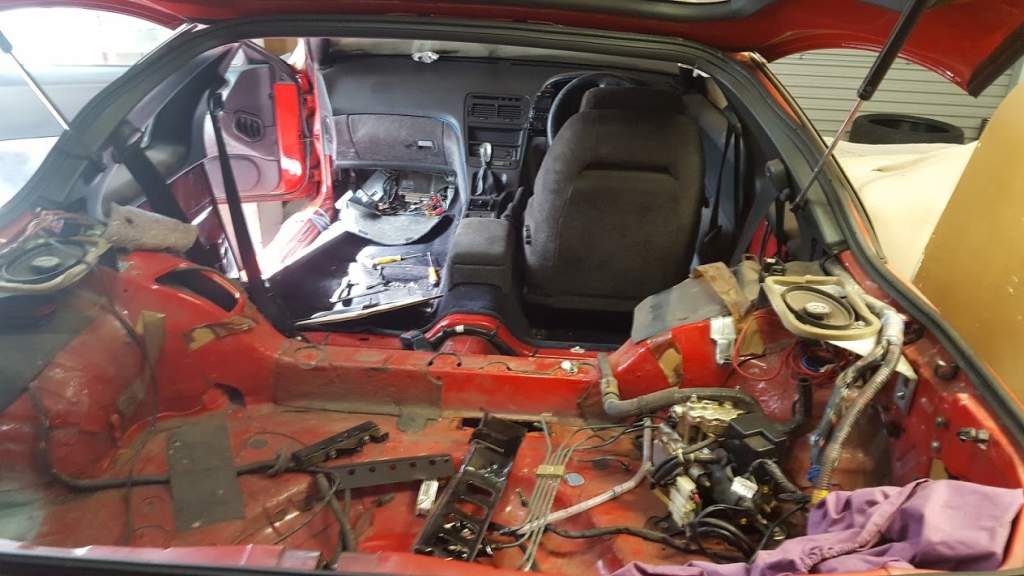
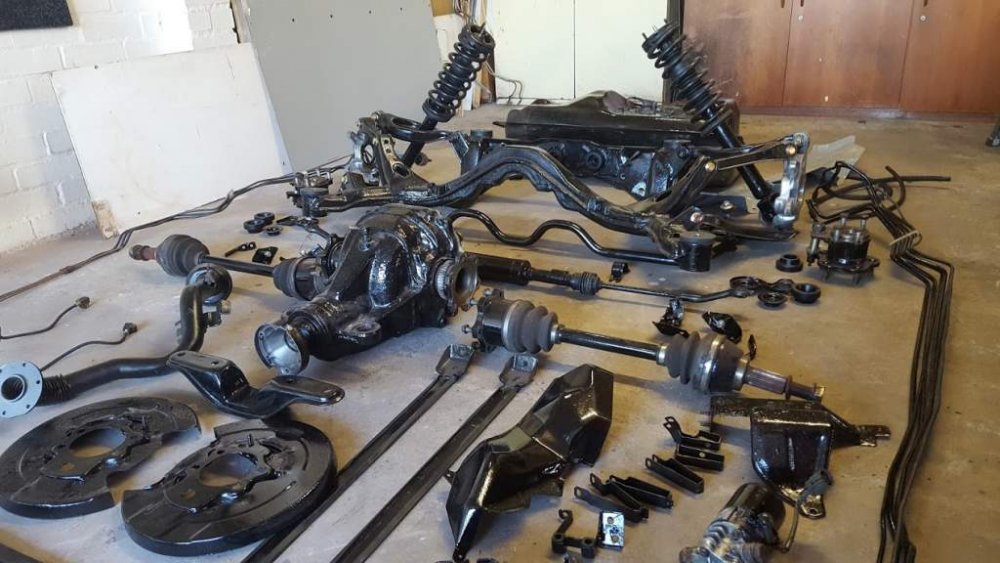
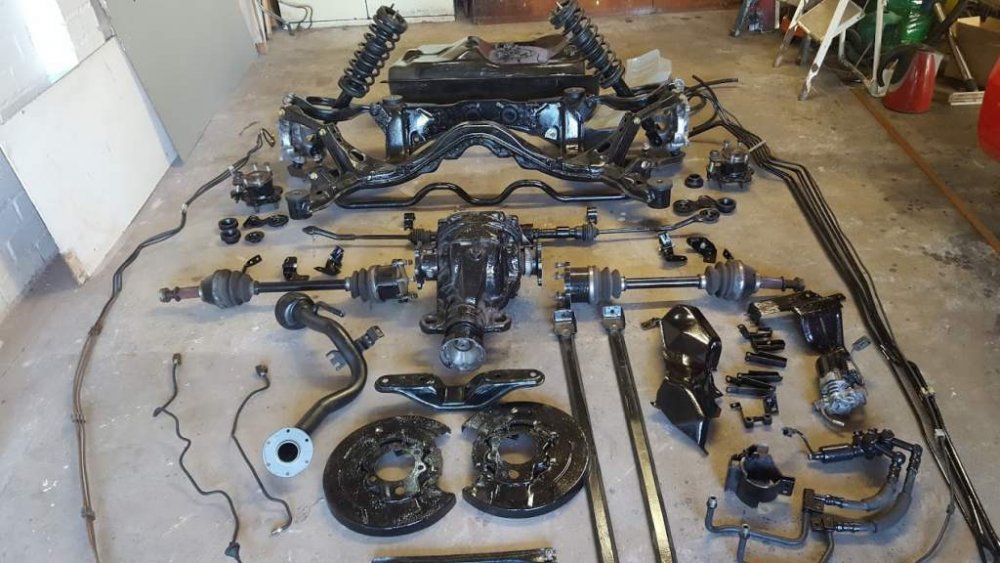
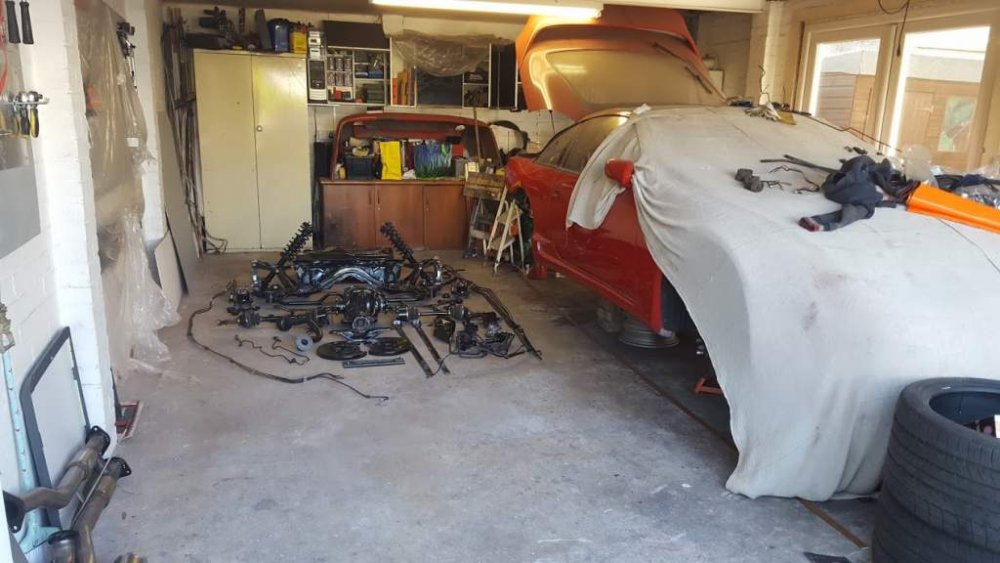
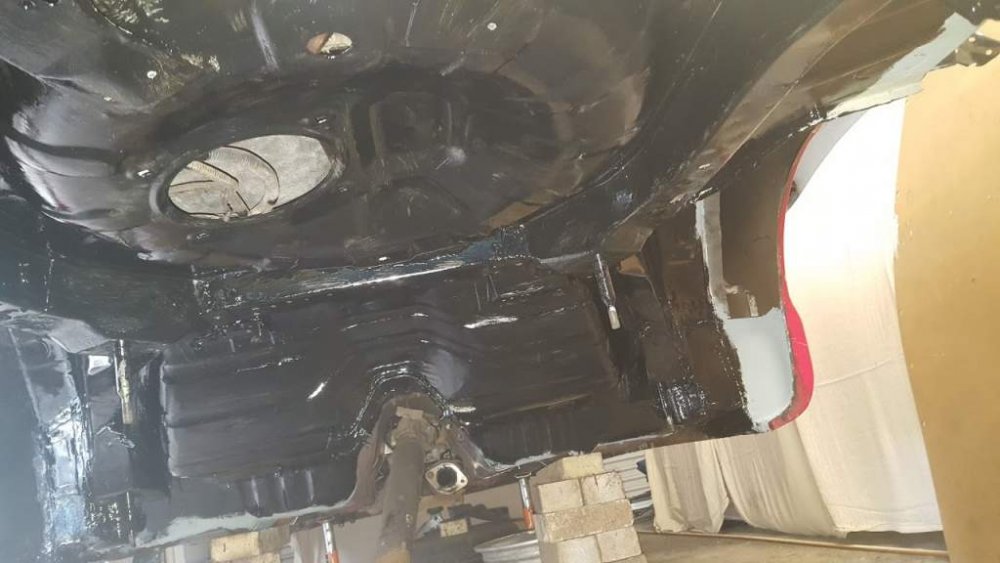
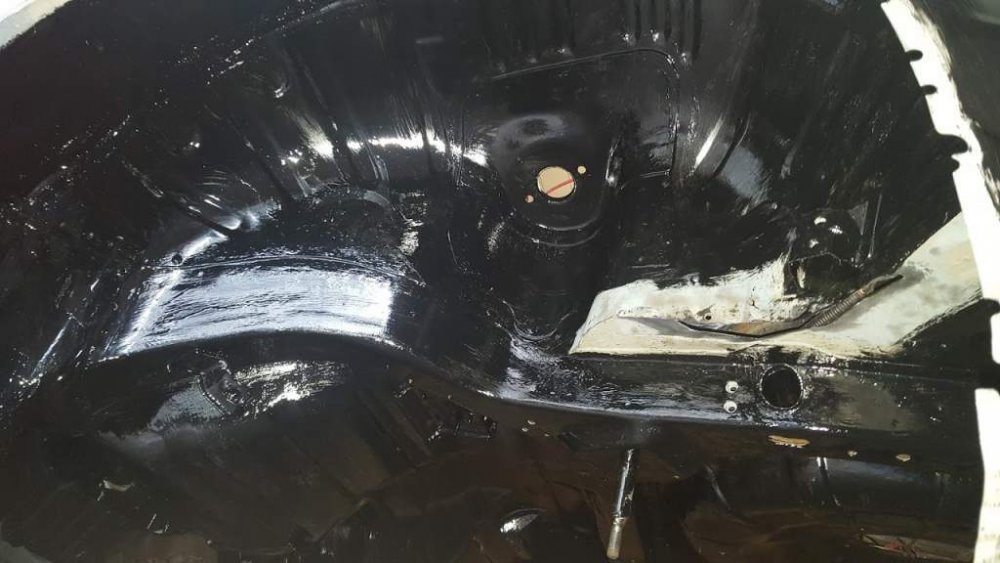
A bit more update on the parts that I have refurbished before it all goes on, everything nearly has been shot blasted and painted with a product called POR 15 looks really good stuff but you have to take your time and do the prep work properly the brake pipes are new using kunifer and I have used heat shrink on the brake pipes for that factory look
-
I found the dinitrol rc900 very flamable also had flames licking up from my sills so had to fire a hosepipe down there was relieved and gutted at the same time
-
Hi matey I sure have considered bracing in the sills as you rightly say they are the backbone of the zed, im going to deffo rebuild the inner sills and strengtheners and see what else i can do Galvanised is leathel stuff so i will be wearing a mask when welding, bonding the sills on are my other option im thinking about
-
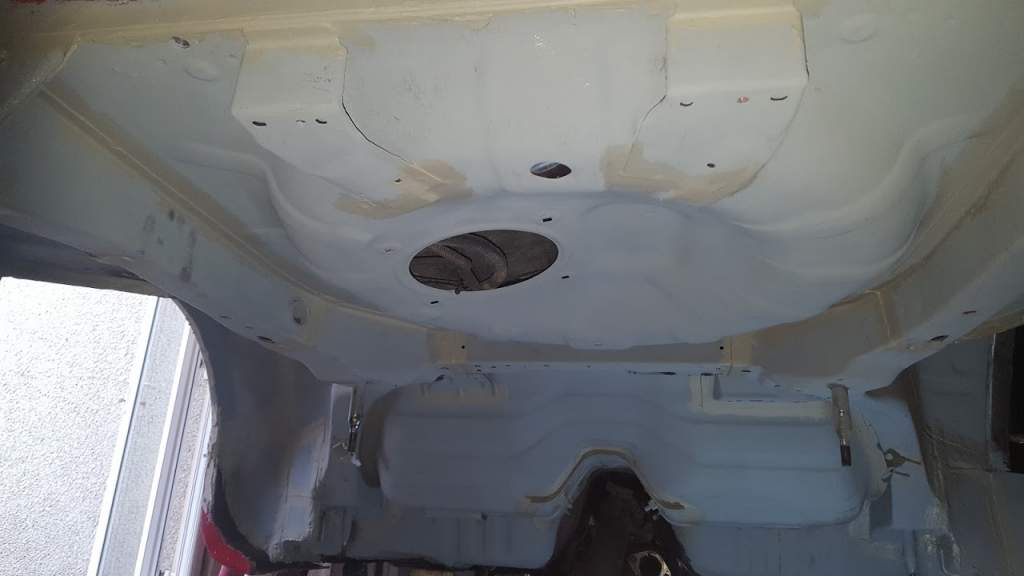
So continuing on with my inner sills, I found the best way to tackle this job was to work from the inside out, I have the fiberglass skirts on the outside blended in so I don't want to disturb them so I cut the rusted section out of the floor, then unstitched the inner sill and the middle sill to gain access to the outer sill I have made new panels using galvanised steel then I got to do some of the underside using the bilt hamber epoxy primer...nice stuff


-
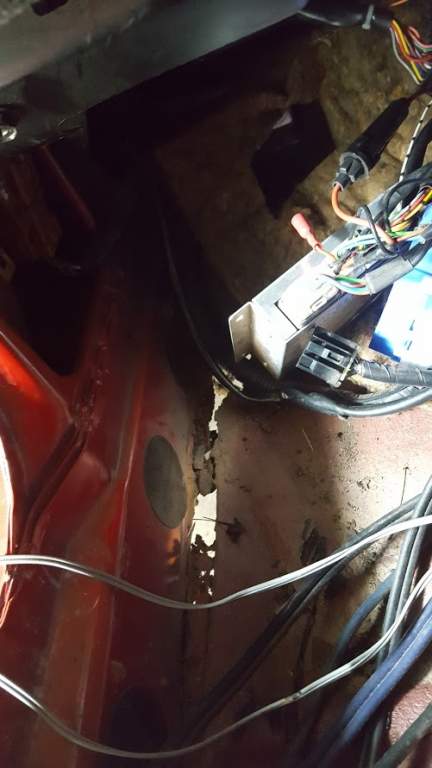
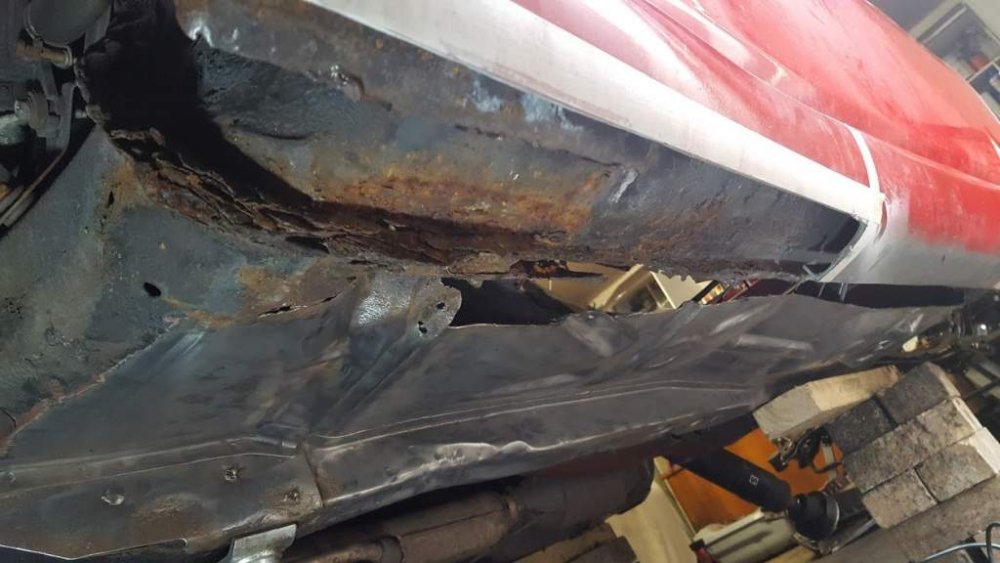
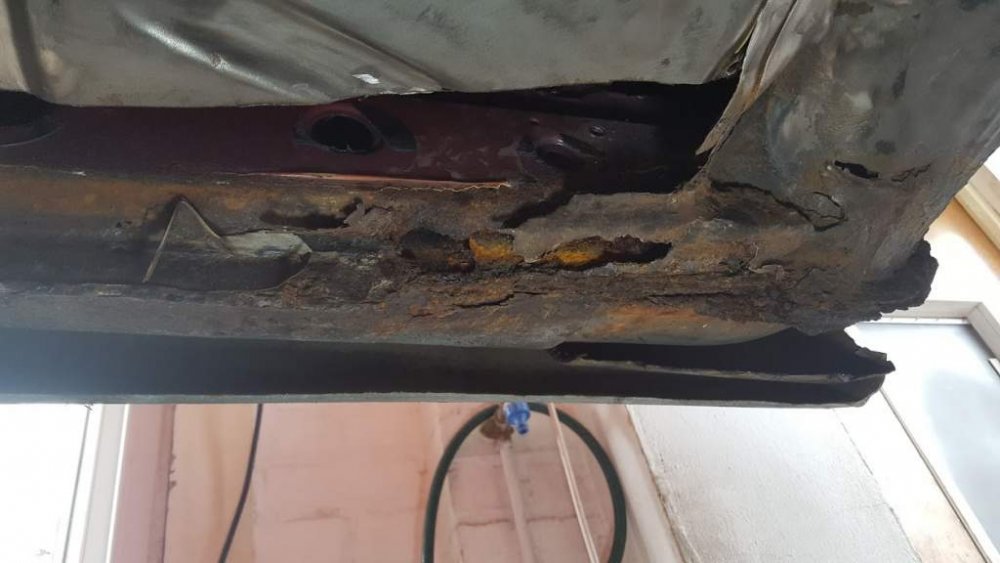
I,ve had some pretty big flames come out of the inner arch box section :) I know where you are with the loom and padding its quite a job checking whats going to catch fire next and keeping an eye on things, the front part of my sill is shot so need to repair that also, to be honest my sills are not to bad thank god, yes there are patches to do but all in all not too bad, the floorpan has disappeared the drivers side being the worst, Im using billit hamber dynax seam on all the seams including any welds runs, weld through etch primer on any seams, painting everything in billt hamber zinc primer and then bilt hamber epoxy mastic on top finished with bilt hamber s50 cavity wax on all the cavitys, I hope this time it will not rust again, very interesting to see that wherever I had previous weld runs this is where the rust has attacked the worse.
-
More update, I have had a look at my sills and the floor section is rotting away from the side sills, so I am going to have to strip everything out, cut sections out of the floor and weld in new steel, Sills don't look to bad but there are sections to repair biggest problem I have is the side skirts from zcentre and I have blended them into the body work, so the only way I have of getting to the sill is to cut a section out of the fiberglass side skirt as low down as possible


-
That's my rltc im at it repairing the floor I can check wires for you what I have, they were indeed wired into the abs sensors at the back

-
I bought a set of goodridge stainless hoses for my zed straight swap and looks great
-
Yes please matey Ive cut mine out and there is not much left for me to patch up With all the rust on it, it would dissapear the moment it saw a welder but yes please do keep me updated
-
Sorry if i have posted in the wrong section But im desperately Looking for a rear drivers side inner wing Ive scoured ebay but there the same breakers all the time And have no inner wings Ive searched google and cant find a breaker with a zx Does anyone know of a breaker anywhere that has a few zeds or Know of anyone breaking one
-
Im also on the rust trail expecially after welding before, im sure for some reason that once the steel gets heated after welding its more prone to corrosion my rear inner wings were shot but im managing slowly to repair them, I had a look in my sills and yep they look like yours so that the next job again mine were previously repaired but also the drain had been extended passed the sill and out, so cant blame the targa drain I coated the inside with aquasteel to be sure it wouldn't rust again but to my surprise its gone again, I asked aquasteel to comment on this and in the small print it says recoat every 2 years ffs deffo be using waxoil this time and zinc rich primer in the sills as I have done with the rear arches I have trouble with mine as the side skirts are fiberglass and blended in so I have no access the the sills without cutting them off and trying to put them back somehow mine also a uk spec 1990
-
Looking for a rear drivers side inner wing If anyone knows of any shells breaking Need this to carry on with my rebuild
-
Looking good there matey be sure that you have treated the inner sills and cavity's, this will save you a lot of rust in years to come I wish I did it